Tuesday, May 31, 2011

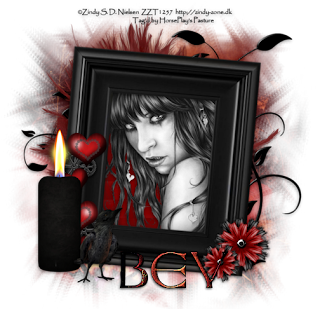
Hidden Heartbreak


Supplies

1 tube of choice - I used the artwork of Zindy S.D. Nielsen here

Font of choice - I used Anglo Saxon here

Weescotlass Mask 149 here

Greg’s Factory Output Vol. II - Pool Shadow

“Shot Through the Heart” is a tagger size scrap kit created by Jen of Sleek n Sassy Designz and can be purchased from Lollipops n Gumdrops. You can visit her blog here. Thank you Jen for such an awesome kit!

This tutorial was written assuming you have a working knowledge of PSP.

~♥~ Let’s get started ~♥~

Open a 700 x 700 blank canvas.
Flood fill white.

Copy and paste Frame 4 as a new layer.
Resize 75%
Free rotate Right 5 degrees
Use your Magic Wand and click inside the frame.
Selections/Modify/Expand by 4.
New Raster layer below the frame.
Copy and paste Paper 7 Into Selection.
Copy and paste your tube as a new layer above the paper.
Selections/Invert
Tap the delete key.
Deselect.

Copy and paste Crow as a new layer.
Resize 40%
Use your Magic Wand and click anywhere outside of the bird.
Selections/Invert
Apply Greg’s Factory Output Vol. II - Pool Shadow:
Use Default Settings.
OK
Deselect.

Add your embellishments. I used:
Flower: Resize 30%/Duplicate/Resize 70%
Steampunk 4: Resize 50%
Candle: Resize 50%
Feather
Doodle: Resize 80%/Duplicate/Resize 70%

Crop your image.

Highlight your white canvas.
New Raster layer.
Select All.
Copy and paste Paper 2 Into Selection.
Deselect.
Apply the mask.
Resize 110%
Merge Group.

Add your copyrights.

Add your name.
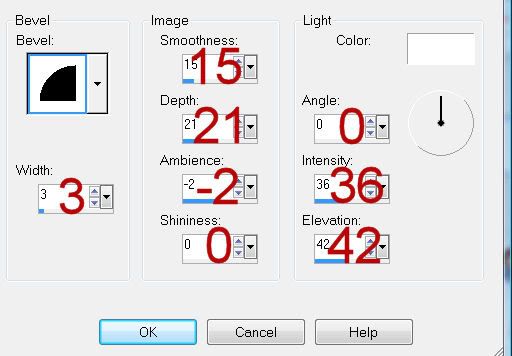
Give it a slight Inner Bevel:

Effects/Edge Effect/Enhance More

Resize all layers 80%.

I hope you enjoyed this tutorial.
I’d love to see your results and show it off in my gallery.
Email me!
Hugs,
Bev

Sunday, May 29, 2011

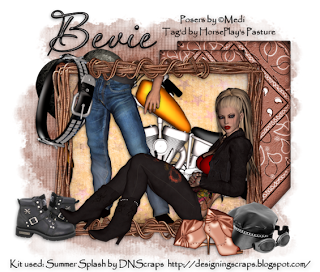
Biker's Summer


Supplies

Font of choice - I used Aquarelle here

Becky mask 22 here

“Summer Splash ” is a tagger size scrap kit created by Conchi of DNScraps and can be purchased from Lollipops n Gumdrops. You can visit her blog here. Thank you Conchi for a super summer kit!

This tutorial was written assuming you have a working knowledge of PSP.

~♥~ Let’s get started ~♥~

Open a 700 x 700 blank canvas.
Flood fill white.

Copy and paste Wire Frame as a new layer.
Resize 55%
Free rotate Left 90 degrees.
Use your Freehand Selection Tool to outline the frame - keeping the marching ants at the center of the frame sides.
New Raster layer below the frame.
Copy and paste Paper 24 Into Selection.
Copy and paste Motobike as a new layer above the paper.
Move into position.
Selections/Invert
Tap the delete key.
Copy and paste Biker Dude 3 as a new layer.
Resize 65%
Move into position.
Tap the delete key.
Deselect.

Copy and paste Biker Babe 2 as anew layer.
Resize 60%.
Position in front of the frame.

Add your embellishments. I used:
Bandana 2: Resize 60%/Duplicate/Resize 70%
Hearts 2: Resize 25%/Mirror
Bracelet: Resize 30%/Free rotate Left 75 degrees
Girl Gear: Resize 25%
Boots: Resize 25% and 70%
Boots 3: Resize 25% and 50%/Duplicate/Free rotate Left 90 degrees

Crop your image.

Highlight your white canvas.
New Raster layer.
Select All.
Copy and paste Paper 8 Into Selection.
Deselect.
Apply the mask.
Merge Group.

Add your copyrights.

Add your name.
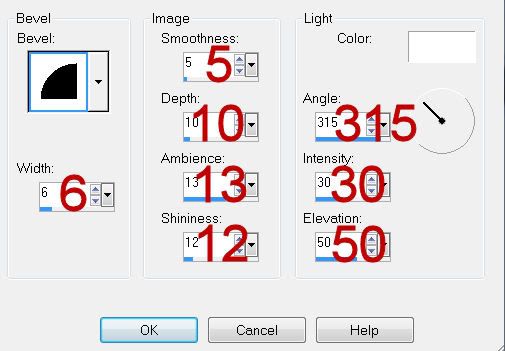
Give it a slight Inner Bevel:


Resize all layers 90%.

I hope you enjoyed this tutorial.
I’d love to see your results and show it off in my gallery.
Email me!
Hugs,
Bev