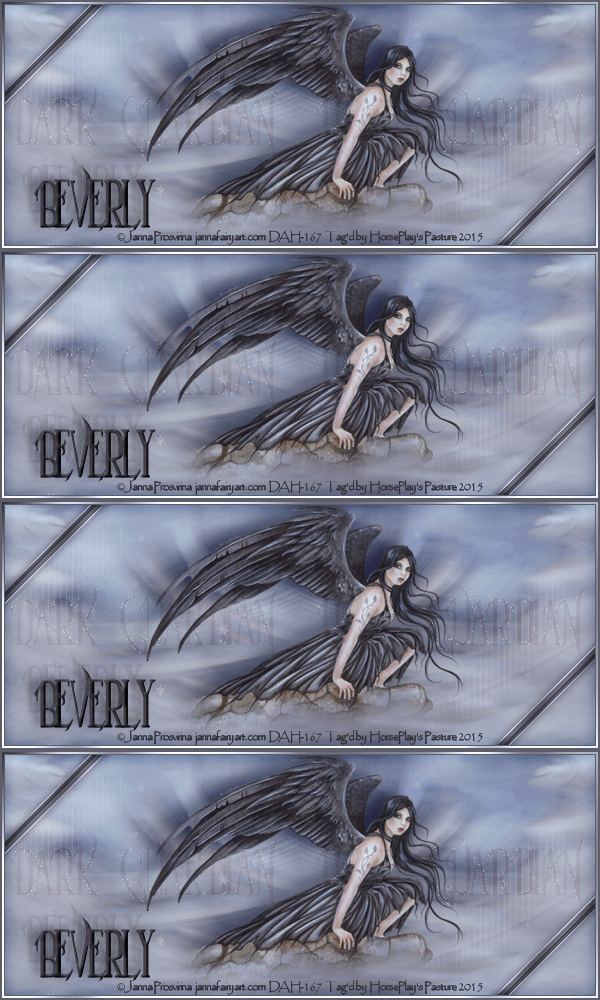
Supplies Needed
1 tube of choice – I
used the artwork of Janna Prosvirina which can be purchased from Digital ArtHeaven. You must have a license to use.
Plug Ins used:
Mura’s Meister – Cloud
Tramages – Tow the Line
Greg’s Factory Output Vol. II – Pool
Shadow
Xenofex 2 – Constellation
Animation Shop
This tutorial was
written assuming you have working knowledge of PSP.
~♥~ Let’s get started ~♥~
Open up a 600 x 250 image.
Flood fill white.
New Raster layer.
Select All.
Copy and paste the image layer from
the tube Into Selection.
Lock the layer by clicking on the
icon at the top of the layers pallet.
Adjust/Blur/Radial Blur:
Spin checked.
Use Default settings.
OK.
Duplicate this layer.
Mirror
Change the Properties to Lighten.
Color Pallet:
Foreground: #646572
Background: #b6c0ce
New Raster layer.
Apply Mura’ s Meister – Cloud.
You’ll already have the correct
colors (from setting your color pallet) so just click OK.
Change the Properties of this layer
to Hard Light.
Close out your white background.
Merge Visible.
Reopen your white background.
Duplicate the merged layer.
Apply Tramages – Tow the Line -
Match your settings to mine:
Make your Freehand Selection Tool
active.
At the top where the settings are
for this tool, be sure the following settings are:
Selection Type: Freehand
Mode: Add (Shift)
Feather: 25
Smoothing: 0
Section out 2 areas where the light
lines are:
Selections/Invert
Tap the delete key until you have a
nice feathered effect of the areas you chose.
Deselect.
Deselect.
Change the Properties to Soft Light.
Lower the Opacity to about 34.
In your Color Pallet, switch the
colors so the dark color is now your background color.
Close out the foreground color.
Make your Rectangle Tool active:
Mode: Rectangle.
Create a thin strip about 10 pixels
wide by about 200 pixels long.
Objects/Align/Center in Canvas.
Convert to Raster layer.
Click on it with your Magic Wand (be
sure to change Feather amount back to 0!)
Effects/Text Effects/Blinds -
Match your settings to mine:
Free Rotate Right 45 degrees.
Click anywhere outside of it with
your Magic Wand.
Selections/Invert
Apply Greg’s Factory Output Vol. II –
Pool Shadow –
Match your settings to mine:
Deselect.
Duplicate/Mirror/Flip
Merge Down
Both Strips should now be on the
same layer.
Effects/Edge Effects/Enhance
Color Pallet:
Make your lighter color your
background.
Close out the foreground.
Make your Symmetric Tool active.
Mode: Draw Stellated
Create on Vector checked
Number of Sides: 6
Radius: 49.21
Round Inner and Round Outer Unchecked
Line Style: Solid
Width: 2.00
Miter Limit: 15
Near the center of your canvas
create a small star.
Objects/Align/Center on Canvas.
Convert to Raster layer.
Adjust/Add Remove Noise/Add Noise:
Uniform checked
Noise: 30%
OK
Apply Mura’s Meister – Copies:
Choose Wallpaper (Perspective)
Use default settings
OK
Erase the stars you don’t want to
keep.
Color Pallet:
Foreground: #2a242a
Background: #6e5e5a
Make your merged background layer
active.
Type the words “Dark Guardian” over
and again until the words run across your canvas – see my tag for reference.
Convert to Raster layer.
Change the Properties to Soft Light.
Duplicate 3 x’s for a total of 4
word layers.
Rename the layers – DG1, DG2, DG3,
DG4
Highlight DG1 layer.
Apply Xenofex 2 – Constellation:
Match your settings to mine:
OK
Highlight DG 2 layer.
Apply the same effect accept hit the
Random Seed button once.
Repeat the above step with DG 3, and
DG 4.
Close out all DG layers 2, 3, and
4. Keep DG1 Open.
New Raster layer at the top of your
layer’s pallet.
Flood fill with #5e5f6c
Select All
Select/Modify/Contract:
Number of Pixels: 2
OK
Tap the delete key.
Flood fill with #dde1eb
Selections/Modify/Contract by 2.
Tap the delete key.
Flood fill with #5e5f6c
Selections/Modify/Contract by 1.
Tap the delete key.
Deselect.
Make your Magic Wand active.
Zoom in on the frame you just
created and click on the light colored area.
Apply Greg’s Factory Output Vol. II –
Pool Shadow:
Change the settings to match mine:
OK
Copy and paste your tube as a new layer - see my tag for reference.
Color Pallet:
Foreground and Background: #3a3840
Type your name.
Give it a slight Inner Bevel:
Duplicate your name layer and move
it slightly to the lift and up a little.
In your layers pallet move this name
layer below the other.
Change the Properties to Soft Light
and lower the Opacity to about 18.
Add your credit.
Copy Merged.
~Time to Animate~
Open up Animation Shop.
Edit/Paste/As New Animation
Back in PSP.
Close out DG 1 layer.
Open up DG 2 layer.
Copy Merged.
Carry into AS.
Edit/Paste/After Current Frame.
Back in PSP.
Close out DG 2 layer.
Open up DG 3 layer.
Copy Merged.
Carry into AS.
Edit/Paste/After Current Frame.
Back in PSP.
Close out DG 3 layer.
Open up DG 4 layer.
Copy Merged.
Carry into AS.
Edit/Paste/After Current Frame.
View your animation.
If you’re happy then save.
I’d love to see your results.
Hugs,
Bev


Hi Beverly! Gorgeous result as usual. I just tried this one and you missed something though :P There's no mentions of adding a tube and what you did with the tube ;) Just thought I'd let you know.
ReplyDeleteDoh! Thank you for pointing that out!! I'm so sorry for just now seeing this message as well.....double doh!!!
ReplyDeleteHugs, Bev xx
Hehe no problem Bev! Just glad I could help :)
ReplyDeleteFYI the font link ..it's not there anymore but it is over here https://www.dafont.com/parseltongue.font
ReplyDelete