Supplies Needed
Plug Ins
used:
VanDerLee - Snowflakes
Animation Shop
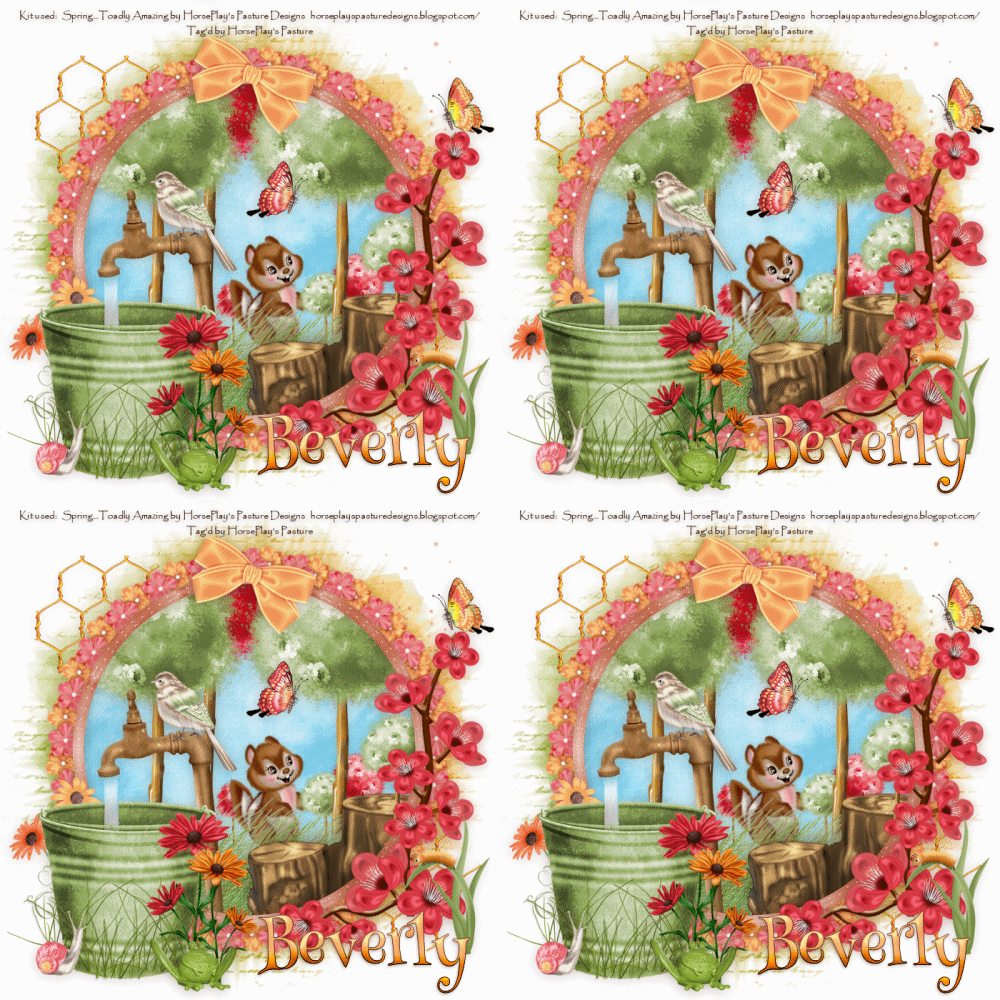
“Spring…Toadly
Awesome!” is a tagger size scrap kit created by me and can be purchased from any of my stores here. You can find the list of my stores in the
upper right corner.
This tutorial was
written assuming you have a working knowledge of PSP.
~♥~ Let’s get started ~♥~
Open up a 700 x 700 blank canvas.
Flood fill white.
Copy and paste El 38 as a new layer.
Click inside of it with your Magic
Wand.
Selections/Modify/Expand by 4.
New Raster layer below the frame.
Copy and paste Paper 1 Into
Selection.
Deselect for now.
Add the following elements below the
frame – use my tag as reference for placement: (Don’t worry about what
overhangs the frame. We’ll clean that up
in a bit)
El 31: Duplicate/Duplicate/Resize
40%/Duplicate/Resize 70%
El 30: Duplicate/Duplicate/Resize
40%/Duplicate/Resize 70%
El 26
El 14: Resize 70%
El 57: Resize 45% and 90%
El 35: Resize 80%
Highlight the paper layer.
Click anywhere outside of it with
your Magic Wand.
Highlight each element layer that
overhangs the frame and tap the delete key.
Deselect.
Add the rest of your elements to the
tag. I used:
El 45: Resize 90%/Mirror
El 39
El 8: Resize 50%
El 55: Resize 80%/Duplicate
El 41: Resize 50%
El 11: Resize 35%/Mirror
El 10: Resize 35%
El 67: Resize 80%
El 34: Resize 60%/Duplicate/Mirror/Duplicate each
grass layer as many times as you like
El 28: Resize 40%
El 60: Resize 70%
El 56: Resize 50%
El 59: Resize 60%
El 58: Resize 50%/Mirror
El 64: Resize 35%
El 74: Mirror
Now it’s time to make the water to
flow from the spigot. If you follow my
directions line for line you shouldn’t have any trouble at all.
In your layers pallet create 4 new
layers just BELOW the spigot layer.
Rename them Water 1, Water 2, Water
3, and Water 4.
Make your Freehand Selection Tool
active set on Point to Point – be sure the feather number is at 0.
Create a section like my example
below:
Highlight Water 1 layer.
Apply Van Der Lee – Snowflakes:
Click OK
Highlight Water 2 layer.
Apply the same effect accept move
the Random Seed Button just a little.
Click OK.
Highlight Water 3 layer.
Repeat the above step.
Highlight Water 4 layer.
Repeat the above step.
Highlight Water 1 layer.
Adjust/Blur/Motion Blur:
Angle: 188
Strength: 309%
OK
Repeat the above step to Water 2,
Water 3, and Water 4 layer.
DO NOT DESELECT YET.
Close out Water 2, Water 3, and
Water 4 layer.
Keep Water 1 layer open.
Highlight the green water bucket.
Selections/Invert
Zoom in and make your Eraser Tool
small and erase the part of the bucket that you can see through the water. Be sure to even get the very tiny area in
between the bucket edge and bucket handle.
Deselect.
Note: If you can see flowers through the “flowing
water” then highlight the flower layer and erase only the part of the flower
you can see through the water.
Highlight your white background.
New Raster layer.
Select All.
Copy and paste Paper 12 Into
Selection.
Deselect.
Apply the mask.
Resize 115%
Merge Group.
Add your copyrights.
Add your name.
Color Pallet:
Foreground: #492c26
Background: #f8a363
Stroke: 0.8
Type your name.
Give it a slight Inner Bevel:
Make your Freehand Selection Tool
active set on Freehand.
Set the feather to 30.
Section off the bottom half of your
name.
New Raster layer.
Flood fill with #89a155
Deselect.
Highlight the layer with your name
on it.
Select All/Float/Defloat
Selections/Invert
Highlight the flood fill layer.
Tap the delete key.
Deselect.
Change the Properties to Burn.
Copy Merged.
~Time to Animate~
Open up Animation Shop.
Edit/Paste/As New Animation
Back in PSP.
Close out Water 1.
Open up Water 2.
Copy Merged.
Carry Into AS.
Edit/Paste/After Current Frame.
Back in PSP.
Close out Water 2.
Open up Water 3.
Copy Merged.
Carry Into AS.
Edit/Paste/After Current Frame.
Back in PSP.
Close out Water 3.
Open up Water 4.
Copy Merged.
Carry Into AS.
Edit/Paste/After Current Frame.
View your animation.
If you’re happy then resize:
Animation/Resize Animation:
Pixel Size checked
Width: 500
Height: 500
OK
Save your animation.
I hope you enjoyed this tutorial as
much as I did creating it for you.
I’d love to see your results.
Hugs,
Bev


No comments:
Post a Comment