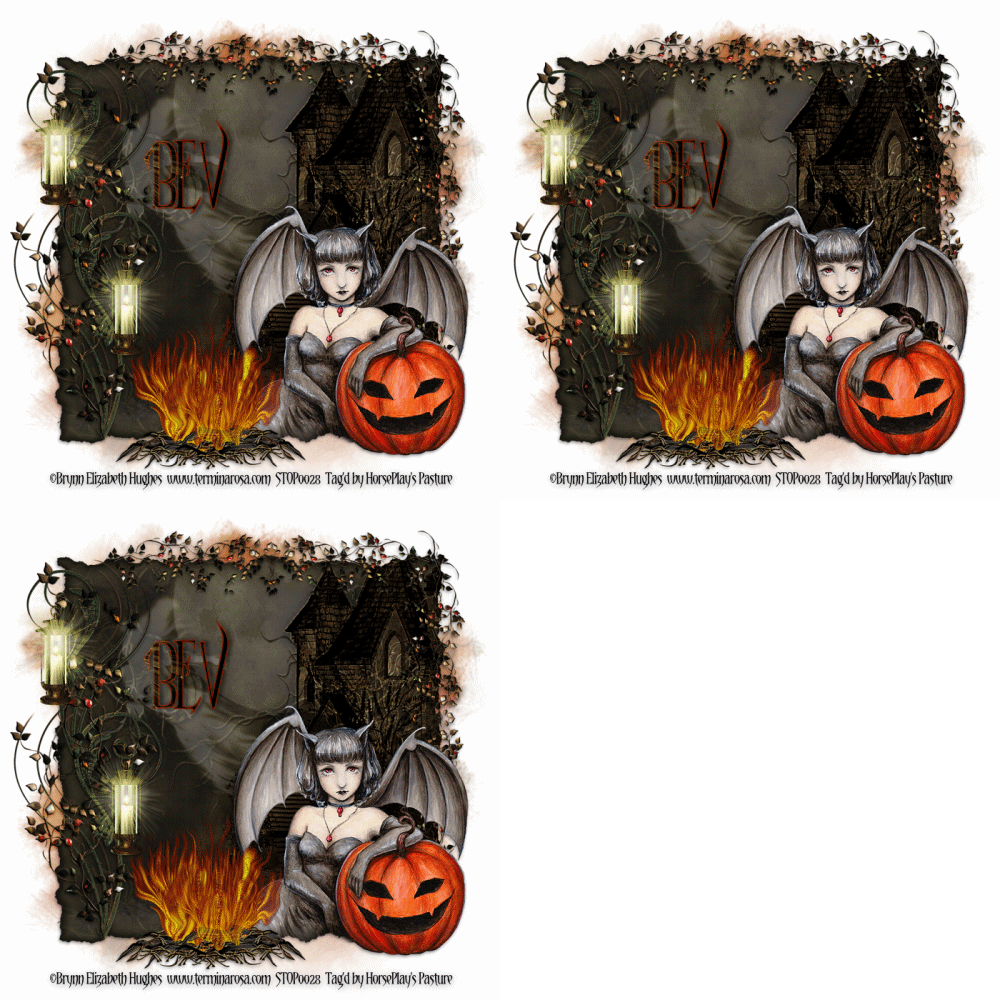
Supplies
1 tube of choice - I used the wonderful artwork of Brynn Elizabeth Hughes which can be purchased from PSP Tube Stop. You must have a
license to use.
Font of choice - I used Parseltongue here
Gem mask 192 here
Plugs Ins:
Alien Skin Xenofex 2: Burnt Edges
DSB Flux - Bright Noise
Animation Shop
"Halloween Night" is a tagger size scrap kit (also available in Full Size) created by Susan of TootyPup Scraps and can be purchased from any of her stores here.
This tutorial assumes you have a working knowledge of PSP.
~♥~ Lets get started ~♥~
Open up a 700 x 700 blank canvas.
Flood fill white.
New Raster Layer.
Select All.
Copy and paste Paper 2 Into Selection.
Deselect.
Apply Xenofex 2 - Burnt Edges:
OK
Resize 80%
Copy and paste Castle 3 as a new layer.
Mirror
Change the Properties to Overlay and move into position - see my tag for reference.
Highlight the paper layer.
Click anywhere outside of it with your Magic Wand.
Highlight the hounted house element.
Tap the delete key.
Deselect.
Copy and paste your tube as a new layer.
Move it into position.
Add your elements. I used:
Witch Ghost 01: Resize 60%/Lower the Opacity to 22
Swirl Lanterns 03a: Resize 60%
Halo Corner 01: Resize 60%/Mirror
Fire: Resize 45%
Duplicate the fire layer 2x's for a total of 3 fire layers.
Rename them Fire 1, Fire 2, and Fire 3.
Highlight Fire 1 layer.
Make your Freehand Selection Tool active set on Freehand and mode: Add (Shift)
Randomly trace around different areas of the fire.
Apply DSB Flux - Bright Noise:
Intensity: 38
Mix checked
OK
DO NOT DESELECT.
Close out Fire 1.
Open up Fire 2.
Apply DSB Flux - Bright Noise:
Use same settings accept hit the Mix button twice.
OK
DO NOT DESELECT.
Close out Fire 2.
Open up Fire 3.
Apply DSB Flux - Bright Noise:
Use same settings accept hit the Mix button three times.
OK
Deselect.
Close out Fire 3 layer.
Open up Fire 1 layer.
Highlight your white background.
New Raster layer.
Select All.
Copy and paste Paper 03a Into Selection.
Deselect.
Apply the mask.
Merge Group.
Add your credit.
Add your name:
Color Pallet:
Foreground: #792002
Background: #000000
Stroke: 1.5
Type your name.
Convert to Raster layer.
Select All/Float/Defloat
Copy and paste StarLight 01 as a new layer.
Resize 35%
Move into position over your name so that the rays from the light are over the first couple of letters.
Selection/Invert
Tap the delete key.
Deselect.
Merge Visible the name and light layer.
Give it a slight Inner Bevel:
Copy Merge.
~Time to Animate~
Open up Animation Shop.
Edit/Paste/As New Animation.
Back in PSP.
Close out Fire 1 layer.
Open up Fire 2 layer.
Copy Merge.
Carry into AS.
Edit/Paste/After Current Frame.
Back in PSP.
Close out Fire 2 layer.
Open up Fire 3 layer.
Copy Merge.
Carry into AS.
Edit/Paste/After Current Frame.
View your animaiton. If you're happy with it -
Animation/Resize Animation -
Pixel Size checked
Width: 500
OK
Save your tag.
I hope you enjoyed this tutorial as much as I did creating it. I'd love to see your results. Email me!
Hugs,
Bev


No comments:
Post a Comment