Supplies
1 tube of choice – I used the wonderful artwork of Victoria Fox which
can be purchased from Up Your Art. You must generate
a license to use.
Plug Ins used:
Eyecandy 3.1 - Glow
“Easter” is a PTU tagger size scrap kit created Vickie of Vickie’s
Scraps and can be purchased from her blog here.
Thank you Vickie for such an adorable kit!
~♥~ Let’s get started ~♥~
Open up a 700 x 700 blank canvas.
Flood fill white.
Copy and paste Ele 81 as a new layer.
Resize 33%
Duplicate
Click on it with your mouse and press the left arrow key on your
keyboard and move until it’s in position on the left side of the original frame.
Duplicate
Mirror
To each frame:
Highlight the frame layer.
Click inside of it with your Magic Wand.
Selections/Modify/Expand by 4.
New Raster layer below the frame.
Copy and paste Paper 22 Into Selection.
Deselect.
Copy and paste the following elements below the right frame – see my tag
for placement of each element. Don’t
worry about what overhangs the frame. We’ll
clean that up in a bit.
Ele 77: Resize 55%/Lower the
Opacity to about 34
Ele 77 again: Resize 35%
Ele 100: Resize 45%
Duplicate and mirror each element.
In your layers pallet move them below the left frame.
To clean each frame’s mess:
Highlight the paper layer that’s below the frame.
Click outside of it with your Magic Wand.
Highlight each element above the paper and tap the delete key.
Deselect.
New Raster layer just above your white canvas.
Make your Selection Tool active set on Rectangle.
Draw out a rectangle approximately 625 x 225 pixels.
Copy and paste Paper 22 Into Selection.
Deselect.
Duplicate/Change the Properties to Multiply.
Merge Down.
Apply Eyecandy 3.1 – Glow:
Width: 3
Opacity: 100
Opacity Drop off: Fat
Color: White
OK
New Raster layer.
Make your Selection Tool active set on Circle.
Draw out a circle approximately 250 pixels.
Copy and paste Paper 1 Into Selection.
Deselect.
Apply the same Glow effect.
Duplicate the circle layer and move both into position – see my tag for
reference.
Copy and paste Element 81 as a new layer just above your white canvas.
Resize 65%
Free rotate Right 5 degrees.
Click inside of it with your Magic Wand.
Selections/Modify/Expand by 4.
New Raster layer below the frame.
Copy and paste Paper 25 Into Selection.
Deselect.
Copy and paste your tube as a new layer.
Position in front of the center frame.
Add your elements. I used:
89: Resize 75%
28: Resize 70%
119: Resize 25%/Duplicate/Resize
70%/Duplicate and mirror both flower layers
107: Resize 25%
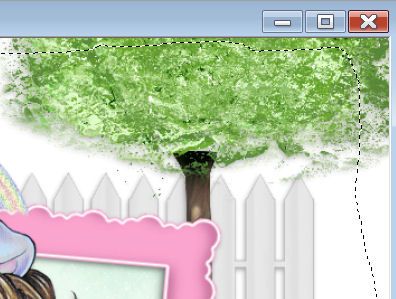
130 – To get the feathered look:
Use your Freehand Selection Tool set on Freehand.
Section around the tree – keeping the dotted line where you want it
feathered and away from the area of the element you don’t want feathered.

Selections/Modify/Inside Outside Feather
Feather amount: 30
OK
Selections/Invert
Tap the delete key until you like the effect.
Deselect.
Crop your image.
Highlight your white canvas.
New Raster layer.
Select All.
Copy and paste paper 21 Into Selection.
Deselect.
Duplicate/Change the Properties to Multiply.
Merge Down
Apply the mask.
Make your Pick Tool active and pull the sides out slightly.
Merge Group.
Add your credits.
Add your name:
Foreground & Background: #74ad3d
Stroke: 0.8
Type your name.
Convert to Raster layer.
Apply the same glow effect.
Add your name:
Foreground & Background: #74ad3d
Stroke: 0.8
Type your name.
Convert to Raster layer.
Apply the same glow effect.
Resize all layers 80%.


No comments:
Post a Comment