My heart goes out to Sue and the loss of her dear feathered friend.
Supplies
1 tube of choice and 1 Image – I
used the beautiful artwork of Sue Miller which can be purchased from UpYour Art. You must have a license to use.
Font of choice - I used Altas Greeting here
Dee’s Sign Post “Dream a Little Dream” Template here
It’s under Thursday, December 29, 2011
Plug Ins used:
Video Rave – Tiled Glass
Greg’s Factory Output Vol. II – Pool Shadow
Supplies which I created for this tutorial here.
These elements are to be used FOR THIS TUTORIAL ONLY.
This tutorial was written assuming you have a working knowledge of PSP.
~♥~ Let’s get started ~♥~
In this tutorial we’ll be bouncing back and forth between your image
and your working canvas quite a bit. We’ll
also be playing around in the layers pallet a bit, too.
Open up the template
Shift + D.
Close out the original.
Delete the Info layer, Dotted Circle, Small Purple Circle, and Group –
Raster 3 layer.
Open up the bg layer.
Make your working canvas active.
Highlight Raster 2 layer.
Click on it with your Magic Wand.
New Raster layer.
Make your tube/image active.
Highlight the Image layer.
Make your Selection Tool active set on Rectangle.
Section out the rippled water area of the image only.
Copy.
Make your working canvas active.
Paste Into Selection.
Deselect.
Delete the template layer.
Give it a slight Inner Bevel:
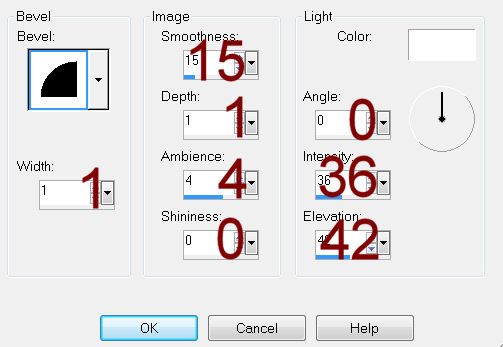
Highlight Large Purple Square layer.
Click on it with your Magic Wand.
New Raster layer.
Make your tube/image active.
Deselect.
Highlight the layer with just the swan on it – “Tube SM0115 Visit From
My Friend”
Make your Selection Tool active still set on Rectangle.
Section off a small area of the wing that mostly has the pink/peach
color to it.
Copy.
Make your working canvas active.
Paste Into Selection.
Deselect.
Delete the template layer.
Give it the same slight Inner Bevel.
Close out all layers that are above the Purple Oval layer.
Highlight Purple Oval layer.
Click on it with your Magic Wand.
New Raster layer.
Flood fill with #202020.
Apply Greg’s Factory Output Vol. II – Pool Sahdow:
Use Default Settings.
Deselect.
Make your tube/image active.
Deselect.
Copy and paste the swan onto your working canvas – don’t worry about
placement just yet.
Make your tube/image active again.
Highlight the Image layer.
Make your Freehand Selection Tool active.
Section off just the area of the water ripples:
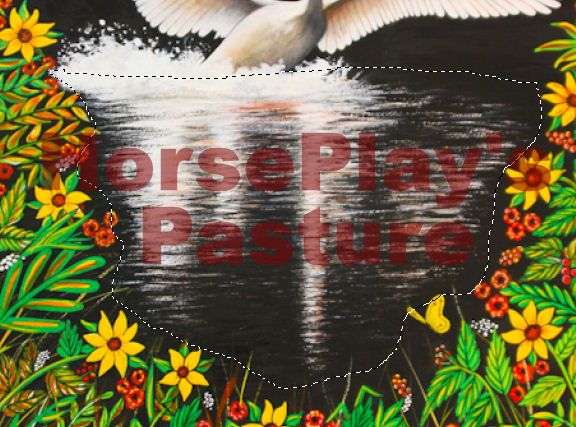
Copy.
Make your working canvas active.
Paste as a new layer.
Make your Pick Tool active and pull the sides out so that the ripples
touch the sides of the oval:
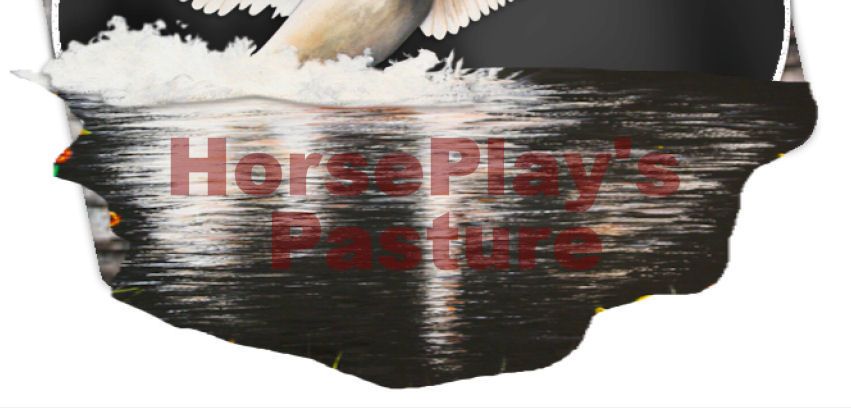
Highlight the flood fill layer.
Click anywhere outside of it with your Magic Wand.
Highlight the water ripples layer.
Tap the delete key.
Deselect.
Delete the template layer.
Move your swan into position – see my tag for reference.
Duplicate/Resize just a little larger.
Move up and to the right just a little.
In your layers pallet move it just above the black oval layer.
Change the Properties to Overlay.
Highlight the oval layer.
Click anywhere outside of it with your Magic Wand.
Highlight the duplicated tube layer.
Tap the delete key.
Deselect.
The water ripples had too much of a blunt line across the top. To blend it make your Eraser Tool active with
the Hardness set to about 22. Hold your
mouse along the blunt edge of the water and click it while sweep across that
blunt edge. Do this until you feel it’s
blended nicely.
Color Pallet:
Foreground: Close it out.
Background: #d6cbc2
Make your Symmetric Shape Tool active:
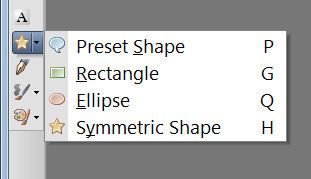
Match your settings to mine:
Hold your mouse over the black oval and pull out to create a star –
make any size you like. Once you have a
star you’re happy with then convert the layer into a Raster layer. Make as many stars as you like.
Merge Visible all stars.
Adjust/Add Remove Noise/Add Noise:
Uniform & Monochrome checked
Noise: 50%
OK
Color Pallet:
Foreground: #caaede
Background: #d3d3cf
Open up and Highlight Copy of Raster 2 layer.
Make your Color Replacer Tool active.
Double Right click your mouse.
Give it the same slight Inner Bevel.
Apply the same Noise Effect.
Repeat the above step with Copy (2) of Raster 2 layer.
Open up Dotted Shape layer.
Color Pallet:
Foreground: #9f6dc1
Background: #e3c095
Open up Purple Shape layer.
Change the color of this layer using your Color Replacer Tool.
Color Pallet:
Foreground: Doesn’t matter what color
Background: #000000
Still working the the Purple Shape layer (which is now a peach color)
Click on it with your Magic Wand.
Apply Video Rave – Tiled Glass:

Highlight and Open Words layer.
Select All/Float/Defloat
New Raster layer below the template layer.
Flood fill with #e5e4df
Deselect.
Merge Visible the words and flood fill layer.
Open up and Highlight White stars layer.
Click anywhere outside of them with your Magic Wand.
Selections/Invert
New Raster layer.
Flood fill with #e8c9a4
Adjust/Blur/Gaussian Blur:
Radius: 6
OK
Deselect.
Merge Visible the blurred layer and template layer.
Give it the same slight Inner Bevel.
Color Pallet:
Foreground: #000000
Background: #e8c9a4
Open up and highlight Black Stars layer.
Make your Color Replacer Tool active and change the color to #e8c9a4.
Add the elements I supplied:
Duplicate them as many times as you like.
Make your tube and image active.
Highlight the image layer.
Use your Selection Tool set on Rectangle and section out the area of
the swan and water:
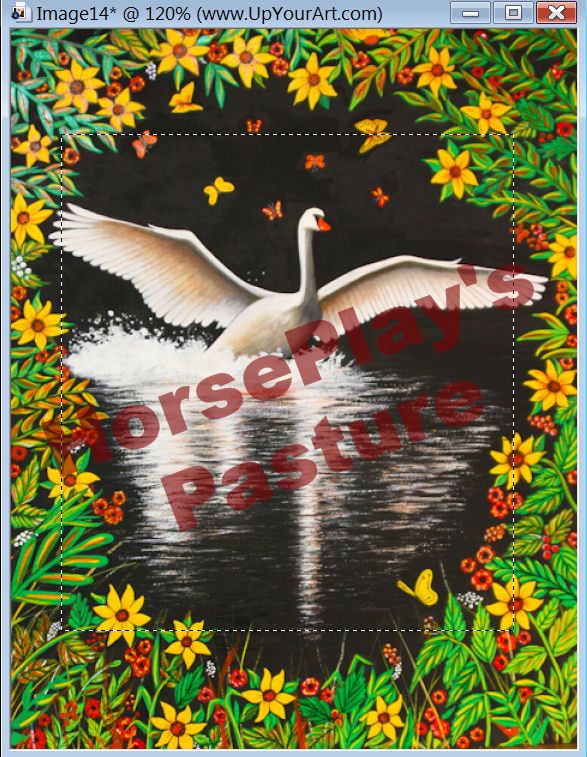
Copy.
Highlight your white background.
New Raster layer.
Select All.
Paste your image Into Selection.
Adjust/Blur/Gaussian Blur:
Radius: 20
OK
Deselect.
Apply the Mask.
Resize 105%
Make your Pick Tool active and pull the side out just a little.
Merge Group.
Add your credits.
Add your name.
Foreground and Background: #000000
Type your name.
Resize all layers 80%.


No comments:
Post a Comment