
Supplies
Font of choice - I used LDGregarious which is a pay font, but Childish should work just as well here
Weescotlass Mask 208 here
Animation Shop
Plug Ins:
Mura’s Meister - Cloud
“Good Tidings” is a tagger size scrap kit created by Freek’s Creations and can be purchased from Exquisite Scraps. You can visit her blog here.
Thank you Freek for a really adorable kit.
This tutorial was written assuming you have a working knowledge of PSP.
~♥~ Let’s get started ~♥~
Open up a 700 x 700 blank canvas.
Flood fill white.
Color pallet:
Foreground: #a8c0ca
Background: #ffffff
Copy and paste E40 as a new layer.
Resize 85%
Free rotate Left 5 degrees
Click inside of it with your Magic Wand - be sure to click inside the gaps at the corners.
Selections/Modify/Expand by 4.
New Raster layer below the frame.
Apply Mura’s Meister - Cloud:
Hit the reset button.
OK
Deselect.
We’re going to add the elements below the frame. See my tag for placement. Don’t worry about what overhangs the frame. We’ll clean that up in a bit.
E 33: Resize 70%
E 22: Resize 85%
E 18: Resize 25%/Mirror
E 4: Resize 25%
E 15: Resize 25%
E 17: Resize 30%
Highlight the Mura’s Meister cloud layer.
Click anywhere outside of it with your Magic Wand.
Highlight each element that’s hanging outside of the frame and tap the delete key.
Deselect.
Add your elements. I used:
E 21: Duplicate/Mirror
E 3: Resize 50%
E 24: Resize 35%
E 5 - Do not give it a drop shadow yet.
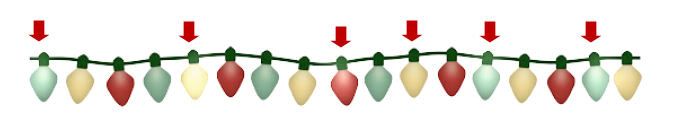
Highlight the lights element layer.
Duplicate 3 times for a total of 4 light layers.
Rename them L1, L2, L3, and L4.
Make your Lighten/Darken tool active.
Highlight L1 layer and lighten the bulbs as indicated:
I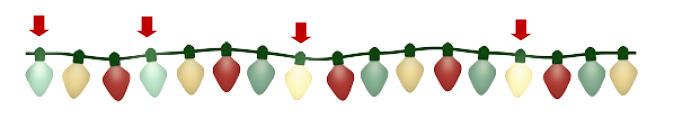
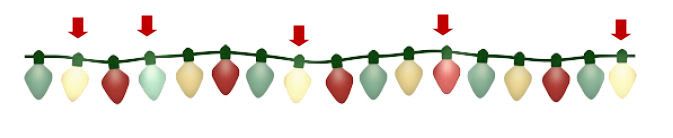
Highlight L2 and lighten the bulbs as indicated:
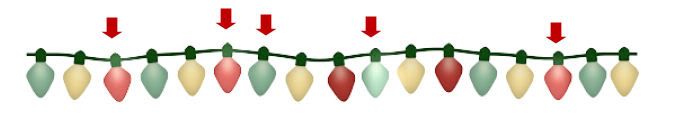
Highlight L3 and lighten the bulbs as indicated:
Highlight L4 and lighten the bulbs as indicated:
Go back and give each light layer a drop shadow.
Close out L2, L3, and L4 layers.
L1 should be left open.
Crop your image.
Highlight your white canvas.
New Raster layer.
Select All.
Copy and paste Paper 9 Into Selection.
Deselect.
Apply the mask.
Resize 110%
Merge Group.
Add your copyrights.
Add your name.
Color Pallet:
Foreground: #0f430f
Background: #a4352e
Stroke: 1.0
Type your name.
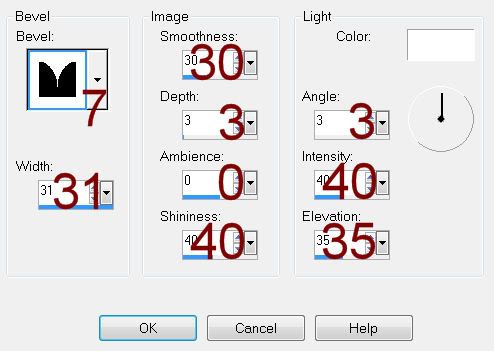
Give it a slight Inner Bevel:
Edit/Copy Merge
Time to Animate:
Open up Animation Shop
Edit/Paste/As New Animation
Back in PSP.
Close out L1.
Open up L2.
Copy Merge
Back in AS.
Edit/Paste/After Current Frame.
Back in PSP.
Close out L2.
Open up L3.
Copy Merge
Back in AS.
Edit/Paste/After Current Frame.
Back in PSP.
Close out L3.
Open up L4.
Copy Merge
Back in AS.
Edit/Paste/After Current Frame.
Ctrl + A (to highlight all the frames)
Animation/Frame Properties:
Change the number to 12
Animation/Resize Animation:
Percentage of Original checked
Width x Height: 80
OK
View your animation.
If you’re happy with it then save.
I hope you enjoyed this tutorial.
I’d love to see your results.
Email me!
Hugs,
Bev
No comments:
Post a Comment