Supplies
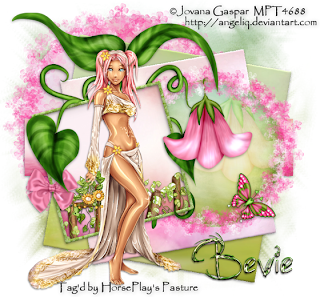
1 tube of choice - I used the artwork of Jovana Gaspar which can be purchased from MPT. You must have a license to use.
Font of choice - I used Jellyka Castle’s Queen here
Weescotlass Mask 249 here
Creative by Nature Template 122 here
Eyecandy 3.1 - Glow
“Fun with Sprite” is a tagger size scrap kit created by Cindy of Puddicat Creations and can be purchased from Heartbeatz Creationz. You can visit her blog here.
Thank you Cindy for another beautiful kit!
This tutorial was written assuming you have a working knowledge of PSP.
~♥~ Let’s get started ~♥~
Open up the template.
Shift + D.
Close out the original.
Delete the top 4 layers.
Resize all layers 80%.
Image/Canvas Size
700 x 650
OK
New Raster layer.
Send to bottom.
Flood fill white.
Highlight 10 layer.
Click anywhere outside of it with your Magic Wand.
Copy and paste Paper 11 as anew layer.
Resize 60%.
Position over the circle.
Selections/Invert
Tap the delete key.
Deselect.
Delete the template layer.
Apply Eyecandy 3.1 - Glow:
Width: 3
Opacity: 100
Opacity Drop off: Fat
Color: white
OK
Highlight 9 layer.
Click on it with your Magic Wand.
New Raster layer.
Copy and paste Paper 1 Into Selection.
Deselect.
Delete the template layer.
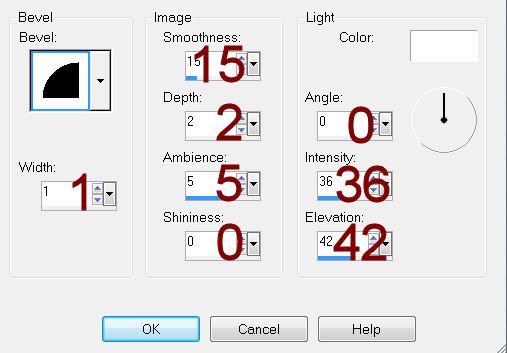
Give it a slight Inner Bevel:

Highlight 8 layer.
Click on it with your Magic Wand.
New Raster layer.
Copy and paste Paper 13 Into Selection.
Deselect.
Delete the template layer.
Give it the same slight Inner Bevel.
Highlight 7 layer.
Click on it with your Magic Wand.
New Raster layer.
Copy and paste Paper 10 Into Selection.
Deselect.
Delete the template layer.
Give it the same slight Inner Bevel.
Highlight 6 layer.
Click on it with your Magic Wand.
New Raster layer.
Copy and paste Paper 2 Into Selection.
Deselect.
Delete the template layer.
Highlight 5 layer.
Click on it with your Magic Wand.
New Raster layer.
Copy and Paste Paper 5 Into Selection.
Deselect.
Delete the template layer.
Give it a slight Inner Bevel.
Highlight 3 layer.
Repeat the above step.
Highlight 4 layer.
Click on it with your Magic Wand.
New Raster layer.
Copy and Paste Paper 9 Into Selection.
Copy and paste Fence 1 as a new layer.
Resize 50%
Move into position - see my tag for reference.
Selections/Invert
Tap the delete key.
Deselect.
Delete the template layer.
Copy and paste Flower 1 as a new layer.
Resize 40%
Move into position over the circle paper layer - see my tag for reference.
Duplicate/Resize 120
Move to the right slightly and just above the circle paper in your layers pallet.
Highlight the paper layer.
Click anywhere outside of it with your Magic Wand.
Highlight the flower just above the paper layer.
Tap the delete key.
Deselect.
Change the Properties to Soft Light.
Add your embellishments. I used:
Bow 2: Resize 25%
Leaves 1: Resize 85%
Bling 3: Resize 50%/Position over the smaller circle.
Bling 3 again: Resize 65%/Position over the large circle.
Butterfly 3: Resize 25%
Copy and paste your tube as a new layer.
Highlight your white canvas.
New Raster layer.
Select All.
Copy and paste Paper 2 Into Selection.
Deselect.
Apply the mask.
Resize 115%
Merge Group.
Add your copyrights.
Add your name.
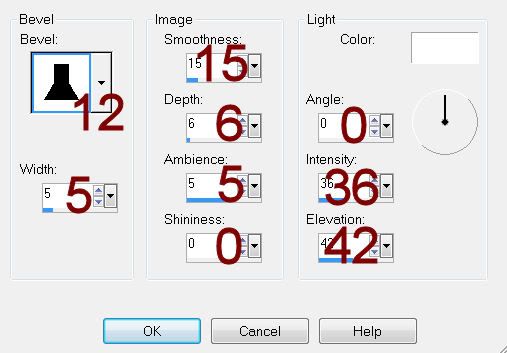
Give it a slight Inner Bevel:

Resize all layers 80%.
I hope you enjoyed this tutorial.
I’d love to see your results and show it off in my gallery.
Email me!
Hugs,
Bev

Hi, I love this tut but when I went to MPT to buy the tube, I can't find it...did you recently buy that tube...Marilyn
ReplyDelete