Supplies
1 tube of choice - I used the wonderful artwork of Lisa Victoria at Up Your Art. You must obtain a license to use.
Font of Choice - I used PaulMaul here
My Mask 20 here and Monti Circular mask here
“Carefree” is a FTU scrap kit created by Cora’s Creations and can be downloaded from her blog here.
Please leave a thank you when downloading. It’s a small gesture for hard work and generosity given freely.
This tutorial was written assuming you have a working knowledge of PSP.
~♥~ Let’s get started ~♥~
Open up a 700 x 700 blank canvas.
Flood fill white.
Copy and paste Frame 3 as a new layer.
Resize 70%
Duplicate/Resize 70%
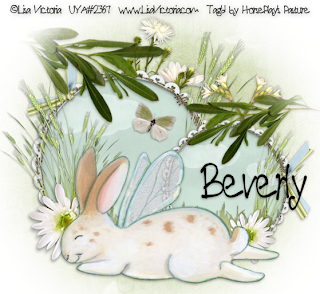
Move both frames into position - see my tag for reference.
Copy and paste Stitching 1 as a new layer.
Resize 65%
Duplicate/Resize 70%
Position each over a frame.
Highlight the larger frame.
Click inside of it with your Magic Wand.
Selections/Modify/Expand by 4.
New Raster layer below the frame.
Copy and paste Paper 2 Into Selection.
Copy and paste Grass as a new layer just below the frame.
Selections/Invert
Tap the delete key.
Deselect.
Highlight the smaller frame.
Repeat the above step.
Copy and paste Cloud 1 as a new layer below the larger frame.
Resize 40%
Move into position.
Highlight the paper layer.
Click anywhere outside of it with your Magic Wand.
Highlight the cloud layer.
Tap the delete key.
Deselect.
Paste the cloud below the smaller frame.
Resize 25%
Duplicate/Mirror
Move both clouds into position - merge down.
Highlight the paper layer.
Click anywhere outside of it with your Magic Wand.
Highlight the merged cloud layer.
Tap the delete key.
Deselect.
Copy and paste your tube as a new layer.
Add your embellishments. I used:
Flower 3
Greens 5: Resize 60% - position behind the frames and in front of the larger frame.
Green 5 again: Resize 40% - Duplicate twice/mirroring one of them - position in front of the frames
Flower 5: Resize 50%
Flower 1 - Duplicate/Mirror
Flower 4: Resize 60%/Mirror
Flower 4 again: Resize 60%/Flip/Resize 70%
Butterfly: Resize 25%/Free rotate Right 25 degrees
Ribbon 3: Resize 50%/Free rotate Right 90 degrees/Duplicate/Mirror/Free rotate Right 40 degrees
Copy and paste Greens as a new layer at the top of your layers pallet.
Resize 70%
Free rotate Left 80 degrees
Move into position - see my tag for reference.
Apply Monti Circular Mask.
Merge Group.
Tip: If too much of your branch is missing the simply undo the mask. Move the branch closer to the middle of your canvas and reapply the mask. Then move your branch wherever you like.
Paste the Greens again.
Resize 60%
Mirror
Free rotate Right 80 degrees.
Apply the mask just as you did to the other greens layer.
Highlight your white canvas.
New Raster layer.
Select All.
Copy and paste Paper 11 Into Selection.
Deselect.
Apply the mask.
Resize 120%
Merge Group.
Add your copyrights.
Add your name.
Resize all layers 80%.
I hope you enjoyed this tutorial.
I’d love to see your results and show it off in my gallery.
Email me!
Hugs,
Bev

No comments:
Post a Comment