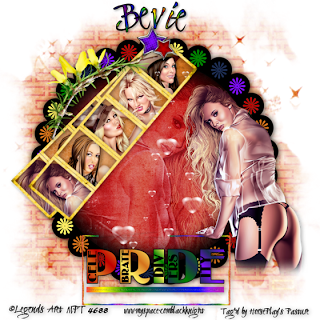
Clicking on the image will allow for bigger view.
Supplies
5 tubes of your choice and 1 close up image - I used the artwork of Legends Art at MPT
Font of Choice - I used Clive Barker here
Gem Mask 204 here
“American Pride” is a PTU tagger size scrap kit created by Artmama Made and can be purchased at Exquisite Scraps. You can visit her blog here.
Thank you Artmama…your talent is amazing!!
This tutorial was written assuming you have a working knowledge of PSP.
~♥~ Let’s get started ~♥~
Open up a 700 X 700 blank canvas.
Flood fill white.
Copy and paste Embellie 28 as a new layer.
Resize 80%
Use your Selection Tool set on Circle and outline the center of the embellishment.
TIP: If the circle is the right size but not centered then move the embellishment so that the dotted-lined circle is centered. It’s alright that the embellishment isn’t centered on your canvas…..yet.
New Raster layer.
Copy and paste a paper of choice Into Selection.
Copy and paste your close up image as a new layer.
Merge down.
Selection/Modify/Feather
Number of Pixels: 73
OK
Selections/Invert
Tap the delete key until you have a nice feathered look.
Deselect.
Close out your white canvas.
Merge visible.
Reopen your white canvas.
Move the merged layer so that it’s centered on your canvas.
Copy and paste Embellie 26 as a new layer.
Resize 65%
Free rotate left 45 degrees
Select All/Float/Defloat
New Raster layer.
Copy and paste a paper of choice Into Selection.
Deselect.
Delete the embellie layer.
Use your Magic Wand and click inside each square.
Selections/Modify/Expand by 4.
New Raster layer below the frame.
Copy and paste a paper of choice Into Selection.
Deselect.
Copy and paste a tube as a new layer below the top square of the frame.
Resize the tube is needed.
Highlight the frame layer.
Click inside the square with your Magic Wand.
Selections/Modify/Expand by 4.
OK
Highlight your tube layer.
Selections/Invert
Tap the delete key.
Deselect.
Use your Eraser Tool and erase the part of the tube that’s seen in other squares of the frame.
Repeat the above step with each square in the frame.
Once you’ve done that then close out all layers accept for the frame layer, tubes below the frame, and paper layer.
Merge Visible.
Reopen all the layers.
Move into position near the top left area of the other merged layer.
See my tag for reference.
Duplicate/Free rotate left 5 degrees
Copy and paste your tube as a new layer.
Add your embellishments. I used:
Embellie 45: Resize 50%
Embellie 18: Resize 40%/Mirror/Free rotate right 45 degrees
Embellie 11: Resize 85%35%
Embellie 4: Resize 25%
Embellie 9: Resize 35%
Highlight your white background.
Select All.
Copy and paste a paper of choice Into Selection.
Deselect.
Apply the mask.
Merge Group.
Add your credits.
Add your name.
Make your Ellipse Tool active.
Foreground: Black
Background: Null
Width: 2
Form a circle a little bit bigger than the merged circle layer.
Make your text tool active.
In your Color Pallet:
Forground: Black
Background: Gradient of choice - I used the rainbow one that came with my pc
Move your curser along the top of the circle until you see a rocking A.
Click your mouse.
A text box should appear.
Type your name.
OK
Click on the plus sign beside your name in your layers pallet.
Close out New Ellipse layer.
Highight Vector layer.
Right click and choose Convert to Raster layer.
I hope you enjoyed this tutorial.
I’d love to see your results and show it off in my gallery.
Email me!
Hugs,
Bev

No comments:
Post a Comment