

Supplies
1 tube of choice - I’m using the artwork of PinUpToons at CILM
Font of Choice - I’m using Bambino here
Vix Mask 350 here
Eyecandy 4000 - Gradient Glow
Tramages - Tow the Line
DSB Flux - Bright Noise
Butterfly Animation - Which I’ve supplied here
Animation Shop
“Awaiting Autumn” is a PTU tagger size scrap kit created by Kristen of Mystical Illusionz and can be purchased at Twilight Scraps. You can visit her blog here.
This tutorial was written assuming you have a working knowledge of PSP.
~♥~ Let’s get started ~♥~
Open up a 700 X 700 blank canvas.
Flood fill white.
Copy and paste Heart Frame 2 as a new layer
Resize 40%
Move to the left side of your canvas.
Duplicate/Mirror
Move to the right side of your canvas.
Click inside one of the frames with your Magic Wand.
Selections/Modify/Expand by 4.
New Raster layer below the frame.
Flood fill with a gradient of choice - if you like, give it a texture.
Copy and paste your tube below the frame.
Selections/Invert
Tap the delete key.
Paste your tube again. It needs to be slightly larger that your tube so resize accordingly.
Tap the delete key.
Change the Properties to Soft Light and move this tube below your other tube in the layers pallet.
Close out your white canvas layer and the frame that’s on the right side.
Merge Visible.
Reopen all layers.
Repeat the above step with your right frame.
Use your Selection Tool set on Rectangle and create a rectangle behind the frames - see my tag for reference.
New Raster layer.
Flood fill with a light color of your choice.
Apply DSB Flux Bright Noise:
Intensity: 39
Mix checked
OK
New Raster layer
….we’ll come back to our working canvas in a bit.
Open up Paper 6.
Shift + D.
Close out the original.
Effects/Texture Effect/Mosiac Glass
Default settings
OK
Copy
Close it out as you won’t need it any more.
Highlight working canvas.
Paste into Selection.
Apply Tramages: Tow the Line
Default settings
OK
Deselect
Use your Selection Tool again still set on Rectangle.
Create a thin rectangle - see my tag for reference.
New Raster layer.
Flood fill with a matching dark color of your choice.
Apply DSB Flux - Bright Noise - same settings.
Deselect.
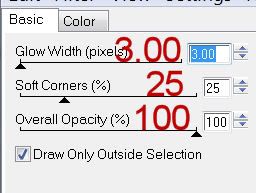
Apply Eyecandy 4000 - Gradient Glow:
Free rotate left 15 degrees.
Add your embellishments. I used:
Doodle: Resize 40%/Duplicate/Mirror
Acorn: Resize 25%
Acorn: Resize 25% and 50%
Leaves of your choice: Resize 25%
Crop your Image
Highlight your white background.
New Raster layer.
Select All.
Copy and paste a paper of choice Into Selection.
Deselect.
Apply the Mask.
Merge Group.
Use the Bambino font and type out the word Autumn.
Add your copyrights.
Add your name.
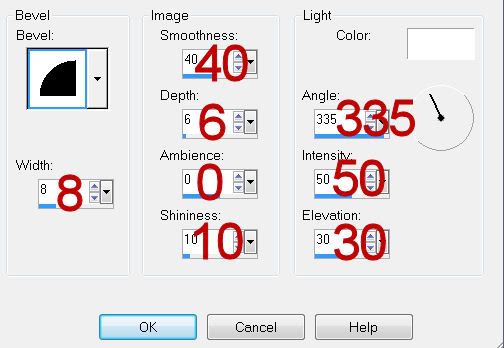
Give it a slight inner bevel:
Edit/Copy Merge
~Time to Animate~
Open up Animation Shop.
Edit/Paste/As New Animation.
Ctrl + L - tap the L key until you have 5 frames.
Edit/Copy
Highlight your tag frames.
Ctrl + A to be sure all frames are highlighted
Ctrl + E and place the butterfly where you like.
View your animation.
If you’re happy with it then save.
I hope you enjoyed this tutorial.
I’d love to see your results and show it off in my gallery.
Email me!
Hugs,
Bev
No comments:
Post a Comment