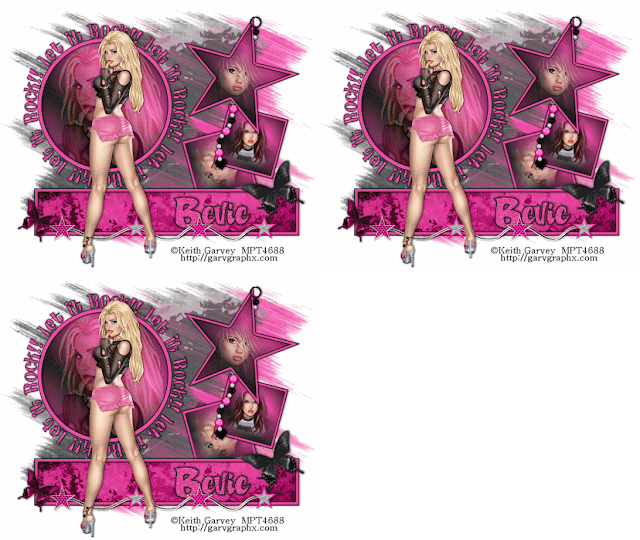
Clicking on the image will enlarge to full view.
Supplies
Font of Choice - I used A&S Rhino
Blissfully Beth Template 52 here
Kreations Mask 71 here - If you know who this mask belong to will you please email me so that I can give proper credit? Thank you.
DSB Flux - Bright Noise
Animation Shop
“Dare Devil Diva” is a FTU tagger size scrap kit created by Dawn of Digital Diva and can be downloaded from her blog here.
Please leave a thank you when downloading. It’s a small gesture for hard work given freely.
Dawn, this kit is awesome!
This tutorial was written assuming you have a working knowledge of PSP.
.
~♥~ Let’s get started ~♥~
Open up the template.
Shift + D.
Close out the original.
Delete the credit layer.
Before we begin create a 600 X 600 image flood filled #e847a0.
You’ll need to copy and paste from that a few times throughout this tutorial.
Also, create a gradient of your choice using #202020 and #e847a0.
Highlight Let it Rock word art layer.
Select All/Float/Defloat
Selections/Modify/Contract by 1
Copy and paste your pink image as a new layer.
Selections/Invert
Tap the delete key.
DO NOT DESELECT.
Select All/Float/Defloat
Selections/Modify/Contract by 1
Copy and paste your pink image as a new layer.
Selections/Invert
Tap the delete key.
DO NOT DESELECT.
Duplicate twice for a total of 3 layers.
Rename them Word Art 1, 2, and 3.
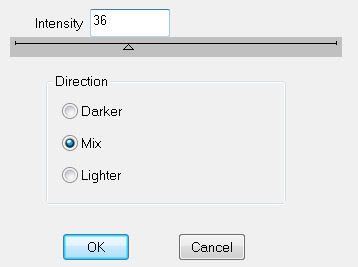
Highlight Word Art 1 and apply DSB Flux - Bright Noise:

Highlight Word Art 2.
Apply Bright Noise accept this time hit the mix button twice.
Apply Bright Noise accept this time hit the mix button twice.
Highlight Word Art 3.
Apply Bright Noise accept this time hit the mix button 3 times.
Deselect.
Highlight Circle Frame layer.
Select All/Float/Defloat
Selections/Modify/Contract by 1
Copy and paste your pink image as a new layer.
Selections/Invert
Tap the delete key.
Deselect.
Merge Down.
Use your Magic Wand and click inside the circle.
Selections/Modify/Expand by 2.
New Raster layer below the circle.
Flood Fill with your gradient color.
DO NOT DESELECT
Copy and paste your tube - resizing as necessary.
Position inside the circle.
Selections/Invert
Tap the delete key.
Deselect.
Change the Properties to Soft Light.
Highlight Rectangle bg layer.
Select All/Float/Defloat
Copy and paste a paper of choice as a new layer.
Selections/Invert
Tap the delete key.
Deselect.
Delete the template layer.
Highlight Rectangle Frame layer.
Select All/Float/Defloat
Selections/Modify/Contract by 1
Copy and paste your pink image as a new layer.
Selections/Invert
Tap the delete key.
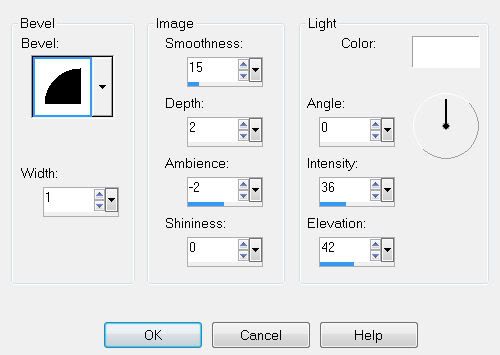
Give it a slight inner bevel:

Deselect.
Merge Down.
Highlight the Star layer.
Select All/Float/Defloat
Selections/Modify/Contract by 1
Copy and paste your pink image as a new layer.
Selections/Invert
Tap the delete key
Select/Invert
Select/Modify/Contract by 5
Tap the delete key.
Selections/Modify/Contract by 1
Flood fill with your gradient.
DO NOT DESELECT
Copy and paste your tube as a new layer over the star -
Positioning it exactly where you want it.
Selections/Modify/Feather

Selections/Invert
Tap the delete key until you have the desired feathered effect.
Deselect.
Repeat the above steps with the remaining two squares.
Add your embellishments. I used:
Flower 2: Resize 30% Free rotate left 30 degrees
Flower 1: Resize 25% Free rotate right 30 degrees
Star wire: Resize 70%
Beads 2: Resize 50% Free rotate right 14 degrees
Copy and paste your tube as a new layer.
Highlight your white background.
New Raster layer.
Copy and paste a paper of choice Into Selection.
Deselect.
Apply the mask.
Merge Group.
New Raster layer.
Select All
Copy and paste your pink image Into Selection.
Deselect.
Apply the mask again.
Merge Group.
Move each mask slightly - see my tag for reference.
Add your copyrights.
Add your name.
Duplicate it twice for a total of 3 layers
Rename them Name 1, 2, and 3.
Apply the Bright Noise effect in the same manner as you did for the Let it Rock word art.
Be sure Word art layers 2 & 3 are closed.
Be sure Name 2 & 3 layers are closed.
Resize all layers 80%.
Copy Merge
Time to Animate:
Carry into Animation Shop
Edit/Paste/As New Animation.
Back into PSP.
Close out W.A. layer 1 and open up W.A. layer 2
Close out Name 1 and open up Name 2.
Copy Merge
Carry into AS
Edit/Paste/After Current Frame
Back into PSP.
Close out W.A. layer 2 and open up W.A. layer 3
Close out Name 2 and open up Name 3.
Copy Merge
Carry into AS
Edit/Paste/After Current Frame
View your animation.
If you’re happy then save.
I hope you enjoyed this tutorial.
I’d love to see your results and show it off in my Show Arena.
Email me!
Hugs,
Bev

No comments:
Post a Comment