
 Clicking on the image will enlarge to full view.
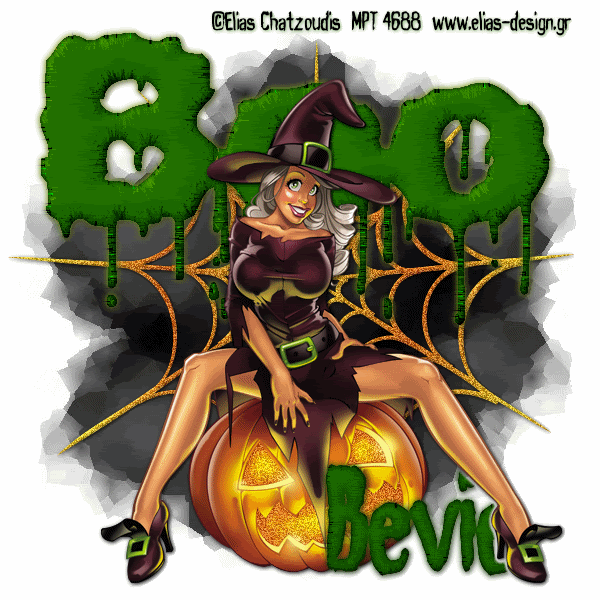
Supplies
1 tube of choice - I’m using the artwork of Elias Chatzoudis which you can purchase here
Font of Choice - I’m using Haunt here
Weescotlass Mask 220 here
My Template 44 here
DSB Flux - Bright Noise (optional)
Animation Shop (Optional)
This tutorial was written assuming you have a working knowledge of PSP.
~♥~ Let’s get started ~♥~
Open up the template.
Shift + D.
Close out the original.
Delete the credit layer.
Highlight the Boo layer.
Select All/Float/Defloat
New Raster Layer.
Flood fill with a color of your choice.
Deselect.
Give it a slight inner bevel: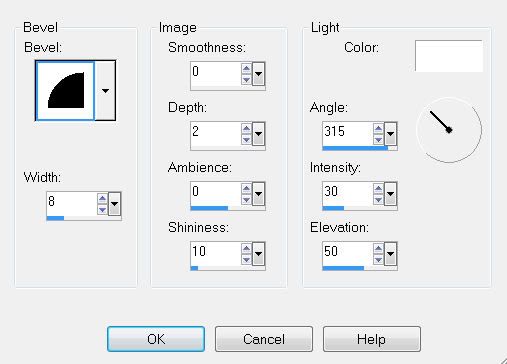
Effects/Text Effects/Fur: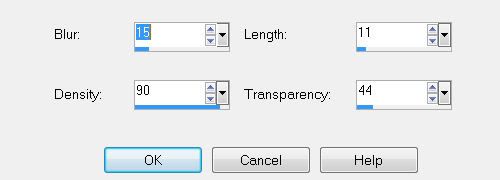
Change the opacity to Overlay.
Merge down.
Highlight the Spider Web layer.
Select All/Float/Defloat
Choose 2 colors complimentary to your tube.
Create a gradient.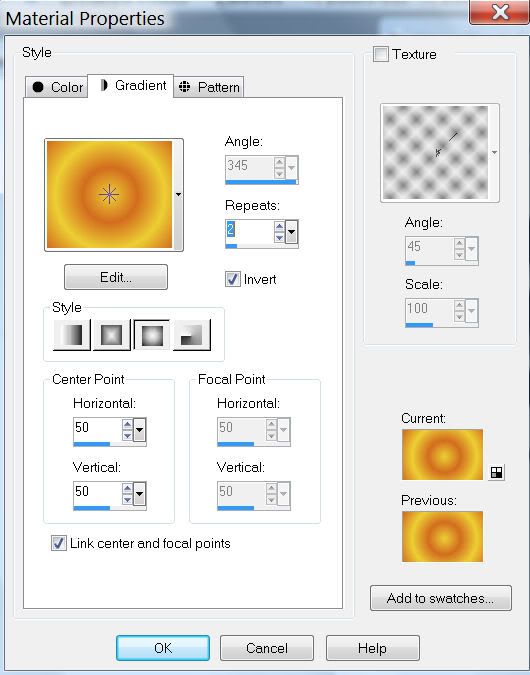
Give it the same slight inner bevel.
Duplicate twice for a total of 3 layers.
Rename Web 1, 2, and 3.
Highlight Web 1 and apply DSB Flux Bright Noise.
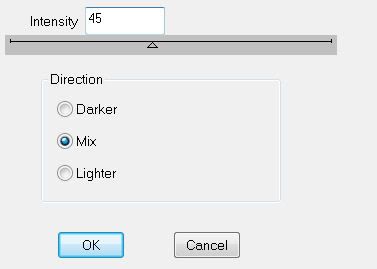
Highlight Web 2 and apply the same accept hit the mix button twice.
Repeat for Web 3 accept hit the mix button 3 times.
Close out Web layers 2 & 3.
Add your tube.
Add your copyrights.
Add your name in the color black.
Select All/Float/Defloat
New Raster Layer.
Flood fill with a color of your choice.
Deselect.
Give it the same inner bevel.
Apply the same fur effect.
Merge down.
Copy Merge
Time to Animate:
Carry into Animation Shop
Edit/Paste/As New Animation
Back into PSP.
Close our Web 1.
Open up Web 2.
Copy Merge
Carry into AS
Edit/Paste/After current frame.
Back into PSP.
Close our Web 2.
Open up Web 3.
Copy Merge
Carry into AS
Edit/Paste/After current frame.
View your animation.
If you’re happy then save.
I hope you enjoyed this tutorial.
I’d love to see your results and show it off in my Show Arena.
Email me!
Hugs,
Bev
No comments:
Post a Comment