Supplies
1 (or 2) tube of choice - I’m using the artwork of Gennadiy Koufay which you can purchase here
Font of Choice - I’m using Auqarelle here
Animation Shop
“Tiny Dancer” a full size size scrap kit created by Victoria of Pink Princess Designs and can be purchased here. You can visit her blog here.Thank you Victoria for such a delicate and beautiful kit!!
This tutorial was written assuming you have working knowledge of PSP.
~♥~ Let’s get started ~♥~
Open up a 700 X 700 blank canvas. Flood fill white.
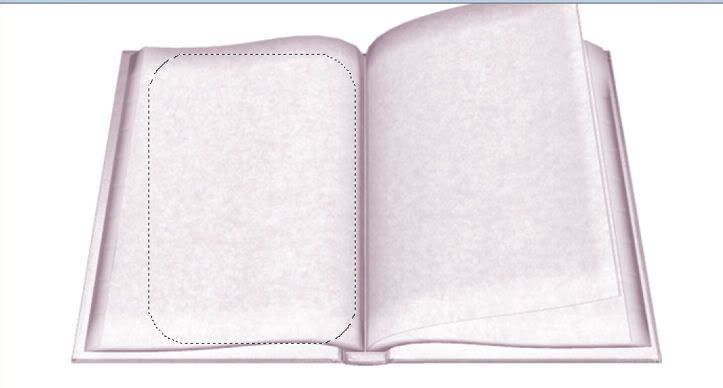
Copy and paste Book as a new layer. Resize 25% & 90%
Copy and paste Lace 1 as a new layer. Resize 10%. Move the lace so that it lines up with the left edge of book at the bottom. Duplicate and move that layer so that the lace is all the way across the bottom of the book. Use either your Selection Tool set on Rectangle or your Eraser tool and get rid of the lace overhang - you want it to only be the length of the book.
Duplicate and flip.
Highlight the merged lace again. Duplicate. Free Rotate Right 99 degrees. Image Mirror.Move all 4 pieces of lace so that it outlines the book. Merge visible these 4 layers and move beneath the book in your layers pallet.
Using your Selection Tool set on Rounded Rectangle, outline the left page of the book.
Using your Selection Tool set on Rounded Rectangle, outline the left page of the book.

Copy and paste a paper of choice. Resize 15% and 60%.
Selections/Invert. Hit the delete key.
Copy and paste your tube of choice - resizing as necessary.
Hit the delete key.
Selections/Modify/Feather
Selections/Modify/Feather
Number of Pixels: 30
Highlight the paper layer.
Tap the delete key until you’ve got the feathered look you desire.
Highlight your tube layer.
Tap the delete key until you’ve got the feathered look you desire.
Merge visible the paper and tube layer.
Free rotate right 4 degrees.
Repeat the above steps if you want a different tube on the opposite page. If you want the same tube then simply duplicate the merged layer/mirror.
Add your embellishments. I used:
Netting: Resize 25%
Flower Stem 2: Resize 15%
Button 2: Resize 60%. Mirror/Free rotate left 15 degrees
Flowers 1 & 2: Resize 15% and 40%
Slippers: Resize 15% & 70%
Ribbon 1: Resize 15%. Free Rotate Left 9 degrees
Feather: Resize 25%. Duplicate and resize 80% twice
Butterflies 1 & 2: Resizxe 15% and 70%
Leaves: Resizes 25%
Butterfly Trail: Resize 25% and 90%
Glow Sparkle: Resize 15%
Highlight your white canvas. New Raster Layer. Select All.Copy and paste a paper of choice Into Selection. Deselect.Apply the mask. Merge Group.
Use your Pick Tool and push in the top and bottom and pull out on the sides until you have the desired look.
Add your copyrights.
Add your name. I gave mine an inner bevel:
Bevel: 2
Width: 7
Smoothness: 55
Depth: 16
Ambience: -27
Shininess: 45
Color: whiteAngle: 135
Intensity: 31
Elevation: 88
OK
Crop your image and resize all layers 85%.
Time to Animate:
Copy Merge your tag. Carry into Animation Shop.
Edit/Paste as New Animation.
Ctrl + hit the L key until you have a total of 21 frames.
Ctrl + A to highlight all frames.
Open up the sparkles supplied.Ctrl + A
Edit/Copy
Highlight your tag.
Ctrl + E
Place the sparkles down the center of the book over the heart sparkle.
Highlight the first frame only.
Animation/Frame Properties
Change the Display Time to 300
View your animation.
If you’re happy then save. :O)
I hope you enjoyed this tutorial.
I’d love to see your results.


No comments:
Post a Comment