Font of choice - I'm using MargaritaVille here
Mask of Choice – I’m using Becky Mask 22
Filters Unlimited 2 (optional)
"Butterfly Effect" PTU kit by Eclipse of Jaded Delusions and can be purchased in her store Pink Krush.
I just adore the delicacy of this kit!
This tutorial was written assuming you have working knowledge of PSP.
~♥~ Let’s get started ~♥~
Open a 600 X 600 transparent canvas. Flood fill white.
Copy and paste Frame 4 as a new layer. Resize 50%. I used my Target Brush and lightly colored the frame. Use your magic wand and click inside of it.
Copy and paste a paper of choice as a new layer. Select/Invert. Delete. Apply Filters Unlimited 2/Paper Texture/Papyrus
Use Default settings.
Copy and paste your tube as a new layer.
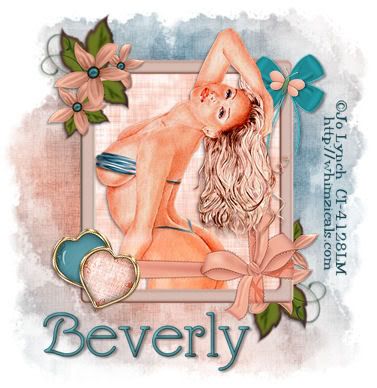
Copy and paste Multi Bloom 3 as a new layer. Resize 60%. Free rotate right 75 degrees. Position near the top left corner of your frame. Duplicate and position behind the right corner of the frame. See my tag for reference.
Copy and paste any Heart Brad of choice as a new layer. Resize 25%. Free rotate left 15 degrees. Position near the bottom left corner of your frame.
Copy and paste another Heart Brad of choice as a new layer. Resize 25%. Free rotate right 15 degrees. Position near the bottom left corner of your frame.
Copy and paste Bow 5 as a new layer. Resize 25%. Position near the top right corner of your frame.
Copy and paste Butterfly 3 as a new layer. Resize 25%. Again at 80%. And again at 80%. Free rotate right 20 degrees. Adjust/Sharpness until the butterfly isn’t so blurry. Position over the top of your bow.
Close out all layers accept for your white canvas. New Raster Layer. Using your paintbrush on size setting of your choice, color your entire canvas on the diagonal with 3 shades of color that are complimentary to your tube.
Adjust/Blur/Gaussian Blur
Radius: 20
Filters Unlimited 2/Paper Textures/Papyrus
Default settings. Apply the mask. Merge group. Open up all layers. Crop Image.
Add your copyrights.
Add your name. I added a slight bevel to mine:
Bevel: 2
Width: 3
Smoothness: 35
Depth: 2
Ambience: -8
Shininess: 10
Color: white
Intensity: 75
Elevation: 20
I hope you enjoyed this tutorial.
I would love to see your results.
Email me!
Hugs,
Bev


No comments:
Post a Comment