
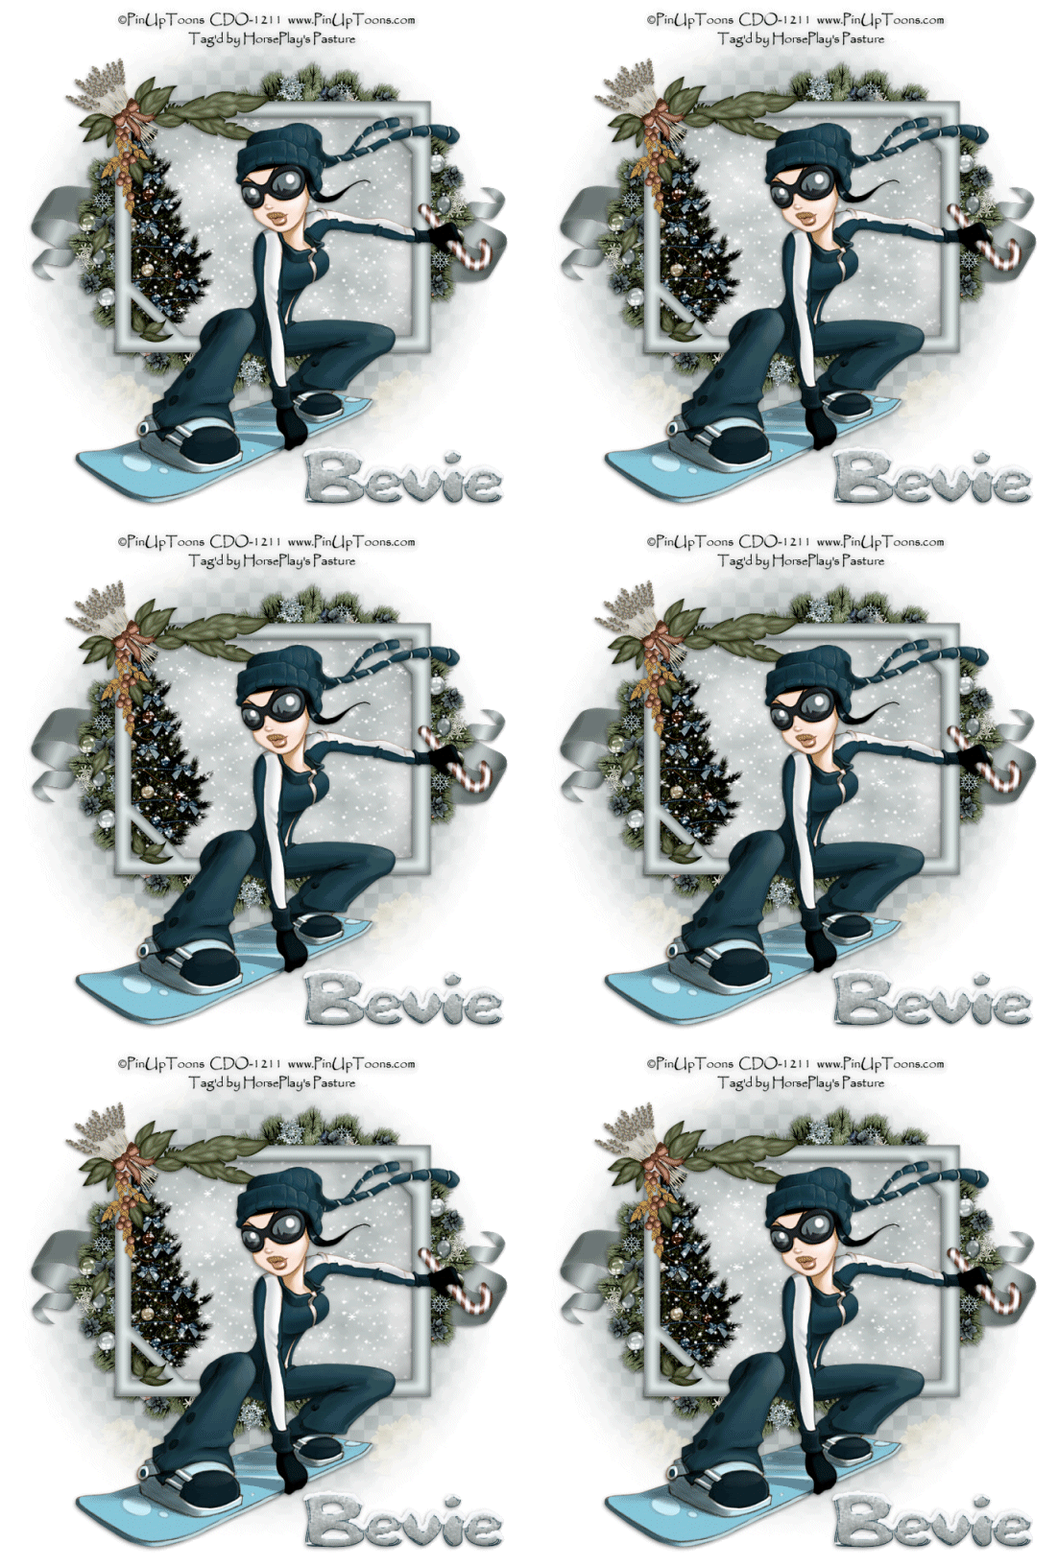
Supplies
1 tube of choice - I used the wonderful artwork of PinUpToons which can be purchased from CDO. You must have a license to use.
Font of choice - I used Bubble 1 here. Just some FYI, when I downloaded this font it was a Binery file. I had to run as administrator and it was automatically installed into my PSP program. Just thought I’d let you know because downloading from that site never used to be like that.
Weescotlass Mask 208 here
Animation Shop
Snow which I supply here. The snow is to be used only for this tutorial. If you would like to use it for anything else please ask.
Plug Ins:
Mura’s Meister - Cloud
Eyecandy 5 - Nature: Snowdrift
“A Christmas Wish” is a tagger size scrap kit created by Shelle of Shellez Creations. This portion is part of a huge mega collab to help a fellow designer in her time of need. It can be purchased from TKO Scraps. You can visit Shelle’s blog here.
Thank you Shelle for your fantastic portion.
This tutorial was written assuming you have a working knowledge of PSP.
~♥~ Let’s get started ~♥~
Open up a 700 x 700 blank canvas.
Flood fill white.
Color Pallet:
Foreground: #ffffff
Background: #a8b1b0
Copy and paste element 17 as a new layer.
Resize 85%
Use your Freehand Selection Tool and outline the frame.
New Raster layer below the frame.
Apply Mura’s Meister - Cloud
You should now have a cloud layer below the frame.
Copy and paste Element 7 as a new layer below the frame.
Move into a position you like.
Selections/Invert
Tap the delete key.
Deselect.
Copy and paste your tube as a new layer.
Add your elements. I used:
Element 4
Element 8: Duplicate/Move both into position and erase what you don’t want seen.
Element 14: Resize 25%/Free rotate Left 40 degrees/Flip/Mirror
Highlight your white canvas.
New Raster layer.
Select All.
Copy and paste Paper 6 Into Selection.
Deselect.
Apply the mask.
Merge Group.
Add your copyrights.
Add your name.
Color Pallet:
Foreground: #1d414f
Background: #a8b1b0
Stroke: 1
Type your name.
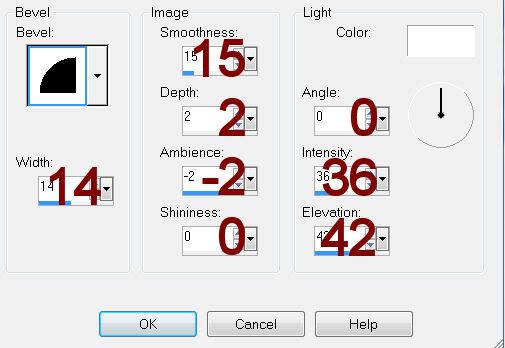
Give it a slight Inner Bevel:
Apply Eyecandy 5: Nature - Snowdrift.
On the Settings Tab choose: Small, First Flakes
Use Default Settings
OK
Open up the snow that I provided.
Open up all layers.
Highlight Frame 1 layer.
Copy.
Highlight your working canvas.
Highlight the layer just below the frame.
Paste - your snow layer should appear.
Rename it S1 (short for Snow 1)
Don’t worry about what overhangs the frame. We’ll clean that up in a bit.
Highlight the animated snow layers.
Highlight Frame 2.
Copy
Highlight your working canvas.
Paste
Rename S2.
Continue to copy and paste all 10 snow layers onto your working canvas.
Once you have all snow layers copied and renamed on your working canvas highlight the Mura Meister Cloud layer.
Click anywhere outside of it with your Magic Wand.
Highlight each snow layer and tap the delete key.
Deselect.
Keep S1 layer open and close out all other snow layers.
Copy Merge.
Time to Animate:
Open up Animation Shop
Edit/Paste/As New Animation
Back in PSP.
Close out S1.
Open up S2.
Copy Merge
Back in AS.
Edit/Paste/After Current Frame.
Back in PSP.
Close out S2.
Open up S3.
Copy Merge
Back in AS.
Edit/Paste/After Current Frame.
Back in PSP.
Close out S3.
Open up S4.
Copy Merge
Back in AS.
Edit/Paste/After Current Frame.
Back in PSP.
Close out S4.
Open up S5.
Copy Merge
Back in AS.
Edit/Paste/After Current Frame.
Back in PSP.
Close out S5.
Open up S6.
Copy Merge
Back in AS.
Edit/Paste/After Current Frame.
Back in PSP.
Close out S6.
Open up S7.
Copy Merge
Back in AS.
Edit/Paste/After Current Frame.
Back in PSP.
Close out S7.
Open up S8.
Copy Merge
Back in AS.
Edit/Paste/After Current Frame.
Back in PSP.
Close out S8.
Open up S9.
Copy Merge
Back in AS.
Edit/Paste/After Current Frame.
Back in PSP.
Close out S9.
Open up S10.
Copy Merge
Back in AS.
Edit/Paste/After Current Frame.
Animation/Resize Animation:
Percentage of Original checked
Width x Height: 80
OK
View your animation.
If you’re happy with it then save.
Resize all layers 80%.
I hope you enjoyed this tutorial.
I’d love to see your results.
Email me!
Hugs,
Bev

