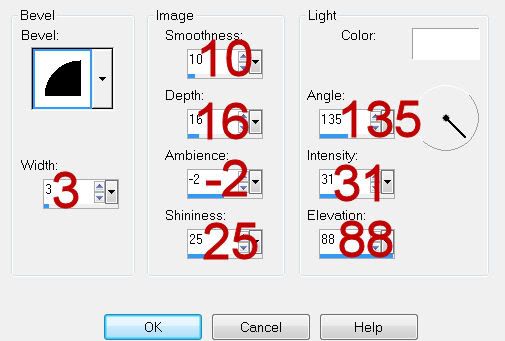
Clicking on the image will allow you to enlarge for bigger view.
Supplies
1 tube of choice and 1 close up - I used the artwork of PinUpToons at CILM
Font of Choice - I used Saginaw here
Divine Intentionz Template 309 here
Weescotlass Mask 84 here
Eyecandy 4000 - Gradient Glow
“Fall Twine” is a tagger size scrap kit created by Sue of Wacky Winnie Designz and can be purchased at Butterfly Blush Designs. You can visit her blog here.
Thank you Sue for such a rich and beautiful autumn kit!
This tutorial was written assuming you have a working knowledge of PSP.
~♥~ Let’s get started ~♥~
Open up the template.
Shift + D.
Close out the original.
Delete the top 2 layers.
Image/Canvas Size
650 X 550
OK
Flood fill the background layer white.
Highlight Oval layer.
Click on it with your Magic Wand.
New Raster layer.
Copy and paste Paper 3 Into Selection.
Deselect.
Delete the template layer.
Apply Eyecandy 4000 - Gradient Glow:
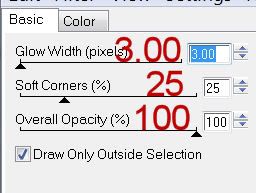
Color tab:
Choose “Fat”
Color choice: white
Highlight Circle layer.
Click on it with your Magic Wand.
New Raster layer.
Copy and paste Paper 1 Into Selection.
Deselect.
Delete the template layer.
Highlight Small Circle layer.
Click on it with your Magic Wand.
New Raster layer.
Copy and paste Paper 12 Into Selection.
Copy and paste your close up as a new layer.
Selections/Invert
Tap the delete key.
Deselect.
Delete the template layer.
Highlight Dotted Circle layer.
Select All/Float/Defloat
New Raster layer.
Flood fill with #ffffc0
Deselect.
Delete the template layer.
Highlight Dotted Frame layer.
Repeat the above step.
Highlight Hearts layer.
Change the color in your pallet to a red shade taken from one of the papers.
Make your Target Tool active and change the colors of the hearts.
Highlight Rectangle layer.
Click on it with your Magic Wand.
Copy and paste Paper 15
Resize 50%
Position over the template.
Selections/Invert
Tap the delete key.
Deselect.
Delete the template layer.
Highlight Thin Rectangle 2 layer.
Click on it with your Magic Wand.
Copy and paste Paper 11 as a new layer.
Resize 50%
Position over the template layer.
Selections/Invert
Tap the delete key.
Deselect.
Delete the template layer.
Highlight Frame Background.
Click on it with your Magic Wand.
Open up Paper 2.
Shift + D
Close out the original.
Free rotate right 10 degrees
Copy
Make your working canvas active.
Edit/Paste/Resize 60%
Position over the template layer.
Selections/Invert
Tap the delete key.
Deselect.
Delete the template layer.
Highlight Frame layer.
Click on it with your Magic Wand.
New Raster layer.
Copy and paste Paper 13 Into Selection.
Deselect.
Delete the template layer.
Copy and paste your tube as a new layer.
Add your embellishments. I used:
Wrappin 2: Resize 40%/Free rotate right 15 degrees/Use your Pick Tool to bring the ribbon on the side in to fit the frame.
Sachet 2: Resize 25% and 40%
Flower 1 & 2: Resize 25%
Fstring 1: Resize 40%
Butterflies 1 & 2: Resize 25% and 70%
Highlight your white background.
Select All.
Copy and paste a paper of choice Into Selection.
Deselect.
Apply the mask.
Resize 120%
Merge Group.
Add your credits.
Add your name.
Apply Eyecandy 4000 - Gradient Glow:
Same settings
Resize all layers 85%
I hope you enjoyed this tutorial.
I’d love to see your results and show it off in my gallery.
Email me!
Hugs,
Bev