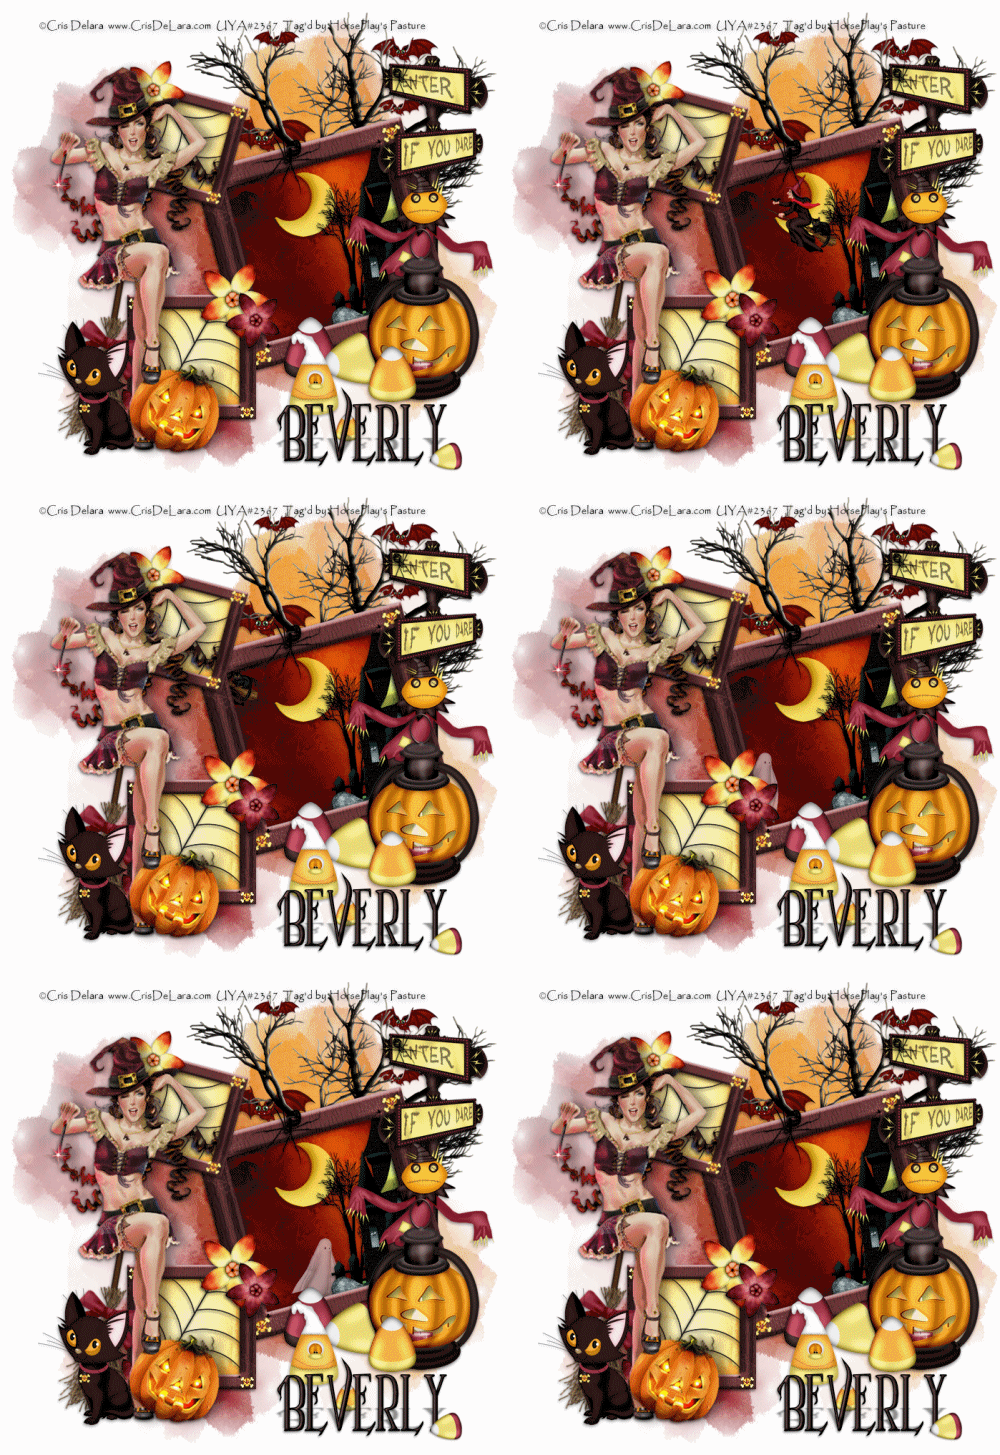
Supplies Needed
1 tube of choice – I used the wonderful artwork of Cris Delara which can be purchased from Up Your Art. You must have a license to use.
Font of choice – I used Parseltongue here
Vix Big Mask 3 here
Animation Shop
"Born to Fly" is a tagger size scrap kit created by me, Bev of HorsePlay's Pasture Designs and can be purchased from any of my stores here.
~♥~ Let’s get started ~♥~
Open up a 700 x 700 blank canvas.
Flood fill white.
Copy and paste El18 as a new layer.
Resize 50%
Free rotate Left 15%
Paste the element again as a new layer.
Resize 25%
Free rotate Right 15 degrees
Paste the element again as a new layer.
Resize 30%
See my tag as reference for placement of all 3 frames.
Highlight the top frame.
Click inside of it with your Magic Wand.
Selections/Modify/Expand by 4.
New Raster layer below the frame.
Copy and paste Paper 7 Into Selection.
Copy and paste El75 as a new layer. Leave where it is or move into a position you like better.
Selections/Invert
Tap the delete key.
Deselect.
Highlight the bottom frame.
Repeat the above steps.
Copy and paste El 55 as a new layer.
Resize 5%
Duplicate 3'x and place each one on the corners of the bottom frame.
Paste the element again as a new layer.
Resize 5%/Free rotate Right 15 degrees
Duplicate 3x's and place at the corners of the top frame.
Paste the element again as a new layer.
Resize 10% and 70%
Place at each corner of the large frame.
Highlight the large frame.
Click inside of it with your Magic Wand.
Selections/Modify/Expand by 4.
New Raster layer below the frame.
Copy and paste Paper 3 Into Selection.
Duplicate/Change the Properties to Multiply.
Copy and paste El36 as a new layer below the frame.
Resize 80%
Move into position - see my tag for reference.
Selections/Invert
Tap the delete key.
Deselect.
Add the following elements below the frame.
El 14: Resize 25% and 90%
El 28: Resize 20% - Rename this layer Witch
EL 27: Resize 20%/Mirror - Rename this layer Ghost
Place the witch so that you can barely see it fly from behind the house.
Place the ghost so that you can barely see it within the frame.
Close both of these element layers out for now.
Copy and paste your tube as a new layer.
See my tag for placement.
Add your elements. I used:
El 15: Resize 60%
El 12: Resize 60%
El 40: Resize 40%/Duplicate/Resize 80%
El 38: Resize 30%/Mirror
El 29: Resize 50%
El30: Resize 70%
El1: Resize 50%/Mirror
El16: Resize 30%
El34: Yellow: Resize 45%/Free Rotate Left 100 degrees - Orange: Resize 40% - Maroon: Resize 45%
El74: Resize 80%
El76: Resize 40%/Free rotate Right 30 degrees/Duplicate/Resize 60%/Mirror
El 35: Resize 40%/Duplicate as many times as you like and resize as you like
Highlight your white background.
New Raster layer.
Select All.
Copy and paste Paper 3 Into Selection.
Deselect.
Apply the mask.
Resize 105%
Merge Group.
Add your copyright.
Add your Name:
Color Pallet -
Foreground: #000000
Background: #443231
Stroke: 1.5
Type your name.
Give it a slight Inner Bevel 2x's:
Decorate your name with some candy corn if you like.
Open up the Witch and Ghost layers.
Copy Merge
~Time to Animate~
Open up Animation Shop.
Edit/Paste/As New Animation.
Back in PSP.
Move your witch forward in the path you want it to fly.
Copy Merge.
Back in AS.
Edit/Paste/After Current Frame.
Back in PSP.
Move your witch forward again.
Copy Merge.
Back in AS.
Edit/Paste/After Current Frame.
Repeat the above steps until your witch "flies out of sight".
TIP: Keep your eye on the witch to be sure it can't been seen outside of the frame.
If it does then erase what shows.
Copy Merge
Paste it into AS like you've been and when you return to PSP then hit the Undo button until the entire witch appears.
Then continue moving the witch forward as you were.
Once your witch has flown "out of sight" then open up your ghost layer.
Repeat the same steps you did with the witch.
Once you have all the frames copied into AS and your witch flies this way, the ghost floats that way:
Highlight Frame 1.
Edit/Copy
We want a pause in between the witch taking flight and the ghost floating so look for frame where you see the witch last.
Highlight that frame.
Edit/Paste/After Current frame
Animation/Frame Properties:
Change the Display time to 175.
Highlight the first frame.
Animation/Frame Properties:
Change the Display time to 175.
View your animation.
If you're happy with it then save.
I’d love to see your results.
Email me!
Hugs,
Bev


No comments:
Post a Comment