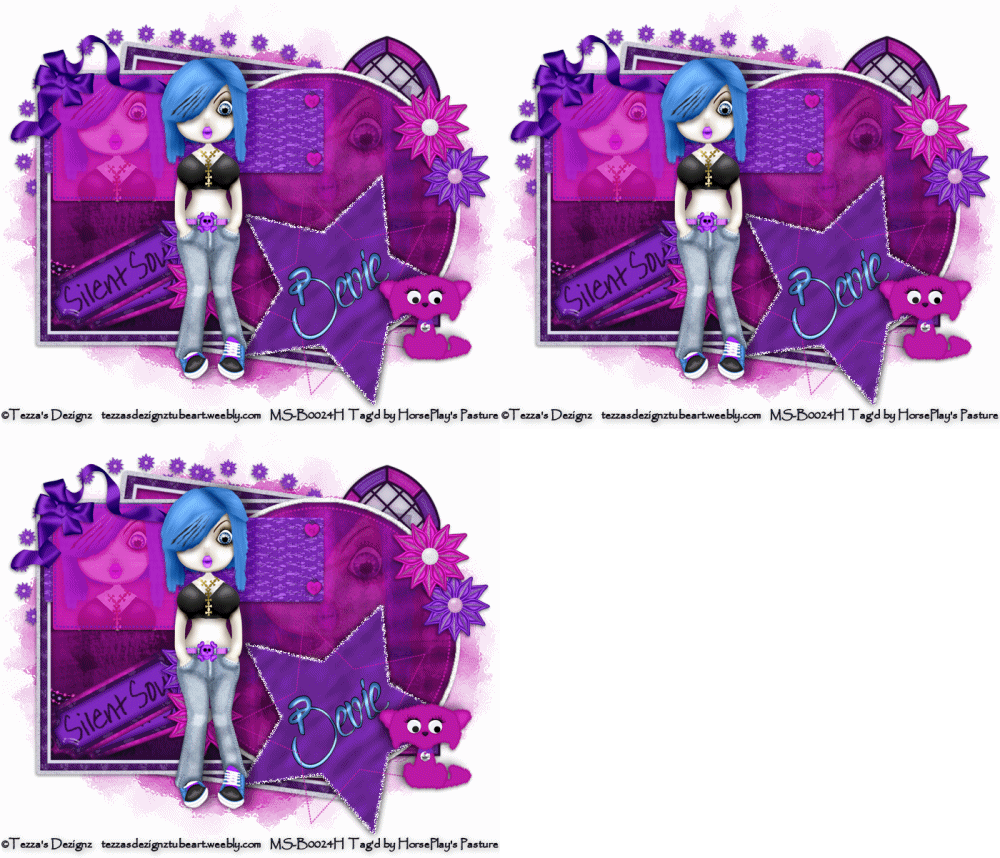
Supplies Needed
1 tube of choice – I used the wonderful artwork of Tezza's Dezignz which can be purchased from Mystical Scraps. You must have a license to use.
Font of choice – I used Quality Street here
Vix Big Mask 1 here
Dangerously Delicious template 2 - Shine here
Plug Ins used:
Mura's Meister - Copies
Xenofex 2 - Constellation
Animation Shop
"Silent Soul" is a tagger size scrap kit created by Dawna Designs which can be purchased from Heartbeatz Creations. You can visit her blog here.
~♥~ Let’s get started ~♥~
Open up the template.
Shift + D.
Close out the original.
Resize all layers 90%
Image/Canvas Size
700 x 600
Highlight the white background.
Flood fill white.
Delete the following layers:
Info, Love Me or Hate, Me, Me d/s, I'm Still Ganna, Shine Teal, Shine White, Shine d/s, and Rust Rectangle
Highlight Teal Square layer.
Copy and paste Frame 2 as a new layer.
Free rotate Right 8 degrees.
Copy.
Delete the frame.
Use your Magic Wand and click on the Teal Square layer.
New Raster layer.
Paste the Frame Into Selection.
Deselect.
Delete the template layer.
Click your Magic Wand Inside the frame.
Selections/Modify/Expand by 4.
New Raster layer below the frame.
Copy and paste Paper 6 Into Selection.
Deselect.
Highlight Brown Square layer.
Click on it with your Magic Wand.
New Raster layer.
Copy and paste Frame 2 Into Selection.
Deselect.
Delete the template layer.
Click inside the frame with your Magic Wand.
Selections/Modify/Expand by 4.
New Raster layer below the frame.
Copy and paste Paper 16 Into Selection.
Deselect.
Highlight Creme Circle.
Click on it with your Magic Wand.
New Raster layer.
Copy and paste Paper 6 Into Selection.
Copy and paste your tube as a new layer and position it over the circle paper.
Change the Properties of the tube to Soft Light and lower the Opacity to about 46.
Selections/Invert
Tap the delete key.
Deselect.
Color Pallet:
Foreground: #070107
Background: #c321ab
Highlight Dotted Circle layer.
Make your Color Replacer Tool active and double right click on the dotted circle.
The color should change the Pink.
Repeat the above step with Dotted Star layer.
Color Pallet:
Change the background color to #7a1fbe
Highlight Dotted Square layer.
Double right click your Color Replacer Tool on the Dotted Square layer.
The color should turn to a purple color.
Highlight Grey Star layer.
Click on it with your Magic Wand.
New Raster layer.
Copy and paste Paper 9 Into Selection.
Deselect.
Delete the template layer.
Duplicate this star layer 2x's for a total of 3 star layers.
Rename the layers Star 1, Star 2, and Star 3.
Highlight Star 1 layer.
Click anywhere outside of it with your Magic Wand.
Selections/Invert
Selections/Modify/Select Selection Borders
Both Sides and Anti Alias checked
Border Width: 3
OK
Apply Xenofex 2 - Constellation:
Match your settings to mine -
Close Star 1.
Highlight and Open Star 2.
Apply Xenofex 2 - Constellation -
Use same settings accept hit the Random Seed button once.
Close out Star 2.
Highlight and Open Star 3.
Repeat the above step.
Close out Star 3 layer.
Open Star 1 layer.
Highlight Rust Rectangle layer.
Click on it with your Magic Wand.
New Raster layer.
Copy and paste Paper 3 Into Selection.
Deselect.
Delete the template layer.
Give it a slight Inner Bevel:
Highlight Grey Square layer.
Click on it with your Magic Wand.
New Raster layer.
Copy and paste Paper 13 Into Selection.
Copy and paste your tube as a new layer and position it over the square paper.
Change the Properties of the tube to Soft Light.
Selections/Invert
Tap the delete key.
Deselect.
Delete the template layer.
Copy and paste Element 33 as a new layer.
Resize 10%
Apply Mura's Meister = Copies:
Choose "Encircle"
Use default settings accept change Number to 25
Ok
Duplicate the ring of flowers.
Move both rings into position - see my tag for reference.
Copy and paste your tube as a new layer.
See my tag for placement.
Add your elements. I used:
El 5: Resize 50%
El 2: Resize 10% and 50%/Duplicate
El 4: Resize 25%
El 49: Resize 40%/Flip
El 26: Resize 45%
El 34: Resize 45%/Duplicate
El 33: Resize 40%/Duplicate
El 16: Resize 60^/Free rotate Left 20 degrees/Duplicate/Free rotate Left 8 degrees
Highlight your white background.
New Raster layer.
Select All
Copy and paste Paper 13 Into Selection.
Deselect.
Apply the mask.
Merge Group.
Duplicate the mask layer.
Lower the Opacity to about 57.
Add your copyright.
Add your name:
Color Pallet:
Foreground: #070107
Background: #478ad9
Stroke: 1.0
Type your name.
Make your Pick Tool active and turn your name to slant it slightly.
Give it a slight Inner Bevel:
Resize all layers 80%.
Copy Merge.
~Time to Animate~
Open up Animation Shop.
Edit/Paste/As New Animation.
Back in PSP.
Close out Star 1.
Open up Star 2.
Copy Merge
Carry into AS.
Edit/Paste/After Current Frame.
Back in PSP.
Close out Star 2.
Open up Star 3.
Copy Merge
Carry into AS.
Edit/Paste/After Current Frame.
View your animation.
If you're happy with it then save.
I’d love to see your results.
Email me!
Hugs,
Bev


No comments:
Post a Comment