Supplies
1 tube of choice – I used the wonderful artwork of Victoria Fox which
can be purchased from Up Your Art. You must generate
a license to use.
Monti Circular Mask here
“Easter Puddles” is a FTU tagger size scrap kit created by me, Bev of
HorsePlay’s Pasture Designs and can be downloaded from my blog here.
~♥~ Let’s get started ~♥~
Color Pallet:
Foreground: Null
Background: Pattern/Paper 7
Angle: 0
Scale: 100
Open up a 700 x 700 blank canvas.
Using the Giant Head font type your name so that it goes across the
canvas – be sure you leave enough room for your tube.
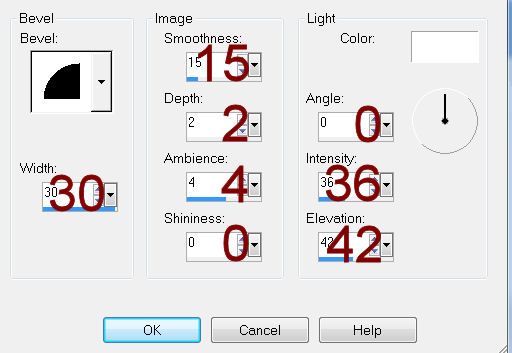
Give it a slight Inner Bevel:

Select All/Float/Defloat
Selections/Modify/Expand by 2.
New Raster layer below the name layer.
Flood fill with #ffffff
Adjust/Add Remove Noise/Add Noise:
Uniform & Monochrome checked
Noise: 65%
OK
Deselect.
Merge Visible the name layers.
Copy and paste your tube as a new layer.
Position it at either end of your name.
Add your elements. I used:
3: Resize 80%/Free rotate Right
15 degrees
4: Resize 80%/Free rotate Right
15 degrees
16: Resize 95%
8: Resize 40%/Free rotate Left 85
degrees
Close out your white canvas.
Merge Visible.
Reopen your white canvas.
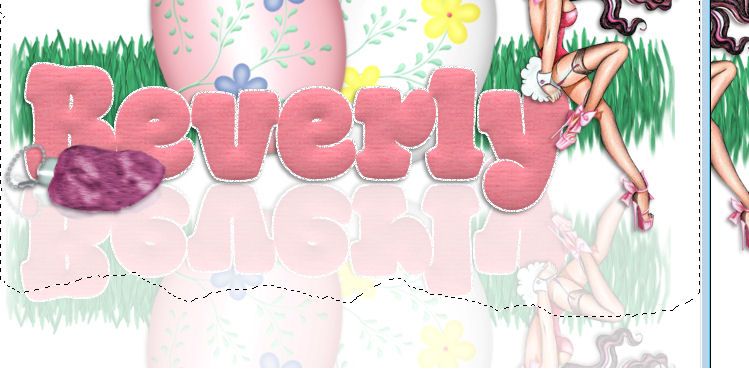
Duplicate the merged layer.
Flip
Move it down on your canvas so that both layers look mirrored.
Move the duplicate layer below the original merged layer in your layers
pallet.
Make your Freehand Selection Tool active and section around an area of
your name :

Selections/Invert
Selections/Modify/Inside Outside Feather:
Both checked
Feather amount: 30
OK
OK
Tap the delete key 2 or 3 times.
Deselect.
Lower the Opacity of this layer to about 42.
Close out your white canvas.
Merge Visible.
Reopen your white canvas.
Move the merged layer down a bit on your canvas.
Finish adding the elements. I
used:
15: Resize 60%/Duplicate/Resize 70%
Highlight your white canvas.
New Raster layer.
Select All.
Copy and paste paper 5 Into Selection.
Deselect.
Apply the mask.
Merge Group.
Use your Eraser Tool and erase the lower half of the mask.
Crop your image.
Add your credits.
Resize all layers 80%.


No comments:
Post a Comment