Supplies
1 tube of choice – I used the wonderful artwork of Lori Karels which
can be purchased from Up Your Art. You must have
a license to use.
Font of choice – I used Allura here
Becky Mask 22 here
“Chances Are” is a tagger size scrap kit created by BabyV Dezign and
can be purchased from ScrapsFrom the Heart. Thank you BabyV for a really beautiful kit.
~♥~ Let’s get started ~♥~
Open up a 700 x 700 blank canvas.
Flood fill white.
Open up Paper 1.
Color Pallet:
Foreground: Null
Background: Pattern/Paper 1
Angle: 0
Scale: 100
OK
New Raster layer.
Make your Ellipse Tool active set on “Draw Ellipse”
Draw out an oval approximately 650 x 450 pixels.
Objects/Align/Center in Canvas
Convert to Raster layer.
Click on it with your Magic Wand.
Adjust/Add Remove Noise/Add Noise:
Uniform and Monochrome checked
Noise: 30%
OK
Selections/Modify/Contract by 7
New Raster layer.
Copy and paste Paper 3 Into Selection – Rename this layer “Oval”
New Raster layer.
Selelctions/Modify/Contract by 20
Copy and paste Paper 5 Into Selection
Deselect.
Apply the same noise Effect.
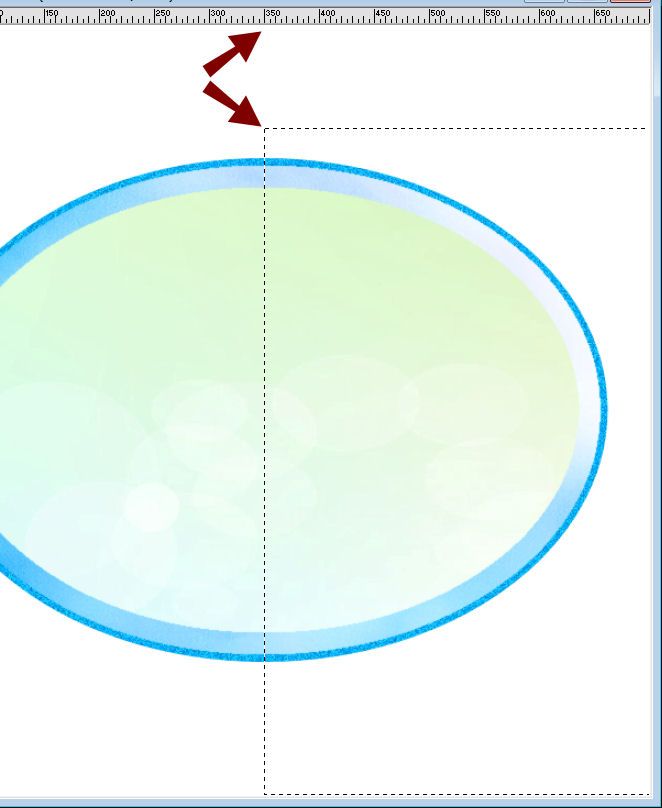
Make your Selection Tool active set on Rectangle.
Make your Rulers active by going to View/Rulers
Using the Ruler to find the center, section off the right side of the
glittered oval.
Tap the delete key.
Deselect.
You can turn the rulers off by going to View/Rulers.
Highlight the “Oval” layer.
Click anywhere outside of it with your Magic Wand.
Copy and paste your tube as a new layer over the oval layer.
Change the Properties to Overlay and move into position – see my tag
for reference.
Tap the delete key.
Deselect.
Copy and paste Heart Frame as a new layer.
Resize 85%
Move into position over the Glittered Half Circle – see my tag for
reference.
Click inside the heart frame with your Magic Wand.
Selections/Modify/Expand by 3.
New Raster layer below the frame.
Copy and paste Paper 4 Into Selection.
Deselect.
Copy and paste Ric Rac 2 as a new layer.
Free rotate Left 90 degrees
Use your Selection Tool set on Rectangle to section off and then delete
what overhangs the glittered over edge.
Copy and paste your tube as a new layer.
Add your elements. I used:
Flower Ribbon
Flower Branch
Heart Pillow: Resize 70%/Free
rotate Left 30 degrees/Duplicate/Mirror
Heart Wire 2: Resize 65%/Erase
what sticks out below
Butterfly 2: Resize 50%/Free
rotate Left 30 degrees
Highlight your white canvas.
New Raster layer.
Select All.
Copy and paste Paper 6 Into Selection.
Deselect.
Apply the mask.
Merge Group.
Crop your image.
Add your credits.
Add your name:
Foreground and Background: #0a3350
Type your name.
Convert to Raster layer.
Resize all layers 80%.


No comments:
Post a Comment