Supplies
1 tube and 1 image of choice – I used the beautiful artwork of Gary
George which can be purchased from UpYour Art. You must have a license to use.
Font of choice - I used Alex Brush here
Becky Mask 22 here
Tracy F. Deisgnz Easter Template #8 here
“Romantic Spring” is a full size collab scrap kit created by Noshay
Designs and Manue can be downloaded from here. This kit was free a couple of weeks ago. It no longer is.
This tutorial was written assuming you have a working knowledge of PSP.
~♥~ Let’s get started ~♥~
Open up the template.
Shift + D.
Close out the original.
Image/Canvas Size
700 x 600
OK
New Raster layer.
Send to bottom.
Flood fill white.
Delete the top 6 layers.
Highlight Circle 1 layer.
Click anywhere outside of it with your Magic Wand.
Selections/Invert
New Raster layer.
Copy and paste manuedesign_romanticspring_papers (1) Into Selection.
Deselect.
Delete the template layer.
Highlight Circle 2 layer.
Click on it with your magic Wand.
New Raster layer.
Copy and paste Noshay _Pa3 Into Selection.
Copy and paste manuedesign_romanticspring_elements (11) as a new layer.
Resize 25%
Move into position – see my tag for reference.
Selections/Invert
Tap the delete key.
Deselect.
Delete the template layer.
Highlight Rectangle layer.
Click anywhere outside of it with your Magic Wand.
Selections/Invert
New Raster layer.
Copy and paste Noshay _Pa2 Into Selection.
Deselect.
Delete the template layer.
Copy and paste Element 5 as a new layer.
Resize 15%
Free rotate Left 15 degrees.
Click inside of it with your Magic Wand.
Selections/Modify/Expand by 6.
New Raster layer below the frame.
Copy and paste Noshay _Pa1 Into Selection.
Deselect.
Merge Visible the frame and paper.
Duplicate
Mirror
Move both merged layers into position – see my tag for reference.
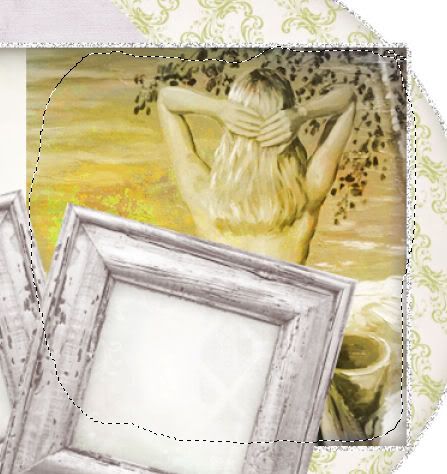
Copy and paste your Image as a new layer over the rectangle paper
layer.
Change the Properties to Luminance
Highlight the rectangle paper.
Click anywhere outside of it with your Magic Wand.
Move your image into position on the right side – see my tag for
reference.
Tap the delete key.
Deselect.
Make your Freehand Selection Tool active set on Freehand and trace
around your image purposely make the outline just a little sloppy:

Selections/Modify/Inside Outside Feather:
Both checked
Feather amount: 35
OK
Selections/Invert
Tap the delete key until you have the feathered effect you like.
Deselect.
Copy and paste your tube as a new layer in front of the merged square
frame layers.
Copy and paste Noshay_EL8 as a new layer.
Resize 20% and 70%
Flip/Mirror
Move into position – see my tag for reference.
Color Pallet:
Foreground: #a3aa41
Make your Target Tool active and change the color of the element.
Add the elements. I used:
manuedesign_romanticspring_elements (13): Resize 10%
manuedesign_romanticspring_elements (12): Resize 10%/Duplicate/Mirror
manuedesign_romanticspring_elements (14): Resize 20%/Duplicate/Mirror
manuedesign_romanticspring_elements (7): Resize 15% and 80%/Duplciate/Mirror
Noshay_EL2_CM: Resize 10%
manuedesign_romanticspring_elements (2): Resize 10%
Highlight your white background.
Select All.
New Raster layer.
Copy and paste Noshay _Pa5 Into Selection.
Deselect.
Apply the mask.
Resize 110%
Merge Group.
Add your credits.
Add your name.
Resize all layers 80%


No comments:
Post a Comment