

Supplies
1 tube of choice - I used the artwork of Guy Powers which can be purchased from Up Your Art. You must have a license to use.
Font of choice - I used Dancing Script here and Scriptina here
Amy & Leah Mask 2 here
Eyecandy 3.1 - Glow
“4th of July” is a tagger size scrap kit created by Tonya of Broken Sky Dezine and can be purchased from Twilight Scraps. You can visit her blog here.
Thank you Tonya for an awesome celebration kit!
This tutorial was written assuming you have a working knowledge of PSP.
~♥~ Let’s get started ~♥~
Open up a 700 x 700 blank canvas.
Flood fill white.
Color Pallet:
Foreground: #849adf
Background: #2b4466
Set the foreground and background to Gradient.
March your settings to mine:
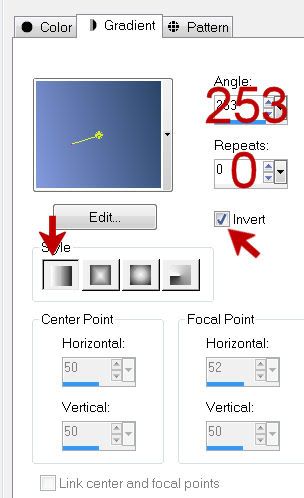
Copy and paste your tube as a new layer.
Resize to the size you want it to be.
Make your Rectangle Tool active and create a rectangle that will fit your tube nicely:
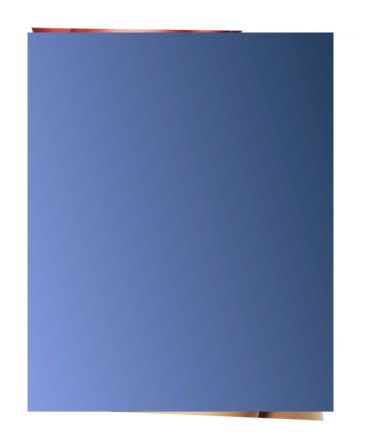
Convert to Raster layer.
Use your Magic Wand and click anywhere outside of the gradient layer.
Highlight the tube layer.
Tap the delete key.
Deselect.
Merge Visible the tube and gradient layer.
Apply Eyecandy 3.1 - Glow:
Width: 3
Opacity: 100
Opacity Drop off: Fat
Color: White
OK
Duplicate
Free rotate Right 10 degrees.
Move this layer below the original.
Copy and paste 22 as a new layer.
Move into position - see my tag for reference.
Color Pallet :
Foreground: Black
Background: Null
Make your Pen Tool active set on Draw Freehand.
Width: 2
Draw a wavy line and make it a point to have the waves go in the opposite direction as the ribbon waves.
Color Pallet:
Foreground and Background: Black
Stroke Width: 0.5
Move your curser along the center of the line until you see a Rocking A.
Click your mouse.
A text bow will appear.
Type the words “Life without liberty is like a body with spirit” or whatever you choose.
Apply
In your layers pallet click on the small plus sign of the Vector layer.
Click on the eye of New Path layer.
Highlight Vector layer.
Right Click/Convert to Raster layer.
Apply the same Glow effect.
Add your embellishments. I used:
28
29
9: Resize 70%
Highlight your white canvas.
Select All
New Raster layer.
Copy and paste Paper 9 Into Selection.
Deselect.
Adjust/Blur/Gaussian Blur:
Radius: 15
OK
Apply the mask.
Merge Group.
Copy and paste 1 above the mask layer.
Move into position.
Apply the mask.
Merge Group.
Add your copyrights.
Add your name.
Resize all layers 80%.
I hope you enjoyed this tutorial.
I’d love to see your results and show it off in my gallery.
Email me!
Hugs,
Bev
No comments:
Post a Comment