Supplies
The cookie used in this tutorial (included with the kit) is created by Lisa K. Please visit her blog here
Font of choice - I used Curly Cue here
Becky Mask 22 here
Divine Intentionz Template 353 here
Eyecandy 3.1 - Glow
“Honey Bee ” is a tagger size scrap kit created by Kara of Sweet Cravings Scraps and can be purchased from TKO Scraps. You can visit her blog here. Thank you Kara for a fantabulous kit to kick off May!!
This tutorial was written assuming you have a working knowledge of PSP.
~♥~ Let’s get started ~♥~
Open up the template.
Shift + D.
Close out the original.
Resize all layers 80%
Image/Canvas Size 700 x 500
Open up the background layer and flood fill white.
Delete the top 4 layers, both Pixel Wording layers, Heart, and Glittered Heart layers.
Copy and paste Honey Bee Frame 7 as a new layer.
Resize 25%
Duplicate/Free rotate Right 8 degrees
Duplicate/Mirror
Move all 3 frames into position over Frame template layer.
Delete Frame template layer and Frame Background template layer.
Highlight one of the frames.
Click inside of it with your Magic Wand.
Selections/Modify/Expand by 4.
New Raster layer below the frame.
Copy and paste Paper 1 Into Selection.
Deselect.
Repeat the above step with the remaining 2 frames.
Highlight Glittered Circle Right layer.
Click anywhere outside of it with your Magic Wand.
Selections/Invert
New Raster layer.
Copy and paste Paper 9 Into Selection.
Adjust/Add Remove Noise/Add Noise:
Gaussian and Monochrome checked’
Nosie: 50%
OK
Deselect.
Delete the template layer.
Highlight Glittered Circle Left layer.
Repeat the above step.
Highlight Circle Right layer.
Click anywhere outside of it with your Magic Wand.
Selections/Invert
New Raster layer.
Copy and paste Paper 16 Into Selection.
Deselect.
Delete the template layer.
Highlight Circle Left layer.
Repeat the above step.
Highlight Circle Top Left layer.
Click on it with your Magic Wand.
New Raster layer.
Copy and paste Paper 8 Into Selection.
Deselect.
Delete the template layer.
Apply Eyecandy 3.1 - Glow:
Width: 5
Opacity: 100
Opacity Drop off: Fat
Color: #311d08
Highlight Circle Bottom Right template layer.
Repeat the above step.
Highlight Circle Center layer.
Click on it with your Magic Wand.
New Raster layer.
Copy and paste Paper 7 Into Selection.
Deselect.
Delete the template layer.
Apply the same glow effect.
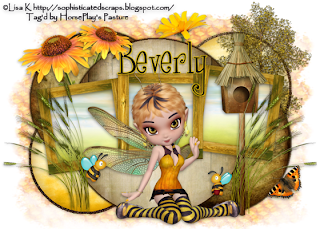
Add your embellishments. I used:
From the cookies folder - Butterscotch 2: Resize 45%
Tree: Resize 60%
Flower 7: Resize 60%
Flower 9: Resize 30%/Duplicate/Mirror/Resize 70%
Bee House: Resize 50%
Wheat; Resize 50%/Duplicate/Mirror
Cute Bee 1 & 2: Resize 25% and 50%
Butterfly: Resize 25% and 60%
Highlight your white canvas.
New Raster layer.
Select All.
Copy and paste Paper 13 Into Selection.
Deselect.
Apply the mask.
Use your Pick Tool to pull the sides and bottom out slightly.
Merge Group.
Add your copyrights.
Add your name:
Apply the same glow effect accept change the Width to 3 and color to #f9d200.
Resize all layers 80%.
I hope you enjoyed this tutorial.
I’d love to see your results and show it off in my gallery.
Email me!
Hugs,
Bev

I loved this tut....very very cute
ReplyDeleteTheresa
Thank you Theresa :o)
ReplyDeleteHugs, Bev