1 tube of choice - I’m using Christine Kotlark here.
Font of Choice - Abagail Jackson here
Weescotlas Mask 241 here
Divine Intentionz Template 84 here
Eyecandy 5: Nature - Fire
Animation Shop
“Gothic Beauty” is a tagger size scrap kit created by Chaos Priestess and can be purchased at Digital Chaos Scrap Store.
Thank you Chaos Priestes for a stunning kit!!
This tutorial was written assuming you have working knowledge of PSP.
~♥~ Let’s get started ~♥~
Open up the template.
Shift + D. Close out the original.
Delete the Copyright and Heart layers.
Highlight the white canvas.
Image/Canvas Size
700 X 700
Flood fill white.
Highlight Frame Background 1 layer.
Select All/Float/Defloat
New Raster Layer
Copy and paste a paper of choice Into Selection.
Deselect.
Delete the template layer.
Highlight Frame 1 layer.
Select All/Float/Defloat
Copy and paste a paper of choice as a new layer.
Selections/Invert
Hit the delete key.
Deselect.
Delete the template layer.
Use your Magic Wand and click inside the frame.
Selections/Modify/Expand by 3.
Paste your tube below the frame.
Selections/Invert
Hit the delete key.
Copy and paste the branch behind your tube - resize 40%
Hit the delete key.
Deselect.
Repeat the above steps with the other frame.
Highlight the Small Circle layer.
Select All/Float/Defloat
New Raster Layer.
Copy and paste the clock Into Selection
Deselect.
Delete the template layer.
Copy and paste the full moon over the Circle layer.
Delete the circle template layer.
Add your embellishments. I used:
Candle: Resize 50%
Crystal Bling Drops: Resize 60% Free rotate right 7 degrees
Doodle Element 3: Resize 70%
Bow 6: Resize 40%. Free rotate left 5 degrees
Flower 4: Resize 50%
Flowers 2 & 3: Resize 40%
Sparkle
Highlight your white canvas.
New Raster Layer.
Select All.
Copy and paste a paper of choice Into Selection.
Deselect.
Apply the mask.
Merge Group.
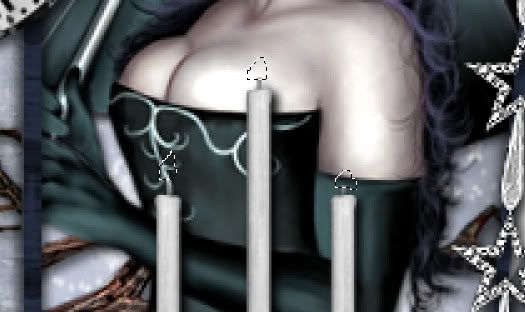
Duplicate the candle layer two times to give you a total of 3 candle layers.
Rename them Candle 1, 2, and 3
Highlight Candle 1 layer - using your Free Hand Selection Tool create an outline for a flame at the top of each candle.

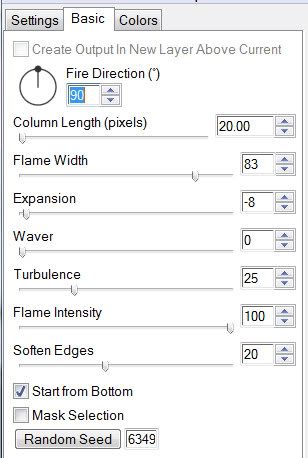
Then apply Eyecandy 5: Nature - Fire with these settings:

Highlight Candle 2, apply the same plugin accept hit the random seed button once. Repeat for Candle 3.
Close out Candle Layers 2 & 3.
Deselect.
Add your copyrights.
Add your name.
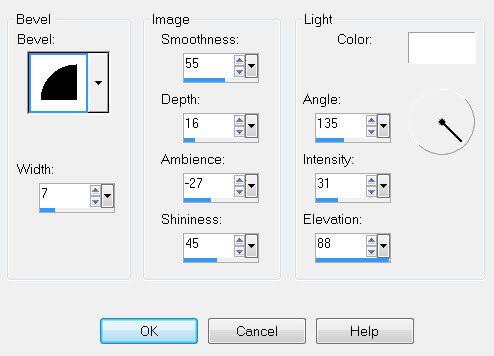
I gave mine an inner bevel:
Resize all layers 85%.
Time to animate:
Copy Merge and carry into Animation Shop.
Edit/Paste/As New Animation
Back into PSP
Close out Candle Layer 1.
Open up Candle Layer 2.
Copy Merge and carry into Animation Shop.
Edit/Paste/After Current Frame
Back into PSP
Close out Candle Layer 2.
Open up Candle Layer 3.
Copy Merge and carry into Animation Shop.
Edit/Paste/After Current Frame
Animation/Frame Properties:
Change the display time to 20.
View your animation.
If you’re happy then save.
I hope you enjoyed this tutorial.
I’d love to see your results and show it off in my Show Arena.
Email me!
Hugs,
Bev


No comments:
Post a Comment