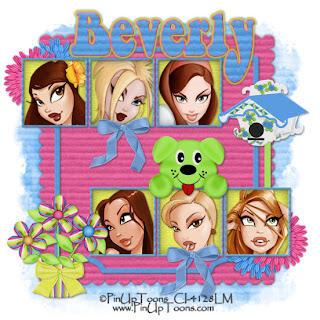
Clicking on the image will enlarge to full view
Supplies Needed
6 tubes of choice. I'm using the artwork of PinUpToons which you can purchase here
Font of choice - I'm using Berthside here
Becky Mask 22 here
EyeCandy 5: Impact – Optional
Template 22 – Dezigns by Ali here
"Almost Spring" PTU scrap kit by Southern Scrapz by Cindy which can be found here. You can visit her blog here.
Thank you so much for such a fun kit, Cindy!
This tutorial was written assuming you have working knowledge of PSP.
~♥~ Let’s get started ~♥~
Open the template. Shift + D. Close out the original. Delete the credit layer. New Rater Layer. Flood Fill white and send down to bottom. Resize canvas 650 X 650.
Highlight the Back layer. Select All/Float/Defloat. Copy and paste a paper of choice. Selections/Invert. Hit the delete button. Effects/3D Effects/Inner Bevel. Use these settings:
Bevel: 2
Width: 1
Smoothness: 6
Depth: 3
Ambience: 0
Shininess: 0
Color: white
Angle: 315
Intensity: 30
Elevation: 50
OK
Delete the template layer.
Repeat the above steps for Inner Frame, Bottom Outer Frame, and Top Outer Frame.
After you’ve done those layers then highlight Bottom Inner Frames layer. Select All/Float/Defloat. Copy and paste a paper of choice as a new layer. Selections/Invert. Hit the delete button. Delete the template.
Highlight the Outer Frame that goes to the inner frames. Use your magic wand and click inside each one. Selections/Invert. Copy and paste a tube as a new layer. Move into position and then hit the delete button. Repeat this for the other 2 frames. Then merge visible the Inner Frame, Outer Frame, and your tubes.
Repeat the above step for Top Inner Frames.
Add your embellishments: I used
Element 27: Resize 30%
Element 17: Resize 40% - gave it the same inner bevel
Element 11: Resize 50%. Same inner bevel
Element 14: Resize 40%. Same inner bevel
Elements 7 & 8: Resize 40%
Highlight your white canvas. New Rater Layer. Select All. Copy and paste a paper of choice Into Selection. Deselect. Apply your mask. Duplicate/Merge down.
Add your copyrights.
Add your name. Foreground and Background I set to Pattern and used papers from the kit then gave it the same inner bevel.
EyeCandy 5: Impact
Gradient Glow with these settings:
On the Basic Tab:
Glow Radius: 5
Soften Corners: 0
Overall Opacity: 100
Distortion Amount: 0
Smoothness: 46
I have the glow color set to #d0d444
OK
Then add a drop shadow
I hope you enjoyed this tutorial.
I’d love to see your results.
Email me!
Hugs,
Bev

No comments:
Post a Comment