
Supplies
1 tube of choice - I used the amazing artwork of Katerina Koukiotis which can be purchased from PSP Tube Stop. You must have a license to use.
Font of choice - I used Yataghan here
Plug Ins used:
Mura's Meister - Cloud
Eyecandy 5 - Nature: Fire
Eyecandy 5 - Texture: Stone Wall
AAA Frames - Photo Frame
Animation Shop
"The Perfect Scare" is a FTU scrap kit created by me and can be downloaded from my designing blog here.
This tutorial assumes you have a working knowledge of PSP.
~♥~ Let's get started ~♥~
Open up a blank 590 x 250 canvas.
Color Pallet:
Foreground: #202020
Background: #c0c0c0
Apply Mura's Meister - Cloud:
Use Default settings and play around with the Amount bar to get the effect you want.
OK
TIP: If you have the effect you like but doesn't seem to be dark enough then duplicate the Cloud layer and change the Properties to Multiply.
In your color pallet, close out the background color.
Make your Ellipse Tool active set on Circle.
Line Style: Solid
Width: 20
Make a circle large enough so that you create a bent line on each side of your canvas - see my tag for reference.
Effects/Text Effects/Blinds:

Give it a slight Inner Bevel:

Duplicate the circle layer.
Shift + B - the Brightness/Contrast Box will appear:
Brightness: 70
Contrast: 15
OK
Move this circle slightly to the right and in your layers pallet move it below the darker circle.
Merge Visible both circle layers.
Make your Magic Wand active and click inside the circle layer.
Selections/Modify/Expand by 4.
Selections/Invert
Highlight the Cloud layer (it's ok if you have 2 cloud layers, just highlight the top layer)
Right Click and choose Promote Section to Layer from the pop up menu.
Apply Eyecandy 5 Texture - Stone Wall:
Match the Basic Tab to mine.

Deselect.
Copy and paste your tube as a new layer just above the cloud layer.
Add your elements. I used:
12
34: Resize 40%/Recolorize using the #202020 color
13: Resize 25%
Shift + D (to duplicate your entire canvas)
Image/Add Borders:
Symmetric checked
Color: #000000
Top, Left, Right, Bottom: 3
OK
Image/Add Borders:
Change the color to #ffffff
Symmetric checked
Top, Left, Right, Bottom: 10
OK
Use your Magic Wand and click on the white border.
Highlight the duplicated canvas.
Copy
Make your working canvas active.
Paste/Into Selection.
Apply AAA Frames - Photo Frame:
Use Default Settings.
OK
Copy and paste Element 40 as a new layer.
Resize 60% and move into a position you like that looks nice within the marching ants area. Duplicate this element as many times as you like to get the effect you like.
Selections/Invert
Highlight and Tap the delete key on each element layer.
Deselect.
Image/Add Borders:
Symmetric checked
Color: #000000
Top, Left, Right, Bottom: 3
OK
Copy and paste Element 3 as a new layer.
Resize 50%
Duplicate/Mirror
Move both elements into position on each side of your canvas -
see my tag for reference.
Merge Visible both elements.
Duplicate 2x's for a total of 3 layers.
Rename them Light 1 Light 2, and Light 3.
Highlight Light 1 layer.
Make your Freehand Selection Tool active and trace around the flame of each lamp.
Apply Eyecandy 5: Nature - Fire:
Settings Tab:
Small, Candle
Basic Tab:

Colors Tab:
Tip: Click on any of the arrows to make the color box active so you can change it.

OK
Close Light 1 out.
Highlight and Open up Light 2 layer.
Apply the same fire effect accept hit the Random Seed button once.
OK
Close out Light 2 layer.
Highlight and Open up Light 3 layer.
Hit the Random Seed button once.
OK
Deselect.
Close this layer out.
Reopen Light 1 layer.
Copy and paste Element 19 as a new layer.
Resize 25% and turn the spider to a position you like.
Add your credit.
Add your name -
Color Pallet:
Foreground: #c0c0c0
Background: #202020
Stroke: 1
Type your name.
Give it a slight Inner Bevel:

Copy Merge.
~Time to Animate~
Open up Animation Shop.
Edit/Paste/As New Animation.
Back in PSP.
Close out Light 1 layer.
Open up Light 2 layer.
Copy Merge
Carry into AS
Edit/Paste/After Current Frame.
Back in PSP.
Close out Light 2 layer.
Open up Light 3 layer.
Copy Merge
Carry into AS
Edit/Paste/After Current Frame.
Ctrl + A - to highlight all frames.
Animation/Frame Properties:
Display time: 18
OK
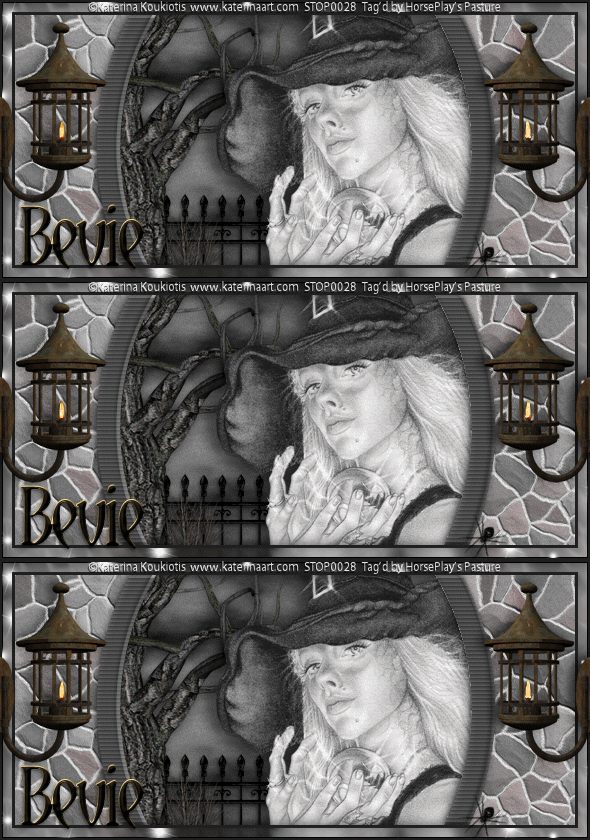
View your animation.
If you're happy then save.
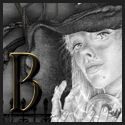
To make the Avatar:
Make a 125 x 125 blank canvas.
Copy the forum banner.
Paste as a new layer.
Resize 60% and move into a position you like.
New Raster layer.
Flood fill with #000000
Select All.
Selections/Modify/Contract by 3.
Tap the delete key.
Deselect.
Using the same font you used on the banner, type the first initial of your name.
Give it the same slight Inner Bevel.
Save as a jpeg.
I hope you enjoyed this tutorial as much as I did creating it.
Would love to see your results...email me!
Hugs,
Bev


