Supplies
1 tube of choice – I used the artwork of Zlata_M which can be purchased
from Pics for Design. You must generate a license to use.
Font of choice - I used Harabarahand here
“Life” template by Dee’s Sign Post here
It’s under Monday, March 26, 2012
“7 Deadly Sins - Sloth”
is a tagger size scrap kit created by Sue Ellen of Wicked Creationz Scraps and
can be purchased from Lollipops n Gumdrops. You can visit her blog here.
Thank you Sue Ellen for a super fantastic kit.
Thank you Sue Ellen for a super fantastic kit.
This tutorial was written assuming you have a working knowledge of PSP.
~♥~ Let’s get started ~♥~
Open up the template.
Shift + D.
Close out the original.
Delete the top 11 layers, Spare Glitter Sheet, Top Striped Circle
layer, and Bottom Striped Circle layer.
Open up the Bg layer.
Highlight White Square layer.
Click on it with your Magic Wand.
New Raster layer.
Copy and paste Paper 8 Into Selection.
Deselect.
Delete the template layer.
Repeat the above step with Top Black Circle and Bottom Black Circle
layers.
Highlight Bottom Grey Strip layer.
Click on it with your Magic Wand.
New Raster layer.
Copy and paste Paper 6 Into Selection.
Deselect.
Delete the template layer.
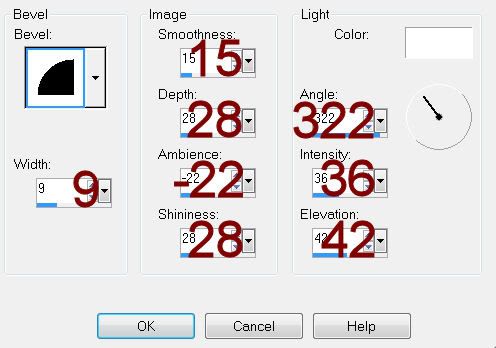
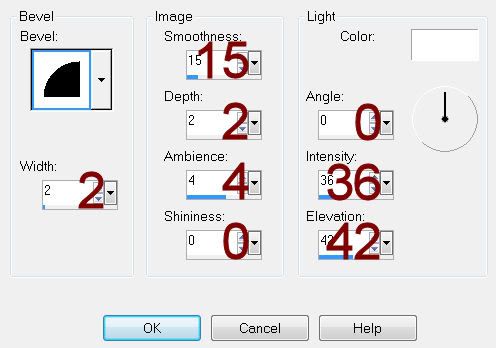
Give it a slight Inner Bevel:
Highlight Grey Oval layer.
Click on it with your Magic Wand.
New Raster layer.
Copy and paste Paper 7 Into Selection.
Deselect.
Delete the template layer.
Highlight Large Square layer.
Click on it with your Magic Wand.
New Raster layer.
Copy and paste Paper 9 Into Selection.
Copy and paste your tube as a new layer over the paper layer.
Change the Properties to Overlay and move into position – see my tag
for reference.
Selections/Invert
Tap the delete key.
Deselect.
Delete the template layer.
Give the paper layer the same slight Inner bevel.
Highlight Small Grey Circle layer.
Click on it with your Magic Wand.
New Raster layer.
Copy and paste Paper 7 Into Selection.
Copy and paste Element 14 as a new layer.
Position over the circle paper.
Selections/Invert
Tap the delete key.
Deselect.
Delete the template layer.
Change the Properties of the element to Soft Light.
Copy and paste your tube as a new layer.
Add your elements. I used:
21: Resize 70%/Duplicate
12: Resize 80%
14: Resize 70%
3: Resize 40%
Highlight your white background.
New Raster layer.
Select All.
Copy and paste Paper 6 Into Selection.
Apply the mask.
Use your Pick Tool to move the mask to the left slightly and pull the
ride side out a little.
Merge Group.
Add your credits.
Add your name.
Resize all layers 80%.