Supplies
1 tube of choice - I used the beautiful artwork of Rachael Tallamy and can be purchased from Up Your Art. You must have a license to use.
Font of choice - I used Before the Rain here
My Mask 4 here
“Butterfly Rain” is a tagger size scrap kit created by Shelly of KairinaKat Kreations and can purchased from Heartbeatz Creationz. You can visit her blog here.
Thank you Shelly for a really beautiful kit.
This tutorial was written assuming you have a working knowledge of PSP.
~♥~ Let’s get started ~♥~
Open up a 700 x 700 blank canvas.
Flood fill white.
Make your Selection Tool active set on rectangle.
Make a rectangle approximately 500 x 225 pixels.
New Raster layer.
Copy and paste Paper 15 Into Selection.
Deselect.
Center it on the canvas.
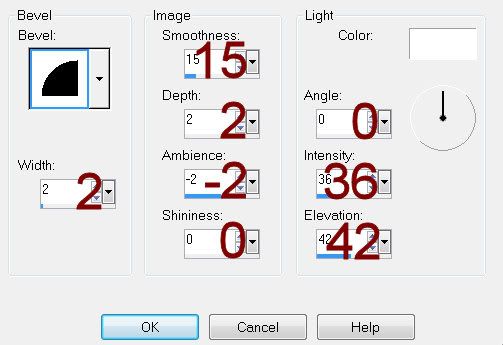
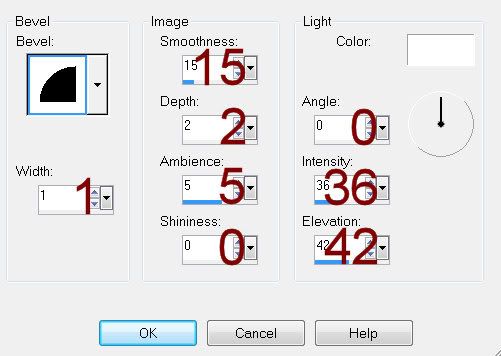
Give it a slight Inner Bevel.
Make your Selection Tool active again.
Make a rectangle approximately 600 x 60 pixels.
New Raster layer.
Copy and paste Paper 13 Into Selection.
Deselect.
Center it on the canvas.
Give it the same Inner Bevel.
Make your Selection Tool active again.
Make a rectangle 275 x 325 pixels.
New Raster layer.
Copy and paste Paper 14 Into Selection.
Deselect.
We’ll come back to this rectangle in a bit.
Make another rectangle approximately 190 x 150 pixels.
New Raster layer.
Paste Paper 14 Into Selection.
Deselect.
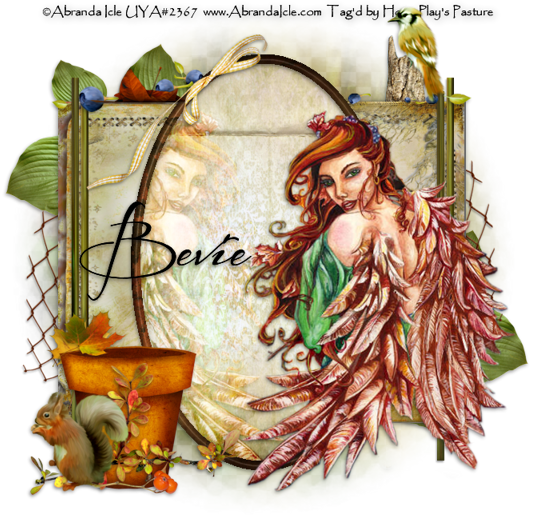
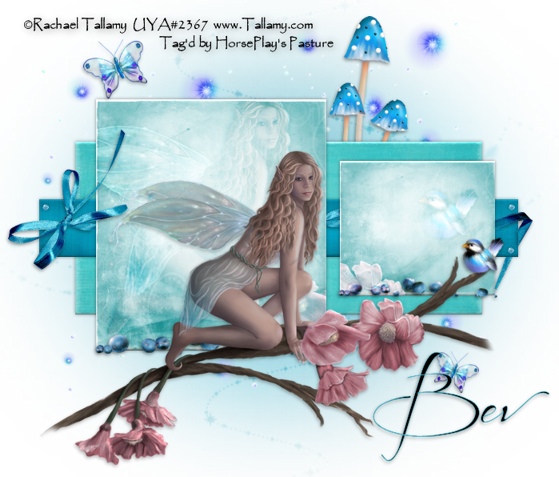
Move both rectangle papers into position on your canvas - see my tag for reference.
Copy and paste your tube as a new layer.
Move into position in front of both of the rectangles.
Duplicate your tube layer - resize just a little bigger.
Move the duplicate layer up and slightly to the right.
In your layers pallet move it below the original tube layer - just above the left rectangle.
Change the Properties to Overlay. Duplicate.
Move just above the right rectangle.
Highlight the smaller rectangle paper layer.
Click anywhere outside of it with your Magic Wand.
Highlight the tube layer above it.
Tap the delete key.
Deselect.
Highlight the larger rectangle paper layer.
Repeat the above step.
Add your embellishments. I used:
34: Resize 25% and 50%
19: Resize 60%/Duplicate/Resize 70%
17: Resize 70%
32: Resize 50%/Duplicate
45: Resize 25%, 25%, and 30%/Duplicate 3x’s.
42: Resize 45%/Duplicate
21: Resize 25% and 60%/Duplicate/Resize 70%/Mirror
Highlight your white canvas.
New Raster layer.
Select All.
Copy and paste Paper 13 Into Selection.
Deselect.
Apply the mask.
Merge Group.
Crop your image.
Add your copyrights.
Add your name.
Color Pallet:
Foreground: #59cfe7
Background: #000000
Stroke: 5
Type your name.
Resize all layers 80%
I hope you enjoyed this tutorial.
I’d love to see your results.
Email me!
Hugs,
Bev