Sunday, May 31, 2009

Two by Two

Clicking on the image will enlarge to full view.

Supplies
Font of Choice - I’m using Arctic 2 here
Weescotlass Mask 62 here
Dezigns by Ali Template 71 here
Filters Unlimited 2 - Optional
“Noah‘s Ark” a scrap kit created by Gina of Aussie’s Scraps and can be purchased here. You can visit her blog here.
Thank you, Gina for such a cute scrap kit!

~♥~ Let’s get started ~♥~

Open up the template.
Shift + D. Close out the original.
Delete the copyright layer.
New Raster layer.
Flood fill white.
Send to bottom.
Image/Canvas Size
700 x 700
OK

Highlight Shape 1 layer.
Select All/Float/Defloat
New Raster Layer
Flood fill with #8d906a
Deselect.
Delete the template layer.

Give it a texture.
I used Filters Unlimited/Paper Texture/Japanese Paper/Default settings

Give it a slight inner bevel:
Bevel: 2
Width: 20
Smoothness: 17
Depth: 3
Ambience: 0
Shininess: 14
Color: white
Angle: 248
Intensity: 28
Elevation: 63
OK

Highlight Back Frames layer.
Select All/Float/Default
New Raster layer
Flood fill with #e4b96b
Deselect.
Delete the template layer.

Highlight Frames layer.
Repeat the above step accept flood fill with #7c4c1e

Use your Magic Wand and click inside the left frame only.
Selections/Modify/Expand by 2.
Copy and paste the turtle as a new layer beneath the frame.
Resize 25% and 80%. Center it in the square.
Duplicate. Resize 80%.
On the original, lower the opacity to 67%.
Deselect.

Repeat the above step for the middle square, pasting the lion as a new layer.

For the last square, using the elephant, you want to repeat the above step accept resize 25% and 50%. Duplicate/Resize 80%.

Copy and paste the Giraffe behind the frames.
Resize 25%.
Duplicate and move one slightly to the side.

Copy and paste Bamboo 2.
Duplicate/Mirror.

Add your copyrights.

Add your name.
I resized the monkeys and made them look like they were hanging from it.

Resize all layers 85%.

I hope you enjoyed this tutorial.
I’d love to see your results.
Email me!
Hugs,
Bev

Saturday, May 30, 2009

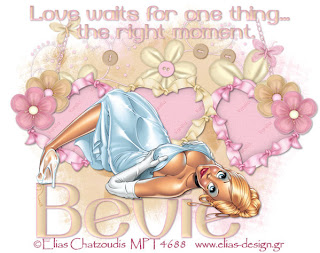
Love Waits


Clicking on the image will enlarge to full view.

Supplies
1 tube of choice - I’m using the artwork of Elias Chatzoudis which you can purchase here
Font of Choice - I’m using Yiggivoo Unicode here
Weescotlass Mask 167 here
“Vanilla” a taggers scrap kit created by Tina of Tina’s Magical Scrap World and can be purchased here. You can visit her blog here.

Thank you, Tina for such a beautiful scrap kit!

~♥~ Let’s get started ~♥~

Open a blank canvas 750 X 700.
Flood fill white.

Copy and paste Bow Heart Frame 1 as a new layer.
Resize 50%.
Free rotate left 15 degrees.
Move to the left side of your canvas.Duplicate/Mirror.

Copy and paste Bow Heart Frame 2 as a new layer.
Resize 50% and position inbetween the other 2 hearts.
Use your Magic Wand and click inside of each frame.
Selections/Modify/Expand by 6.

Copy and paste a paper of choice as a new layer.
Selections/Invert.Hit the delete key.

Close out your white canvas.
Merge visible.
Re-open your canvas.

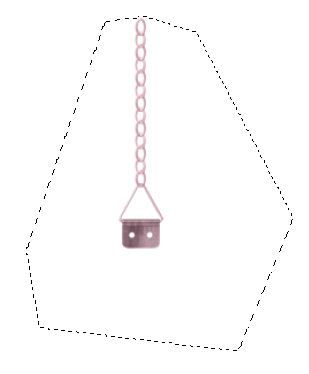
Copy and paste Frame Hanger 1 as a new layer.
Resize 40%.
Using your Freehand Selection tool draw around the framehanger.

Selections/Modify/Feather
Number of Pixels: 20
Tap the delete key twice.
Deselect.
Free rotate right 15 degrees.
Move into position on the left side.
Duplcate/Mirror
 
Add your embellishments:
Organza Flowers 1 & 2: Resize 25%.
Butterflies 1 & 2: Resize 25% and 60%
Flower String: Free rotate left 60 degrees

Highlight your white canvas.
New Raster layer.
Select All.
Copy and paste a paper of choice Into Selection.
Deselect.
Apply the mask.
Merge Group.
Move slightly to the left of your canvas.

Repeat the above step accept use another paper of a different color.Mirror.
Move slightly to the right of your canvas.
Merge down.
Flip.

Type out the words
LOVE WAITS FOR ONE THING…
THE RIGHT MOMENT
Or whatever words you like.

I added a slight inner bevel:
Bevel: 2
Width: 20
Smoothness: 17
Depth: 3
Ambience: 0
Shininess: 14
Color: white
Angle: 248
Intensity: 28
Elevation: 63
OK

Add your copyrights.

Add your name, giving it the same inner bevel.

Resize all layers 80%.

I hope you enjoyed this tutorial.

I’d love to see your results.
Email me!
Hugs,
Bev