Tuesday, May 21, 2013

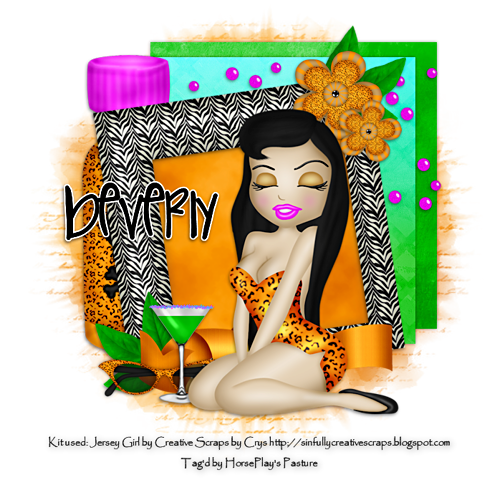
Jersey Girls 2

 photo JG2_zps21757524.png

Supplies Needed

Font of choice – I used Safari Colorway here

Weescotlass Mask 236 here

“Jersey Girl’s” is a tagger size scrap kit created by Crys of Creative Scraps by Crys.  It is part of the TKO Collaboration and can be purchased here.  You can visit her blog here.  Thank you Crys for your portion!
  
This tutorial was written assuming you have working knowledge of PSP. 

~~ Let’s get started ~~

Open up a 700 x 700 blank canvas.
Flood fill white.

Copy and paste Frame 2 as a new layer.
Resize 70%
Click inside of it with your Magic Wand.
Selections/Modify/Expand by 4.
New Raster layer below the frame.
Copy and paste Paper 1 Into Selection.
Deselect.

Add your elements.  I used:
Paper 6:  Resize 50%
Paper 5:  Resize 50%
27:  Resize 65%
5
20:  Resize 60%
11:  Resize 30%/Duplicate/Resize 70%
22:  Resize 30%/Duplicate/Mirror
4:  Resize 30%16:  Resize 40%
2:  Resize 70%

Highlight your white background.
Select All.
Copy and paste Paper 1 Into Selection.
Deselect.
Apply the mask.
Merge Group.

Add your copyrights.

Add your name:
Color Pallet: 
Foreground & Background:#000000

Type your name.
Convert to Raster layer.
Select All/Float/Defloat
Selections/Modify/Expand by 2.
New Raster layer below the name.
Flood fill with #ffffff
Deselect.
Merge Visible both name layers.

Resize all layers 80%.
   
I’d love to see your results.
Email me!
Hugs,
Bev

Jersey Girls 1


Supplies Needed

Font of choice – I used God Given Name here

Becky Mask 9 here

My template 1 here

“Jersey Girl’s” is a tagger size scrap kit created by Becky of Becky’s Creations.  It is part of the TKO Collaboration and can be purchased here.  You can visit her blog here.  Thank you Becky for your portion!
  
This tutorial was written assuming you have working knowledge of PSP. 

~~ Let’s get started ~~

Open up the template.
Shift + D.
Close out the original.
Delete the credit layer and stitches layer.
Image/Canvas Size
700 x 500
OK
Highlight the background layer.
Flood fill white.

Highlight Rectangle layer.
Click on it with your Magic Wand.
New Raster layer.
Copy and paste Patterned 1 Into Selection.
Deselect.
Delete the template layer.
Give it a slight Inner Bevel:

Highlight Rectangle 2 layer.
Repeat the above step.

Highlight Circle layer.
Click on it with your Magic Wand.
New Raster layer.
Copy and paste Patterned 1 Into Selection.
Effects/Reflection Effects/Kaleidoscope
Use Default settings.
OK
Deselect.
Delete the template layer.
Give it the same slight Inner Bevel.

Highlight Large Rectangle layer.
Click anywhere outside of it with your Magic Wand.
Copy and paste Patterned 2 as a new layer.
Resize 50%
Tap the delete key.
Deselect.
Delete the template layer.
Give it the same slight Inner Bevel.

Add your elements.  I used:
Rosette 2:  Resize 95%
Rosette 2 again:  Resize 20%/Duplicate/Resize 70%/Duplicate
Keychain 1:  Resize 40%
Bow 4:  Resize 25%
PinUp: Resize 60%
High Heel 1:  Resize 40%/Duplicate
Lipstick 2:  Resize 40%/Mirror
Polish:  Resize 40%

Highlight your white background.
Select All.
Copy and paste Patterend 3 Into Selection.
Deselect.
Adjust/Blur/Gaussian Blur:
Radius: 5
OK
Apply the mask.
Merge Group.
Duplicate
Move one mask layer left, the other right.

Add your copyrights.

To add your name in a circle -

Color Pallet: 
Foreground:#000000
Close the background out.

Make your Ellipse Tool active set on “Draw Circle”
Create a circle that’s just slightly larger than the flower that’s behind the round paper layer.
If you draw the circle too larger or too small just resize accordingly.

Color Pallet:
Switch the foreground to now be your background
(your foreground should now be closed out)

Make your text tool active and move your mouse along the top center of the circle line you just made until you see a Rocking A appear.
Click your mouse.
A text box will appear.
Type your name in the box as many times as you like adding spaces in between.
Apply.
In your Layers pallet click on the + sign.
Close out the New Ellipse layer.
Highlight Vector 1 layer.
Right Click and choose Convert to Raster.

Resize all layers 80%.
   
I’d love to see your results.
Email me!
Hugs,
Bev