Supplies
1 tube of choice – I used the beautiful artwork of Katarina Koukiotis
which can be purchased from PSP Tube Stop. You must have a license to use. This particular tube comes with the little
elements you see in my tag – cards, hat, and watch.
Weescotlass Mask 208 here
Paper, branch, and scattered stars
This tutorial was written assuming you have a working knowledge of PSP.
~♥~ Let’s get started ~♥~
Open up a 700 x 700 blank canvas.
Flood fill white.
New Raster layer.
Make your Selection Tool active set on Circle.
Create a circle approximately 475 pixels.
Flood fill with #151515
Duplicate (and close this layer out for now)
Highlight the original circle layer.
Adjust/Add Remove Noise/Add Noise:
Gaussian and Monochrome checked
Noise: 50%
OK
Center this circle on your canvas.
Click anywhere outside of the circle with your Magic Wand.
Selections/Invert
New Raster layer.
Copy and paste the paper that I supplied Into Selection.
Deselect for now.
Open up the other circle layer.
Resize 55%
Apply the same noise effect.
Move into position – see my tag for reference.
This is all we’ll do with this layer for now.
New Raster layer.
Make your Selection Tool active set on Rectangle.
Create a rectangle approximately 350 x 400 pixels.
Flood fill with the same as you used for the circle.
Apply the same noise effect.
Deselect.
Move into position – see my tag for reference.
Click anywhere outside of the rectangle with your Magic Wand.
Selections/Invert
New Raster layer.
Copy and paste the paper Into Selection.
Duplicate/Change the Properties to Multiply.
Duplicate.
Deselect.
Highlight the smaller circle layer – be sure it’s in exact position.
Click anywhere outside of it with your Magic Wand.
Selections/Invert
Paste the paper Into Selection.
Deselect for now.
Copy and paste your tube as a new layer at the top of your layers
pallet.
If you’re using the same tube as I did, resize 80% and put it so that
the bottom left corner is snug into the corner of the black rectangle.
Highlight the Rectangle paper layer.
Click anywhere outside of it with your Magic Wand.
Highlight the tube layer and erase the area of the tube that overhangs
the black rectangle.
Deselect.
Paste your tube again.
Move into position over the small circle paper layer.
Highlight the paper layer.
Click anywhere outside of it with your Magic Wand.
Highlight the tube layer.
Tap the delete key.
Deselect.
Lower the Opacity of the tube to about 24.
Paste your tube again.
Repeat the above step.
Lower the Opacity of the tube to about 14.
Add the elements:
Branch: Duplicate
Stars: Duplicate
New Raster layer at the top of your layers pallet.
Flood fill with #c891cb.
Apply the mask.
Merge Group.
Move this just a little toward the top right corner of your canvas.
Move just above your white canvas in your layers pallet.
Duplicate/Move toward the bottom right corner.
Add your credits.
Add your name.
Foreground: #151515
Background: #c891cb
Stroke: 1
Type your name.
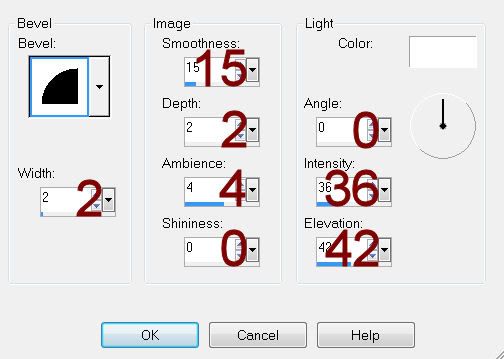
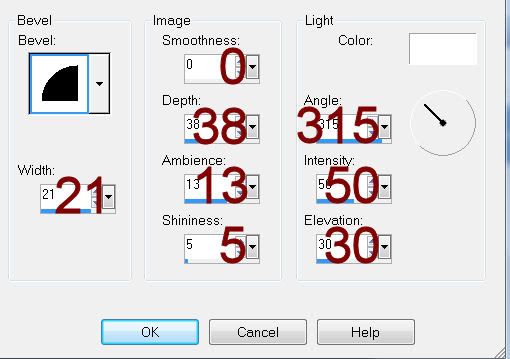
Give it a slight Inner Bevel:
Resize all layers 80%.