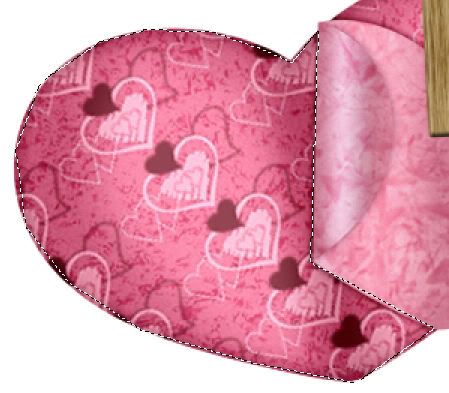
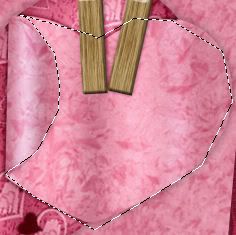
Clicking on the image will enlarge to full view.
Supplies
1 tube and 1 close up image of choice - I used the wonderful artwork of Michale Landefeld at CILM
Font of Choice - I used Dream Orphans Bold here
Weescotlass Mask 138 here
Scraps of Enchantment Template 108 here
“Time for Coffee” is a FTU scrap kit created by Schnegge of Schnegge’s Scraps and can be downloaded from here.
Please leave a thank you when downloading as it’s a small gesture for hard work given freely.
This tutorial was written assuming you have a working knowledge of PSP.
~♥~ Let’s get started ~♥~
Open up the template.
Shift + D.
Close out the original.
Delete the credit layer.
Resize all layers 90%
Image/Canvas Size 700 X 600
New Raster layer.
Send to bottom.
Flood fill white.
Highlight Circle layer.
Use your Magic Wand and click on the black side.
New Raster layer.
Copy and paste a light colored paper of choice Into Selection.
Deselect.
Delete the template layer.
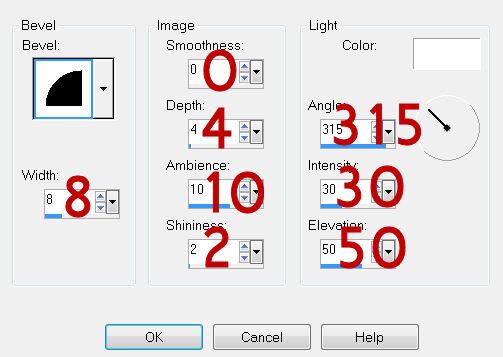
Give it an inner bevel:
Highlight Circle layer again.
Repeat the above step with the pink side using a dark colored paper of choice.
Highlight Inner Frame layer.
Click on it with your Magic Wand.
New Raster layer.
Copy and paste a light colored paper of choice Into Selection.
Copy and paste your close up image as a new layer.
Position it over the paper.
Selections/Invert
Tap the delete key.
Deselect.
Lower the opacity of the image to about 50.
Highlight Frame layer.
Select All/Float/Defloat
New Raster layer.
Copy and paste a paper of choice Into Selection.
Deselect.
Delete the template layer.
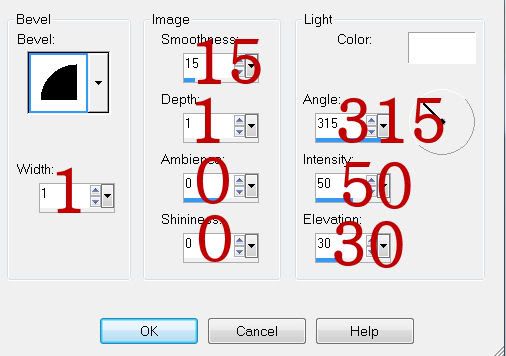
Give it the same inner bevel.
Highlight Black Dotted Lines layer.
Select All/Float/Defloat
Copy and paste a light colored paper of choice Into Selection.
Deselect.
Delete the template layer.
Highlight Pink Dotted Line layer.
Repeat the above step using a dark colored paper of choice.
Highlight Gray Rectangle layer.
Click on it with your Magic Wand.
New Raster layer.
Copy and paste a paper of choice into Selection.
Deselect.
Delete the template layer.
Give it the same inner bevel.
Highlight Pink Rectangle layer paper.
Repeat the above step using a different paper.
Highlight Are you Ready layer.
Select All/Float/Defloat
Copy and paste a paper of choice Into Selection.
Deselect.
Delete the template layer.
Give it an inner bevel.
Highlight BOYS layer.
Repeat the above step.
Highlight Stars Right layer.
Select All/Float/Defloat
New Raster layer.
Copy and paste a light colored paper of choice Into Selection.
Deselect.
Delete the template layer.
Highlight Stars left layer.
Select All/Float/Defloat
New Raster layer.
Flood fill with a gradient of choice.
Deselect.
Delete the template layer.
Copy and paste Heart 2 as a new layer.
Resize 25%
Position it over the Large Star Template layer.
Delete the template layer.
Add your embellishments. I used:
Frame Round 2: Resize 80%
Schmuckkordel 1: Resize 40%
Flower 3: Resize 25%
Flower 4: Resize 25% and 90%
Butterflies 1, 2, and 3: Resize 25% and 80%
Copy and paste your tube as a new layer.
Highlight your white background.
New Raster layer.
Select All.
Copy and paste a paper of choice Into Selection.
Deselect.
Apply the mask.
Resize 120%
Merge Group.
Use your Pick Tool and pull it out slightly to the right.
Add your copyrights.
Add your name.
Give it the same inner bevel.
Resize all layers 80%.
I hope you enjoyed this tutorial.
I’d love to see your results and show it off in my gallery.
Email me!
Hugs,
Bev