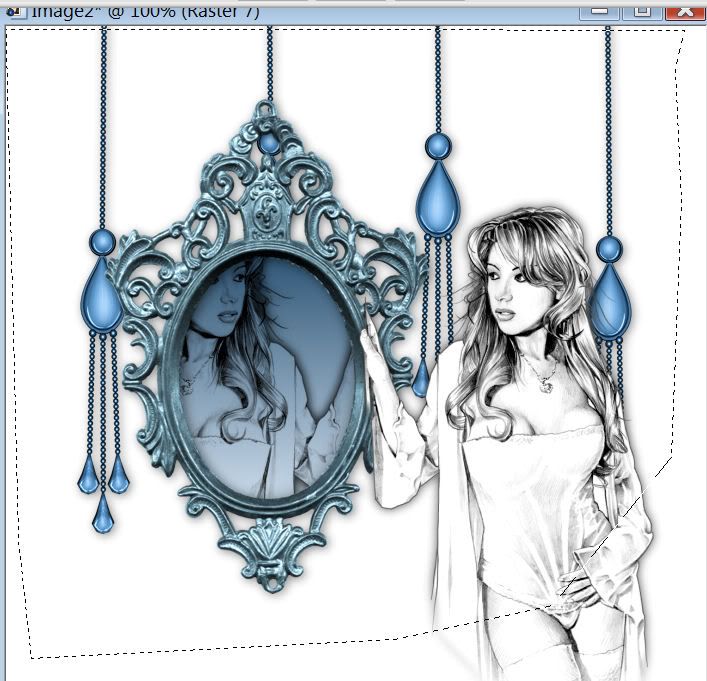
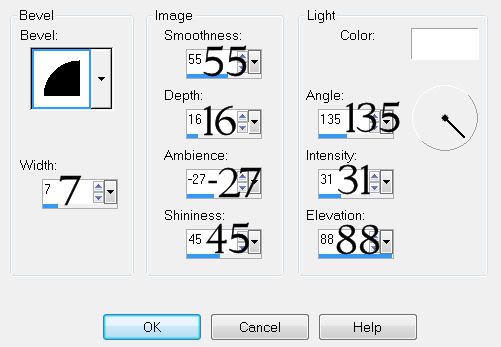
Clicking on the image will enlarge to full view.
Supplies
1 tube of choice and 1 image (image is optional) - I used the wonderful artwork of Gary George here
Font of choice - I used OhLara and is a pay font
Becky Mask 22 here
“Southern Breeze” is a FTU scrap kit created by me and can be downloaded from my blog here.
A thank you is not required but is greatly appreciated.
This tutorial was written assuming you have a working knowledge of PSP.
~♥~ Let’s get started ~♥~
Open up a 700 X 700 blank canvas.
Flood fill white.
Copy and paste Frame 3 as a new layer.
Use your Magic Wand and click inside the right side.
Selections/Modify/Expand by 6.
Copy and paste your image (or a paper of choice) below the frame.
Selections/Invert
Tap the delete key.
Deselect.
Copy and paste Sand Dune as a new layer.
Resize 40%
Position it near the bottom left of the frame.
Using your Freehand Selection Tool, outline the dune:
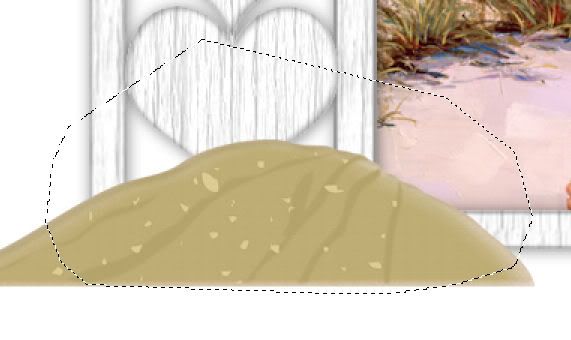
Selections/Modify/Feather
Number of Pixels: 33
OK
Selections/Invert
Tap the delete key until you have a nice feathered look.
Deselect.
Duplicate/Mirror
Move the duplicate into position.
See my tag for reference.
Copy and paste Flower Doodle 4 as a new layer.
Image/Mirror
Resize 70%
Move into position behind the frame.
Use your Eraser Tool and erase the flower doodle that you can see behind the hearts.
Paste Flower Doodle 4 again as a new layer.
Resize 50%
Move into position behind the frame on the upper right side.
Copy and paste your tube as a new layer.
Add your embellishments. I used:
Bow 3: Resize 40% Mirror/Free rotate left 20 degrees
Flower Doodle 2: Resize 70%
Flip Flops 1: Resize 50% - Free rotate the left one 30 degrees left. Free rotate the right one 80 degrees right.
Starfish: Resize 25% and 70%
Butterflies 1 & 3: Resize 30% Free rotate 20 degrees
Butterfly 2: Resize 25% and 80% Free rotate left 20 degrees
Copy and paste Bucket as a new layer.
Resize 25%
Free rotate right 15 degrees.
Move it into position.
See my tag for reference
.
Copy and paste Seashell as a new layer.
Resize 25%
Duplicate/Flip
(We’ll come back to the seashells in a minute)
Copy and paste Starfish as a new layer.
Resize 25% and 70%
Arrange the Seashells and Starfish “in the bucket”
See my tag for reference.
Merge Visible the Seashells and Starfish.
Lower the opacity really low so that you can see the bucket through them.
Using your Freehand Selection Tool, outline the inside portion of the bucket.
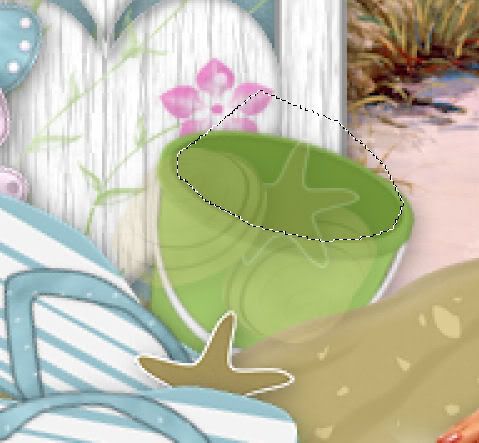
Duplicate/Mirror
Move the duplicate into position.
See my tag for reference.
Copy and paste Flower Doodle 4 as a new layer.
Image/Mirror
Resize 70%
Move into position behind the frame.
Use your Eraser Tool and erase the flower doodle that you can see behind the hearts.
Paste Flower Doodle 4 again as a new layer.
Resize 50%
Move into position behind the frame on the upper right side.
Copy and paste your tube as a new layer.
Add your embellishments. I used:
Bow 3: Resize 40% Mirror/Free rotate left 20 degrees
Flower Doodle 2: Resize 70%
Flip Flops 1: Resize 50% - Free rotate the left one 30 degrees left. Free rotate the right one 80 degrees right.
Starfish: Resize 25% and 70%
Butterflies 1 & 3: Resize 30% Free rotate 20 degrees
Butterfly 2: Resize 25% and 80% Free rotate left 20 degrees
Copy and paste Bucket as a new layer.
Resize 25%
Free rotate right 15 degrees.
Move it into position.
See my tag for reference
.
Copy and paste Seashell as a new layer.
Resize 25%
Duplicate/Flip
(We’ll come back to the seashells in a minute)
Copy and paste Starfish as a new layer.
Resize 25% and 70%
Arrange the Seashells and Starfish “in the bucket”
See my tag for reference.
Merge Visible the Seashells and Starfish.
Lower the opacity really low so that you can see the bucket through them.
Using your Freehand Selection Tool, outline the inside portion of the bucket.
Selections/Invert
Be sure the merged shell layer is highlighted and tap the delete key.
Deselect.
Move the Opacity back up to 100.
Highlight your white background.
New Raster layer.
Select All.
Copy and paste a paper of choice Into Selection.
Deselect.
Apply the Mask.
Merge Group.
Copy and paste the Fence as a new layer as the top of your layers pallet.
Resize 70%.
Position to one side of the canvas.
Duplicate/Mirror
Merge Down.
Apply the mask.
Merge group.
Duplicate/Merge down.
In your layers pallet move it just above your paper mask layer.
Use your Eraser Tool and erase any of the fence you see behind the hearts of the frame.
Add your copyrights.
Add your name.
Resize all layers 80%.
I hope you enjoyed this tutorial.
I’d love to see your results and show it off in my gallery.
Email me!
Hugs,
Bev
Be sure the merged shell layer is highlighted and tap the delete key.
Deselect.
Move the Opacity back up to 100.
Highlight your white background.
New Raster layer.
Select All.
Copy and paste a paper of choice Into Selection.
Deselect.
Apply the Mask.
Merge Group.
Copy and paste the Fence as a new layer as the top of your layers pallet.
Resize 70%.
Position to one side of the canvas.
Duplicate/Mirror
Merge Down.
Apply the mask.
Merge group.
Duplicate/Merge down.
In your layers pallet move it just above your paper mask layer.
Use your Eraser Tool and erase any of the fence you see behind the hearts of the frame.
Add your copyrights.
Add your name.
Resize all layers 80%.
I hope you enjoyed this tutorial.
I’d love to see your results and show it off in my gallery.
Email me!
Hugs,
Bev