Supplies
Poser used in this tutorial is by © Krissy’s Imaging. You can visit her blog here.
Font of choice - I used AL Sandra here
Gem Mask 8 here
Plug Ins:
Eyecandy 3.1 - Glow
“Dorm Room Drama Queen” is a scrap kit created by Pixie of KissedbyPix and is part of a collaboration that can be purchased at TKO Scraps and is available in tagger and full size. You can visit her blog here.
Thank you Pixie for your awesome contribution!
This tutorial was written assuming you have a working knowledge of PSP.
~♥~ Let’s get started ~♥~
Open up a 700 x 700 blank canvas.
Flood fill white.
Make your Selection Tool active set on Rectangle.
Make a rectangle approximately 525 x 300 pixels.
New Raster layer.
Copy and paste Paper 1 Into Selection.
Selections/Modify/Contract by 8.
New Raster layer.
Flood fill with a gradient of your choice.
Copy and paste Mask 2 as a new layer.
Move into Position.
Selections/Invert
Tap the delete key.
Deselect.
Highlight the larger rectangle and apply Eyecandy 3.1 - Glow:
Width: 3
Opacity: 100
Opacity Drop off: Fat
Color: White
OK
Add your embellishments. I used:
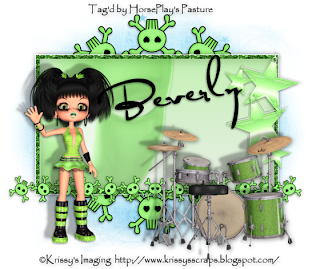
Skull Frame 6
Skull Line 1
Star Cluster 6: Resize 60%
Pixie Drum Set: Resize 60%
Pixie 3: Resize 80%
Crop your image.
Highlight your white canvas.
New Raster layer.
Select All.
Copy and paste Paper 6 Into Selection.
Deselect.
Apply the mask.
Merge Group.
Add your copyrights.
Add your name:
Resize all layers 80%.
I hope you enjoyed this tutorial.
I’d love to see your results and show it off in my gallery.
Email me!
Hugs,
Bev

No comments:
Post a Comment