Saturday, September 12, 2009

Trick or Treat

Clicking on the image will enlarge to bigger view.

Supplies
1 tube of choice - I’m using the artwork of Elias Chatzoudis which you can purchase here
Font of Choice - I’m using Treasure here
Weescotlass Mask 35 here
My Template 46 here
Greg’s Factory Output Vol. II - Pool Shadow
Mura Meister - Copies

This tutorial was written assuming you have a working knowledge of PSP.

~♥~ Let’s get started ~♥~

Open up the template.
Shift + D.
Close out the original.
Delete the credit layer.

Highlight Raster 2.
Select All/Float/Defloat
New Raster Layer.
Flood fill with a gradient of your choice.
Deselect.
Apply Greg’s Factory Output Vol. II - Pool Shadow
Default Settings
Adjust/Add Remove Noise/Add Noise
Random checked
Noise: 30%
OK

Highlight Raster 3
Select All/Float/Defloat
Selections/Modify/Expand by 1
Invert your gradient and flood fill.
Copy and paste your tube of choice.
Resize much larger than it is.
Selections/Modify/Invert
Tap the delete key.
Change the Properties to Soft Light.

Copy and paste your tube as a new layer.

Close out your white canvas and merge visible.
Duplicate.
Highlight the original layer.
Reopen your white canvas.
Apply Mura Meister Copies:
Wallpaper (rotate) with default settings.
Adjust/Blur/Gaussian Blur
Radius: 10
OK
Apply the mask.
Merge Group.
Duplicate/Merge Down.

Now we’re going to write your name on a curve.
In your color pallet set foreground to black, background null.
Click on your Ellipse Tool and make a circle bigger than the outer circle of the template.
Objects/Align/Center in Canvas.
Resize the circle if you need to.
Duplicate the Ellipse circle - close out the copy.
Move your mouse along the circle until you see a Rocking A.
Click your mouse.
A Text Box will open up.Type in your name.
Apply
In your Layers pallet Click on the + sign beside your writing
Click on the eye beside the New Ellipse layer
Highlight the Vector Layer
Right click
Convert to Raster Layer.

Give it a slight inner bevel:


Give your name a heavy drop shadow.

Highlight the copy of the Ellipse.
Open the layer up and repeat the above step accept this time write in your credits.
Do not give it an inner bevel.

I hope you enjoyed this tutorial.
I’d love to see your results and show it off in my Show Arena.
Email me!
Hugs,
Bev

Keys to Heaven's Gate

Clicking on the image will enlarge to bigger view.

Supplies
1 tube of choice - I’m using the artwork of Barbara Jensen which you can purchase here
Font of Choice - I’m using FairydustB here
Weescotlass Mask 249 here
“Night Passion” is a FTU scrap kit by Scraps Dimensions and can be downloaded from her blog here.
Please leave a thank you when downloading.
It’s a small gesture for hard work given freely.

This tutorial was written assuming you have a working knowledge of PSP.

~♥~ Let’s get started ~♥~

Open up a 700 X 700 transparent canvas.
Flood fill white.

Copy and paste Frame 1 as a new layer.
Resize 65%.
Use your Magic Wand and click inside of it.
Selections/Modify/Expand by 6.
New Raster layer below the frame.
Copy and paste a paper of choice Into Selection.
Deselect.

Copy and paste your tube as a new layer..

Add your embellishments. I used:
Embellishment 1: Resize 40%
Rose 2
Rose: Resize 40% Free rotate right 15 degrees.
Duplicate/Mirror/Resize 70%
Pearls and Diamond: Resize 25%
Key: Resize 25%. Duplicate/Mirror
Candle 1: Resize 40%
Candle 2: Resize 30%
Feathers: Resize 50%
Butterfly 3: Resize 25%. Duplicate/Mirror/Resize 70%

Add your copyrights.

Add your name.
I gave mine a slight inner bevel:


Resize all layers 85%.

I hope you enjoyed this tutorial.
I’d love to see your results and show it off in my Show Arena.
Email me!
Hugs,
Bev

Crimson Hearts

Clicking on the image will enlarge for bigger view.

Supplies
3 tubes of choice - I’m using the artwork of Keith Garvey which you can purchase here
Font of Choice - I’m using Chicken Basket and Yippy Skippy here
Weescotlass Mask 84 here
“My Grungy Crimson Heart” is a PTU tagger size scrap kit created by Terry of Treasures by Terry and can be purchased at Butterfly Blush Designs. You can visit Terry’s blog here.
Thank you Terry for such a rich and stunning kit!!

This tutorial was written assuming you have a working knowledge of PSP.

~♥~ Let’s get started ~♥~

Open up a transparent 700 X 700 canvas.
Flood fill white.

Copy and paste Frame 2 as a new layer.
Click inside of it with your Magic Wand.
Selections/Modify/Expand by 6
New Raster layer below the frame.
Flood Fill with a gradient of your choice.
DO NOT DESELECT.

New Raster Layer below the frame.
Effects/3D Effects/Cutout


Repeat the above step accept change the vertical & horizontal numbers to -10.
Deselect.

Copy and paste your tube beside the frame making sure you have it exactly where you want it.
Duplicate/Mirror
Move the copy below the mirror.
Selections/Invert
Tap the delete key.
Deselect.
Change the Properties to Soft Light.

Close out your white canvas and your original tube layer.
Merge Visible.
Reopen your white canvas.

Copy and paste Frame 3 as a new layer.
Move into position - see my tag for reference.
Repeat all the steps above using tubes of your choice.
Accept for the left and right frame, change the Properties to Luminance Legacy.

Add your embellishments. I used:
Doodle 1: Free rotate left 15 degrees.
Doodle 5
Heart 3: Mirror/Resize 45%.
Fan 2: Resize 60%. Adjust/Sharpen: sharpen 3x’s.
Ribbon and Chain Silver: Resize 70%
Butterfly 2: Resize 50%
Hearts & Arrow 2: Resize 60%. Free rotate left 15 degrees

Highlight your white canvas.
New Raster layer.
Select All
Copy and paste a paper of choice Into Selection.
Deselect.
Apply the mask.
Merge Group.

Using the Yippy Skippy font type out
“Love can be painful” or whatever you like.

Add your copyrights.

Add your name.

Resize all layers 85%.

I hope you enjoyed this tutorial.
I’d love to see your results and show it off in my Show Arena.
Email me!
Hugs,
Bev

Friday, September 11, 2009

Simply Sexy

Clicking on the image will enlarge to bigger view.

Supplies
1 tube of choice - I’m using the artwork of Elias Chatzoudis which you can purchase here
Font of Choice - I’m using Velvenda Cooler here
Weescotlass Mask 167 here
“Simply Sassy” is a PTU tagger size scrap kit created by Shani of Wicked Princess Scraps and can be purchased at Twilight Scraps. Please visit her blog here.
Thank you Shani for a fabulous kit!!

This tutorial was written assuming you have a working knowledge of PSP.

~♥~ Let’s get started ~♥~

Open up a transparent 700 X 700 canvas.
Flood fill white.

Copy and paste Frame 1 as a new layer.
Click inside of it with your Magic Wand.
New Raster layer below the frame.
Copy and paste a paper of choice Into Selection.
Deselect.
Close out your white canvas.
Merge Visible.
Reopen your white canvas.

Copy and paste your tube as a new layer.

Copy and paste Doodle 4 as a new layer behind the merged frame layer.
Resize 105%
Copy and paste Doodle 7 as a new layer below Doodle 4 layer.
Resize 90%
Free rotate right 45 degrees.

Add your embellishments. I used:
Baby’s Breath
Bow 5: Resize 30% Free rotate left 10 degrees

Highlight your white canvas.
New Raster layer.
Select All
Copy and paste a paper of choice Into Selection.
Deselect.
Apply the mask.
Merge Group.

Add your copyrights.

Add your name.

Resize all layers 85%.

I hope you enjoyed this tutorial.
I’d love to see your results and show it off in my Show Arena.
Email me!
Hugs,
Bev

Tub Talk

Clicking on the image will enlarge to bigger view.

Supplies
1 tube of choice - I’m using the artwork of Anjara which you can purchase here
Font of Choice - I’m using Dragonfly here
Weescotlass Mask 297 here
“Lost Romance” is a FTU scrap kit created by Scrap Dimensions. Please visit her blog here for download. She has many amazing kits. Please leave a thank you when downloading. It’s a small gesture for hard work given freely.

This tutorial was written assuming you have a working knowledge of PSP.

~♥~ Let’s get started ~♥~

Open up a transparent 700 X 700 canvas.
Flood fill white.

Copy and paste Frame 2 as a new layer.
Resize 60%
Click inside of it with your Magic Wand.
New Raster layer below the frame.
Copy and paste a paper of choice Into Selection.

Copy and paste your tube as a new layer below the frame.
Selections/Invert
Tap the delete key.
Deselect.

Copy and paste Wrap 2 as a new layer below the frame.
Resize 65%
Erase any that overhangs from the sides of the frame.

Add your embellishments. I used:
Branch 1: Resize 60%
Branch 1 again: Resize 50%
Vase: Resize 70%
Dragonfly 1: Resize 25% Free rotate right 30 degrees
Dragonfly 2: Resize 30%. Free rotate left 30 degrees
Bag: Resize 25%
Ribbon 1: Resize 40%

Highlight your white canvas.
New Raster layer.
Select All
Copy and paste a paper of choice Into Selection.
Deselect.
Apply the mask.
Merge Group.

Add your copyrights.

Add your name.

Resize all layers 85%.

I hope you enjoyed this tutorial.
I’d love to see your results and show it off in my Show Arena.
Email me!
Hugs,
Bev


Boo!

Clicking on the image will enlarge to full view.
Image below shows the animation.


Supplies
1 tube of choice - I’m using the artwork of Elias Chatzoudis which you can purchase here
Font of Choice - I’m using Haunt here
Weescotlass Mask 220 here
My Template 44 here
DSB Flux - Bright Noise (optional)
Animation Shop (Optional)

This tutorial was written assuming you have a working knowledge of PSP.

~♥~ Let’s get started ~♥~

Open up the template.
Shift + D.
Close out the original.
Delete the credit layer.

Highlight the Boo layer.
Select All/Float/Defloat
New Raster Layer.
Flood fill with a color of your choice.
Deselect.
Give it a slight inner bevel:


Effects/Text Effects/Fur:

Change the opacity to Overlay.
Merge down.

Highlight the Spider Web layer.
Select All/Float/Defloat
Choose 2 colors complimentary to your tube.
Create a gradient.


Give it the same slight inner bevel.
Duplicate twice for a total of 3 layers.
Rename Web 1, 2, and 3.

Highlight Web 1 and apply DSB Flux Bright Noise.


Highlight Web 2 and apply the same accept hit the mix button twice.
Repeat for Web 3 accept hit the mix button 3 times.
Close out Web layers 2 & 3.

Add your tube.

Add your copyrights.

Add your name in the color black.
Select All/Float/Defloat
New Raster Layer.
Flood fill with a color of your choice.
Deselect.
Give it the same inner bevel.
Apply the same fur effect.
Merge down.

Copy Merge

Time to Animate:

Carry into Animation Shop
Edit/Paste/As New Animation

Back into PSP.
Close our Web 1.
Open up Web 2.
Copy Merge

Carry into AS
Edit/Paste/After current frame.

Back into PSP.
Close our Web 2.
Open up Web 3.
Copy Merge

Carry into AS
Edit/Paste/After current frame.

View your animation.
If you’re happy then save.

I hope you enjoyed this tutorial.
I’d love to see your results and show it off in my Show Arena.
Email me!
Hugs,
Bev
 

Thursday, September 10, 2009

Hocus Pocus

Clicking on the image will enlarge the view.
The view below shows the animation.


Supplies
1 tube of choice - I’m using the artwork of Michael Calandra which you can purchase here
Font of Choice - I’m using Plasma Drip here
Becky Mask 22 here
Eyecandy 5: Impact - Gradient Glow
Animation Shop (Optional)
“Spooky Hollow” is a PTU tagger size scrap kit created by Susan of Tootypup Scraps and can be purchased at Twilight Scraps.
You can visit her blog here.
Thank you Susan for a stunning Halloween kit!

This tutorial was written assuming you have a working knowledge of PSP.

~♥~ Let’s get started ~♥~

Open up a 700 X 700 transparent image.
Flood Fill white.
First we’ll make the layer for the mask.
New Raster layer.
Select All.
Copy and paste a paper of choice Into Selection.
Deselect.
Copy and paste Shadow 1 as a new layer.
Copy and paste a Moon of your choice.
Copy and paste Tree 3: Resize 140%
Close out your white canvas.
Merge Visible.
Apply the mask.
Merge Group.

Copy and paste Frame 3 as a new layer.
Resize 70%.
Using your Selection Tool, outline the frame.
New Raster layer below the frame.
Copy and paste a paper of choice Into Selection.
DO NOT DESELECT.

Copy and paste your tube below the frame.
Selections/Invert
Tap the delete key.
Deselect.

Add your embellishments. I used:
Tree 3
Iron Fence : Resize 40%
Cat 1: Resize 40%
Grass 1: Resize 20%
Ghost 3: Resize to your liking

Add your copyrights.

Add your name.
Adjust/Add Remove Noise/Add Noise
Random
Noise: 10%
OK
Apply Eyecandy 5 Impact - Gradient Glow


Resize all layers 85%.

Move your ghost into position so that it appears above your name.

If you don't want to animate then save your tag.
If you do then Copy Merge.

Time to Animate:

Carry into Animation Shop.
Edit/Paste/As New animation.

Back into PSP.
Lower the Opacity of the ghost to 75
Copy Merge

Carry into AS
Edit/Paste/After Current Frame

Back into PSP.
Lower the Opacity of the ghost to 50
Copy Merge

Carry into AS
Edit/Paste/After Current Frame

Back into PSP.
Lower the Opacity of the ghost to 25
Copy Merge

Carry into AS
Edit/Paste/After Current Frame

Back into PSP.
Lower the Opacity of the ghost to 0
Copy Merge

Carry into AS
Edit/Paste/After Current Frame

Back into PSP.
Open the opacity of the ghost to 100.
Move it below the frame and get into position where you want.
Close the opacity to 0 again.
Copy Merge.

Carry into AS
Edit/Paste/After Current Frame

Back into PSP.
Change the Opacity of the ghost to 25
Copy Merge

Carry into AS
Edit/Paste/After Current Frame

Back into PSP.
Change the Opacity of the ghost to 50
Copy Merge

Carry into AS
Edit/Paste/After Current Frame

Back into PSP.
Change the Opacity of the ghost to 75
Copy Merge

Carry into AS
Edit/Paste/After Current Frame

Back into PSP.
Change the Opacity of the ghost to 100
Copy Merge

Carry into AS
Edit/Paste/After Current Frame

Now repeat the above steps going back and forth between PSP and AS accept you want to lower the opacity each time… Lower to 75, then 50, then 25, then 0.

After you’ve done that….
Highlight Frame 3.
Copy
Highlight Frame 14.
Edit/Paste after current frame.

Highlight Frame 2.
Copy
Highlight Frame 15.
Edit/Paste after current frame.

Highlight Frame 1.
Copy.
Highlight Frame 16.
Edit/Paste after current frame.

Ctl + A (to highlight all frame)
Animation/Frame Properties:
30

Now highlight frames 1, 5, 9, and 13.
Animation/Frame Properties:
50

View your animation.
If you’re happy then save.

I hope you enjoyed this tutorial.
I’d love to see your results and show it off in my Show Arena.
Email me!
Hugs,
Bev


Wednesday, September 9, 2009

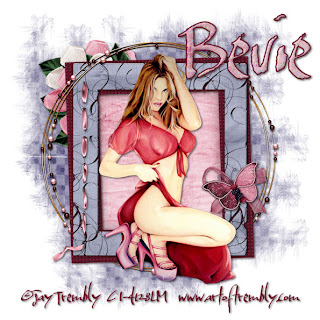
Temptress

Clicking on the image will enlarge to bigger view.

Supplies
1 tube of choice - I’m using the artwork of Jay Trembly which you can purchase here
Font of Choice - I’m using Baka here
Weesctolass Mask 297 here
“Love you Berry Much” is a FTU full size scrap kit created by KatNKDA.
It can be downloaded from her blog here.
Please leave a thank you when downloading.
It’s a small gesture for hard work given freely.
Kat, thank you for such a beautiful kit!

This tutorial was written assuming you have a working knowledge of PSP.

~♥~ Let’s get started ~♥~

Open up a 700 X 700 transparent image.
Flood fill white.

Copy and paste Element 3 as a new layer.
Click inside with your Magic Wand.
Selections/Modify/Expand by 6
New Raster layer below the frame.
Copy and paste a paper of choice Into Selection.
Deselect.

Copy and paste your tube as a new layer.

Add your embellishments. I used:
Element 15: Resize 40%. Free Rotate left 90 degrees. Mirror.
Element 11
Element 19: Resize 30%
Element 17: Resize 25%
Elements 8 & 9: Resize 50%
Element 12: Resize 40%

Highlight your white canvas.
Select All.
Copy and paste a paper of choice Into Selection.
Deselect.
Apply the mask.
Merge Group.

Add your copyrights.

Add your name.
Foreground: Dark color
Background: set to Pattern - use paper from kit
Stroke set at 2
Type your name.
Select All/Float/Defloat
Selections/Modify/Contract by 2
Give it a slight inner bevel:


Deselect.
Add your drop shadow.
Adjust/Add Remove Noise/Add Noise
Random checked
Noise: 10%
Ok

Resize all layers 85%.

I hope you enjoyed this tutorial.
I’d love to see your results and show it off in my Show Arena.
Email me!
Hugs,
Bev


Tuesday, September 8, 2009

Free Spirits

Clicking on the image will enlarge to full view.

Supplies
2 tubes of choice - I’m using the artwork of Henri Peter
Font of Choice - I’m using Wesley here
Weesctolass Mask 249 here.
“Free Spirits” is a PTU full size scrap kit created by KatNKDA.
It can be downloaded from her store NK Art Shop.
You can visit Kat’s blog here.
Kat, this kit proves to me once again the beauty in the native people!!
Thank you!

This tutorial was written assuming you have a working knowledge of PSP.

~♥~ Let’s get started ~♥~

Open up a 700 X 700 transparent image.
Flood fill white.

First we’re going to create the layer to apply the mask to:
New Raster layer.
Copy and paste a paper of choice Into Selection.
Deselect.
Copy and paste Element 13 as a new layer.
Resize 90%
Lower the Opacity to around 55 or so.
Copy and paste Element 5 as a new layer.
Image Mirror
Free rotate left 30 degrees.
Lower the Opacity to around 55 or so.
Close out your white canvas.
Merge Visible.
Apply the mask.
Highlight the layer the black mask is on.
Resize 120%
Merge Group.

Copy and paste Element 4 as a new layer.
Resize 50%
Duplicate/Mirror
Move both frames into position.

Click inside one of the frames with your Magic Wand.
Selections/Modify/Expand by 10
New Raster layer below the frame.
Copy and paste a paper of choice Into Selection.
DO NOT DESELECT

Copy and paste a tube below the frame.
Selections/invert
Tap the delete key.
Deselect.

Close out your white canvas.
Merge Visible.
Reopen your white canvas.

Repeat the above steps with the other frame.

Add your embellishments. I used:
Element 22
Element 8
Element 31
Element 23: Resize 10%
Element 12: Resize 60% Free rotate Right 35 degrees
Element 32: Resize 25%
Element 44: Resize 50%
Element 25: Resize 50%

Add your copyrights.

Add your name.

Resize all layers 85%

I hope you enjoyed this tutorial.
I’d love to see your results and show it off in my Show Arena.
Email me!
Hugs,
Bev