Saturday, April 18, 2009

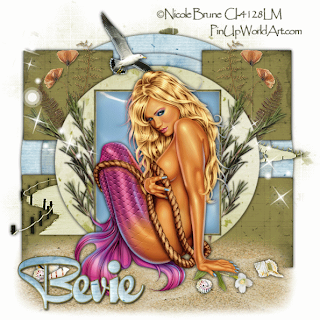
Once Upon a Time

Clicking on the image will enlarge to full view.
Since I can't get the animation to show, you can see it on the tag below

Supplies
1 tube of choice - I’m using the artwork of Nicole Brune which you can purchase here
Font of Choice - I’m using QuigleyWiggly here
Weescotlass Mask 84 here
Dezigns by Ali Template 55 here
Animation Shop - optional
“By the Sea” a PTU tagger scrap kit by Chili Designz and can be purchased at Exquisite Scraps here
Thank you Chili for an amazing kit!!

This tutorial was written assuming you have working knowledge of PSP.
~♥~ Let’s get started ~♥~

Open up the template. Shift + D. Close out the original.
Image/Resize 120% - Resize all layers checked.
Image/Canvas Size
Width & Height: 700
New Raster layer. Send to Bottom. Flood fill white.
Delete the credit layer.

For each of the template layers do the following:
Select All/Float/Defloat
Copy and paste a paper of choice as a new layer. Selections/Invert. Hit the delete key. Deselect. Delete the template layer. Give a heavy drop shadow.
It is not important that the layer names get changed accept PLEASE KEEP THE MIDDLE RECTANGLE name the same - or you’ll be completely lost when it comes time to animate.

Add your embellishments. I used:
Plant (I used the selection tool to only use the large plant) Resize: 50%. Free rotate right 25 degrees
Pressed Flowers: Resize 40%
Promenade: Resizes 70%
Sparkles
Seagull: Resize 50%
Various Seashells: 25%

Copy and paste your tube as a new layer.

Copy and paste the sand as a new layer beneath your tube. Position near the bottom of your canvas. Use your Freehand Selection Tool and make a large oval beneath your tube.
Selections/Modify/Feather
Number of Pixels: 53
Selections/Invert
Tap the delete key until you’re satisfied with the feathered look of the sand.

Highlight your white canvas. New Raster Layer. Select All. Copy and paste a paper of choice Into Selection. Apply the mask. Merge Group. Resize 120%.

Add your copyrights.

Add your name.

Time to Animate :O)

In PSP copy Middle Rectangle layer.

In Animation Shop:
Click on Effects/Insert Image Effects.
Under Effect you want to choose Underwater.
Effect Length: 1.3 sec
Frames per second: 6
Click Customize
Under Effects:Apply Sunlight Dappling
Sun Intensity: 25
Liquid Properties:
Water Depth: 20
Waves:
Wave 1: X -24, Y 61
Wave 2: X 0, Y 33
Wave 3: X 11, Y 83
Wave 4: X 50, Y 72
Wave 5: X 18, Y 47
Wave 6: X 21, Y 15
Wave 7: X 52, Y 24
Wave 8: X 36, Y 0
Wave 9: X 12, Y -49
Wave 10: X -19, Y -26
Wave 11: X -48 Y -3
Wave 12: X -29, Y 17
Wave 13 – 16: X 0, Y 0
Click Ok, and then OK again.

View/Normal Viewing
Your Middle Rectangle should now have 8 frames. Highlight and delete Frame 1.

Go back into PSP.
Close out all the layer. Re-open only the layers from just below the Middle Rectangle layer. (DO NOT OPEN THE MIDDLE RECTANGEL LAYER). Copy Merge and carry into AS.

Edit/Paste/As New Animation
Ctl + L. Hit the L key until you have 7 frames.
View/Normal Viewing

Highlight the animated Middle Rectangle. Ctl + A. Copy

Highlight the merged layer from PSP.
Ctl + A.
Ctl + E
Be sure to position the animated water in the center of the circle.

Go back into PSP. Close out all the layers and only open up the layers from ABOVE the Middle Rectangle layer. (DO NOT OPEN UP THE MIDDLE RECTANGLE LAYER) Copy Merge. Carry into AS.
Ctl + A
Click on the Propogate paste button (It looks like 3 folders with the corners bent down)
Ctl + E
Position it so that the frame fits nicely over the animated water.

If you’re happy with how it looks then go to:
Animation/Frame Properties
Change the number to 20
OK

Animation/Resize Animation
Click Percentage of Original
85
OK

I hope you enjoyed this tutorial.
I’d love to see your results.
Email me!
Hugs,
Bev

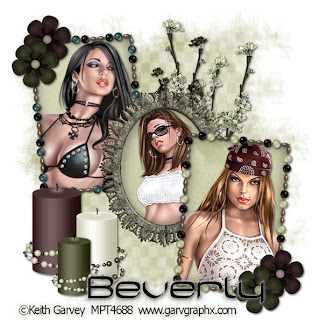
There's Beauty in Grunge


Clicking on the image will enlarge to full view.

Supplies

3 tubes of choice - I’m using the artwork of Keith Garvey which you can purchase here
Font of Choice - I’m using Casa Sans here
Weescotlass Mask 297 here
EyeCandy 5 - Impact (optional)
“Grunge Love” a PTU tagger scrap kit by Creative Intentionz by Nikki and can be purchased here. Visit her blog here.
Nikki, this kit is beautiful!!

This tutorial was written assuming you have working knowledge of PSP.
~♥~ Let’s get started ~♥~

Open up a blank 700 X 700 canvas. Flood fill white.

Copy and paste Bead Frame 1 as a new layer. Free rotate left 90 degrees. Resize 50%. Use your Magic Wand and click inside the frame. Selections/Modify/Expand by 4.

Copy and paste a paper of choice below the frame. Selections/Invert. Hit the delete key.

Copy and paste your tube below the frame. Hit the delete key. Deselect.

Close out your white canvas and merge visible. Open you canvas back up. Free rotate the merged frame left 5 degrees.

Copy and paste Bead Frame 2 as a new layer. Repeat the above steps using a different tube. After you merge visible these layers, free rotate right 5 degrees.

Copy and paste Victorian Frame 3 as a new layer. Repeat the above steps using a different tube.
Move the 3 merged frame layers into position.

Add your embellishments. I used:
Candle 2 - Resize 60%
Candle 5 - Resize 50%
Candle 3 - Resize 40%
Cherry Blossom 1 & 3: Resize 70%
Flower 2 & 3: Resize 30%

Highlight your white canvas. New Raster Layer. Select All. Copy and paste a paper of choice Into Selection. Select none. Apply the mask. Merge visible.

Add your copyrights.

Add your name.

I closed off the foreground
Set background to Pattern and used a paper from the kit.
I used EyeCandy/Gradient Glow on mine.
On the Basic Tab:
Outside Glow checked
Mask Selection checked
Glow Radius: 40
Soften Corners: 0
Overall Opacity: 100
Distortion Amount: 23
Distortion Lump Size: 0
Gradient Smoothness: 100
Color: White
Ok

I hope you enjoyed this tutorial.

I’d love to see your results.
Email me!
Hugs,
Bev

Wednesday, April 15, 2009

April Showers Did Bring Flowers

Clicking on the image will enlarge to full view

Supplies

1 tube of choice - I’m using the artwork of DeanYeagle which you can purchase here
Font of Choice - I’m using Yiggivoo Unicode here
Becky Mask 22 here
“Darlings of Spring” a PTU scrap kit by Scraps with Attitude and can be purchased at Dazzling Scraps here

This tutorial was written assuming you have working knowledge of PSP.
~♥~ Let’s get started ~♥~

Open up a blank 700 X 650 canvas. Flood fill white.

Copy and paste Windows 3 as a new layer. Resize 65%. Use your Magic Wand and click inside both sides of it. Selections/Modify/Expand by 6.

Copy and paste a paper of choice below the frame. Selections/Invert. Hit the delete button.

Copy and paste your tube below the frame. Resize to your liking.
Hit the delete key.

Copy and paste the Tree as a new layer. Resize 50%. Position to the left of the window frame. Duplicate and move to the opposite side of the frame and move behind it.

Copy and paste Fence 3 as a new layer. Resize 25%. Duplicate 3 times and line them up in a blended line near the bottom of your canvas. Merge visible all the fence layers.

Add your embellishments. I used:
Watering Can: Resize 15%
Flower Ribbon 1: Resize 40%
Horse: Resize 40%
Flowers: Resize 15%
Button Bow 1: Resize 20%
Flower: (in her hand) Resize 10%, 70%, and 80%
 
Highlight your white canvas. New Raster Layer. Select All. Copy and paste a paper of choice Into Selection. Apply the mask. Merge Group.

Add your copyrights.

Add your name.
I set my foreground to: #400040
Background to Pattern and used a paper from the kit.
Stroke 2.

I also used an Inner Bevel:
Bevel: 2
Width: 20
Smoothness: 17
Depth: 3
Ambience: 0
Shininess: 14
Color: white
Angle: 248
Intensity: 28
Elevation: 63
Ok

I hope you enjoyed this tutorial.
I’d love to see your results.
Email me!
Hugs,
Bev
 

Tuesday, April 14, 2009

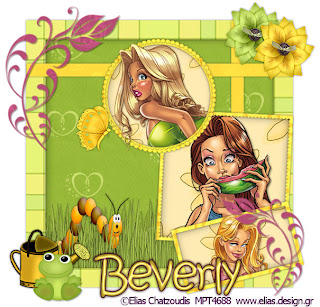
Carefree Summer Days


Clicking on the image will enlarge to full view.

Supplies
3 tubes of choice - I’m using the artwork of Elias Chatzoudis which you can purchase here
Font of Choice - I’m using Kristen ITC (came on my pc)
Chica’s Template #9 here
“Summertime Fun” a PTU tagger scrap kit by DanI and can be purchased at her store Dazzling Scraps. Visit her blog here.

This tutorial was written assuming you have working knowledge of PSP.

~♥~ Let’s get started ~♥~

Open up the template. Shift + D. Close out the original. Delete the watermark layer, Word Art 1, and Word Art 2. New Raster Layer. Send to bottom and flood fill white.

Highlight Frame Back 1 layer. Select All. Float/Defloat. Copy and paste a paper of choice as a new layer. Selections/Invert. Hit the delete key. Deselect. Delete the template layer.

Highlight Frame 1 layer. Select All. Float/Defloat. Copy and paste a paper of choice as a new layer. Selections/Invert. Hit the delete key. Deselect. Delete the template layer.

Highlight Ribbon 2 layer. Select All. Float/Defloat. Copy and paste a paper of choice as a new layer. Selections/Invert. Hit the delete key. Deselect. Delete the template layer.

Repeat the above step for Ribbon 1.

Highlight Circle Frame layer. Select All. Float/Defloat. Copy and paste a paper of choice as a new layer. Selections/Invert. Hit the delete key. Deselect. Delete the template layer.

Highlight Circle Back layer. Select All. Float/Defloat. Copy and paste a paper of choice as a new layer. Selections/Invert. Hit the delete key. Deselect. Delete the template layer.

Highlight Circle Frame layer again. Use your Magic Wand and click inside of it. Copy and paste a tube of choice below the frame layer. Move into position. Selection/Modify/Expand by 4. Selections/Invert. Hit the delete key.

Merge visible Circle Frame, Circle Back, and the tube layer.

Repeat the above steps for Frame 2 and 3.

Highlight Doodle 1 layer. Select All/Float/Defloat. Copy and paste a paper of choice Into Selection. Selections/Invert. Hit the delete key. Deselect. Delete the template layer.

Repeat the above step for Doodle 2 layer.
Add your embellishments. I used:
Grass 1: Resize 30%
Earthworm 2: Resize 30%
Watering Pot 2: Resize 30%
Frog 1: Resize 20% and 90%
Butterfly 1: 25% and 80%
Flowers 1 & 3: Resize 25%

Add your copyrights.

Add your name.

I gave mine an inner bevel:
Bevel: 5
Width: 7
Smoothness: 55
Depth: 16
Ambience: -27
Shininess: 45
Color: white
Angle: 135
Intensity: 31
Elevation: 88
Ok

Then I gave it a drop shadow
Vertical and Horizontal: 0
Opacity: 60
Blur: 6.89
Color: 390813
I repeated the drop shadow accept changed the color to
#000000

I hope you enjoyed this tutorial.

I’d love to see your results.
Email me!
Hugs,
Bev

One of Us

Clicking on the Image will enlarge to full view.

Supplies

1 tube of choice - I’m using the artwork of Jay Trembly which you can purchase here
Font of Choice - I’m using Alpha font provided in the kit
Weescotlass Mask 38 here
EyeCandy 3.1 - Glow (optional)
“Jasper Hale” a PTU scrap kit by Nicole Gregory of Simply Irresistible and can be purchased at Aussie Scrap Designs

This tutorial was written assuming you have working knowledge of PSP.
~♥~ Let’s get started ~♥~

Open up a blank 700 X 700 canvas. Flood fill white.

Copy and paste Frame 2 as a new layer. Resize 45%. Use your Magic Wand and click inside of both frames. Selections/Modify/Expand by 2.

Copy and paste a paper of choice below the frame. Selections/Invert. Hit the delete button. Deselect.

Use your Magic Wand and click inside of only one of the frames. Copy and paste your tube beneath the frame. Position it exactly where you’d like it to be.
Selections/Modify/Feather
Number of Pixels: 58
Ok
Selections/Invert
Tap the delete button until your image is feathered nicely within the frame. Deselect.

Duplicate/Mirror. Position exactly in the other frame.

Add your embellishments: I used:
Flower 3: Resize 40%
Flower 2: Resize 30%
Tags: Resize 50%. Free rotate left 90 degrees.
Ribbon Heart 2: 30%
Ribbon Heart 1: 30% and 90%
String Buttons: Resize 60%
Word Art 2: 40%
I added a glow:
EyeCandy 3.1/Glow
Width: 5
Opacity: 100
Opacity Dropoff: Thin
Color: #ca936a
Ok

Apply the Glow once more and then add a drop shadow.

Highlight your white canvas. New Raster Layer. Select All. Copy and paste a paper of choice Into Selection. Apply the mask. Merge Group.

New Raster Layer. Select All. Copy and paste a contrasting paper of choice Into Selection. Apply the mask. Merge Group. Resize 80%.

Add your copyrights.

Add your name. I used the Alpha font in the kit and made the button string appear as if it’s twined through it.

The first letter in the name I resized 70%. All other letters in the name I resized 50%.

I hope you enjoyed this tutorial.
I’d love to see your results.
Email me!
Hugs,Bev