Saturday, September 5, 2009

Witchy Poo...Boo!

Clicking on the image will enlarge to full view.

Supplies
1 tube of choice - I’m using the artwork of Michael Calandra which can be purchased here
Font of Choice - I’m using Toontime here
“I am Batty” is a PTU tagger size scrap kit created by Sticky Kisses Designs.
It can be purchased from her store Scrappin‘ Bratz.
You can visit Natasha’s blog here.
Thank you so much, Natasha, for this totally fab Halloween kit!
Boo!

This tutorial was written assuming you have a working knowledge of PSP.

~♥~ Let’s get started ~♥~

Open up a 700 X 700 transparent canvas.
Flood fill white.

Copy and paste Frame 4 as a new layer.
Resize 70%
Use your Magic Wand and click inside of it.
New Raster layer below the frame.
Copy and paste a paper of choice Into Selection.
DO NOT DESELECT

Copy and paste Haunted House below the frame.
Resize 50%

Copy and paste the Tree below the frame.
Move into position.
Tap the delete key.
Deselect.

Add your embellishments. I used:
Bat 2: Resize 40%
Flower 1: Resize 30%
Open the Bat Pack. Use your Freehand Selection tool to pick out bats to paste onto your image where you like.

Highlight your white canvas.
Copy and paste Mask 2 as a new layer.
Resize 80%

Add your copyrights.

Add your name.

Resize all layers 85%

I hope you enjoyed this tutorial.

I’d love to see your results and show it off in my Show Arena.
Email me!
Hugs,
Bev


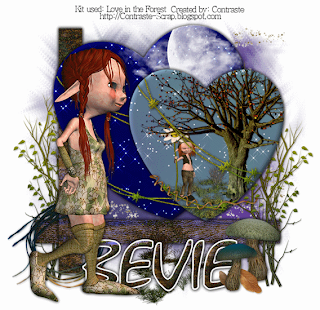
Love in the Forest

Clicking on the image will enlarge to full view

Supplies
Font of Choice - Xoxoxa here
Weescotlass Mask 249 here
My Template 19 here
DSB Flux - Bright Noise
Animation Shop - optional
“Love in the Forest” is a PTU tagger size scrap kit created by Mim of Contraste Scrap and can be purchased at Butterfly Blush Designs.
Thank you Mim for another amazing scrap kit!

This tutorial was written assuming you have a working knowledge of PSP.

~♥~ Let’s get started ~♥~

Open up my template.
Delete the merged layer.
Highlight the background layer.
Image/Canvas Size
700 x 700
Flood fill white.

Highlight the Vertical Rectangle layer.
Select All/Float/Defloat
Copy and paste a paper of choice as a new layer.
Selections/Invert
Tap the delete key.
Deselect.
Delete the template layer.

Repeat the above step with - Oh my word!
I just realized I named the vertical and horizontal layers wrong…lol!!
We all know Vertical is up and down.
Horizontal is across…. So….
As I was saying…(insert red face)….
Repeat the above step with what I named as the Horizontal layer.
Lol!!

Highlight Large Heart layer.
Select All/Float/Defloat
Copy and paste paper a paper of choice as a new layer.
Selections/Invert
Tap the delete key.

Copy and paste LF 71 as a new layer.
Move into position.
Tap the delete key.
Deselect.

Highlight the heart layer and give it a slight inner bevel:


Highlight Big Heart Barbed Wire.
Select All/Float/Defloat
Copy and paste paper a paper of choice as a new layer.
Selections/Invert
Tap the delete key.
Deselect.
Delete the template layer.
Give it the same slight inner bevel.

Duplicate twice for a total of 3 layers.
Rename them BHBW 1, 2, and 3

Highlight BHBW 1 and apply DSB Flux Bright Noise:


Repeat the above step accept for BHBW 2 hit the mix button twice, and for BHBW hit the mix button 3 times.

Close out BHBW 2 and 3.

Highlight Small Heart layer.
Select All/Float/Defloat
Copy and paste a paper of choice as a new layer.
Selections/Invert
Tap the delete key.

Copy and paste LF 50 as a new layer.
Resize 60%
Move into position.
Tap the delete key.

Copy and paste LF3 as a new layer.
Resize 30%
Move into position.
Tap the delete key.
Deselect.
Delete the template layer.

Highlight the small heart.
Give it the same inner bevel.

Highlight Small Heart Barbed Wire.
Select All/Float/Defloat
Copy and paste paper a paper of choice as a new layer.
Selections/Invert
Tap the delete key.
Deselect.
Delete the template layer.
Give it the same slight inner bevel.

Duplicate twice for a total of 3 layers.
Rename them SHBW 1, 2, and 3
Apply the DSB Flux in the same manner as you did for the BHBW layers.
Close out SHBW 2 and 3.

Add your embellishments. I used:
LF 16: Resize 70%
LF 35: Resize 60%
LF 41
LF6: Resize 25%
LF11: Resize 50%
LF5
LF27: Resize 60%
LF28: Resize 50%
LF1
LF53

Highlight your white canvas.
New Raster layer.
Select All
Copy and paste a paper of choice Into Selection.
Deselect.
Apply the mask.
Merge Group.

Add your copyrights if you used a PTU tube.
If not, please give credit to the designer of the kit.

Add your name.

Crop your Image.

Resize all layers 85%

If you’re not going to animate then save your tag.

Time to Animate:
Copy Merge and carry into Animation Shop.
Edit/Paste as New animation.

Back into PSP.
Close out BHBW 1 and open BHBW 2
Close out SBHW 1 and open SHBW 2
Copy Merge and carry into AS
Edit/Paste/After Current Frame

Back into PSP.
Close out BHBW 2 and open BHBW 3
Close out SBHW 2 and open SHBW 3

View your animation.
If you’re happy then save and show off your awesome work!!

I hope you enjoyed this tutorial.
I’d love to see your results and show it off in my Show Arena.
Email me!
Hugs,
Bev


Fright Night

Clicking on the image will enlarge to full view.

Supplies
1 tube of choice - I’m using the artwork of Michael Calandra which can be purchased here
Font of Choice - I’m using Grunt Reaper here
Missy Template 184 here
Creative Desires Mask 31 here.
If you know who this mask belongs to, please email me so that I can give proper credit. Thank you!
“Nightmare” is a PTU full size scrap kit created by KatNKDA. It can be purchased from her store NK Art Shop. You can visit Kat’s blog here.
Kat, thank you for such a spook-tacular kit!
Boo! Eek!

This tutorial was written assuming you have a working knowledge of PSP.

~♥~ Let’s get started ~♥~

Open up the template.
Resize all layers 120%.
Image/Canvas Size
700 X 700
Highlight the white background and flood fill white.
Delete “By Missy” layer.

Highlight Rectangel 1.
Select All/Float/Defloat
Copy and paste a paper of choice as a new layer, resizing to your liking.
Selections/Invert
Tap the delete key.
Deselect.
Delete the template layer.

Highlight Thin Rectangle 2.
Repeat the above step.

Repeat the above step with Thin Rectangle 1.

Highlight the Circle Layer.
Select All/Float/Defloat
Flood fill with the color black.
DO NOT DESELECT.

Copy and paste the Spider Web Overlay as a new layer.
Resize 50%
Selections/Invert
Tap the delete key.

Copy and paste your tube as a new layer.
Tap the delete key.
Deselect.

Copy and paste Element 5 as a new layer.
Resize 35%
Position behind the circle.
Layer/Duplicate/Flip
Move into position.

Add your embellishments. I used:
Element 23: Resize 25% and 70%
Element 25: Resize 25%
Element 12: Resize 25%
Element 22: Resize 20% and 70%

Highlight your white canvas.
New Raster layer.
Copy and paste a paper of choice Into Selection.
Deselect.
Apply the mask.
Merge Group.

Type out the words “Fright” and “Night” and move them into position.

Add your copyrights.

Add your name.

Resize all layers 85%

I hope you enjoyed this tutorial.
I’d love to see your results and show it off in my Show Arena.
Email me!
Hugs,
Bev

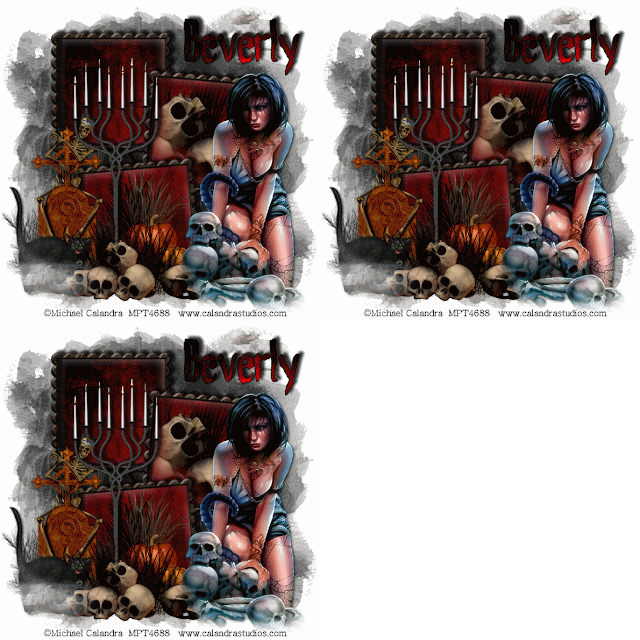
Graveyard Shift

Clicking on the image will enlarge to full view
and show the animation.

Supplies
1 tube of choice - I’m using the artwork of Michael Calandra which you can purchase here
Font of Choice - I’m using Haunt here
Weescotlass Mask 254 here
Greg’s Factory Output Vol. II - Pool Shadow
Eyecandy 5: Nature - Fire
Animation Shop
“Halloween Night” is a PTU tagger size scrap kit created by Seachell’s Scrapz and can be purchased at Exquisite Scraps. You can visit Seachell’s blog here.
Thank you Seachell for a stunning Halloween kit!

This tutorial was written assuming you have a working knowledge of PSP.

~♥~ Let’s get started ~♥~

Open up a 700 X 700 transparent image.
Flood Fill white.

First we’ll make the layer for the mask.
New Raster layer.
Select All.
Copy and paste a paper of choice Into Selection.
Deselect.
Copy and paste Elem 18 as a new layer.
Resize 90% - give it a glowing drop shadow.
Copy and paste Elem 11
Resize 60% - move to upper right corner.
Close out your white canvas.
Merge Visible.
Apply the mask.
Merge Group.

Copy and paste Element 64 as a new layer.
Resize 70%.
Click inside of each square with your Magic Wand.
New Layer below the frame.
Copy and paste a paper of choice Into Selection.
DO NOT DESELECT.

New Raster layer just below the frame.
Effects/3D Effects/Cutout


Repeat the above step accept change the Horizontal and Vertical numbers to -10.
Deselect.

Use your Magic Wand and click inside the middle frame.
Copy and paste Element 26 as a new layer.
Resize 70%
Move this beneath the Cutout Layers.
Selections/Modify/Feather
Number of Pixels: 53
Selections/Invert
Tap the delete key until you like the feathered look.
Deselect.

Copy and paste Element 27 as a new layer.
Resize 50%. Move below the bottom frame, below the cutout layers.
Free rotate left 3 degrees
Click inside the bottom frame with your Magic Wand.
Selections/Modify/Expand by 3.
Tap the delete key.
Deselect.

Add your embellishments. I used:
Elem 10: Resize 50%
Elem 21: Resize 35%
Elem 26: Resize 50%
Elem 45: Resize 85%
Elem 60: Resize 70%

Copy and paste your tube as a new layer.

Highlight Element 45 (the candles)
Duplicate twice for a total of 3 layers.
Rename them Candle 1, 2, and 3.

Using your Freehand Selection Tool, zoom in and outline each candle tip where you want the flame.
Highlight Candle 1
Apply Eyecandy 5: Nature - Fire:


Highlight Candle 2 and apply the fire again accept hit the random seed button once.
Repeat the above with Candle 3.
Deselect.

Close out Candle layers 2 & 3.

Add your copyrights.

Add your name.
Color Pallet:
Foreground: Black
Background: Set to Patten/Paper of choice from kit.
Stroke: 1.5
Type out your name.
Select All/Float/Defloat
Selections/Modify/Contract by 2
Apply Greg’s Factory Output Vol. II
Default settings.
Deselect.

Resize all layers 85%.

Time to Animate:
Carry into Animation Shop.
Edit/Paste/As New animation.

Back into PSP.
Close out Candle 1.
Open Candle 2.
Copy Merge
Carry into AS
Edit/Paste/After Current Frame

Back into PSP.
Close out Candle 2.
Open Candle 3.
Copy Merge
Carry into AS
Edit/Paste/After Current Frame

Ctrl + A to highlight all the frames.
Animation/Frame Properties
Change the number to 20

View your animation.
If you’re happy then save.

I hope you enjoyed this tutorial.
I’d love to see your results and show it off in my Show Arena.
Email me!
Hugs,
Bev

Friday, September 4, 2009

Diamond Showcase

Clicking on the image will enlarge to full view.

Supplies
5 tubes of choice - I’m using the artwork of Barbara Jensen which you can purchase here
Font of Choice - I’m using Impact (came with my pc) and Al Sandra here
Weescotlass Mask 84 here
My Template #26 here
Xerox - Porcelain (optional)
“Opposites Attract” is a PTU tagger size scrap kit created by Julie of Bits ’n Bobs and can be purchased at AMI. You can visit Julie’s blog here.
Thank you Julie for such a classy kit!

This tutorial was written assuming you have a working knowledge of PSP.

~♥~ Let’s get started ~♥~

Open up my template.
Delete the Merged and Raster 1 layer.
Highlight the Background layer.
Image/Canvas size
700 X 700
Flood fill white.

Highlight Large Square layer.
Select All/Float/Defloat
New Raster layer.
Copy and paste a paper of choice Into Selection.
Deselect.
Delete the template layer.

Repeat the above step with the Small Square layer accept don’t deselect.
Copy and paste your tube as a new layer.
Image/Resize much larger.
Selections/Invert
Tap the delete key.
Deselect.
Change the Properties to Luminance Legacy.
Lower the opacity to about 32.
Delete the template layer.

Highlight Film Strip Back.
Select All/Float/Defloat
Copy and paste a paper of choice Into Selection
Deselect.

Highlight the Film Strip layer.
Using your Magic Wand, click inside the top square.
Selections/Modify/Expand by 2.
Copy and paste a tube as a new layer beneath the Film Strip.
Selections/Invert
Tap the delete key.
Deselect.

Repeat the above step with the other 3 remaining squares in the film strip.
Once you’ve done that, merge visible all 4 tubes.
Apply Xerox - Porcelain
Default settings.

Add your embellishments. I used:
Drape 2Fastener 4: Resize 25%
Brad 2: Resize 25%
Tag 1: Resize 50%
Branch 3
Feather 1: Resize 50%
Feather 2: Resize 40%
Sparkle 1: Resize 50%

Copy and paste your tube as a new layer.
Highlight your white background.
New Raster Layer.
Copy and paste a paper of choice Into Selection.
Deselect.
Apply the mask.
Merge group.

Add your copyrights.

Add your name.
In your color pallet:
Foreground and Background: White
Using the Impact Font, type out your name.
Select All/Float/Defloat
Selections/Modify/Contract by 3
Flood fill with the color black.
Change your font to Al Sandra
Foreground off/Background set to white
Type out your name again.

Resize all layers 90%

I hope you enjoyed this tutorial.
I’d love to see your results and show it off in my Show Arena.
Email me!
Hugs,
Bev


Thursday, September 3, 2009

Autumn's Beauty

Clicking on the image will enlarge to full view.

Supplies
1 tube of choice - I’m using the artwork of Jennifer Janesko which you can purchase here
Font of Choice - I’m using Annabelle here
Tramages - Tow the Line
“Fall Giggles” is a PTU tagger size scrap kit created by Katelynn’s Designs and can be purchased at Scraps with Attitude.
Thank you Chris for such a cute kit!

This tutorial was written assuming you have a working knowledge of PSP.

~♥~ Let’s get started ~♥~

Open up a 700 X 700 transparent image.
Flood fill white.

Copy and paste Frame 12 as a new layer.
Click inside with your Magic Wand
Selections/Modify/Expand by 3
Copy and paste a paper of choice below the frame.
Selections/Invert
Tap the delete key.
DO NOT DESELECT

Copy and paste your tube below the frame.
Tap the delete key.
Deselect.

Add your embellishments. I used:
Butterfly 12: Resize 40%
Butterfly 13: Resize 35%
Bow 21: Resize 50%
Leaves 23 & 25: Resize 50%

Close out your white canvas.
Merge Visible.
Reopen the white canvas.
Highlight the Original layer.
Adjust/Blur/Gaussian Blur
Radius: 20
Ok

Apply Tramages - Tow the Line
Default settings

Crop your image.

Add your copyrights.

Add your name.

I hope you enjoyed this tutorial.
I’d love to see your results and show it off in my Show Arena.
Email me!
Hugs,
Bev

Tuesday, September 1, 2009

Beginning Fall

Clicking on the image will enlarge to full view.

Supplies
Font of Choice - Whutever here
Weescotlass Mask 39 here
My Template 32 here
“Beginning Fall” is a PTU tagger size scrap kit created by Mim of Contraste Scrap and can be purchased at Butterfly Blush Designs.
Thank you Mim for an incredibly precious kit!

This tutorial was written assuming you have a working knowledge of PSP.

~♥~ Let’s get started ~♥~

Open up my template.
Delete the copyright and Raster 3 layer.
Highlight the background layer.
Image/Canvas Size
700 x 700
Flood fill white.

We’re going to make the layer for the mask first.
Close out Diamond 1 & 2 layers, and also the frame layer.
New Raster Layer.
Copy and paste a paper of choice Into Selection.
Deselect.

Copy and paste E14 (the fence) as a new layer.
Position it to the center right side of your canvas.
Duplicate/Mirror
Don’t worry that there’s a gap in between the fences.

Copy and paste E4 as a new layer.
Position it at the bottom of the fence.

Copy and paste E13 as a new layer.
Resize 80%
Position in the top left corner of your canvas.

Copy and paste E32 as a new layer.
Resize 30%
Position behind the fence on the right side.

Close out your white canvas.
Merge Visible.
Reopen all your layers - even the template layers.
Be sure the layer you just made is highlighted.
Apply the mask.
Highlight the Mask layer itself.
Resize 120%.
Merge Group.

Highlight Diamond 1 layer.
Select All/Float/Defloat
New Raster layer.
Copy and paste a paper of choice Into Selection.
Deselect.
Change the Properties to Overlay.
Merge Down.

Repeat with Diamond 2 layer.

Highlight the Frame layer.
Select All/Float/Defloat
New Raster Layer.
Flood fill with a complimentary color.
Selections/Invert
Tap the delete button.
Deselect.
Change the Properties to Overlay.
Merge Down.

Using your Free Hand Selection Tool, outline the frame.
Copy and paste a paper of choice below the frame.
Selections/Invert
Tap the delete button.
Deselect.

Copy and paste E35 as a new layer.
Get rid of any that overhangs the frame near the bottom.

Add your embellishments. I used:
E19 & E20: Resize 30%
E6: Resize 40%
E26: Resize 40%
E15: Resize 50% Duplicate/Resize 80%

Add your copyrights.
If you only used the scrap kit and no PTU artist tube then please give credit to the designer of the kit.

Add your name.
What I did with mine is this:
In your color pallet:
Foreground: #4c3a21
Background: Set on Patter with Paper 4 from the kit
Stroke set on 2.
Type out your name.
Change it to a Raster layer.
Select All/Float/Defloat
Selections/Modify/Contract by 2
Copy and paste E5 as a new layer, positioning it over your name.
Selections/Invert
Tap the delete key.
Change the Properties to Overlay.
Deselect.
Merge Down.

Give it a slight bevel:


Resize all layers 85%

I hope you enjoyed this tutorial.
I’d love to see your results and show it off in my Show Arena.
Email me!
Hugs,
Bev


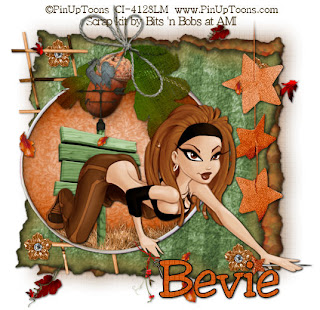
The Magic of Autumn

Clicking on the image will enlarge to full view
and show the animation.

Supplies
1 tube of choice - I’m using the artwork of PinUpToons which you can purchase here
Font of Choice - I’m using Jester here
Penta.com - Dot and Cross
Alien Skin Xenofex 2 - Burnt Edges
DSB Flux - Bright Noise - Optional
Animation Shop - Optional
“Feels like Autumn” is a PTU tagger size scrap kit created by Julie of Bits ’n Bobs and can be purchased at AMI. You can visit Julie’s blog here.
Thank you Julie for a festive kit!

This tutorial was written assuming you have a working knowledge of PSP.

~♥~ Let’s get started ~♥~

Open up a 700 X 700 transparent image.
Flood fill white.

Copy and paste Frame 3 as a new layer.
Move it over to the left of your canvas.
Click inside with your Magic Wand
Selections/Modify/Expand by 3
Copy and paste a paper of choice below the frame.
DO NOT DESELECT

Copy and paste Sign 4 as a new layer below the frame.
If any over hangs the frame,
Selections/Invert
Tap the delete key.

Copy and paste Grass 2 as a new layer below the frame.
Resize 50% - duplicate as many times as you like and arrange at the base of the sign. Merge visible all grass layers.
If you didn’t need to Select/Invert with Sign 4, then go ahead -
Selections/Invert
Tap the delete key.

Copy and paste your tube as a new layer.
Deselect.

Close out your white canvas.
Merge Visible.
Reopen the white canvas.

Highlight your white canvas.
New Raster Layer.
Select All
Copy and paste a paper of choice Into Selection.
Apply Xenofex 2 - Burnt Edges - default settings.

Repeat the above step with another paper of choice,
And then free rotate right 5 degrees.

Duplicate the bottom paper.
On the original -
Adjust/Blur/Gaussian blur
Radius: 20
Apply Penta.come - Dot & Cross - default settings.

Add your embellishments. I used:
Pin 1: Resize 60%
Element 1: Resize 25%
Brad 2: Resize 50%
Ladder 2
Stars 4
I opened up Element 3 and used the Selection Tool to copy and paste different leaves and splashed some on my canvas.
Add your copyrights.

Add your name.

Resize all layers 85%.

If you don’t want to animate then save your tag.
If you do want to animate:

Highlight your stars layer.
Using your Freehand Selection Tool, outline all 3 stars.
Duplicate twice for a total of three layers.
Rename Star 1, 2, and 3.

Highlight Star 1 and apply DSB Flux - Bright Noise
Intensity: 23
Mix Checked
OK

Highlight Star 2 and apply Bright Noise again accept hit the mix button twice.

Highlight Star 3 and apply Bright Noise again accept hit the mix button three times.

Close out Star layers 2 & 3.
Copy Merge and carry into Animation Shop
Edit/Paste/As New Animation.

Back into PSP.
Close out Star layer 1.
Open Star layer 2.
Copy Merge and carry into AS
Edit/Paste/After Current Frame

Back into PSP.
Close out Star layer 2.
Open Star layer 3.
Copy Merge and carry into AS
Edit/Paste/After Current Frame

View your animation.
If you’re happy then save.

I hope you enjoyed this tutorial.
I’d love to see your results and show it off in my Show Arena.
Email me!
Hugs,
Bev


Welcome Autumn


Clicking on the image will enlarge to full view.

Supplies
1 tube of choice - I’m using the artwork of Jennifer Janesko which you can purchase here
Font of Choice - I’m using Annabelle here
Dezings by Ali Template 82 here
Xenofex 1.0 - Shower Door
“Feels like Autumn” is a PTU tagger size scrap kit created by Julie of Bits ’n Bobs and can be purchased at AMI. You can visit Julie’s blog here.
Thank you Julie for a fantabulous kit!

This tutorial was written assuming you have a working knowledge of PSP.

~♥~ Let’s get started ~♥~

Open up the tempalte.
Shift + D.
Close out the original.
Delete the DBA Layer.
New Raster layer.
Send to bottom.
Image/Canvas Size
650 X 550
Flood fill white.

Highlight Rectangle 1 layer.
Select All/Float/Defloat
Copy and pate a paper of choice as a new layer.
Selections/Invert
Tap the delete key.
Deselect.
Delete the template layer.

Repeat with remaining layers.

Highlight the frame layer.
Use your Magic Wand and click inside of the frame.
Selections/Modify/Expand by 3.
Copy and paste your tube as a new layer.
Selections/Invert
Tap the delete key.
Deselect.

Add your embellishments. I used:
Bow 1: Resize 40%
Pin 3: Resize 80% Free rotate right 15 degrees
Parcel 4: Resize 70% Mirror
Brad 4: Resize 80%
Brad 1: 80% & 90%
I opened up Element 3 and used the Selection Tool to copy and paste different leaves and splashed some on my canvas.

Crop your image but be sure to leave play room on the top and bottom. I found I didn’t need to take anything off the sides.
Close out your white canvas.
Merge Visible.
Duplicate
On the Original Layer -Adjust/Blur/Guassian blur
Radius: 20
Apply Xenofex 1.0 - Shower door using the default settings.

Now we’re going to write Welcome Autumn at the top of the circle frame.
Click on your Ellipse Tool - circle
Line Width: 2
Style: solid
Make a circle that’s just a little bit bigger than your frame.
Use your Mover tool to position the circle over the frame circle.
If it’s too small or too large just click on Image/Resize
Move your curser along the circle until you see a Rocking A
Click your mouse.
A Text Box will open up.
Type in Welcome Autumn or whatever you like.
Apply
In your Layers pallet Click on the + sign beside your writing
Click on the eye beside the New Ellipse layer
Highlight the Vector Layer
Right click
Convert to Raster Layer.

Add your copyrights.

Add your name.

Resize all layers 90%

I hope you enjoyed this tutorial.

I’d love to see your results and show it off in my Show Arena.
Email me!
Hugs,
Bev

Monday, August 31, 2009

Down Will Fall Angel

Clicking on the image will enlarge to full view.

Supplies
1 tube of choice - I’m using the artwork of Michael Calandra which you can purchase here
Font of Choice - Abaddon here
Weescotlass Mask 297 here
Eyecandy 5 - Nature - Fire
Animation Shop
“Lil Miss Witch” is a PTU tagger size scrap kit created by Susan of TootyPup Scraps and can be purchased at Dazzling Scraps.
Thank you Susan for such a Spooktacular kit!
Boo!

This tutorial was written assuming you have a working knowledge of PSP.

~♥~ Let’s get started ~♥~

Open up a 700 X 700 transparent image.
Flood fill white.

Copy and paste Frame A as a new layer.
Resize 80%
Use your Magic Wand and click inside.
Selections/Modify/Expand by 6

Copy and paste a paper of choice below the frame.
Selections/Invert
Tap the delete button.
DO NOT DESELECT

Copy and paste your tube below the frame.
Enlarge to your liking.
Selections/Modify/Feather
Number of Pixels: 53
Tap the delete key until you like the feathered look.
Deselect.
Reduce the opacity to about 26.

Copy and paste Chain 4 as a new layer.
Resize 35%
Center it on the top of the frame.
Erase any that overhangs on each side.
Duplciate
Move to lower part of frame.
Duplicate/Free rotate 90 degrees right.
Position on right side of frame.
Duplicate/Mirror
Position on left side of frame.
Copy and paste your tube as a new layer.

Add your embellishments. I used:
Leaves 2
Bat 2: Resize 50%
Key Chain 3: Resize 35%
Candle 1: Resize 35%
Spider 2: Resize 50%

Highlight your candle layer.
Zoom in and using your Free Hand Selection Tool outline the frames on the candle.
Duplicate twice for a total of 3 candle layers.
Rename Candle 1, 2, and 3.

Highlight Candle 1 and apply Eyecandy 5 Nature - Fire


Highlight Candle 2 layer.
Apply Eyecandy 5 Nature again accept this time hit the random seed button once.

Repeat the above step with Candle 3 layer.
Deselect.

Close out Candle 2 & 3 layers.

Add your copyrights.

Add your name.

Resize all layers 85%

Time to Animate:
Copy Merge and carry into Animation Shop.
Edit/Paste/As New Animation

Back into PSP.
Close out Candle 1 layer.
Open up Candle 2 layer.
Copy Merge.

Carry into AS
Edit/Paste/After Current Frame.

Back into PSP.
Close out Candle 2 layer.
Open up Candle 3 layer.
Copy Merge.

Carry into AS
Edit/Paste/After Current Frame.

Animation/Frame Properties
Change the display time to 20

View your animation.
If you’re happy then save and show off your awesome work!!

I hope you enjoyed this tutorial.
I’d love to see your results and show it off in my Show Arena.
Email me!
Hugs,
Bev