Saturday, December 5, 2009

Frozen Ice Pop

Clicking on the image will enlarge to full view.

Supplies
1 tube of choice - I used the wonderful artwork of Dean Yeagle here
Font of choice - I used Toontime here
Monti Circle Mask here
“White Christmas” is a PTU tagger size scrap kit created by Julie of Bits ’n Bobs and can be purchased at AMI. You can visit Julie’s blog here.
Thank you Julie for a very festive kit!

This tutorial was written assuming you have a working knowledge of PSP.

~♥~ Let’s get started ~♥~
Open up a 700 X 700 transparent image.
Flood fill white.
Copy and paste Element 4 as a new layer.
Use your Magic Wand and click inside of it.
Selections/Modify/Expand by 2.
New Raster layer below the frame.
Copy and paste a paper of choice Into Selection.
Deselect.
Copy and paste your tube as a new layer.
Add your embellishments. I used:
Element 2: Resize 50% (for place behind the frame)
Element 2: Resize 30% (for placing in the flowers) Free rotate left 40 degrees. Duplicate/Mirror as you like.
Element 55
Element 32: Resize 50%. Duplicate/Resize 80%
Element 7: Resize 40%. Duplicate/resize smaller to your liking
Element 20
Element 48: Free rotate Left 37 degrees

Highlight your white background.
New Raster layer.
Select All.
Copy and paste a paper of choice Into Selection.
Deselect.
Apply the mask.
Merge Group.

Copy and paste Element 40 as a new layer.
Move into position.
Apply the mask.
Merge Group.
Add your copyrights.

Add your name.
Give it a slight inner bevel:
Adjust/Add Remove Noise/Add Noise
Gaussinan and Monochrome checked
Noise 25%
OK
Resize all layers 80%.
I hope you enjoyed this tutorial.
I’d love to see your results.
Email me!
Hugs,
Bev

Gypsy


Clicking on the image will enlarge to full view.

Supplies
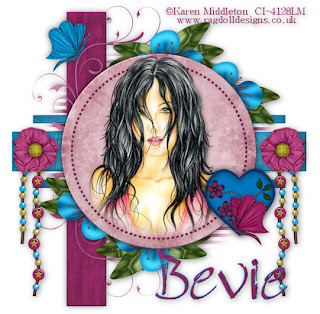
1 tube of choice - I used the beautiful artwork of Karen Middleton here
Font of choice - I used Bambino here
Babes Designz Template 34 here
“Gypsy” is a PTU tagger size scrap kit created by Rieneke and can be purchased at Twilight Scraps. You can visit her blog here.
Thank you Rieneke for such an amazing kit filled with such bright, rich colors!

This tutorial was written assuming you have a working knowledge of PSP.
~♥~ Let’s get started ~♥~
Open up the template.
Delete the Credit layer.
Highlight the Circle layer.
Select All/Float/Defloat
New Raster layer.
Copy and paste a paper of choice Into Selection.
Deselect.
Delete the template layer.
Give it a slight inner bevel:


Copy and paste your tube as a new layer.
(Duplicate if you want any part of your tube at all to go beyond the dot circle layer. Close the duplicated tube layer out.)
Selections/Modify/Feather
Number of Pixels:
53
OK
Selections/Invert
Tap the delete key until you have a nice feathered look.
Deselect.

If you duplicated your tube, open it up.
Use your erase tool to erase all but the portion that you want to go beyond the dot circle.

Highlight Dot Circle layer.
Select All/Float/Defloat.
New Raster Layer.
Copy and paste a paper of choice Into Selection.
Deselect.
Delete the template layer.
Give it the same inner bevel.

Repeat the above step with Black Bars layer, Bar 1 & 2 layers.

Highlight Doodles layer.
Select All/Float/Defloat
New Raster layer.
Flood fill with a gradient of your choice.
Delete the template layer.
Give it the same inner bevel.

Highlight the Transmission layer.
Select All/Float/Defloat
Copy and paste a paper of choice as a new layer.
Selections/Invert
Tap the delete key.
Delete the template layer.

Copy and paste Fabric Flower 1 as a new layer.
Resize 25% and 75%
Duplicate.
Move each of the flowers into position over the small heart templates.
Delete the template layer.

Copy and paste Felt Heart as a new layer.
Resize 25% and 85%
Position over the Large Heart Template.
Delete the template.

Add your embellishments. I used:
Arrangement 2: Resize 40% - erase the bottom of the step and one of flowers that overlaps one of the paper layers where the fabric flower is.
Duplicate/Flip/Mirror.
Butterfly 3: Resize 50%. Mirror.
Butterfly 4
String 3: Resize 40%

Add your copyrights.

Add your name.
Give it the same inner bevel.
Crop your image.
I hope you enjoyed this tutorial.
I’d love to see your results.
Email me!
Hugs,
Bev

Friday, December 4, 2009

Denim Diva

Clicking on the image will enlarge to full view.

Supplies
1 tube of choice - I used the wonderful artwork of Elias Chatzoudis here
Font of choice - I used Ferro Rosso here
Weescotlass Mask 47 here
“Denim Diva” is a PTU tagger size scrap kit created by Kat of Katz Scrapz and can be purchased at Lollipops n Gumdrops. You can visit Kat’s blog here.
Thank you Kat for an amazing kit!

This tutorial was written assuming you have a working knowledge of PSP.

~♥~ Let’s get started ~♥~

Open up a 700 X 700 transparent image.
Flood fill white.
Copy and paste Jean Pocket as a new layer.
Resize 70%
Select All/Float Defloat
Copy and paste a paper of choice as a new layer.
Resize 80%
Selections/Invert
Tap the delete key.
Deselect.
Copy and paste your tube as a new layer.
Move into the exact position you want it.
(If you want to see any part of your tube overhang the pocket - in my tag I have the top of the head that overhangs - then duplicate your tube)
If you duplicated your tube, close out the duplicate.
Highlight your tube.
Merge down.
Your Paper and tube should now be merged and on one layer.

Highlight the Jean Pocket layer.
Select All/Float/Defloat
Selections/Modify/Feather
Number of Pixels:
53
Ok
Selections/Invert
Tap the delete key until you have a nice feathered look.
Deselect.

Open up the copy of the tube and erase all but the part that overhangs the pocket.
Close out your white background.
Merge visible.
Reopen your white background.

Copy and paste Blue Lily as a new layer beneath the merged layer.
Move into position up near the top left corner.
Duplicate/Mirror/Flip
Move into position near the bottom right of the pocket.

Add your embellishments. I used:
Blue Brand: Resize 25% and 50%
Blue Lilly: Resize 40%
Blue Flower: Resize 40%
Light Blue Flower: Reisze 25% and 75%
Butterfly 2: Resize 80% Free rotate right 25 degrees
Butterfly 1: Resize 80% Free rotate left 25 degrees.

Highlight your white background.
New Raster layer.
Select All.
Copy and paste a paper of choice Into Selection.
Deselect.
Apply the mask.
Merge Group.
Add your copyrights.

Add your name.
Give it a slight inner bevel:

Resize all layers 85%.

I hope you enjoyed this tutorial.
I’d love to see your results.
Email me!
Hugs,
Bev

Thursday, December 3, 2009

A Winter Fairytale

Clicking on the above image will enlarge to full view.
The image below shows the animation

Supplies
1 tube of choice - I used the beautiful artwork of Cane Hoyer here
Font of choice - I used Oh Lara - I’m sorry, I can’t find a link
Weescotlass Mask 35 here
Designz by Ali Template 159 here
Eyecandy 4 Impact: Glass
Twinks which I’ve supplied here
Animation Shop
“Winter Fairytale” is a PTU tagger size scrap kit created by Gina of Gina’s Gems Scraps and can be purchased at Butterfly Blush Designs. You can visit her blog here.

This tutorial was written assuming you have a working knowledge of PSP.

~♥~ Let’s get started ~♥~
Open up the template.
Delete the credit layer.
Resize all layers 80%
Image/Canvas size 700 X 600
New Raster layer.
Send to bottom.
Flood fill white.

Highlight Copy of Raster 6 layer.
Merge Down.
Circle templates should be on one layer now.
Select All/Float/Defloat
Copy and paste a paper of choice as a new layer.
Selections/Invert
Tap the delete key.
Deselect.
Delete the template layer.

Apply Eyecandy 5 Impace - Glass


Highlight Raster 3
Select All/Float/Defloat
New Raster layer.
Flood fill with a light color.
Deselect.
Delete the template layer.

Highlight Raster 4 layer.
Repeat the above step accept flood fill with a dark color.

Highlight Raster 1 layer.
Select All/Float/Defloat
Copy and paste a paper of choice as a new layer.
Resize 83%
Selections/Invert
Tap the delete key.
Delete the template layer.
DO NOT DESELECT

Copy and paste Christmas Tree 1 as a new layer
Resize 40%
Move into position
Tap the delete key.

Copy and paste Christmas Tree 2 as a new layer.
Resize 35%
Move into position
Tap the delete key.

Copy and paste Star Bling 1 as a new layer.
Resize 60%
Tap the delete key.
Deselect.

Highlight Raster 2 layer.
Select All/Float/Defloat
Copy and paste a paper of choice as a new layer.
Resize 83%
Selections/Invert
Tap the delete key.
Deselect.
Delete the template layer.

Highlight Raster 5 layer.
Select All/Float/Defloat
New Raster Layer.
Copy and paste a paper of choice Into Selection.
Deselect.
Delete the template layer.

Copy and paste your tube as a new layer.

Add your embellishments. I used:
Blossom 1: Resize 30%
Blossom 2: Resize 25%
Blossom 3: Resize 25% and 80%
Butterfly 2: Resize 25% Free rotate left 20 degrees
Butterfly 3: Resize 25% and 80% Free rotate right 20 degrees
Bauble Deco: Resize 70%
Leaves 1: Resize 50% Free rotate left 45 degrees
Shiny Bow 1: Resize 25%
Various snowflakes: Resize 40% and smaller

Highlight your white background.
New Raster layer.
Select All.
Copy and paste a paper of choice Into Selection.
Deselect.
Apply the mask.
Merge Group.
Use your Pick Tool to pull it out just a bit.
Duplicate
Merge Down.

Add your copyrights.
Add your name.
Give it a slight inner bevel:


Resize all layers 85%.

~Time to Animate~

Copy Merge and carry into Animation Shop.
Edit/Paste/As New Animation

Ctl + L and tap the L key until you have 16 frames.
Open up the twinks that I’ve supplied in AS.
Ctl + A to highlight all
Edit/Copy

Make your tag frames active.
Ctl + A
Ctl + E and place the twinks where you like.

View your animation.
If you’re happy then save.

I hope you enjoyed this tutorial.
I’d love to see your results.
Email me!
Hugs,
Bev

Wednesday, December 2, 2009

Cold Winter's Evening

Clicking on the image will enlarge to full view.

Supplies
1 tube of choice - I used the beautiful artwork of KatNKDA here
Font of choice - I used Odstemplik here
Weescotlass Mask 133 here
Eyecandy 4 Impact: Gradient Glow
“Heartland Holiday” is a PTU full size scrap kit created by Kat of KatNKDA and can be purchased at her store here.You can visit her blog here.
Thank you Kat for an amazing festive kit!

This tutorial was written assuming you have a working knowledge of PSP.

~♥~ Let’s get started ~♥~

Open up a 700 x 700 transparent image.
Flood fill white.

Copy and paste Elem. 48 as a new layer.
Resize 25% and 65%

Use your Magic Wand and click inside each of the squares.
Selections/Modify/Expand by 6
New Raster layer below the frame.
Copy and paste Paper 11 Into Selection.
DO NOT DESELECT.

Copy and paste Elem. 28 as a new layer below the frame.
Resize 60%
Move into position
Tap the delete key.
Deselect
Copy and paste Elem. 1 as a new layer.
Resize 25%

Copy and paste Elem. 4 as a new layer.
Resize 25% and 25%
Free rotate Right 70 degrees.
Move the branch into position. Use your Eraser Tool on any that overhangs.
Duplicate/Mirror/and or Flip as you like.

Close out your white background.
Merge Visible.
Reopen your white Background.
Move the merged window up a bit.

Add your embellishments. I used:
Elem 27: Resize 25% Free rotate Right 20 degrees
Elem 32: Resize 25% and 50%
Elem 11: Resize 45%
Elem 20: Resize 25%
Elem 11: Resize 25%
Elem: 4: Resize 25%, 25%, and 80% Free rotate Right 70 degrees
Elem 40: Resize 25% Free rotate Left 70 degrees
Elem 39: Resize 25% Free rotate Right 45 degrees

Highlight your white background.
New Raster layer.
Select All.
Copy and paste a paper of choice Into Selection.
Deselect.
Apply the mask.
Merge Group.

Add your copyrights.

Add your name.
Give it a slight inner bevel:


Apply Eyecandy 5 Impact: Gradient Glow

I used the string of lights element and made it appear as if it were strung through my name.

Resize all layers 80%.

I hope you enjoyed this tutorial.
I’d love to see your results.
Email me!
Hugs,
Bev

Tribal

Clicking on the image will enlarge to full view.

Supplies
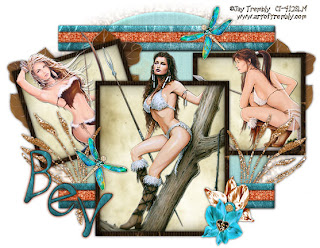
3 tubes of choice - I used the beautiful artwork of Jay Trembly here
Font of choice - I used Wesley here
Monti Circular Mask here
Dezigns by Ali Template 18 here
Filters Unlimited 2.0 - Aged Film - Optional
“Dragonfly” is a PTU tagger size scrap kit created by Kat of KatNKDA and can be purchased at her store here. You can visit her blog here.

This tutorial was written assuming you have a working knowledge of PSP.

~♥~ Let’s get started ~♥~
Open up the template.
Delete the Credit layer.
New Raster layer.
Flood fill white.
Send to bottom.

Highlight Large Circle layer.
Select All/Float/Defloat
New Raster layer.
Copy and paste a paper of choice Into Selection.
Deselect.
Delete the template layer.
Give it a slight inner bevel:
Apply Filters Unlimited 2:
Special Effects/Aged Film
Default settings

Highlight Rectangle 2 layer.
Merge Down.
Rectangle 1 and 2 layers should be on one merged layer now.

Select All/Float/Defloat
Copy and paste a paper of choice as a new layer.
Selections/Invert
Tap the delete key.
Deselect.
Delete the template layer.
Give it a slight inner bevel:


Copy and paste Element 2 as a new layer.
Resize 40%.
Duplicate - move it over to create a long ribbon.
Merge Down.
Resize 80%
Position over the top rectangle.
Center it.
Duplicate and close it out.
Highlight the rectangle layer.
Select All/Float/Defloat
Selections/Invert
Highlight the long ribbon.
Tap the delete key.
Open up the duplicated ribbon layer.
Move into position over the bottom rectangle.
Tap the delete key.
Deselect.
Highlight Photo 1 Frame layer.
Select All/Float/Defloat
New Raster layer.
Copy and paste a paper of choice Into Selection.
Deselect.
Delete the template layer.
Repeat the above step with Photo 2 Frame and Photo 3 Frame layers.

Highlight Photo 1.
Select All/Float/Defloat
New Raster layer.
Copy and paste a paper of choice Into Selection.
Deselect.
Delete the template layer.

Repeat the above step with Photo 2 and Photo 3 layers.

Copy and paste a tube of choice below each of the frames.  
 
Add your embellishments. I used:
Element 19: Resize 60% Free rotate left 90 degrees
Element 29: Resize 25%
Element 30: Resize 25%
Element 31: Resize 30%
Element 37: Resize 50%

Highlight your white background.
New Raster layer.
Select All.
Copy and paste a paper of choice Into Selection.
Deselect.
Apply the mask.
Merge Group.
Use your Pick Tool to pull it out just a little.

Add your copyrights.
Add your name.
Give it the same inner bevel you used on the Large Circle layer.

Resize all layers 85%.

I hope you enjoyed this tutorial.
I’d love to see your results.
Email me!
Hugs,
Bev

Tuesday, December 1, 2009

Old Fashioned Christmas

Clicking on the tag will enlarge to full view.

Supplies
1 tube of choice - I used the beautiful artwork of Agent Melon here
Font of choice - I used Curly Cue here
Weescotlass Mask 138 here
“Wonderful Christmas” is a PTU tagger size scrap kit created by Wilma of Wilma4ever and can be purchased her store here. You can visit her blog here.
Thank you Wilma for a….wow! A really fantastic kit!!
This tutorial was written assuming you have a working knowledge of PSP.

~♥~ Let’s get started ~♥~

Open up a 700 x 700 transparent image.
Flood fill white.

Copy and paste Frame 1 as a new layer.
Resize 80%
Free rotate left 30 degrees.

Click inside with your Magic Wand.
Selections/Modify/Expand by 6
New Raster layer below the frame.
Copy and paste a paper of choice Into Selection.
Copy and paste your tube below the frame.
Tap the delete key.
Deselect.
Copy and paste Ribbon with Bells as a new layer.
Resize 65%
Free rotate left 30 degrees
Position at the top of the frame.
See mine for reference.
Close out your white background.
Merge visible.
Reopen your white background.
Now you can move the merged image up a bit on your canvas.
Add your embellishments. I used:
Pineapple 1: Resize 60% Free rotate right 10 degrees - Duplicate/Mirror/Resize 80%
Branch 1: Erase the stem on it. Duplicate and/or Mirror as you see fit.
Branch 2: Resize 50%
Bow 2: Resize 40%
Reindeer 3: Resize 60%. Duplicate/Mirror Resize 80%

Highlight your white background.
New Raster layer.
Select All.
Copy and paste a paper of choice Into Selection.
Deselect.
Apply the mask.
Image/Resize 120%
Merge Group.
Add your copyrights.
Add your name.
Give it a slight inner bevel:

Copy and paste Stars 1 as a new layer.
Position over your name. Erase any that overhangs.
Duplicate.
Merge down.

Resize all layers 80%.

I hope you enjoyed this tutorial.
I’d love to see your results.
Email me!
Hugs,
Bev

Holiday Shimmer


Supplies
2 tubes of choice - I used the beautiful artwork of Dave Nestler here
Font of choice - I used Oh Lara - I’m sorry, I can’t find a link
Zuzanna Mask 7 here
Twinks which I’ve supplied here
Animation Shop
“Holiday Shimmer” is a PTU tagger size scrap kit created by Vicki of Gemini Creationz and can be purchased at Twilight Scraps. You can visit Vicki’s blog here.

This tutorial was written assuming you have a working knowledge of PSP.

~♥~ Let’s get started ~♥~

Open up a 700 x 700 transparent image.
Flood fill white.

Copy and paste Frame 4 as a new layer.
Resize 60%
Duplicate.
Close out the Copy.

Click inside with your Magic Wand.
Selections/Modify/Expand by 6
New Raster layer below the frame.
Copy and paste a paper of choice Into Selection.
Duplicate.
Close out the Copy.

Copy and paste your tube below the frame.
Tap the delete key.
Deselect.

Close out your white background.
Merge Visible.
Free rotate right 5 degrees.

Close that layer out and reopen all the other layers.

Hey! Look at that! Now do you see why I had you make copies?:)
Just copy and paste your other tube below the frame.
Merge Visible the frame, tube, and paper.
Free rotate left 5 degrees.

Move both merged frame layers into position.
See my tag for reference.

Add your embellishments. I used:
Pine Branch: Resize 50%. Mirror. Duplicate/Mirror/Flip
Ornament 2: Resize 25% Free rotate left 5 degrees
Pinecone: Resize 25% Free rotate right 5 degrees
Poinsettia: Resize 40%
Candy Cane: Resize 30%
Deer: Resize 50% Duplicate/Mirror
Ornament 4: Resize 40% Free rotate right 30 degrees
Ornament 5: Resize 30% Free rotate left 25 degrees
Snowflake: Resize 25% and 60% - duplicate and resize to your liking.
Light Sparkles

Highlight your white background.
New Raster layer.
Select All.
Copy and paste a paper of choice Into Selection.
Deselect.
Apply the mask.
Merge Group.

Add your copyrights.

Add your name.

Resize all layers 80%.

Copy Merge.

Time to Animate:

Paste as New Animation
Ctrl + L key
Tap the L key until you have 6 frames.

Open up the twinks that I’ve supplied.
Ctrl + A to highlight all the frames.
Edit/Copy

Highlight your tag frames.
Ctrl + A to highlight all the frames.
Ctrl + E
And place the twinks over the light stars on your image.

Once you’ve put as many twinks on your image as you like, view it.
If you’re happy then save.

I hope you enjoyed this tutorial.
I’d love to see your results.
Email me!
Hugs,
Bev

Monday, November 30, 2009

Pretty Winter

Clicking on the image will enlarge to full view.

Supplies
1 tube of choice - I used the beautiful artwork of Gennadiy Koufay here
Font of choice - I used Honey Script here
Weescotlass Mask 19 here
My Template 54 here
“Oh Pretty Winter” is a PTU tagger size scrap kit created by ZaZa of Scrap and Tubes and can be purchased at TKO Scraps. You can visit ZaZa’s blog here.

This tutorial was written assuming you have a working knowledge of PSP.
~♥~ Let’s get started ~♥~

Open up the template.
Delete the Credit and Stripes layers.
Highlight Stamp Back layer.
Select All/Float/Defloat
New Raster layer.
Copy and paste a paper of choice Into Selection.
Deselect.
Delete the template layer.

Repeat the above step with Circle Frame layer.

Highlight Stamp Square layer.
Select All/Float/Defloat
New Raster layer.
Copy and paste a paper of choice Into Selection.
DO NOT DESELECT.
Copy and paste your tube below the frame.
Selections/Modify/Feather
Number of Pixels: 53
OK
Selections/Invert
Tap the delete key until you have a nice feathered look to your image.
Deselect.
Delete the template layer.
Change the Properties to Soft Light.
Copy and paste your tube as a new layer.

Add your embellishments. I used:
Snow Tree: Resize 80%. Duplicate/Mirror
Holly: Resize 55% Free rotate left 20 degrees. Duplicate/Mirror/Flip
Bow 1: Resize 40%. Mirror.
Candle: Resize 40%. Duplicate/Resize 80%
Candy Cane: Resize 40%
Snowflake 1: Resize 40%, duplicate as many times as you like, resizing as you like.
Highlight your white background.
New Raster layer.
Select All.
Copy and paste a paper of choice Into Selection.
Deselect.
Apply the mask.
Image/Resize 120%
Merge Group.
Add your copyrights.
Add your name.

I hope you enjoyed this tutorial.
I’d love to see your results.
Email me!
Hugs,
Bev