Saturday, July 24, 2010

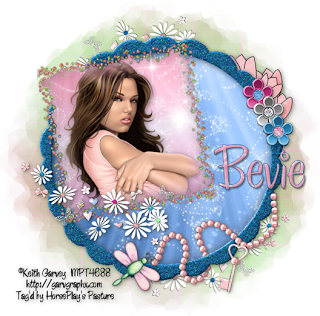
Pearls and Beauty


Clicking on the image will enlarge to full view.

Supplies

1 tube of your choice - I used the awesome artwork of Keith Garvey at MPT
Font of Choice - I used Chicken Basket
Weescotlass Mask 219 here
“May Spring” is a FTU scrap kit created by
Bubble’s Dream and can be downloaded from her site here. Please leave a thank you when downloading as it’s a small gesture for hard work given freely.
Thank you Bubbles for another fantastic kit!

This tutorial was written assuming you have a working knowledge of PSP.

~♥~ Let’s get started ~♥~

Open up a 700 X 700 blank canvas.
Flood fill white.

Copy and paste Frame 1 as a new layer.
Click inside with your Magic Wand.
Selections/Modify/Expand by 6.
New Raster layer below the frame.
Copy and paste Paper 5 Into Selection.
Deselect.

Copy and paste Glitter Frame as a new layer.
Resize 60%
Click inside with your Magic Wand.
Selections/Modify/Expand by 2.
New Raster layer below the frame.
Copy and paste Paper 2 Into Selection.
Copy and paste your tube below the frame.
Selections/Invert
Tap the delete key.
Selections/Modify/Feather
Number of Pixels:
43
OK
Tap the delete key twice.
Deselect.
Merge Visible the frame, paper, and tube.
Free rotate Left 10 degrees.
Move into position - see my tag for reference.

Add your embellishments. I used:
Flower 1, 2, and 3
Flowers Deco
Firefly
Jewel Key
Tulip 1: Resize 60% Free rotate left 10 degrees Duplicate/Mirror

Highlight your white background.
Select All
New Raster layer.
Copy and paste a Paper 6 Into Selection.
Deselect.
Apply the mask.
Merge Group.

Add your credits.

Add your name.
Give it a slight inner bevel:
INSERT PIC HERE

Resize all layers 80%.

I hope you enjoyed this tutorial.
I’d love to see your results and show it off in my gallery.
Email me!
Hugs,
Bev

Thursday, July 22, 2010

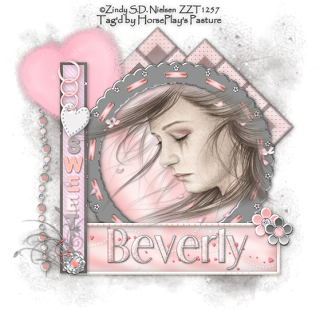
First Broken Heart


Supplies
1 tube of your choice - I used the beautiful artwork of Zindy S.D. Nielsen here
Font of Choice - I used Dream Orphans here
Gem Mask 161 here
“Sweet Peach” is a FTU scrap kit created by Bubble’s Dream and can be downloaded from her site here. Please leave a thank you when downloading as it’s a small gesture for hard work given freely.
Thank you Bubbles for sharing another piece of your beautiful work with us!

This tutorial was written assuming you have a working knowledge of PSP.

~♥~ Let’s get started ~♥~

Open up a 700 X 700 blank canvas.
Flood fill white.

Copy and paste Round Frame as a new layer.
Resize 85%
Move it up slightly to the right on your canvas.
Click inside with your Magic Wand.
Selections/Modify/Expand by 6.
New Raster layer below the frame.
Copy and paste Paper 1 Into Selection.
Copy and paste a tube as a new layer.
Selections/Invert
Tap the delete key.
Deselect.

Close out your white canvas.
Merge Visible.
Reopen your white canvas.

Make your Selection Tool active.
Set to Rectangle.
Draw out a rectangle about 550 X 100 pixels.
New Raster layer.
Copy and paste Paper 3 Into Selection.
Selections/Modify/Contact by 7
OK
Tap the delete key.
Selections/Modify/Expand by 3.
New Raster layer below the new frame you just created.
Copy and paste Paper 1 Into Selection.
Copy and paste Hearts 2 as a new layer just below the frame.
Resize 80%
Move into position - see my tag for reference.
Selections/Invert
Tap the delete key.
Deselect.
Give the frame a slight Inner Bevel:

You can go ahead and merge visible the frame, paper, and element.
This will allow you to move the merged layers into better position if you need to.

Make your Selection Tool active again.
Still set on Rectangle create a rectangle about 75 X 550 pixels
OK
Copy and paste Paper 7 as a new layer.
Selections/Invert
Tap the delete key.
Deselect.
Use your Magic Wand and click anywhere outside of the rectangle you just created.
Selections/Modify/Contract by 7.
Tap the delete key.
Copy and paste Paper 10 as a new layer.
Move into position below the frame.
Selections/Invert
Tap the delete key.
Deselect.

Add your embellishments. I used:
Background Block: Resize 80%/Duplicate
Beads Bar: Resize 80% Free rotate left 90 degrees
Doodle Jewel: Resize 50%
Charm Heart
Flower 1
Flower 2
Furry Heart: Free rotate left 15 degrees
Word Art 2: Resize 70%

Highlight your white background.
Select All
New Raster layer.
Copy and paste a Paper of choice Into Selection.
Deselect.
Apply the mask.
Merge Group.

Add your credits.

Add your name.
Give it the same slight inner bevel.

Resize all layers 80%.

I hope you enjoyed this tutorial.
I’d love to see your results and show it off in my gallery.
Email me!
Hugs,
Bev

Heaven's Ocean

Clicking on the image will enlarge to full view.

Supplies
4 tubes of your choice - I used the beautiful artwork of Anna Marine at CILM
Font of Choice - I used Aquarelle here
Gem Mask 164 here
“Ocean Dreams” is a FTU scrap kit created by Bubble’s Dream and can be downloaded from her site here. Please leave a thank you when downloading as it’s a small gesture for hard work given freely.
Thank you Bubbles for sharing your beautiful work with us. This kit is amazing!

This tutorial was written assuming you have a working knowledge of PSP.

~♥~ Let’s get started ~♥~

Open up a 700 X 700 blank canvas.
Flood fill white.

Copy and paste Round Frame Fishnet as a new layer.
Resize 90%
Move it up slightly on your canvas.
Click inside with your Magic Wand.
Selections/Modify/Expand by 12.
New Raster layer below the frame.
Flood fill with a gradient of choice.
Copy and paste a tube as a new layer.
Selections/Invert
Tap the delete key.
Deselect.

Close out your white canvas.
Merge Visible.
Reopen your white canvas.

Copy and paste Double Square Frame as a new layer.
Resize 80%
Move it into position behind the merged layer - let the frame stick out from the side a little. See my tag for reference.
Click inside the side of the frame that’s sticking out from behind the merged layer with your Magic Wand.
Selections/Modify/Expand by 6.
New Raster layer below the frame.
Copy and paste Paper 17 Into Selection.
Copy and paste your tube as a new layer below the frame.
Resize as needed.
Selections/Invert
Tap the delete key.
Deselect.

Close out the merged layer and white canvas.
Merge Visible.
Reopen all layers.

Highlight the merged square frame layer.
Duplicate/Mirror

Copy and paste Polaroid Frame as a new layer.
Resize 50%
Free rotate left 10 degrees
Click inside with your Magic Wand.
Selections/Modify/Expand by 3.
New Raster layer below the frame.
Copy and paste Paper 10 Into Selection.
Copy and paste your tube as a new layer.
Resize to your liking.
Paste the tube again but resize just a bit larger and move behind the other tube.
Change the Properties to Soft Light.
Selections/Invert
Highlight each of the tube layers and tap the delete key.
Deselect.

Close out all the merged layers and white canvas.
Merge Visible.
Reopen all layers.

Copy and paste Polaroid Frame again.
Resize 50%
Free rotate right 5 degrees.
Repeat the above steps using a different tube.

Add your embellishments. I used:
Flower
Flower 2
Doodle 2: Resize 35%
Deco 1: Resize 80%
Bow Frame: Resize 70%
Seagull
Charm 3

Highlight your white background.
Select All
New Raster layer.
Copy and paste a of choice Into Selection.
Deselect.
Apply the mask.
Merge Group.
Duplciate/Merge Down
Duplicate/Merge Down

Copy and paste Fishnet over the masked layer.

Add your credits.

Add your name.
Give it a slight inner bevel:


Resize all layers 80%.

I hope you enjoyed this tutorial.
I’d love to see your results and show it off in my gallery.
Email me!
Hugs,
Bev


Clicking on the image will enlarge to full view.


Chivalrous


Clicking on the image will enlarge to full view.

Supplies
1 tube of your choice - I used the beautiful artwork of Ida Larsen at MPT
Font of Choice - I used Annabelle here
Weescotlass Mask 138 here
“Endless Love” is a PTU scrap kit created by Kara of Sweet Cravings Scraps and can be purchased at TKO Scraps. You can visit her blog here.
Thank you Kara for a truly amazing kit! The possibilities are endless for the imagination.

This tutorial was written assuming you have a working knowledge of PSP.

~♥~ Let’s get started ~♥~

Open up a 700 X 700 blank canvas.
Flood fill white.

Copy and paste Balcony as a new layer.
Resize 65%
Use your Freehand Selection Tool and outline the opening of the balcony. Be sure to go all the way to the “floor” when outlining.


New Raster layer below the balcony.
Copy and paste Paper 15 Into Selection.
Deselect.

Copy and paste your tube as a new layer.
Give your tube an exaggerated drop shadow to throw on the wall.

Copy and paste Trillis Vine as a new layer.
Position to the left of the balcony - behind the door.
See my tag for reference.

Copy and paste Flowers 4 as a new layer.
Move into position - see my tag for reference.
Highlight your white background.
Select All
Selection/Modify/Feather
Number of Pixels:
43
OK
Selections/Invert
Highlight the Flowers layer and tap the delete key until you have a nice feathered look.

Highlight your trellis layer and erase any that is sticking out above the flowers.

Add your embellishments. I used:
Catty Nine Tails: Resize 40%
Grass: Resize 80%
Bow 4: Resize 25%
Flowers 3: Resize 25% and 25%

Highlight your white background.
Select All
New Raster layer.
Copy and paste a Paper 17 Into Selection.
Deselect.
Copy and paste Castle Mountain as a new layer above the paper.
Move it into position - see my tag for reference.
Merge Down.
Apply the mask.
Resize 120%
Merge Group.

Add your credits.

Add your name.
Give it a slight inner bevel:


Resize all layers 80%.

I hope you enjoyed this tutorial.
I’d love to see your results and show it off in my gallery.
Email me!
Hugs,
Bev

Wednesday, July 21, 2010

Tinker's Dragon

Clicking on the image will enlarge to full view.

Supplies
Font of Choice - I used SC Tina’s Baby Shower here
Weescotlass Mask 161 here
Greg’s Factory Output Vol. II - Pool Shadow
“Tinker‘s Dragon” is a PTU full size size scrap kit created by Pixie of Kissed by Pix Design and is free with any purchase of $6 or more at her store TKO Scraps. You can visit her blog here.
Thank you Pixie - this kit is an amazing free deal! No disapointments with this!!!

This tutorial was written assuming you have a working knowledge of PSP.

~♥~ Let’s get started ~♥~

Open up a 700 X 700 blank canvas.
Flood fill white.

Copy and paste Paper 1 as a new layer.
Resize 25% and 45%
Use your Magic Wand and click anywhere on your white canvas.
Selections/Invert
Selections/Modify/Contract by 10
OK
Tap the delete key.
Selections/Modify/Expand by 6.
New Raster layer below the new frame you just created.
Flood fill with a gradient of choice.
Deselect.

Give the frame an Inner Bevel:

Copy and paste Fairy House 1 as a new layer below the frame.
Mirror/Resize 50%
Move into position - see my tag for reference.

Copy and paste Magic Lights 6 as a new layer.
Resize 25%
Move into position.

Highlight the gradient layer.
Use your Magic Wand and click outside of it.
Highlight each of the elements above the gradient layer and tap the delete key.
Deselect.

Highlight the gradient layer again.
Apply Greg’s Factory Output Vol. II - Pool Shadow

Copy and paste Lady Bug Frame as a new layer.
Resize 25% and 50%
Duplicate
Move each frame into position - see my tag for reference.

Highlight the top Frame.
Click inside with your Magic Wand.
Selections/Modify/Expand by 2.
New Raster layer below the frame.
Flood fill with a gradient of choice.
Make Dragon 3 active.
Mirror/Copy
Highlight your canvas.
Edit/paste as a new layer below the frame.
Resize 25% and 40%
Change the Properties to Soft Light.
Move into position - see my tag for reference.
Selections/Invert
Tap the delete key.
Deselect.

Paste the dragon again above the frame.
Resize 25% and 40%
Move into position - see my tag for reference.

Highlight the bottom frame.
Repeat the above steps used for the top frame accept use Tinker 4.
Tinker 4 - Inside the frame: Resize 40%
Tinker 4 - Outside the frame: Resize 35%

Add your embellishments. I used:
Spiral 1: Resize 25% and 50% Free rotate right 20 degrees
Daisy: Resize 25% and 60%
String 1: Resize 25% and 50%
Ladder 1: Resize 25% and 40%
Vine 1: Resize 25% and 25%
Glitter Trail: Resize 25% and 70%
Dragonfly: Resize 25% and 50% Free rotate right 30 degrees
Flutterby: Resize 25% and 40% Free rotate left 30 degrees

Highlight your white background.
Select All
New Raster layer.
Copy and paste a paper of choice Into Selection.
Deselect.
Apply the mask.
Resize 110%
Merge Group.

Add your credits.
If you used the poser be sure to give Medi the credit.

Add your name.
Give it the same inner bevel.

Resize all layers 80%.

I hope you enjoyed this tutorial.
I’d love to see your results and show it off in my gallery.
Email me!
Hugs,
Bev

Monday, July 19, 2010

Back in Time When...

Clicking on the image will enlarge to full view.

Supplies
1 tube of your choice - I used the beautiful poser that came with the kit
Font of Choice - I used Oh Lara a pay font
Weescotlass Mask 297 here
“Steam Punk” is a PTU tagger size scrap kit created by Jay of Bello Scarto and can be purchased at her store Heartbeatz Creationz. You can visit her blog here.
Thank you Jay for a really terrific kit!

This tutorial was written assuming you have a working knowledge of PSP.

~♥~ Let’s get started ~♥~

Open up a 700 X 700 blank canvas.
Flood fill white.

Copy and paste Element 12 as a new layer.
Resize 85%

Copy and paste Element 46 as a new layer.
Resize 60%
Free rotate left 90 degrees
Move to the left just a bit and move the clock face to the right just a bit.
See my tag for reference.

Highlight the frame layer.
Click inside with your Magic Wand.
Selections/Modify/Expand by 6.
New Raster layer below the frame.
Copy and paste a paper of choice Into Selection.
Deselect for now.

Copy and paste Element 49 as a new layer.
Resize 40%/Mirror
Move beneath the frame in your layers pallet - we’ll come back to this in a minute.
Paste the element again but above the frame in your layers pallet.
Resize 35%.
Move this tube exactly where you want it.
Highlight the tube that's below the frame and move it up and to the left just a bit - enough so that you can see it just over the shoulder of the other tube.
Lower the Opacity to about 28 or so.
Highlight the frame layer.
Click inside of it with your Magic Wand.
Selections/Modify/Expand by 6
Selections/Invert
Highlight the tube layer.
Tap the delete key.
Deselect.

TIP: You can Merge Visible the paper frame and tube if you would like to get the frame and clock face into better position.

Copy and paste Element 22 as a new layer.
Resize 50%
Move below the clock face in your layer’s pallet - see my tag for reference.

Copy and paste the top two clock hands as new layers.
Resize each 50%
Free rotate each hand however you like for the time.

Copy and paste Element 43 as a new layer.
Free rotate left 90 degrees.
Move into position - see my tag for reference.
Duplicate/Mirror

Note: You will see any elements through the clock face that you have below it in the layers pallet. It’s ok. We’ll take care of all of them near the end of the tutorial.

Copy and paste Element 3 as a new layer.
Move into position over the top of Element 43.
Duplicate/Mirror

Add your embellishments. I used:
Element 47: Resize 90%
Element 10: Resize 80%
Element 7: Resize 70%
Element 4: Resize 25% and 80%
Element 42: Resize 50%
Element 39: Resize 50%
Element 20: Resize 50%/Duplicate/Free rotate right 15 degrees
Element 28: Resize 35%/Mirror

Make your Magic Wand active.
In your layers pallet highlight the clock face layer.
Click anywhere on your white canvas with your Magic Wand.
Selections/Invert
Highlight every element layer that you see showing through the clock face and tap the delete key.
Deselect.

Highlight your white background.
Select All
New Raster layer.
Copy and paste a paper of choice Into Selection.
Deselect.
Apply the mask.
Merge Group.

Add your credits.

Add your name.
Give it a slight inner bevel:


Resize all layers 80%.

I hope you enjoyed this tutorial.
I’d love to see your results and show it off in my gallery.
Email me!
Hugs,
Bev

Fire of Desire


Supplies
1 tube of your choice - I used the beautiful artwork of Jennifer Janesko at CILM
Font of Choice - I used Black Heart Inertia
Gem Mask 21 here
Eyecandy 5: Nature - Fire
Animation Shop - Optional
“Dragon‘s Breath” is a PTU tagger size scrap kit created by Dee of Scraps by Dmg and can be purchased at The North Wing. You can visit her blog here.
Thank you Dee - this kit is more than awesome!!

This tutorial was written assuming you have a working knowledge of PSP.

~♥~ Let’s get started ~♥~

Quick Note:
First we’re going to assemble the entire tag and then go back and add the extra layers for the animation. It seems the easiest way without losing anyone.

Open up a 700 X 700 blank canvas.
Flood fill white.

Copy and paste Frame 8 as a new layer.
Resize 85%
Click inside of it with your Magic Wand.
Selections/Modify/Expand by 3.
New Raster layer below the frame.
Copy and paste Paper 14 Into Selection.
Copy and paste Dragon 1 as a new layer.
Move into position - see my tag for reference.
Selections/Invert
Tap the delete key.
Deselect.
Lower the Opacity to about 48 or so.
DO NOT give the frame a drop shadow yet if you intend to animate the tag.

Copy and paste Frame 5 as a new layer.
Resize 85%
Move to the left just a bit.
Click inside of all the openings with your Magic Wand.
Selections/Modify/Expand by 6.
New Raster layer below the frame.
Copy and paste Paper 24 Into Selection.
Deselect for now.

Copy and paste Fire Tower as a new layer.
Resize 40%
Move into position below the frame - see my tag for reference.

Copy and paste Glass Bobble Hanger as a new layer.
Resize 40%

Copy and paste Dragon 1 as a new layer.
Free rotate right 25 degrees.
Move into position - see my tag for reference.
Change the Properties to Luminance Legacy.

Highlight the frame layer again.
Click inside of all the openings with your Magic Wand.
Selections/Modify/Expand by 6
Selections/Invert
Highlight each of the elements below the frame and tap the delete key.
Deselect.

(I erased the part of the dragon that you could see in the left frame)

Copy and paste your tube as a new layer.

Add your embellishments. I used:
Brad 2: Resize 25% and 30%/Duplicate to decorate the corners of the frames
Candle: Resize
Frame 11: Resize 50%
Dragon 2
Gem 12 through 16: Choose which stars you want/Resize 60%
 
Highlight your white background.
Select All
New Raster layer.
Copy and paste a paper of choice Into Selection.
Deselect.
Apply the mask.
Merge Group.

Add your credits.

Add your name.
Give it a slight inner bevel:


Resize all layers 80%.

If you’re not going to animate then save.

If you are then lets continue…

Highlight the Candle layer.
Create 4 layers above it.
Name them C1, C2, C3, and C4

Highlight the Candle layer again.
Using your Freehand Selection tool outline the flame.
Highlight C1 and apply Eyecandy 5: Nature - Fire
In the Settings Tab:
Small Candle

In the Basic Tab:


OK

Highlight C2 layer.
Apply the Fire effect accept hit the random seed button once.

Repeat the above Step with C3 and C4.
Deselect.

Close out C2, C3, and C4 layers.

Highlight the paper of the round chain frame (Frame 8) layer.
Create 4 layers above it.
Rename them F1, F2, F3, and F4.

Highlight the chain frame.
Click inside of it with your Magic Wand.
Selections/Modify/Expand by 6.
Highlight F1 layer.
Apply Eyecandy 5: Nature - Fire
Settings Tab:
Medium, Campfire

Basic Tab:


OK

Highlight F2 layer.
Apply the fire effect accept hit the random seed button once.

Repeat the above step with layers F3 and F4.

DO NOT DESELECT YET!

Selections/Invert
Highlight each of the flame layers and tap the delete key.
Deselect.
Be sure to close out F2, F3, and F4 layers.

Give the chain frame a drop shadow now.

~ Onto the Animation ~

Copy Merge
Carry into Animation Shop.
Edit/Paste/As new Animation

Back in PSP.
Close out C1 and F1.
Open up C2 and F2.
Edit/Copy Merge

Carry into AS.
Edit/Paste/After Current Frame.

Back in PSP.
Close out C2 and F2.
Open up C3 and F3.
Edit/Copy Merge

Carry into AS.
Edit/Paste/After Current Frame

Back in PSP.
Close out C3 and F3.
Open up C4 and F4.
Edit/Copy Merge

Carry into AS.
Edit/Paste/After Current Frame.

Ctrl + A (to highlight all the frames)
Animation/Frame Properties
Change the number to 19.

View your animation.

If you’re happy then save.

I hope you enjoyed this tutorial.
I’d love to see your results and show it off in my gallery.
Email me!
Hugs,
Bev