Saturday, January 8, 2011

Retro Love


Clicking on the image will allow you to enlarge for bigger view.

Supplies

1 tube of choice and one close up image - I used the artwork of Ismael Rac here
Font of Choice - I used Single Malta here
Gem Mask 70 here
Blissfully Beth template 175 here
“Retro Punk” is a PTU scrap kit created by Nikki of Creative Intentionz and can be purchased from her store Twilight Scraps. You can visit her blog here.
Thank you Nikki for such a cheerful colored kit. I had so much fun with this!

This tutorial was written assuming you have a working knowledge of PSP.

~♥~ Let’s get started ~♥~

Open up the template.
Shift + D.
Close out the original.
Delete the top 3 layers.
New Raster layer.
Send to Bottom.
Image/Canvas size
700 x 700
Flood fill white.

Highlight Pink Square 2 layer.
Click on it with your Magic Wand.
New Raster layer.
Copy and paste Paper 8 Into Selection.
Deselect.
Delete the template layer.

Highlight White Frame 2 layer.
Click on it with your Magic Wand.
New Raster layer.
Copy and paste Paper 1 Into Selection.
Give it a slight Inner Bevel:


Deselect.
Delete the template layer.

Repeat the above step with White Frame layer.

Highlight Black Circle layer.
Click on it with your Magic Wand.
New Raster layer.
Copy and paste Paper 11 Into Selection.
Deselect.
Delete the template layer.
Give it a slight inner bevel:


Highlight Pink Square layer.
Click on it with your Magic Wand.
New Raster layer.
Copy and paste Paper 4 Into Selection.
Copy and paste your close up Image as a new layer above the paper.
Move into position.
Selections/Invert
Tap the delete key.
Deselect.
Delete the template layer.

Copy and paste your tube as a new layer.

Copy and paste Flower 1 as a new layer.
Move it behind the circle layer so that the petals peek out at the top. Duplicate the flower as many times as you have to and move them so that the petals peek out around the circle.

Copy and paste Chrome Swirl 2 as a new layer.
Flip
Position in front of the circle so that the beads can be seen - se my tag for reference.
Duplicate 2 more times and move them around the circle so you can see the beads.

Add your embellishments. I used:
Clip 2: Resize 40%/Free rotate Right 25 degrees
Bug Globe - Resize 50%
Barb wire Heart: Resize 50%
Branch: Resize 80%
Sparkles
Flame

Highlight your white background.
New Raster layer.
Select All.
Copy and paste Paper 12 Into Selection.
Deselect.
Adjust/Blur/Gaussian blur:
Radius: 10
OK
Apply the mask.
Resize 110%.
Merge Group.
Move the mask down slightly. You’ll notice you can see an “edge” to the top of the mask. Make your Eraser Tool active and use these settings:


Run your eraser along the “edge” so that it disappears and blends into the background.

Add your credits.

Add your name.
For my name I typed each letter individually using a different color for each, but kept the Foreground color the same, stroke set on 2.
After all letters in my name were typed I Merged Visible all of them.
Select All/Float/Defloat
Selections/Modify/Contract by 2
Give it the same inner bevel you did for the circle.
Deselect.

Resize all layers 80%.

I hope you enjoyed this tutorial.
I’d love to see your results and show it off in my gallery.
Email me!
Hugs,
Bev

Dark Gothic Love


Clicking on the image will allow you to enlarge for bigger view.

Supplies

1 tube of choice - I used the artwork of Amberly Berendson at Mistaken Art
Font of Choice - I used Luna Bar here
Weescotlass Mask 138 here
My template 128 here
Brush Strokes - Sprayed Strokes
Eyecandy 3.1 - Glow
“Dark Gothic Love” is a PTU scrap kit created by Conchi of dnscraps-Diseñando and can be purchased from Scraps with Attitude. You can visit her blog here.
Thank you Conchi for an amazing gothic kit!

This tutorial was written assuming you have a working knowledge of PSP.

~♥~ Let’s get started ~♥~

Open up the template.
Shift + D.
Close out the original.
Delete the top 3 layers and Dotted Circles layer.
Highlight the background layer.
Image/Canvas size
700 x 700
Flood fill white.

Highlight Rectangle 1 layer.
Click on it with your Magic Wand.
New Raster layer.
Copy and paste Paper 24 Into Selection.
Apply Brush Strokes - Sprayed Strokes:
Default Settings.
Deselect.
Apply Eyecandy 3.1 - Glow:
Width: 3
Opacity: 100
Opacity Dropoff: Fat
Color: White
Delete the template layer.

Highlight Right Rectangle layer.
Move it just about Left Rectangle layer.
Merge down.
Move the merged layer just above Center Rectangle in your layers pallet.
Merge down.
All 3 rectangles should be on one layer.
Click on each one with your Magic Wand and repeat the above step.

Highlight Rectangle 2 layer.
Click on it with your Magic Wand.
New Raster layer.
Copy and paste Paper 10 Into Selection.
Deselect.
Delete the template layer.

Highlight Right Rec A layer.
Merge Down.
Merge Down.
All 3 of these rectangles should be on one layer.
Click anywhere outside of them with your Magic Wand.
Selections/Invert
New Raster layer.
Copy and paste Paper 10 Into Selection.

Copy and paste your tube as a new layer.
Position it over the center rectangle.
Selections/Invert
Tap the delete key.
Deselect.
Erase any part of the tube that may be seen on the left and right rectangles.

Paste your tube again.
Resize a little smaller and position over the right rectangle.
Paste your tube again.
Resize the same as the other and position it over the left rectangle.
Highlight the rectangle paper and click anywhere outside of it with your Magic Wand.
Highlight each of the tube layers and tap the delete key.
Deselect.
Erase any part of the tubes that overlap onto the center rectangle.
Lower the opacity of both tube layers to about 30.
Delete the template layer.

Add your embellishments. I used:
Heart Rubis: Resize 40%/Duplicate/Mirror
Pretty Bow: Resize 40%
Rose: Resize 25% and 80%
Diamond Butterfly: Resize 40%/Free rotate Left 30 degrees/Duplicate/Mirror/Resize 80%
Doodles: Resize 40%/Duplicate/Mirror/Merge down/Duplicate/Flip

Highlight your white background.
New Raster layer.
Select All.
Copy and paste a paper of choice Into Selection.
Deselect.
Apply the mask.
Resize 115%.
Merge Group.

Add your credits.

Add your name.
Give it the same Glow.

Resize all layers 80%.

I hope you enjoyed this tutorial.
I’d love to see your results and show it off in my gallery.
Email me!
Hugs,
Bev

Friday, January 7, 2011

Total Eclipse


Clicking on the image will enlarge for full view.

Supplies

1 tube of choice - I used the artwork of Tom Fleming at MPT
Font of Choice - I used Dragonfly here
Weescotlass Mask 241 here
Greg’s Factory Output Vol. II - Pool Shadow
“Total Eclipse” is a PTU scrap kit created by Gina’s Gems Scraps and can be purchased from Twilight Scraps. You can visit her blog here.
Thank you Gina for a really amazing fairy kit!

This tutorial was written assuming you have a working knowledge of PSP.

~♥~ Let’s get started ~♥~

Open up a 700 x 700 blank canvas.
Flood fill white.

Copy and paste Round Frame 2 as a new layer.
Click inside of it with your Magic Wand.
Selections/Modify/Expand by 6.
New Raster layer below the frame.
Copy and paste the Paper 1 Into Selection.
Deselect.

We’re going to add the elements below the frame. They’ll still out from the edges of it, but that’s ok. We’ll clean it all up in a bit.

Copy and paste Rope Bridge as a new layer below the frame.
Resize 70%
Move into position - see my tag for reference.

Copy and paste Sparkle Trail 1 as a new layer below the frame.
Resize 70%
Move into position - see my tag for reference.

Copy and paste Moon as a new layer.
Resize 25%
Move into position.

Highlight the paper layer.
Click anywhere outside of it with your Magic Wand.
Highlight each of the elements that are below the frame and tap the delete key.
Deselect.

Copy and paste your tube as a new layer.
Give it a drop shadow.
Give it an exaggerated drop shadow on a layer of it’s own.

Add your embellishments. I used:
Magnolia 4: Resize 50%
Magnolia 1: Resize 25%
Ribbon 4: Resize 80%

Highlight your white background.
New Raster layer.
Select All.
Copy and paste 12 Into Selection.
Deselect.
Apply the mask.
Merge Group.

Add your credits.

Add your name.
In your colors palllet:
Foreground: Black
Background: Null

Make your Ellipse Tool active - set on Circle
Width: 2
Draw a circle that’s a little bigger than your frame. It’s alright if it’s too big because you can resize in just a bit.
Objects/Align/Center in Canvas
Resize it larger or smaller now if you have to.
Choose the colors your want your text to be.
I used:
Foreground: Black
Background: #85250f
Stroke: 2

Make your Text Tool active and run your curor along the edge of the circle where you want your name. When you see a Rocking A click your mouse. A text box will appear.
Type your name.
Apply.
In your layers pallet click on the plus sign.
Close out the New Ellipse layer.
Highlight the top layer.
Convert to Raster layer.

Select All/Float/Defloat
Selections/Invert/Contract by 2
Give it a slight Inner Bevel:


Apply Greg’s Factory Output Vol. II - Pool Shadow:


Resize all layers 80%.

I hope you enjoyed this tutorial.
I’d love to see your results and show it off in my gallery.
Email me!
Hugs,
Bev

Wednesday, January 5, 2011

Skye Legend


Clicking on the image will allow you to enlarge for bigger view.

Supplies

1 tube of choice - I used the artwork of Ray Leaning at MPT
Font of Choice - I used Clive Barker here
Weescotlass Mask 161 here
Brush Strokes - Sprayed Strokes
Eyecandy 3.1 - Glow
“Hibernating Beauty” is a FTU scrap kit created by Lady Raven Creations Scraps and can be downloaded from her blog here.
Please leave a thank you when downloading as it’s a very small gesture for hard work given freely.

This tutorial was written assuming you have a working knowledge of PSP.

~♥~ Let’s get started ~♥~

Open up a 700 x 700 blank canvas.
Flood fill white.

Copy and paste Frame 2 as a new layer.
Resize 80%
Click inside of each square with your Magic Wand.
Selections/Modify/Expand by 2.
New Raster layer below the frame.
Open up Paper 18.
Adjust/Blur/Gaussian Blur:
Radius 6
OK
Apply Brush Strokes - Sprayed Strokes:
Stroke Length: 12
Stroke Radius: 20
Stroke Direction: Right Diag
OK
Copy and paste the paper Into Selection.

Copy and paste your tube as a new layer below the frame.
Selections/Invert
Tap the delete key.

Copy and paste Tree 2 as a new layer below the frame.
Move into position.
Tap the delete key.
Deselect.

Apply Greg’s Factory Output Vol. II - Pool Shadow to the paper layer:


Copy and paste Bush 1 as a new layer.
Place behind the frame.
Duplicate/Mirror

Copy and paste Doodles 5 as a new layer.
Resize 50%
Duplicate/Mirror/Merge Down
Position behind the paper layer.
Duplicate/Flip

Highlight your white background.
New Raster layer.
Select All.
Copy and paste 10 Into Selection.
Deselect.
Apply the mask.
Merge Group.

Add your credits.

Add your name.
Apply Eyecandy 3.1 - Glow:
Width: 3
Opacity: 100
Opacity Drop off: Fat
Color: white

Resize all layers 80%.

I hope you enjoyed this tutorial.
I’d love to see your results and show it off in my gallery.
Email me!
Hugs,
Bev

Pure Beauty


Clicking on the image will allow you to enlarge for bigger view.

Supplies

1 tube of choice - I used the artwork of Jennifer Janesko which can now be found at CDO
Font of Choice - I used Jellyka Castle’s Queen here
Gem’s Mask 161 here
“Angel” is a FTU scrap kit created by Diane of Candy’s Treats and can be downloaded from her blog here.
Please leave a thank you when downloading as it’s a very small gesture for hard work given freely.

This tutorial was written assuming you have a working knowledge of PSP.

~♥~ Let’s get started ~♥~

Open up a 700 x 700 blank canvas.
Flood fill white.

Copy and paste Angle Torn Frame 3 as a new layer.
Move it up slightly on your canvas.
Click inside of each square with your Magic Wand.
Selections/Modify/Expand by 6.
New Raster layer below the frame.
Copy and paste Paper 9 Into Selection.
Deselect.

Close out your white canvas.
Merge Visible.
Reopen your white canvas.

Copy and paste your tube as a new layer.

Add your embellishments. I used:
Lace
Glitter Circle
Bow 1: Resize 80%
Winged Heart: Resize 70%/Mirror/change the Properties to Overlay/Duplicate/Lower the Opacity to about 20
Clouds

Highlight your white background.
New Raster layer.
Select All.
Copy and paste Block 1 Into Selection.
Deselect.
Apply the mask.
Merge Group.

Add your credits.

Add your name.
Give it a slight Inner Bevel:


Resize all layers 80%.

I hope you enjoyed this tutorial.
I’d love to see your results and show it off in my gallery.
Email me!
Hugs,
Bev

Be My Valentine


Clicking on the image will allow you to enlarge for bigger view.

Supplies

2 tubes of choice - I used the artwork of Elias Chatzoudis at MPT
Font of Choice - I used HarabaraHand here
Divine Intentionz template 294 here
Becky Mask 22 here
Eyecandy 3.1 - Glow
“Be My Valentine” is a PTU scrap kit created by Melissa of P&A Designz and can be purchased from Twilight Scraps. You can visit her blog here.
Thank you Melissa for such a beautiful kit!

This tutorial was written assuming you have a working knowledge of PSP.

~♥~ Let’s get started ~♥~

Open up the template.
Shift +D.
Close out the original.
Delete the top 9 layers.
Image/Canvas Size
700 x 550
Highlight background layer and flood fill white.

Highlight Oval layer.
Click on it with your Magic Wand.
New Raster layer.
Copy and paste Paper 7 Into Selection.
Copy and paste one of your tubes as a new layer over the paper.
Selectons/Invert
Tap the delete key.
Deselect.
Change the Properties to Soft Light.
Delete the template layer.

Highlight the paper layer and apply Eyecandy 3.1 - Glow
Width: 3
Opacity: 100
Opacity Dropff - Fat
Color: white.

Highlight Circle 1 layer.
Click on it with your Magic Wand.
New Raster layer.
Copy and paste Paper 13 Into Selection.
Deselect.
Give it a slight Inner Bevel:


Delete the template layer.

Highlight Circle 2 layer.
Click on it with your Magic Wand.
New Raster layer.
Copy and paste Paper 9 Into Selection.
Deselect.
Delete the template layer.

Highlight Shape layer.
Click on it with your Magic Wand.
New Raster layer.
Copy and paste Paper 7 Into Selection.
Deselect.
Delete the template layer.

Copy and paste your tube as a new layer and position in front of the circle.

Add your embellishments. I used:
37: Resize 35%/Mirror
21: Resize 30%/Free rotate Left 15 degrees
13: Resize 25% and 60%/Duplciate/Resize 60%/Duplicate
15: 15
1: Resize 35%/Duplicate/Resize 70%/Duplciate/Resize 70%

Highlight your white background.
New Raster layer.
Select All.
Copy and paste Paper 13 Into Selection.
Deselect.
Apply the mask.
Merge Group.

Add your credits.

Add your name.
Give it the same Glow effect.

Resize all layers 80%.

I hope you enjoyed this tutorial.
I’d love to see your results and show it off in my gallery.
Email me!
Hugs,
Bev

Lil Devils

Clicking on the image will allow you to enlarge for bigger view.

Supplies

Font of Choice - I used Toontime here
Designs by Vaybs Mask 133 here
Brush Strokes - Sprayed Strokes
Eyecandy 3.1 - Glow
“Lil Devils” is a PTU scrap kit created by Brooke of Sweet Diva Dezigns and can be purchased from her store Butterfly Blush Designs. You can visit her blog here.
Thank you Brooke for a kit that’s cuter than cute!!

This tutorial was written assuming you have a working knowledge of PSP.

~♥~ Let’s get started ~♥~

Open up a 700 x 700 blank canvas.
Flood fill white.

Copy and paste Frame 2 as a new layer.
Resize 50%
Click inside of it with your Magic Wand.
Selections/Modify/Expand by 3.
New Raster layer below the frame.
Copy and paste Paper 4 Into Selection.
Deselect.

Close out your white canvas.
Merge Visible.
Reopen your white canvas.

Duplicate the merge layer.
Move both into position - see my tag for reference.

Add your embellishments. I used:
Flower Ribbon 2: Resize 90%/Duplicate
Flower Ribbon 2 again: Resize 90%/Free rotate right 90 degrees/Duplicate
Flower: Resize 60%
Flower 2: Resize 70%
Flower Stem 1: Free rotate Right 90 degrees
Lil Bat 1
Lil Bunny 2: Resize 85%
Dragonfly 1: Resize 50%/Mirror/Duplciate/Resize 70%
Dragonfly 2: Resize 60%
Dragonfly 3: Resize 40%

Highlight your white background.
New Raster layer.
Select All.
Copy and paste Paper 3 Into Selection.
Deselect.
Adjust/Blur/Gaussian Blur:
Radius 6
OK
Apply Brush Stroke - Sprayed Strokes 2x‘s:
Default Settings.
Apply the mask.
Merge Group.

Add your credits.

Add your name.
Give it a slight Inner Bevel:


Apply Eyecandy 3.1 - Glow
Width: 3
Opacity: 100
Opacity Drop off: Fat
Color: white

Resize all layers 80%.

I hope you enjoyed this tutorial.
I’d love to see your results and show it off in my gallery.
Email me!
Hugs,
Bev

Tuesday, January 4, 2011

Love is in the Air


Clicking on the image will allow you to enlarge for bigger view.

Supplies

1 tube of choice - I used the artwork of Keith Garvey at MPT
Font of Choice - I used HarabaraHand here
Designs by Vaybs Mask 133 here
Mura’s Meister - Copies
Eyecandy 3.1 - Glow
“Paper Doll” is a FTU scrap kit created by Heike of Fantansy Dreams Designzs and can be downloaded from her blog here.
Please leave a thank you when downloading as it’s a small gesture for hard work given freely.

This tutorial was written assuming you have a working knowledge of PSP.

~♥~ Let’s get started ~♥~

Open up a 700 x 700 blank canvas.
Flood fill white.

Copy and paste Flower 5 as a new layer.
Resize 25%
Apply Mura’s Meister - Copies:
Encircle - Default Settings accept change Number to 15.
OK

Resize the ring of flowers 110%.
Use your Magic Wand and click inside of it.
Selections/Modify/Expand by 6.
New Raster layer below the flowers.
Copy and paste Paper 6 Into Selection.
Deselect.

Copy and paste your tube as a new layer.


Add your embellishments. I used:
Deco 2: Resize 80%/Duplciate/Mirror/Flip - erase the leaves you don’t want
Bow 4: Resize 60%
Heart 4: Resize 50%
Swirl 1: Resize 70%/Duplciate/Flip/Mirror

Highlight your white background.
New Raster layer.
Select All.
Copy and paste Paper 18 Into Selection.
Deselect.
Apply the mask.
Merge Group.

Add your credits.

Add your name.
Apply Eyecandy 3.1 - Glow
Width: 3
Opacity: 100
Opacity Drop off: Fat
Color: white

Resize all layers 80%.

I hope you enjoyed this tutorial.
I’d love to see your results and show it off in my gallery.
Email me!
Hugs,
Bev

Heavens Angels


Clicking on the image will allow you to enlarge for bigger view.


Supplies

1 tube of choice - I used the artwork of Zindy S.D. Nielsen here
Font of Choice - I used Oh Lara - a pay font
Monti Circular Mask here
“Heavens Angels” is a PTU scrap kit created by Tracey of Heart of Essence and can be purchased from Lollipops n Gumdrops. You can visit her blog here.
Thank you Tracey for such a soft and beautiful kit.

This tutorial was written assuming you have a working knowledge of PSP.

~♥~ Let’s get started ~♥~

Open up a 700 x 700 blank canvas.
Flood fill white.

Select All
New Raster layer.
Copy and paste Paper 3 Into Selection.
Deselect.
Apply the Mask.
Merge Group

Copy and paste your tube as a new layer.

Copy and paste all your elements as new layers. They’ll all overhang the mask and we’ll take care of that later. Use my tag as reference to move elements in position - or since this is your piece of heaven….do your own arranging!
I used:
46: Resize 70%
32: Resize 25%
15: Resize 30%
47: Resize 70%/Duplicate/Mirror/Resize 70%

Close out your white background.
Merge Visible.
Reopen your white background.

Add a few more embellishments. I used:
50: Resize 25%
1: Resize 25% and 50%/Lower the Opacity to about 55
49: Resize 50%/Free rotate Right 90 degrees
49 again: Resize 40%/Free rotate Right 90 degrees/Mirror

Add your credits.

Add your name.

Resize all layers 80%.

I hope you enjoyed this tutorial.
I’d love to see your results and show it off in my gallery.
Email me!
Hugs,
Bev

Monday, January 3, 2011

I Heart Goth


Clicking on the image will allow you to enlarge for bigger view.

Supplies

1 tube of choice - I used the artwork of Anna Marine which can now be found at CDO
Font of Choice - I used UnZialish here
Weescotlass Mask 236 here
Greg’s Factory Output Vol. II - Pool Shadow
DSB Flux - Bright Noise
“I Heart Goth” is a PTU tagger size scrap kit created by Rieka Rafiti and can be purchased from Scraps with Attitude. You can visit her blog here.
Thank you Rieka for such an awesome kit!

This tutorial was written assuming you have a working knowledge of PSP.

~♥~ Let’s get started ~♥~

Open up a 700 x 700 blank canvas.
Flood fill white.

Copy and paste Frame 2 as a new layer.
Resize 85%.

Copy and paste your tube as a new layer.

Use my tag as reference and move the frame and tube into position.

Highlight the frame layer.
Click inside with your Magic Wand.
Selections/Modify/Expand by 3.
Copy and paste Paper 14 as a new layer.
Resize 85%
Selections/Invert
Tap the delete key.
Deselect.

Highlight your tube layer.
Duplicate/Mirror
Move the duplicated layer below the frame layer and into position - see my tag for reference.
Highlight the paper layer.
Click anywhere outside of it with your Magic Wand.
Highlight the duplicated tube layer.
Tap the delete key.
Deselect.
Change the Properties to Overlay.
Duplicate/Lower the Opacity to 42.

Add your embellishments. I used:
Sparkle 1
Arch: Resize 70%
Bow 1: Resize 35%
Bottle: Resize 85%
Cup: Resize 50%

Crop your image.

Highlight your white background.
Select All
Copy and paste Paper 1 Into Selection.
Deselect.
Apply the mask
Merge Group.
Position it behind the paper/frame layers.

Add your credits.

Add your name.
In your color pallet:
Foreground: Black
Background: Null
Width: 2

Make your Ellipse Tool active set on circle.
Make a circle that’s a little larger than the frame.

In your color pallet:
Foreground: Black
Background: Patten/Set to Paper 1
Stroke: 2

Move your curser along the edge of the circle where you want your name.
When you see the rocking A click the mouse.
A Text Box will appear.
Type your name in it.
In your layers pallet click on the + sign.
Close out the New Ellipse layer.
Highlight Vector 1 layer.
Convert to Raster layer.

Select All/Float/Defloat
Selections/Modify/Contract by 2.
Give your name a slight inner bevel:


Apply Greg’s Factory Output Vol. II - Pool Shadow:
Default Settings

Apply DSB Flux - Bright Noise:
Intensity: 25
Mix: checked
OK
Deselect.

Resize all layers 80%.

I hope you enjoyed this tutorial.
I’d love to see your results and show it off in my gallery.
Email me!
Hugs,
Bev


European Diva


Clicking on the image will allow you to enlarge for bigger view.

Supplies

1 tube of choice - I used the artwork of Jose Cano. This is an exclusive tube for ACDiva forum. Simply reach 600 posts (incredibly easy to do) and it’s yours! So head on over there now.
Font of Choice - I used HarabaraHand here
Weescotlass Mask 236 here
Divine Intentionz Template 358 here
This tutorial was created with Artmama Made’s Diva’s Rule portion of the AC Diva’s collaboration kit. This kit is available for purchase only at Exquisite Scraps. You can visit Artmama’s blog here.

This tutorial was written assuming you have a working knowledge of PSP.

~♥~ Let’s get started ~♥~

Open up the template.
Shift + D.
Close out the original.
Delete the following layers:
Top 2 layers, Heart 1, Heart 2, and Heart 3
Resize all layers 90%
Image/Canvas Size
700 x 600
Open up Raster 2 and flood fill white.

Highlight Glitter Circle 1 layer.
Use your Magic Wand and click anywhere outside of the circle.
Selections/Invert
New Raster layer.
Copy and paste 4 Into Selection.
Adjust/Add Remove Noise/Add Noise:
Uniform and Monochrome checked
Noise: 65%
Deselect.
Delete the template layer.

Repeat the above step with:
Rectangle 1
Glitter Circle Left
Glitter Circle Right
Glitter Circle Center

Highlight Circle 1 layer.
Click on it with your Magic Wand.
New Raster layer.
Copy and paste 5 Into Selection.
Copy and paste Embellie 5 as a new layer.
Move into position over the paper.
Selections/Invert
Tap the delete key.
Deselect.
Delete the template layer.

Highlight Rectangle 2 layer.
Click on it with your Magic Wand.
New Raster layer.
Copy and paste 1 Into Selection.
Deselect.
Delete the template layer.

Highlight Circle Left layer.
Click on it with your Magic Wand.
New Raster layer.
Copy and paste 2 Into Selection.
Deselect for now.
Copy and paste Embellie 2 as a new layer above the paper.
Resize 75% - move into position - see my tag for reference - lower the Opacity to about 38.
Copy and paste ACD Main (tube) as a new layer above the tower.
Resize 50% - move into position - Lower the Opacity to about 81.
Use your Magic Wand and click anywhere outside of the tube.
Selections/Invert
Highlight the tower layer. Use your Eraser Tool and erase the tower that can be seen through the tube.
Deselect.
Highlight the circle paper layer.
Use your Magic Wand and click anywhere outside of it.
Highlight the tower layer and tap the delete key.
Highlight the tube layer and tap the delete key.
Deselect.

Highlight Circle Right layer.
Click on it with your Magic Wand.
New Raster layer.
Copy and paste 2 Into Selection.
Deselect for now.
Copy and paste Embellie 48 as a new layer.
Resize 50%
Move into position over the circle paper.
Use your Pick Tool to pull the top and bottom of the clock out just a little so that it meets up with the edge of the paper.

Highlight Circle Center layer.
Click on it with your Magic Wand.
New Raster layer.
Copy and paste 6 Into Selection.
Copy and paste Embellie 4 as a new layer.
Move into position over the paper layer.
Selections/Invert
Tap the delete key.
Lower the Opacity to about 46.
Deselect.
Delete the template layer.

Copy and paste Acde CU-2 (tube) as a new layer.
Resize 90%
Use your Freehand Selection Tool and circle around the tube - make sure the line touches wherever you want the tube to have a feathered effect.
Selections/Modify/Inside Outside Feather
Both: checked
Feather amount: 43
OK
Selections/Invert
Tap the delete key until you have a nice feathered look to the bottom of your tube.
Deselect.

Add your embellishments. I used:
Embellie 11: Resize 50%
Embellie 60: Resize 85%
Embellie 20: Resize 50%/Free rotate Left 45 degrees

Highlight your white background.
New Raster layer.
Select All.
Copy and paste 15 Into Selection.
Deselect.
Apply the mask.
Merge Group.

Add your credits.

Add your name.

Resize all layers 80%

I hope you enjoyed this tutorial.
I’d love to see your results and show it off in my gallery.
Email me!
Hugs,
Bev

Cause for Celebration


Supplies

1 tube of choice - I used the artwork of Renee Biertempfel. She can now be found at CDO
Font of Choice - I used HarabaraHand here
Vix Mask 451 here
Eyecandy 3.1 - Glow
This tutorial was created with Kissed by Pix and Kissed by Cari Designs’ portion of the TKO Twinkle’s collaboration kit. This kit is available for purchase only at TKO Scraps. You can visit Pixie’s blog here and Cari's blog here.
Thank you both for a beautiful collaboration!

This tutorial was written assuming you have a working knowledge of PSP.

~♥~ Let’s get started ~♥~

Open up a 700 x 700 blank canvas.
Flood fill white.

Copy and paste Bling Cluster Frame Silver from Element 4 Folder as a new layer.
Resize 30%
Use your Magic Wand and click inside of it.
Selections/Modify/Expand by 4.
New Raster layer below the frame.
Copy and paste Black Card Stock from Papers 2 Folder Into Selection.
Deselect.

Copy and paste your tube as a new layer above the frame.
Position to the right - see my tag for reference.
Duplicate/Move to the left a little.
In your layers pallet move beneath the frame.
Highlight the paper layer.
Click anywhere outside of it with your Magic Wand.
Highlight the duplicated tube layer and tap the delete key.
Lower to Opacity to about 42.

Add your embellishments. I used:
Elements 1 Folder -
Silver Star Spray: Resize 25%
Silver Key 1: Resize 25% and 85%/Duplicate/Free rotate Left 5 degrees
Night Bow 5: Resize 25% and 45%

Elements 2 Folder -
Flower Clock 2: Resize 40%

Elements 4 Folder -
Bubbly Silver: Resize 25% and 30%
Sexy Shoe: Resize 25% and 50%/Duplciate/Mirror

Highlight your white background.
New Raster layer.
Select All.
Copy and paste Velvet Black Paper from Papers1 Folder Into Selection.
Deselect.
Apply the mask.
Merge Group.

Add your credits.

Add your name.
Apply Eyecandy 3.1 - Glow:
Width: 3
Opacity: 100
Opacity Dropoff: Medium
Color: White

Crop your image.

Resize all layers 90%

I hope you enjoyed this tutorial.
I’d love to see your results and show it off in my gallery.
Email me!
Hugs,
Bev
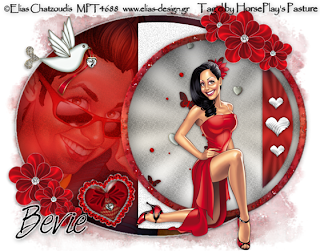
Yes, I'm a Diva


Clicking on the image will allow you enlarge for bigger view.

Supplies

1 tube of choice - I used the artwork of Jose Cano. This is an exclusive tube for ACDiva forum. Simply reach 600 posts (incredibly easy to do) and it’s yours! So head on over there now.
Font of Choice - I used HarabaraHand here
Becky Mask 22 here
This tutorial was created with Bits N Bob’s Diva’s Rule portion of the AC Diva’s collaboration kit. This kit is available for purchase only at Exquisite Scraps. You can visit Julie’s blog here.

This tutorial was written assuming you have a working knowledge of PSP.

~♥~ Let’s get started ~♥~

Open up a 700 x 700 blank canvas.
Flood fill white.

Copy and paste Frame 6 as a new layer.
Resize 80%
Use your Magic Wand and click inside of each frame.
New Raster layer below the frame.
Copy and paste Paper 2 Into Selection.
Deselect.

Copy and paste your tube as a new layer.
Position to the right of your canvas. See my tag for reference.

Add your embellishments. I used:
19: Resize 50%
29: Resize 40%
17: Resize 70%
21: Resize 55%/Mirror
53
39: Resize 30%
8: Resize 70%/Flip
48: Mirror
48 again: Resize 70%


Highlight your white background.
New Raster layer.
Select All.
Copy and paste Paper 6 Into Selection.
Deselect.
Apply the mask.
Merge Group.
Duplicate

Copy and paste your tube again.
Position just above the mask - see my tag for reference.
Apply the mask.
Merge Group.
Change the Properties to Multiply.
Lower the Opacity to about 24.
Use your Eraser Tool and erase the lower part of the tube that you can see below the frame.

Add your credits.

Add your name.

Resize all layers 80%

I hope you enjoyed this tutorial.
I’d love to see your results and show it off in my gallery.
Email me!
Hugs,
Bev


Diva's Rock


Clicking on the image will allow you to enlarge for bigger view.

Supplies

1 tube of choice - I used the artwork of Jose Cano. This is an exclusive tube for ACDiva forum. Simply reach 600 posts and it’s yours! So head on over there now.
Font of Choice - I used HarabaraHand here
Divine Intentionz Template 259 here
Weescotlass Mask 241 here
Eyecandy 3.1 - Glow
This tutorial was created with Bits N Bob’s Diva’s Rule portion of the AC Diva’s collaboration kit. This kit is available for purchase only at Exquisite Scraps. You can visit Julie’s blog here.

This tutorial was written assuming you have a working knowledge of PSP.

~♥~ Let’s get started ~♥~

Open up the template.
Shift + D.
Close out the original.
Delete the following layers:
By Missy, Words, and Circle.
Highlight the background layer.
Image/Canvas Size
650 x 525
OK
Flood fill white.

Highlight Rectangle layer.
Click on it with your Magic Wand.
New Raster layer.
Copy and paste Paper 5 Into Selection.
Copy and paste ACD Main (tube) as a new layer.
Resize 50%
Move it just inside the rectangle - see my tag for reference.
Selections/Invert
Tap the delete key.
Deselect.
Change the Properties to Hard Light and Lower the Opacity to about 26.
Delete the template layer.

Highlight Thin Rectangle 3 layer.
Merge Down.
Merge Down.
3 template layers should now all be on one layer.
Click on each on with your Magic Wand.
New Raster layer.
Copy and paste Paper 5 Into Selection.
Deselect.
Delete the template layer.

Highlight Dotted Line 2.
Merge Down.
Select All/Float/Defloat
Open up element 50 from the kit.
Us your Selection Tool set on rectangle and section out a portion of the shoe.
In your color pallet set the Foreground to pattern and look for the section of shoe you chose.
Open up a new 700 x 700 blank canvas.
Flood fill with your pattern.
Edit/Copy
Make your working canvas active.
Edit/Paste Into Selection.
Deselect.
Delete the template layer.

Highlight Frame layer.
Click on it with your Magic Wand.
New Raster layer.
Paste the pattern paper you made Into Selection.
Give it a slight Inner Bevel:


Deselect.
Delete the template layer.

Highlight Frame Background layer.
Click on it with your Magic Wand.
New Raster layer.
Open up Paper 6.
Use your Selection Tool again and section out a plain area of the paper.
In your color pallet set the foreground to pattern and look for section of paper.
Make your working canvas active.
Flood fill.
Copy and paste ACD-CU2 (the close up tube) as a new layer just below the frame.
Move into position - see my tag for reference.
Selections/Invert
Tap the delete key.
Deselect.
Delete the template layer.

Copy and paste ACD Main (tube) again.
Resize 50%
Position beside the rectangle - see my tag for reference.

Add your embellishments. I used:
10: Use your Eraser Tool (or Freehand Selection Tool) to eliminate the hanging leaves. Resize 60%
48:
50: Resize 35%
51: Resize 30%/Duplicate/Resize 60%
52: Resize 25%/Duplicate
56, 57 and 58: Resize 30%
39: Resize 25%
55: Resize 40%

Highlight your white Background.
New Raster layer.
Select All.
Copy and paste a paper of choice Into Selection.
Deselect.
Apply the mask.
Merge Group.

Add your credits.

Add your name.
Apply Eyecandy 3.1 - Glow:
Width: 3
Opacity: 100
Opacity Dropoff: Medium
Color: White

Resize all layers 90%

I hope you enjoyed this tutorial.
I’d love to see your results and show it off in my gallery.
Email me!
Hugs,
Bev
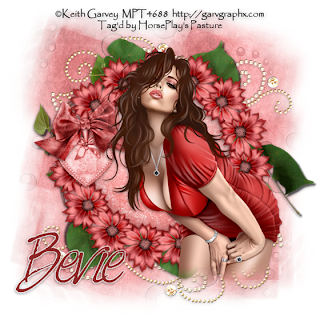

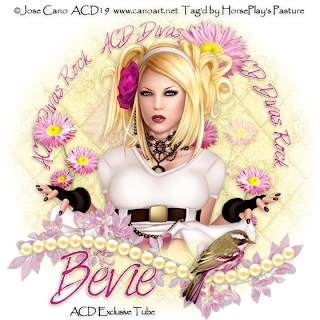
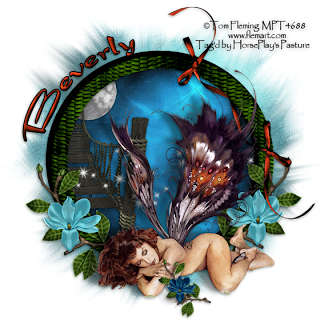
ACD Diva's Rock


Clicking on the image will allow you to enlarge for bigger view.

Supplies

1 tube of choice - I used the artwork of Jose Cano. This is an exclusive tube for ACDiva forum. Simply reach 600 posts and it’s yours! So head on over there now.
Font of Choice - I used HarabaraHand here
Monti Circular Mask here
Eyecandy 3.1 - Glow
My Supplies here
This tutorial was created with Bits N Bob’s Diva’s Rule portion of the AC Diva’s collaboration kit. This kit is available for purchase only at Exquisite Scraps. You can visit Julie’s blog here.

This tutorial was written assuming you have a working knowledge of PSP.

~♥~ Let’s get started ~♥~

Open up a 700 x 700 blank canvas.
Flood fill white.

New Raster layer.
Select All.
Copy and paste Paper 6 Into Selection.
Deselect.
Apply the mask.
Merge Group.
Duplicate.

Copy and paste ACD-CU2 as a new layer.
We’re going to feather the bottom of the tube so it doesn’t have such a strict look to it.
Use your Freehand Selection Tool and circle around the tube - be sure the dotted line touches the bottom part of the tube and keep the line away from the rest of the tube:


Selections/Modify/Inside Outside Feather
Both: checked
Feather amount: 43
OK
Selections/Invert
Tap the delete key a few times.
Deselect.

Add your embellishments. I used:
30:
48: Paste and duplicate as you like - see my tag for reference.
8: Resize 50%/Free rotate Left 90 degrees/Duplicate/Mirror/Flip/Free rotate Left 10 degrees
39: Resize 60%

Open up the words that I’ve supplied.
Copy and paste them just above the mask layer.
Move into position - see my tag for reference.
Duplicate

Add your credits.

Add your name.
Apply Eyecandy 3.1 - Glow:
Width: 3
Opacity: 100
Opacity Dropoff: Medium
Color: White

Resize all layers 80%

I hope you enjoyed this tutorial.
I’d love to see your results and show it off in my gallery.
Email me!
Hugs,
Bev

Sunday, January 2, 2011

Sweet Treat


Clicking on the image will allow you to enlarge for bigger view.


Supplies

1 tube of choice - I used the artwork of Barbara Jensen here
Font of Choice - I used HarabaraHand here
Divine Intentions Template 288 here
“Cute Little Girl‘” is a PTU scrap kit by Seven’s Scraps and can be purchased at Twilight Scraps. You can visit her blog here.
Thank you Seven for a super precious kit!!

This tutorial was written assuming you have a working knowledge of PSP.

~♥~ Let’s get started ~♥~

Open up the template.
Shift & D.
Close out the original.
Delete the top 3 layers.
Image/Canvas Size
700 x 600
OK
Highlight the background layer and flood fill white.

Highlight Square layer.
Click on it with your Magic Wand.
New Raster layer.
Copy and paste Paper 15 Into Selection.
Copy and paste your tube above the paper.
Move into position - see my tag for reference.
Selections/Invert
Tap the delete key.
Deselect.
Change the Properties to Overlay.
Delete the template layer.

Highlight Glittered Oval 1 layer.
Select All/Float/Defloat
New Raster layer.
Copy and paste Paper 4 Into Selection.
Adjust/Add Remove Noise/Add Noise:
Uniform and Monochrome checked
Noise: 35%
OK
Deselect.
Delete the template layer.

Highlight Glittered Rectangle layer.
Repeat the above step.

Highlight Glittered Frame layer.
Repeat the above step.
Give it a slight Inner bevel:


Highlight Oval layer.
Click on it with your Magic Wand.
New Raster layer.
Copy and paste Paper 13 Into Selection.
Deselect.
Delete the template layer.

Highlight Circle layer.
Click on it with your Magic Wand.
New Raster layer.
Copy and paste Paper 3 Into Selection.
Copy and paste your close up image as a new layer (or resize your tube)
Move into position over the circle.
Selections/Invert
Tap the delete key.
Change the Properties to Soft Light.
Duplicate/Change the Properties to Multiply and lower the Opacity to about 51.
Deselect.
Delete the template layer.

Highlight Frame Background layer.
Click on it with your Magic Wand.
New Raster layer.
Copy and paste Paper 3 Into Selection.
Deselect.
Delete the template layer.

Highlight Rectangle layer.
Click on it with your Magic Wand.
New Raster layer.
Copy and paste Paper 6 Into Selection.
Deselect.
Delete the template layer.

Copy and paste your tube as a new layer.
Position it in front of the frame.

Add your embellishments. I used:
Flower 1: Resize 50%
Flower 5: Resize 50%
Bead 2: Resize 30%
Leaves 1: Resize 90%/Free rotate Left 50 degrees
Flower Boarder 1: Resize 50%
Ribbon 5: Resize 80%Wings 1: Resize 25% and 80%/Free rotate Left 25 degrees

Highlight your white background.
New Raster layer.
Select All.
Copy and paste a paper of choice Into Selection.
Deselect.
Apply the mask.
Resize 110%
Because I am anal with my tags (lol) if you notice at the top of your mask you can see an “edge” line at the top of it. Make your eraser tool active, set the size to about 83, Hardness 50 and barely touch that line with the eraser to get rid of it.
Merge Group.

Copy and paste 8 as a new layer just above the mask layer.
Apply the mask.
Merge Group.

Add your credits.

Add your name.
Give it the same inner bevel.

Resize all layers 80%

I hope you enjoyed this tutorial.
I’d love to see your results and show it off in my gallery.
Email me!
Hugs,
Bev