Thursday, December 31, 2009

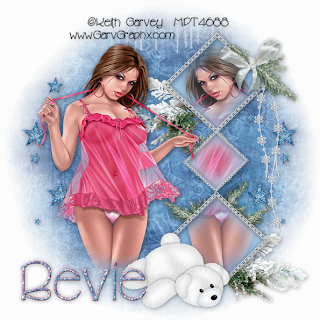
On a Chilly Winter's Night


Supplies
1 tube of choice - I used the awesome artwork of Keith Garvey at My PSP Tubes
Font of choice - I used Cricket here
Monti Circular Mask here
DSB Flux - Bright Noise
Animation Shop
“Blue Christmas” is a PTU tagger size scrap kit created by Lynne of Baby Cakes Scraps and can be purchased at Creative Scraps. You can visit her site here.
Thank you Lynne for a beautiful and wintery kit!

This tutorial was written assuming you have a working knowledge of PSP.


~♥~ Let’s get started ~♥~

Open up a 700 X 700 blank canvas.
Flood fill white.

Copy and Paste Diamond Frame as a new layer.
Resize 55%
Move into position at the right side of the canvas.
See mine for positioning.
Copy and Paste your tube as a new layer.
Move into position at the left side of your canvas.
Duplicate/Mirror.
Move the duplicate below the frame layer and center it within the diamonds.
Now close the duplicate tube layer out for now.
Highlight the Diamond Frame layer.
Use your Magic Wand and click inside of all the diamonds.
Selections/Modify/Expand by 4.
New Raster layer below the closed out duplicate tube.
Flood fill with a gradient of choice.
DO NOT DESELECT.

Open up the duplicate tube layer.
Selections/Modify/Feather
Number of Pixels:
53
OK
Selections/Invert
Tap the delete key until you have the feathered look you want.
Deselect.
Add your embellishments. I used:
Dnagle: Resize 30%
Branch 2: Resize 30%
Branch: Resize 25% and 80% Free rotate right 30 degrees
Bear: Resize 45%

Copy and paste Glitter Stars as a new layer.
Resize 40%
Move into position at the right side of your canvas.
Duplicate/Mirror
Move into position at the left side of your canvas.
Merge Down.
In your layers pallet move the stars layer just above your white canvas.
Duplicate 2 times for a total of 3 star layers.
Rename the layers:
Stars 1, Stars 2, Stars 3

Highlight your white background.
New Raster layer.
Select All.
Copy and paste a paper of choice Into Selection.
Deselect.
Apply the mask.
Merge Group.

Copy and paste Icicles as a new layer.
Duplicate and move it so that you have a long line of icicles across your canvas.
Merge Down.
Move them into position near the top of your circle.
(See mine for reference)
Apply the Mask.
Merge Group.
Add your copyrights.

Add your name.
Give it a slight inner bevel:


Highlight Stars 1 layer.
Apply the DSB Flux - Bright Noise:


Highlight Stars 2.
Apply the DSB Flux Bright Noise again accept click on the mix button twice.

Highlight Stars 3.
Apply the DSB Flux Bright Noise again accept click on the mix button 3 times.

Close out Stars 2 and Stars 3 layers.
Copy Merge

~Time to Animate~

Open up Animation Shop.
Copy/Paste/As New Animation.

Go back into PSP.
Close out Stars 1
Open up Stars 2
Copy Merge

Carry Into AS
Edit/Paste/After Current Frame.

Go back into PSP.
Close out Stars 2.
Open up Stars 3.
Copy Merge.

Carry into AS
Edit/Paste/After Current Frame.

View your animation. If you're happy with it then resize:
Animation/Resize Animation
Percentage of Original checked.
Width and Height 85%
OK

Now save your animation.

I hope you enjoyed this tutorial.
I’d love to see your results.
Email me!
Hugs,
Bev

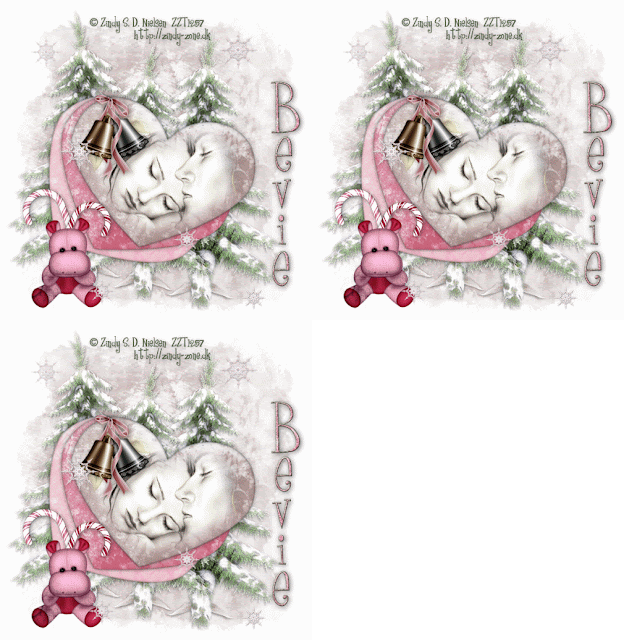
Winter Affair


Supplies
1 tube of choice - I used the beautiful artwork of Zindy S. D. Nielsen here
Font of choice - I used Curly Cue here
Becky Mask 22 here
DSB Flux - Bright Noise
Animation Shop
“Winter Love” is a PTU tagger size scrap kit created by Valerie of Baby V Dezign and can be purchased at TKO Scraps. You can visit her site here.
Thank you Valerie for such an amazing kit!

This tutorial was written assuming you have a working knowledge of PSP.

~♥~ Let’s get started ~♥~

Open up a 700 X 700 blank canvas.
Flood fill white.
Copy and Paste Heartele 1 as a new layer.
Resize 140%

Copy and Paste Heartele 2 as a new layer.
Resize 140%
Copy and Paste Heartele 3 as a new layer.
Resize 140%
Choose which heart you’d like your tube on.
I chose Heartele 2.
Highlighting each of the other heart layers, use your Pick tool and turn each of the hearts just a little to give a fan effect.
(Move the hearts slightly to the left side of your canvas)
Position the hearts so that all the holes line up exactly.

Highlight the heart you chose to have your tube on.
Select All/Float/Defloat
Copy and paste your tube as a new layer.
Move into position over the heart.
Selections/Modify/Feather
Number of Pixels:
53
OK
Selections/Invert
Tap the delete key until you have the feathered affect you want.
Deselect.
Merge Down.

Copy and paste Bells as a new layer.
Resize 70%
Use your Eraser tool and erase the ribbon that’s above the knot.
Move into position over the holes in the hearts.
Copy and paste Pine Tree as a new layer behind all the hearts.
Resize 120%.
Move to the left.
Duplicate/Mirror
Position at the right side
Duplicate/Resize 80%
Position in the middle of the two trees.
Copy and paste Candy Cane 3 as a new layer.
Resize 40%
Free rotate left 25 degrees.

Copy and paste Candy Cane 1 as a new layer.
Resize 40%
Mirror
Free rotate right 25 degrees.
Copy and paste Animal 2 as a new layer.
Resize 40%
Copy and paste snowflakes of your choice.
Resize as you like.

Highlight your white background.
New Raster layer.
Select All.
Copy and paste a paper of choice Into Selection.
Deselect.
Apply the mask.
Merge Group.
Add your copyrights.

Add your name.
Give it a slight inner bevel:

Duplicate it 2 times for a total of 3.
Rename them Name 1, Name 2, and Name 3.

Highlight Name 1.
Apply the DSB Flux-Bright Noise:

Highlight Name 2.
Apply the DSB Flux Bright Noise again accept click on the mix button twice.

Highlight Name 3.
Apply the DSB Flux Bright Noise again accept click on the mix button 3 times.

Close out Name 2 and Name 3 layers.
Copy Merge

~Time to Animate~
Open up Animation Shop.
Copy/Paste/As New Animation.

Go back into PSP.
Close out Name 1
Open up Name 2
Copy Merge

Carry Into AS
Edit/Paste/After Current Frame.

Go back into PSP.
Close out Name 2.
Open up Name 3.
Copy Merge.

Carry into AS
Edit/Paste/After Current Frame.

View your animation. If you like then resize:
Animation/Resize Animation
Percentage of Original checked.
Width and Height 85%
OK
Now save your animation.

I hope you enjoyed this tutorial.
I’d love to see your results.
Email me!
Hugs,
Bev
 

Sunday, December 27, 2009

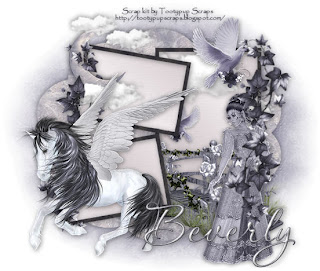
Mystical Dreams


Clicking on the image will enlarge to full view.

Supplies
Font of choice - I used Aquarelle here
Monit Circle Mask here
Essence of Creativity Template # 7 here
“Mystical Dreams” is a PTU tagger size scrap kit created by Susan of Tootypup Scraps and can be purchased at Aussie Scraps Designs. You can visit her blog here.
Thank you Susan for such an amazing kit!


This tutorial was written assuming you have a working knowledge of PSP.


~♥~ Let’s get started ~♥~


Open up the template.
Delete the credit layer.


Highlight Shape Layer.
Select All/Float/Defloat
New Raster Layer.
Copy and paste a paper of choice Into Selection.
Deselect.
Delete the template layer.
Highlight Large Frame layer.
Select All/Float/Defloat
New Raster Layer.
Copy and paste a dark colored paper Into Selection
Selection/Modify/Contract
Number of Pixels: 8
OK
Tap the delete key
Selections/Modify/Expand
Number of Pixels: 2
OK
New Raster layer below the new frame you just made.
Flood fill with a gradient of your choice.
Deselect.
Delete the template layer.

Highlight Small Frames Layer.
Repeat the above step.


Add your embellishments. I used:
Ivy 2: Free rotate left 25 degrees. Move into position over the frames on the left side of your canvas.
Ivy 2 again: Free rotate left 30 degrees. Move into position at the right side of your canvas.
Clouds Moon 1: Resize 30% and 90%. Mirror.
Cloud 1: Resize 25%
Dove 1: Resize 40%. Duplicate as many times as you like and resize to your liking.
Bridge 2: Resize 50%. Mirror.Winged Horse 1: Resize 50%. Mirror.
Poser 1: Resize 50% and 85%. Mirror.

Highlight your white background.
New Raster layer.
Select All.
Copy and paste a paper of choice Into Selection.
Deselect.
Apply the mask.
Merge Group.


Add your copyrights.
If you didn’t use an artist’s tube then please give credit to the scrap kit designer. She’ll appreciate it!

Add your name.
Give it a slight inner bevel:


Resize all layers 85%.


I hope you enjoyed this tutorial.

I’d love to see your results.

Email me!

Hugs,

Bev

Sunday, December 20, 2009

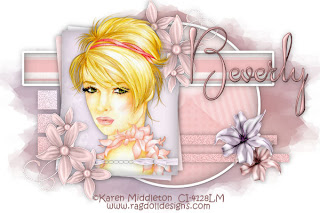
Pretty in Pink


Supplies
1 tube of choice - I used the beautiful artwork of Karen Middleton here.
Font of choice - I used Pendulum here
Weescotlass Mask 220 here
Scrappity Scrap and More Template 17 here
“Glam and Glitter” is a FTU tagger size scrap kit created by Terry of Treasure’s by Terry and can be found on her blog here.
Please leave a simple thank you when downloading. It’s a small gesture for hard work given freely.
Thank you Terry for such a delicate freebie!


This tutorial was written assuming you have a working knowledge of PSP.

~♥~ Let’s get started ~♥~


Open up the template.
Delete the credit layer.
Image/Canvas Size
600 X 400
Highlight Raster 1 and flood fill white.

Highlight Raster 3.
Select All/Float/Defloat
New Raster layer.
Copy and paste a paper of choice Into Selection.
Deselect.
Delete template layer.


Highlight Raster 4.
Select All/Float/Defloat
New Raster layer.
Flood fill with a gradient of your choice..
Deselect.
Delete template layer.
Adjust/Add Remove Noise/Add Noise
Gaussian and Monochrome checked
Noise: 22%
OK

Highlight Raster 5.
Repeat the above step.


Highlight Raster 6.
Select All/Float/Defloat
Copy and paste a paper of choice Into Selection.
Deselect.
Delete template layer.


Highlight Copy of Vector 1 layer.
Select All/Float/Defloat
New Raster layer.
Copy and paste a paper of choice Into Selection.
Deselect.
Delete template layer.


Repeat the above step with Copy of Raster 7 layer and Raster 7 layer.

Copy and paste your tube as a new layer.

Add your embellishments. I used:
Flower 9: Resize 80% Duplciate/Mirror/Flip
Ribbon and Chain 2: Resize 38%. Use Pick Tool to pull ends in slightly.
Flower 1: Resize 40%
Flower 2: Resize 30%

Highlight your white background.
New Raster layer.
Select All.
Copy and paste a paper of choice Into Selection.
Deselect.
Apply the mask.
Resize 110%
Merge Group.

Add your copyrights.


Add your name.
Give it a slight inner bevel:


I hope you enjoyed this tutorial.

I’d love to see your results.

Email me!

Hugs,

Bev

Saturday, December 19, 2009

Winter Wishes


Supplies
Font of choice - I used Chicken Basket which I’ve supplied here
Weescotlass Mask 249 here
Dezigns by Ali Template 84 here
“Winter Wishes” is a FTU tagger size scrap kit created by Deb of Debs Design and can be found on her blog here.
Thank you Deb for such an adorable freebie!

This tutorial was written assuming you have a working knowledge of PSP.

~♥~ Let’s get started ~♥~

Open up the template.
Image/Canvas Size
600 x 600

Highlight Shape 1 Layer.
Select All/Float/Defloat
New Raster layer.
Copy and paste a paper of choice Into Selection.
Deselect.
Delete the template layer.

Highlight Shape 2 Layer.
Select All/Float/Defloat
New Raster layer.
Copy and paste a paper of choice Into Selection.
Deselect.
Delete the template layer.

Copy and paste Chair as a new layer.
Resize 70%
Change the Properties to Soft Light.

Highlight Shape 3 Layer.
Select All/Float/Defloat
New Raster layer.
Copy and paste a paper of choice Into Selection.
DO NOT DESELECT.

Copy and paste Santa as a new layer.
Resize 40%
Move into position.
Selection/Modify/Feather
Number of Pixels: 53
OK
Selection/Invert
Tap the delete key until you have the feathered look you like.
Deselect.
Delete the template layer.

Highlight the top Shape 4 Layer.
Select All/Float/Defloat
New Raster layer.
Copy and Paste a paper of choice Into Selection.
DO NOT DESELECT.

Copy and paste Rudolf 2 as a new layer.
Resize 40%

Copy and paste Rudolf 1 as a new layer.
Resize 35%

Merge visible both Rudolf layers.
Selection/Modify/Feather
Number of Pixels: 33
OK
Selection/Invert
Tap the delete key until you have the feathered look you like.
Deselect.
Delete the template layer.

Highlight the bottom Shape 4 Layer.
Select All/Float/Defloat
New Raster layer.
Copy and Paste a paper of choice Into Selection.
DO NOT DESELECT.
Copy and paste Momma Bear as a new layer.
Resize 40%
Selection/Modify/Feather
Number of Pixels: 33
OK
Selection/Invert
Tap the delete key until you have the feathered look you like.
Deselect.
Delete the template layer.

Add your embellishments. I used:
Sleigh 3: Resize 60%
Tree 1: Resize 60%

Highlight your white background.
New Raster layer.
Select All.
Copy and paste a paper of choice Into Selection.
Deselect.
Apply the mask.
Resize 120%
Merge Group.

If you used an artist’s tube(s) then add their copyrights.
If you only used the mask then please give credit to the designer. I’m positive it would be greatly appreciated.

Add your name.
Give it a slight inner bevel:


Resize all layers 80%.

I hope you enjoyed this tutorial.
I’d love to see your results.
Email me!
Hugs,
Bev

Happy New Year 2010

Clicking on the tag above will enlarge to full view.
Tag below shows the animation.


In this tutorial I give you screen shots to help you along.
I do hope you'll give this one a try...
the animation is actually quite easy to do!

Supplies
1 tube of choice - I used the awesome artwork of Elizabeth Austin here.
Font of choice - I used Aquarelle here
20-20 Mask which I’ve supplied
“Happy New Year” glitter words which I’ve supplied
Monti Bling 2010 here
Animation Shop
Supplies here
“Happy New Year” is a PTU tagger size scrap kit created by Micki of Heaven Dreams and can be purchased at Scraps with Attitude. You can visit her blog here.
Thank you Micki for such a stunning kit!

This tutorial was written assuming you have a working knowledge of PSP.

~♥~ Let’s get started ~♥~

Open up a 700 x 700 blank canvas.
Flood fill white.

Copy and paste Element 54 as a new layer.
Move into position near the bottom of your canvas.
Center it.
Click inside each rectangle with your Magic Wand.
New Raster layer below the film strip.
Copy and paste a paper of choice Into Selection.
Deselect.

Paste Element 54 again.
Image/Free Rotate left 40 degrees.
Move into position.
See my tag for reference.
Use your Magic Wand and click inside each rectangle.
New Raster layer below the film strip.
Copy and paste a paper of choice Into Selection.
Deselect.

Copy and paste your tube as a new layer.

Add your embellishments. I used:
Element 20: Resize 50%
Element 19: Resize 55%
Element 13: Resize 60%
Various ribbon elements: Resize as small as you like
Element 23: Resize 80%
Element 53: Resize 80%
Element 15: Resize 25%

Highlight your white background.
New Raster layer.
Select All.
Copy and paste a paper of choice Into Selection.
Deselect.
Apply the mask.
Merge Group.

Add your copyrights.

Add your name.
Give it a slight inner bevel:


Now we’re going to start animating the tag…

Close out all your layers.
Starting with the bottom layer (white canvas), open them up until you reach the paper back to the film strip that is horizontal.


Copy Merge and carry into Animation Shop.
Edit/Paste as New Animation.
Ctrl + L and tap the L key until you have a total of 10 frames.

Open up the Monti Bling 2010.
Ctl + A to highlight all frames.
Animation/Resize Animation
"Percentage of Original" checked.
80%
OK.
Be sure all of the bling frames are highlighted.
Edit/Copy

Make your tag frames active.
Ctrl + A
Ctrl + E and center the bling in the first rectangle.
Ctrl + E again, center in the center rectangle.
Ctrl + E again, center in the last rectangle.

Go back into PSP.
Close out all frames.
Starting at the frame that covers the bottom horizontal rectangle, open up the layers until you get to the paper back of the angled film strip.


Copy Merge and carry into Animation Shop.
Ctrl + A to be sure all your tag frames are highlighted.
Click on the Propagate Paste Icon at the top
(It looks like 3 folders with the corners bent down)
Ctrl + E
Position the frame over the bottom paper layer.
If you didn’t get it exact you can always click on the undo button and have a go at it again.

Now open up the glittered “Happy New Year” words that I’ve supplied.
Ctrl + A
Edit/Copy
Make your tag frames active again.
Ctrl + A
Ctrl + E
Position them over the angled paper back.

Go back into PSP.
Close out all layers.
Reopen the remaining layers starting with the angled film frame.


Copy Merge and carry into AS.
Make your tag frames active.
Ctrl + A
Ctrl + E
Position the angled frame over the angled paper.

View your animation.
If you’re happy then click on Animation/Resize Animation.
(It should still be set on 80% from resizing the bling)
OK
Save your animation.

I hope you enjoyed this tutorial.
I’d love to see your results.
Email me!
Hugs,
Bev

Thursday, December 17, 2009

Winter Dreams

Clicking on the image will enlarge to full view.

Supplies
1 tube of choice - I used the beautiful artwork of Zindy S. D. Nielsen here
Font of choice - I used Neverwinter here
Weescotlass Mask 39 here
Essence of Creativity Template 44 here
“Winter Dreams” is a PTU tagger size scrap kit created by Julie of Bits N Bobs and can be purchased at Exquisite Scraps. You can visit her blog here.
Thank you Julie for such a beautiful kit!

This tutorial was written assuming you have a working knowledge of PSP.

~♥~ Let’s get started ~♥~

Open up the template.
Resize all layers 120%.
Image/Canvas Size
600 x 600

Highlight Rounded Rectangle Layer.
Select All/Float/Defloat
New Raster layer.
Copy and paste a paper of choice Into Selection.
Deselect.
Delete the template layer.

Highlight Rectangles Layer.
Select All/Float/Defloat
New Raster layer.
Flood fill with a gradient of your choice.
Deselect.
Delete the template layer.

Highlight Circle Layer.
Select All/Float/Defloat
New Raster layer.
Copy and paste a paper of choice Into Selection.
DO NOT DESELECT.

Copy and paste your tube as a new layer.
Selections/Invert
Tap the delete key.
Deselect.
Delete the template layer.

Highlight Dotted Line Layer.
Select All/Float/Defloat
New Raster layer.
Flood fill with a dark color of your choice.
Deselect.
Delete the template layer.

.Add your embellishments. I used:
Element 13: Resize 40%
Element 41: Resize 80%
Element 40: Resize 50% Free rotate right 20%
Element 15: Resize 80%

Highlight your white background.
New Raster layer.
Select All.
Copy and paste a paper of choice Into Selection.
Deselect.
Apply the mask.
Resize 130%
Merge Group.

Add your copyrights.

Add your name.
Give it a slight inner bevel:


Resize all layers 90%.

I hope you enjoyed this tutorial.
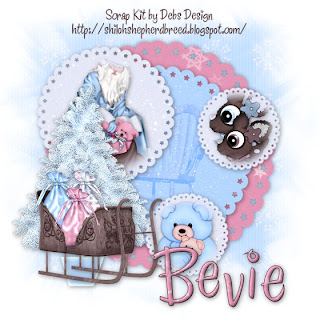
I’d love to see your results.
Email me!
Hugs,
Bev

Wednesday, December 16, 2009

Am I on the Naughty List?

Clicking on the image will enlarge to full view.

Supplies
1 tube of choice - I used the awesome artwork of Ismael Rac. The tube I used was purchased at MPT, but now he can be found at AMI.
Font of choice - I used Dobkin here
Weescotlass Mask 167 here
“A Country Christmas” is a PTU tagger size scrap kit created by Terry of Treasure’s by Terry and can be purchased at Butterfly Blush Designs. You can visit her blog here.
Thank you Terry for such an amazing kit!

This tutorial was written assuming you have a working knowledge of PSP.

~♥~ Let’s get started ~♥~

Open up a 700 x 700 blank canvas.
Flood fill white.

Copy and paste Frame 12 as a new layer.
Resize 70%
Duplicate twice for a total of 3.
Move them into position - see my tag for reference.
Close out the middle and bottom frame layers.

Highlight the top frame layer.
Use your Magic Wand and click inside of it.
Selections/Modify/Expand by 6.
New Raster layer below the frame.
Copy and paste a paper of choice Into Selection.
DO NOT DESELECT.

Copy and paste Teddy Bear 2 as a new layer below the frame.
Resize 70%
Copy and paste Teddy Bear 1 as a new layer above the other teddy bear.
Resize 70%
Move each into position.
Selection/Invert
Highlight each of the teddy bear layers and tap the delete key.
Deselect.

Close out your white background and merge visible.
Reopen your white background and middle frame layer.
Highlight the middle frame layer.
Click inside with your Magic Wand.
Selections/Modify/Expand by 6
New Raster Layer below the frame.
Copy and paste a paper of choice Into Selection.
DO NOT DESELECT.

Copy and paste Snowman 2 as a new layer below the frame.
Resize 70%
Copy and paste Snowman as a new layer above the other snowman.
Resize 60%
Move each into position.
Selection/Invert
Highlight each of the snowman layers and tap the delete key.
Deselect.

Close out your white background and merge visible.
Reopen your white background and bottom frame layer.
Highlight the bottom frame layer.
Click inside with your Magic Wand.
Selections/Modify/Expand by 6
New Raster Layer below the frame.
Copy and paste a paper of choice Into Selection.
DO NOT DESELECT.

Copy and paste Santa 1 as a new layer below the frame.
Resize 60%
Selections/Invert
Tap the delete key.
Deselect.

Close out your white background and merge visible.
Reopen all your layers.
You should now have 3 merged frame layers and your white background.

Move each of the merged layers into position and resize each 90%.
See my tag for reference.
Highlight the top merged frame layer and Free Rotate left 5 degrees.
Highlight the bottom merged frame layer and Free rotate right 5 degrees.

Copy and paste your tube as a new layer.

Add your embellishments. I used:
Holly 1: Resize 50%
Bow 3: Resize 50%
Candy Cane 1: Resize 50% Free rotate left 10 degrees
Poinsettia 4

Highlight your white background.
New Raster layer.
Select All.
Copy and paste a paper of choice Into Selection.
Deselect.
Apply the mask.
Resize 110%
Merge Group.

Add your copyrights.

Add your name.
Give it a slight inner bevel:


Resize all layers 80%.

I hope you enjoyed this tutorial.
I’d love to see your results.
Email me!
Hugs,
Bev

Winter Glory

Clicking on the image will enlarge to full view.

Supplies
1 tube of choice - I used the beautiful artwork of KatNKDA here
Font of choice - I used Santas Sleigh here
Becky Mask 22 here
“Blue Christmas” is a PTU tagger size scrap kit created by Nikki of Creative Intentionz and can be purchased at her store Twilight Scraps. You can visit her blog here.
Thank you Nikki for such a magnifiscent kit!

This tutorial was written assuming you have a working knowledge of PSP.

~♥~ Let’s get started ~♥~

Open up a 700 x 700 blank canvas.
Flood fill white.

Copy and paste Frame 2 as a new layer.
Resize 85%
Use your Magic Wand and click inside of it.
Selections/Modify/Expand by 4.
New Raster layer below the frame.
Copy and paste a paper of choice Into Selection.
Deselect.

Copy and paste Icicles below the frame.
Move into position at the top. See my tag for reference.
Erase any that overhangs the edges of the frame.

Copy and paste your as a new layer.

Add your embellishments. I used:
Leaf String 1
Ribbon Bow 2: Resize 85%
Twig: Resize 50% Free rotate left 40 degrees
Christmas Tree: Resize 110%
Glass Bauble 1 & 2: Resize 25% and 80%
Snowflake 1: Resize 80% and 25%, duplicate and resize smaller if you like.
 
Highlight your white background.
New Raster layer.
Select All.
Copy and paste a paper of choice Into Selection.
Deselect.
Apply the mask.
Merge Group.

Add your copyrights.

Add your name.
Give it a slight inner bevel:

Resize all layers 80%.

I hope you enjoyed this tutorial.
I’d love to see your results.
Email me!
Hugs,
Bev

Tuesday, December 15, 2009

Christmas Angels


Supplies
1 tube of choice - I used the beautiful artwork of Jennifer Janesko here
Font of choice - I used Neverwinter here
Weescotlass Mask 138 here
“Christmas Angels” is a PTU tagger size scrap kit created by Missy Lynn of Missy Lynn Scraps and can be purchased at Lollipops n Gumdrops. You can visit her blog here.
Thank you Missy Lynn for such a beautiful kit!

This tutorial was written assuming you have a working knowledge of PSP.

~♥~ Let’s get started ~♥~

Open up a 700 x 700 blank canvas.
Flood fill white.

Copy and paste Frame 7 as a new layer.
Resize 60%
Use your Magic Wand and click inside of it.
Selections/Modify/Expand by 2.
Copy and paste a paper of choice as a new layer below the frame.
Resize 50%
Move into position.
Selections/Invert
Tap the delete key.
Deselect.

Copy and paste your as a new layer.

Add your embellishments. I used:
Angel 2: Resize 25% and 80%
Bench: Resize 50%
Tree: Resize 80%
Flower 1: Resize 25%

Highlight your white background.
New Raster layer.
Select All.
Copy and paste a paper of choice Into Selection.
Deselect.
Apply the mask.
Resize 120%
Merge Group.
Add your copyrights.

Add your name.

Resize all layers 80%.

I hope you enjoyed this tutorial.
I’d love to see your results.
Email me!
Hugs,
Bev

Saturday, December 12, 2009

Desert Beauty

Clicking on the image will enlarge to full view.

Supplies
1 tube of choice - I used the beautiful artwork of Tom Fleming here
Font of choice - I used Viking here
Weescotlass Mask 249 here
“Morraccan Sunset” is a PTU tagger size scrap kit created by Lynne of Baby Cakes Scraps and can be purchased at Creative Scraps Store. You can visit her blog here.
Thank you Lynne for such a stunning kit!

This tutorial was written assuming you have a working knowledge of PSP.

~♥~ Let’s get started ~♥~
Open up a 700 x 700 blank canvas.
Flood fill white.

Copy and paste Deco Frame as a new layer.
Resize 75%
Use your Magic Wand and click inside of it.
Selections/Modify/Expand by 3.
New Raster layer below the frame.
Copy and paste a paper of choice Into Selection.
DO NOT DESELECT.

Copy and paste your tube below the frame.
Selections/Invert
Tap the delete key.
Deselect.

Add your embellishments. I used:
Canna: Resize 50%
Water Lilly: Resize 50%
Blossom: Resize 60%
Butterfly Two: Resize 25% Free rotate right 20 degrees. Duplicate/Resize 80%
Hummer: Resize 30%
Sparkle

Highlight your white background.
New Raster layer.
Select All.
Copy and paste a paper of choice Into Selection.
Deselect.
Apply the mask.
Resize 115%
Merge Group.

Add your copyrights.

Add your name.
I hope you enjoyed this tutorial.
I’d love to see your results.
Email me!
Hugs,
Bev


No Peeking


Supplies

Font of choice - I used Santa’s Sleigh here
Becky Mask 23 I’ve supplied here
Essence of Creativity Template 1 here
Animation Shop
“Christmas Critters” is a PTU tagger size scrap kit created by Katie of Crazed’s Creations and can be purchased at Twilight Scraps. You can visit her blog here.
Thank you Katie for such a fun kit!

This tutorial was written assuming you have a working knowledge of PSP.

~♥~ Let’s get started ~♥~

Open up the template.
Delete the credit layer.

Open up Frame 6.
Using your Selection Tool select an area of the frame.
Set your foreground to Pattern using the selection of the frame.
Make your template active.
Highlight Frame 1 layer.
Select All/Float/Defloat
New Raster Layer.
Flood fill with the pattern.
Deselect.
Delete the template layer.

Repeat the above step with Frame 2 layer.

Highlight Photo 1 layer.
Select All/Float/Defloat
Copy and paste a paper of choice as a new layer.
Selections/Invert
Tap the delete key.
Deselect.

Copy and paste Sticker 4 as a new layer.
Resize 60%
Free rotate left 20 degrees.
Move into position below the frame.
We’ll take care of what’s overhanging the frame in a bit.

Copy and paste Star 1 as a new layer.
Resize 50%
Free rotate left 20 degrees.
Move into position below the frame.

Highlight the frame.
Use your Magic Wand and click inside of it.
Selections/Modify/Expand by 6.
Highlight each of the elements you moved below the frame and tap the delete key.
Deselect.

Highlight Photo 2 Layer.
Select All/Float/Defloat
Copy and paste the same paper you already used as a new layer.
Selections/Invert
Tap the delete key.
Deselect.

Copy and paste Tree 2 as a new layer.
Resize 80%
Free rotate right 20 degrees
Move into position below the frame.
We’ll take care of what’s overhanging the frame in a bit.

Copy and paste Mouse 1 as a new layer.
Resize 60%
Free rotate right 20 degrees

Highlight the frame.
Use your Magic Wand and click inside of it.
Selections/Modify/Expand by 6.
Highlight each of the elements you moved below the frame and tap the delete key.
Deselect.

Highlight Rectangle 1 layer.
Select All/Float/Defloat
New Raster Layer.
Copy and paste a paper of choice Into Selection.
Deselect.
Delete the template layer.

Copy and paste Lights 1 as a new layer.
Resize 50%.
Duplicate/Mirror
Overlap them to create one long string of lights.
Merge down.

Highlight the Rectangle layer.
Select All/Float/Defloat
Highlight the merged string of lights layer.
Selections/Invert
Tap the delete key.
Deselect.

Duplicate the string of lights twice for a total of 3 light layers.
Rename them Lights 1, 2, and 3.
Highlight Light 1 layer.
Using your Light/Darken Tool, run it over each of the red light bulbs 3 times.

Highlight Light 2 layer.
Again, using your Light/Darken tool, run it over each of the blue light bulbs 3 times.

Highlight Light 3 layer.
Run the Light/Darken tool over each of the yellow light bulbs 3 times.

Close out Light 2 & 3 layers.

Highlight Rectangle 2 layer.
Select All/Float/Defloat
Copy and paste a paper of choice as a new layer.
Selections/Invert
Tap the delete key.
Deselect.
Delete the template layer.

Add your embellishments. I used:
Tree 3
Mouse 2
Train: Resize 50%
Present 1: Resize 40%
Present 6: Resize 50%
Candy Cane 2: Resize 25% Free rotate Left 20 degrees

Highlight your white background.
New Raster layer.
Select All.
Copy and paste a paper of choice Into Selection.
Deselect.
Apply the mask.
Merge Group.
Add your copyrights.
If you didn’t use an artists tubes and only used the kit, please give credit to the designer of the kit.

Add your name.

~Time to Animate~

Copy Merge and carry into Animation Shop.
Edit/Paste/As New Animation.

Back into PSP.
Close out Lights 1
Open up Lights 2.
Copy Merge.

Carry into AS
Edit/Paste/After Current Frame.

Back into PSP.
Close out Lights 2.
Open up Lights 3.
Copy Merge
.
Carry into AS.
Edit/Paste/After Current Frame.

Shift + A to highlight all frames.
Animation/Frame Properties
Change the number to 20.

View your animation.
If you’re happy then save.

I hope you enjoyed this tutorial.

I’d love to see your results.
Email me!
Hugs,
Bev

Thursday, December 10, 2009

Desire


Clicking on the image will enlarge to full view.
Supplies
1 tube of choice - I used the wonderful artwork of Ismael Rac here
Font of choice - I used Happy Days here
Weescotlass Mask 62 here
Blissfully Beth’s Template 32 here
“Autumn Sunset” is a PTU tagger size scrap kit created by Julie of Bits N Bobs and can be purchased at Exquisite Scraps. You can visit her blog here.
Thank you Julie for an amazing kit!

This tutorial was written assuming you have a working knowledge of PSP.
~♥~ Let’s get started ~♥~

Open up the template.
Delete the credit layer.
Highlight the background layer.
Flood fill white.
Highlight Gray Rectangle layer.
Select All/Float/Defloat
New Raster Layer.
Flood fill with a dark color.
Selections/Modify/Contract by 10
New Raster layer.
Flood fill with a gradient of your choice.
Deselect.
Delete the template layer.
Highlight White Circle layer.
Select All/Float/Defloat
New Raster Layer.
Copy and paste a paper of choice Into Selection.
DO NOT DESELECT.

Copy and paste your tube as a new layer.
If you want any part of your tube to stick out further than the circle then duplicate and close the copy layer out.
Selections/Modify/Feather
Number of Pixels:
53
OK
Tap the delete key until you have the feathered look you want.
Deselect.
Delete the template layer.
Reopen the copy of the tube.
Using your Eraser Tool erase all of the tube accept what you want to stick out beyond the circle.

Highlight Dotted Circle layer.
Select All/Float/Defloat
New Raster layer.
Flood fill with the dark color you already used.
Deselect.
Delete the template layer.
Give it a slight inner bevel:


Highlight Raster One layer.
Select All/Float/Defloat
New Raster Layer.
Flood fill with the dark color.
Selections/Modify/Contract by 2
New Raster Layer.
Flood fill with a light color.
Deselect.
Give it the same inner bevel.
Merge down.
Delete the template layer.

Add your embellishments. I used:
Element 34: Resize 25% and 50%
Element 14: Resize 25%
Element 33: Resize 40%
Element 45: Resize 40% Free rotate right 45 degrees
Element 20: Resize 30%
Element 21: Resize 30%

Highlight your white background.
New Raster layer.
Select All.
Copy and paste a paper of choice Into Selection.
Deselect.
Apply the mask.
Merge Group.

Add your copyrights.

Add your name.
Give it the same inner bevel:
Adjust/Add Remove Noise/Add Noise
Gaussian and Monochrome checked
Noise: 55%
OK
I hope you enjoyed this tutorial.
I’d love to see your results.
Email me!
Hugs,
Bev


Wednesday, December 9, 2009

Yearning

Clicking on the image will enlarge to full view.

Supplies
1 tube or image of choice - I used the beautiful artwork of Michael Calandra here
Font of choice - I used Stonehenge here
Weescotlass Mask 167 here
Babes Designz Template 10 here
“Natural” is a PTU tagger size scrap kit created by Lisa of Frosted Illusions and can be purchased at Aussie Scrap Designs. You can visit her blog here.
Thank you Lisa for such a beautiful kit!

This tutorial was written assuming you have a working knowledge of PSP.

~♥~ Let’s get started ~♥~

Open up the template.
Delete the credit layer.

Highlight Rectangle 1 layer.
Select All/Float/Defloat
New Raster Layer.
Copy and paste a paper of choice Into Selection.
Deselect.
Delete the template layer.

Highlight Rectangle 2 layer.
Select All/Float/Defloat
Copy and paste a paper of choice as a new layer.
Resize 65%
Selections/Invert
Tap the delete key.
Deselect.
Delete the template layer.
Highlight the Circle layer.
Select All/Float/Defloat
New Raster layer.
Copy and paste a paper of choice Into Selection.
DO NOT DESELECT.

Copy and paste your tube or image as a new layer.
Position it over the circle.
Selections/Modify/Feather
Number of Pixels:
53
Ok
Selections/Invert
Tap the delete key until you have the feathered look you want.
Deselect.
Delete the template layer.
Highlight the Stitches layer.
Select All/Float/Defloat
New Raster Layer.
Flood fill with a dark color that will match your tag.
Deselect.
Delete the template layer.
Repeat the above step with the Dot Circle layer.
Add your embellishments. I used:
Bow 4: Resize 35%
Tag 4: Resize 50%
Butterfly 3: Resize 25% Free rotate right 25 degrees
Flower 8: Resize 25%
Flower 5: Resize 25% and 75%
Glittered Heart: Resize 35% Free rotate left 10 degrees
Highlight your white background.
New Raster layer.
Select All.
Copy and paste a paper of choice Into Selection.
Deselect.
Apply the mask.
Resize 110%
Merge Group.
Crop you image.

Add your copyrights.
Add your name.
I hope you enjoyed this tutorial.

I’d love to see your results.
Email me!
Hugs,
Bev

Dreaming of a White Christmas


Supplies
1 tube of choice - I used the beautiful artwork of Zindy S.D. Nielsen here
Font of choice - I used Papyrus which came with my pc.
Weescotlass Mask 39 here
Snow which I’ve supplied here
Animation Shop
“Winter Day” is a PTU tagger size scrap kit created by Rikiche of Scrappin Dsigns and can be purchased at Scraps with Attitude. You can visit Rikiche’s blog here.
Thank you Rikiche for a very brrrrrr-illiant kit!

This tutorial was written assuming you have a working knowledge of PSP.

~♥~ Let’s get started ~♥~

Open up a 700 X 700 transparent image.
Flood Fill white.

Copy and paste Snow Frame as a new layer.
Resize 70%
Use your Magic Wand and click inside both of the frames. Be sure to click in between the icicles and the frame in spots as well.
New Raster layer below the frame. Rename Paper layer.
Copy and paste a paper of choice Into Selection.
Deselect.

Now using your Freehand Selection Tool outline both of the circles.


New Raster layer below the Paper layer. Rename flood fill.
Flood fill with the color white.
Deselect.

Copy and paste your tube as a new layer.

Add your embellishments. I used:
Mistletoe: Resize 50%
Street Lamp: Resize 70%
Xmas Tree 2: Resize 70%
Bow: Resize 40%

Highlight your white background.
New Raster layer.
Select All.
Copy and paste a paper of choice Into Selection.
Deselect.
Apply the mask.
Resize 130%
I used my Pick Tool to pull the sides out a bit.
Merge Group.

Add your copyrights.

Add your name.
Give it a slight inner bevel:


Highlight your Paper layer.
Open up the snow that I’ve supplied.
Be sure Frame 10 is highlighted.
Copy.


Now make your working canvas active.
Paste as a new layer.
Rename Snow 10

Go back to the Snow Frame.
Copy Frame 9.

Make your working canvas active again.
Paste as a new layer.
Rename Snow 9.

Repeat the above steps until you have all 10 snow layers pasted onto your working canvas.

Highlight the Flood Fill layer.
Select All/Float/Defloat
Selections/Invert
Highlight each of the snow layers and tap the delete key.
Deselect.

Close out all the snow layers accept for Snow 1.
Copy Merge

~ Time to Animate ~

Open up Animation Shop.
Edit/Paste/as a New Animation

Go back into PSP
Close out Snow 1
Open up Snow 2
Copy Merge

Go back into AS
Edit/Paste/After Current Frame.

Go back into PSP
Close out Snow 2
Open up Snow 3.
Copy Merge.

Go back into AS
Edit/Paste After Current Frame.

Go back into PSP
Close out Snow 3
Open up Snow 4.
Copy Merge.

Go back into AS
Edit/Paste After Current Frame.

Go back into PSP
Close out Snow 4
Open up Snow 5.
Copy Merge.

Go back into AS
Edit/Paste After Current Frame

Go back into PSP
Close out Snow 5
Open up Snow 6.
Copy Merge.

Go back into AS
Edit/Paste After Current Frame

Go back into PSP
Close out Snow 6
Open up Snow 7.
Copy Merge.

Go back into AS
Edit/Paste After Current Frame

Go back into PSP
Close out Snow 7
Open up Snow 8.
Copy Merge.

Go back into AS
Edit/Paste After Current Frame

Go back into PSP
Close out Snow 8
Open up Snow 9.
Copy Merge.

Go back into AS
Edit/Paste After Current Frame

Go back into PSP
Close out Snow 9
Open up Snow 10.
Copy Merge.

Go back into AS
Edit/Paste After Current Frame.

View your animation.
If you’re happy then save.

I hope you enjoyed this tutorial.
I’d love to see your results.
Email me!
Hugs,
Bev

Monday, December 7, 2009

Season of Joyfulness

Clicking on the image will enlarge to full view.

Supplies
1 tube of choice - I used the beautiful artwork of Zindy S.D. Nielsen here
Font of choice - I used Oh Lara. It’s a pay font and can be found here.
Weescotlass Mask 241 here
Babe’s Designz Template 31 here
DSB Flux - Bright Noise
Eyecandy 5: Impact - Glass
“White Christmas” is a PTU tagger size scrap kit created by Julie of Bits ’n Bobs and can be purchased at AMI. You can visit Julie’s blog here.
Thank you Julie for a very beautiful kit!

This tutorial was written assuming you have a working knowledge of PSP.

~♥~ Let’s get started ~♥~

Open up the template.
Delete the credit and circle layer.

Highlight Large Rectangle layer.
Select All/Float/Defloat
Copy and paste a paper of choice as a new layer.
Selections/Invert
Tap the delete key.
Deselect.
Delete the template layer.
Highlight Frame Inner layer.
Select All/Float/Defloat
New Raster layer.
Copy and paste a paper of choice Into Selection.
Deselect.
Delete the template layer.
Highlight Fancy Frame layer.
Select All/Float/Defloat
New Raster Layer.
Flood fill with a color of your choice.
Deselect.
Delete the template layer.
Apply DSB Flux - Bright Noise


Highlight Small Rectangle layer.
Select All/Float/Defloat
New Raster Layer.
Flood fill with a gradient of choice.
Deselect.
Delete the template layer.

Highlight Small Dots layer.
Select All/Float/Defloat
New Raster Layer.
Flood will with the same color you used on the fancy frame.
Deselect.
Delete the template layer.

Highlight Large Dots layer.
Select All/Float/Defloat
New Raster layer.
Flood fill with the same color you used for the fancy frame.
DO NOT DESELECT.
Effects/Artistic Effects/Balls and Bubbles
On the Shape tab:

On the Surface Tab:

On the Maps tab:


On the Illumination tab:

Deselect

Apply Eyecandy 5: Impact - Glass


Add your embellishments. I used:
Element 2: Resize 50%. Duplicate/Mirror as you like and use your Pick Tool to angle differently.
Element 13: Resize 80%
Element 12: Resize 50%
Element 15
Element 5: Resize 70%

Highlight your white background.
New Raster layer.
Select All.
Copy and paste the BNB White Christmas Preview Into Selection.
Deselect.
Adjust/Blur/Gaussian Blur:
Radius: 20
OK
Apply the mask.
Merge Group.

Add your copyrights.

Add your name.
Give it a slight inner bevel:


I hope you enjoyed this tutorial.
I’d love to see your results.
Email me!
Hugs,
Bev

Saturday, December 5, 2009

Frozen Ice Pop

Clicking on the image will enlarge to full view.

Supplies
1 tube of choice - I used the wonderful artwork of Dean Yeagle here
Font of choice - I used Toontime here
Monti Circle Mask here
“White Christmas” is a PTU tagger size scrap kit created by Julie of Bits ’n Bobs and can be purchased at AMI. You can visit Julie’s blog here.
Thank you Julie for a very festive kit!

This tutorial was written assuming you have a working knowledge of PSP.

~♥~ Let’s get started ~♥~
Open up a 700 X 700 transparent image.
Flood fill white.
Copy and paste Element 4 as a new layer.
Use your Magic Wand and click inside of it.
Selections/Modify/Expand by 2.
New Raster layer below the frame.
Copy and paste a paper of choice Into Selection.
Deselect.
Copy and paste your tube as a new layer.
Add your embellishments. I used:
Element 2: Resize 50% (for place behind the frame)
Element 2: Resize 30% (for placing in the flowers) Free rotate left 40 degrees. Duplicate/Mirror as you like.
Element 55
Element 32: Resize 50%. Duplicate/Resize 80%
Element 7: Resize 40%. Duplicate/resize smaller to your liking
Element 20
Element 48: Free rotate Left 37 degrees

Highlight your white background.
New Raster layer.
Select All.
Copy and paste a paper of choice Into Selection.
Deselect.
Apply the mask.
Merge Group.

Copy and paste Element 40 as a new layer.
Move into position.
Apply the mask.
Merge Group.
Add your copyrights.

Add your name.
Give it a slight inner bevel:
Adjust/Add Remove Noise/Add Noise
Gaussinan and Monochrome checked
Noise 25%
OK
Resize all layers 80%.
I hope you enjoyed this tutorial.
I’d love to see your results.
Email me!
Hugs,
Bev

Gypsy


Clicking on the image will enlarge to full view.

Supplies
1 tube of choice - I used the beautiful artwork of Karen Middleton here
Font of choice - I used Bambino here
Babes Designz Template 34 here
“Gypsy” is a PTU tagger size scrap kit created by Rieneke and can be purchased at Twilight Scraps. You can visit her blog here.
Thank you Rieneke for such an amazing kit filled with such bright, rich colors!

This tutorial was written assuming you have a working knowledge of PSP.
~♥~ Let’s get started ~♥~
Open up the template.
Delete the Credit layer.
Highlight the Circle layer.
Select All/Float/Defloat
New Raster layer.
Copy and paste a paper of choice Into Selection.
Deselect.
Delete the template layer.
Give it a slight inner bevel:


Copy and paste your tube as a new layer.
(Duplicate if you want any part of your tube at all to go beyond the dot circle layer. Close the duplicated tube layer out.)
Selections/Modify/Feather
Number of Pixels:
53
OK
Selections/Invert
Tap the delete key until you have a nice feathered look.
Deselect.

If you duplicated your tube, open it up.
Use your erase tool to erase all but the portion that you want to go beyond the dot circle.

Highlight Dot Circle layer.
Select All/Float/Defloat.
New Raster Layer.
Copy and paste a paper of choice Into Selection.
Deselect.
Delete the template layer.
Give it the same inner bevel.

Repeat the above step with Black Bars layer, Bar 1 & 2 layers.

Highlight Doodles layer.
Select All/Float/Defloat
New Raster layer.
Flood fill with a gradient of your choice.
Delete the template layer.
Give it the same inner bevel.

Highlight the Transmission layer.
Select All/Float/Defloat
Copy and paste a paper of choice as a new layer.
Selections/Invert
Tap the delete key.
Delete the template layer.

Copy and paste Fabric Flower 1 as a new layer.
Resize 25% and 75%
Duplicate.
Move each of the flowers into position over the small heart templates.
Delete the template layer.

Copy and paste Felt Heart as a new layer.
Resize 25% and 85%
Position over the Large Heart Template.
Delete the template.

Add your embellishments. I used:
Arrangement 2: Resize 40% - erase the bottom of the step and one of flowers that overlaps one of the paper layers where the fabric flower is.
Duplicate/Flip/Mirror.
Butterfly 3: Resize 50%. Mirror.
Butterfly 4
String 3: Resize 40%

Add your copyrights.

Add your name.
Give it the same inner bevel.
Crop your image.
I hope you enjoyed this tutorial.
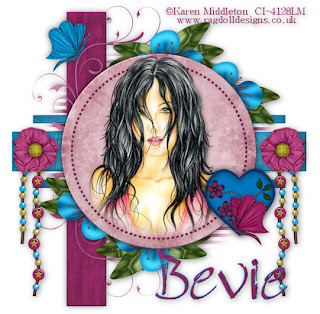
I’d love to see your results.
Email me!
Hugs,
Bev

Friday, December 4, 2009

Denim Diva

Clicking on the image will enlarge to full view.

Supplies
1 tube of choice - I used the wonderful artwork of Elias Chatzoudis here
Font of choice - I used Ferro Rosso here
Weescotlass Mask 47 here
“Denim Diva” is a PTU tagger size scrap kit created by Kat of Katz Scrapz and can be purchased at Lollipops n Gumdrops. You can visit Kat’s blog here.
Thank you Kat for an amazing kit!

This tutorial was written assuming you have a working knowledge of PSP.

~♥~ Let’s get started ~♥~

Open up a 700 X 700 transparent image.
Flood fill white.
Copy and paste Jean Pocket as a new layer.
Resize 70%
Select All/Float Defloat
Copy and paste a paper of choice as a new layer.
Resize 80%
Selections/Invert
Tap the delete key.
Deselect.
Copy and paste your tube as a new layer.
Move into the exact position you want it.
(If you want to see any part of your tube overhang the pocket - in my tag I have the top of the head that overhangs - then duplicate your tube)
If you duplicated your tube, close out the duplicate.
Highlight your tube.
Merge down.
Your Paper and tube should now be merged and on one layer.

Highlight the Jean Pocket layer.
Select All/Float/Defloat
Selections/Modify/Feather
Number of Pixels:
53
Ok
Selections/Invert
Tap the delete key until you have a nice feathered look.
Deselect.

Open up the copy of the tube and erase all but the part that overhangs the pocket.
Close out your white background.
Merge visible.
Reopen your white background.

Copy and paste Blue Lily as a new layer beneath the merged layer.
Move into position up near the top left corner.
Duplicate/Mirror/Flip
Move into position near the bottom right of the pocket.

Add your embellishments. I used:
Blue Brand: Resize 25% and 50%
Blue Lilly: Resize 40%
Blue Flower: Resize 40%
Light Blue Flower: Reisze 25% and 75%
Butterfly 2: Resize 80% Free rotate right 25 degrees
Butterfly 1: Resize 80% Free rotate left 25 degrees.

Highlight your white background.
New Raster layer.
Select All.
Copy and paste a paper of choice Into Selection.
Deselect.
Apply the mask.
Merge Group.
Add your copyrights.

Add your name.
Give it a slight inner bevel:

Resize all layers 85%.

I hope you enjoyed this tutorial.
I’d love to see your results.
Email me!
Hugs,
Bev

Thursday, December 3, 2009

A Winter Fairytale

Clicking on the above image will enlarge to full view.
The image below shows the animation

Supplies
1 tube of choice - I used the beautiful artwork of Cane Hoyer here
Font of choice - I used Oh Lara - I’m sorry, I can’t find a link
Weescotlass Mask 35 here
Designz by Ali Template 159 here
Eyecandy 4 Impact: Glass
Twinks which I’ve supplied here
Animation Shop
“Winter Fairytale” is a PTU tagger size scrap kit created by Gina of Gina’s Gems Scraps and can be purchased at Butterfly Blush Designs. You can visit her blog here.

This tutorial was written assuming you have a working knowledge of PSP.

~♥~ Let’s get started ~♥~
Open up the template.
Delete the credit layer.
Resize all layers 80%
Image/Canvas size 700 X 600
New Raster layer.
Send to bottom.
Flood fill white.

Highlight Copy of Raster 6 layer.
Merge Down.
Circle templates should be on one layer now.
Select All/Float/Defloat
Copy and paste a paper of choice as a new layer.
Selections/Invert
Tap the delete key.
Deselect.
Delete the template layer.

Apply Eyecandy 5 Impace - Glass


Highlight Raster 3
Select All/Float/Defloat
New Raster layer.
Flood fill with a light color.
Deselect.
Delete the template layer.

Highlight Raster 4 layer.
Repeat the above step accept flood fill with a dark color.

Highlight Raster 1 layer.
Select All/Float/Defloat
Copy and paste a paper of choice as a new layer.
Resize 83%
Selections/Invert
Tap the delete key.
Delete the template layer.
DO NOT DESELECT

Copy and paste Christmas Tree 1 as a new layer
Resize 40%
Move into position
Tap the delete key.

Copy and paste Christmas Tree 2 as a new layer.
Resize 35%
Move into position
Tap the delete key.

Copy and paste Star Bling 1 as a new layer.
Resize 60%
Tap the delete key.
Deselect.

Highlight Raster 2 layer.
Select All/Float/Defloat
Copy and paste a paper of choice as a new layer.
Resize 83%
Selections/Invert
Tap the delete key.
Deselect.
Delete the template layer.

Highlight Raster 5 layer.
Select All/Float/Defloat
New Raster Layer.
Copy and paste a paper of choice Into Selection.
Deselect.
Delete the template layer.

Copy and paste your tube as a new layer.

Add your embellishments. I used:
Blossom 1: Resize 30%
Blossom 2: Resize 25%
Blossom 3: Resize 25% and 80%
Butterfly 2: Resize 25% Free rotate left 20 degrees
Butterfly 3: Resize 25% and 80% Free rotate right 20 degrees
Bauble Deco: Resize 70%
Leaves 1: Resize 50% Free rotate left 45 degrees
Shiny Bow 1: Resize 25%
Various snowflakes: Resize 40% and smaller

Highlight your white background.
New Raster layer.
Select All.
Copy and paste a paper of choice Into Selection.
Deselect.
Apply the mask.
Merge Group.
Use your Pick Tool to pull it out just a bit.
Duplicate
Merge Down.

Add your copyrights.
Add your name.
Give it a slight inner bevel:


Resize all layers 85%.

~Time to Animate~

Copy Merge and carry into Animation Shop.
Edit/Paste/As New Animation

Ctl + L and tap the L key until you have 16 frames.
Open up the twinks that I’ve supplied in AS.
Ctl + A to highlight all
Edit/Copy

Make your tag frames active.
Ctl + A
Ctl + E and place the twinks where you like.

View your animation.
If you’re happy then save.

I hope you enjoyed this tutorial.
I’d love to see your results.
Email me!
Hugs,
Bev