Saturday, November 6, 2010

Believe


Supplies

Font of Choice - I used Adria DB and Santa’s Sleigh here
Weescotlass mask 241 here
Eyecandy 5: Nature - Fire and Snow
Animation Shop
“Holiday Wishes” is a PTU tagger size scrap kit created by Jessica of Gothic Inspirations and can be purchased from her store Gothic Inspirations. You can visit her blog here.
Thank you Jessica - the possibilities with this kit are endless!

This tutorial was written assuming you have a working knowledge of PSP.

~♥~ Let’s get started ~♥~

Open up a 700 x 700 blank canvas.
Flood fill white.

First we’re going to create the scenery that you see in the window.

Select All.
Copy and paste Paper 17 Into Selection.
Deselect.

Copy and paste Tree Pine as a new layer.
Resize 70% - Position at the left side of your canvas.

Copy and paste Santa 2 as a new layer.
Resize 50%/Mirror - position beside the tree.

Copy and paste Christmas Ball, Christmas Ball 2, and Candy Cane all as new layers.
Resize them as small as you like and decorate the tree - you only need to decorate the right side as that’s all you’ll see in the window.

Copy and paste Tab Snowman as a new layer.
Resize 30%/Duplciate/Mirror
Move them into position as if they’re pictures on the wall.

Go ahead and use your imagination and decorate this scenery up really festive…like it’s really Santa’s house!

Once you’ve done that then minimize or move off to the side for now.

Create a new 700 x 700 blank canvas.
Flood fill white.

Copy and paste WindowWSnow 2 as a new layer.
Resize 80%

Make you other canvas (Santa’s room that you created) active.
Copy Merge.
Make the new canvas with the window active.
Paste the scenery below the frame.
Resize 70%
Highlight the window layer.
Click anywhere outside of it with your Magic Wand.
Highlight your scenery layer.
Tap the delete key.
Deselect.

Copy and paste Candles ABOVE the window.
Resize 30%
Move it into position - centered on the sill.
Move this layer below the window layer.
Copy and paste Pine Garland as a new layer.
Resize 60%
Center that at the bottom of the window.

Copy and paste Bow as a new layer.
Resize 25%
Place it on the window.

Copy and paste Reindeer 1 & 2 as new layers.
Move each into position - see my tag for reference.
Once you have them positioned Merge Visible.
Apply the mask.
Merge Group.

Highlight your white background.
Select All.
Copy and paste Paper 18 Into Selection.
Deselect.
Apply the mask.
Resize 110%
Merge Group.

Make your Ellipse Tool active.
In your color pallet:
Foreground: Black
Background: Null
Width: 2
Draw out a circle that will match the top of the window. If you make it slightly bigger that’s ok - just resize or use your Pick Tool.

You need to change your color pallet to colors you want to use to Type out of the word “Believe”
I used:
Foreground: Gradient set on Metal Brass
Angle: 45
Repeat: 2
Linear Style

Background: Pattern/Paper 20

Move your curser along the circle at the top center. Once you see a Rocking A click the mouse.
A Text Box will appear.
Type out the word “Believe” using the Santa’s Sleight font.
Apply.
In your layers pallet click on the plus sign.
Close out the eye on the New Ellipse layer.
Highlight the top layer/Right click/Convert to layer.

Apply Eyecandy 5: Nature - Snow Drift to the word.
Settings Tab:
Small, First Flakes

Basic Tab:


OK

Apply the same effect to the bow and reindeer as well.

Type your name out using the other font or one of your choice.
Apply the same snow effect.

Add your credits.

Add your name.

Now we’re going to get it ready to animate the candles.
Close out the window layer so you can work with them.

Highlight the candle layer.
Duplicate it twice for a total of 3 layers.
Rename them Candle 1, 2, and 3.

Highlight Candle 1.
Using your Freehand Selection Tool outline all of the flames.
Apply Eyecandy 5 Nature - Fire

Settings Tab:
Small, Candle

Basic Tab:


Colors Tab:
Move the tabs into about the same position as mine are. (You’re trying to keep the flame color the same as the element already is.)


OK

Highlight Flame 2 layer.
Apply the same fire effect accept hit the random seed button once.
OK

Highlight Flame 3 layer.
Apply the same effect hitting the random seed button once.
OK

Deselect.

Close out Flame 2 and Flame 3 layers.
Copy Merge.

~Time to Animate~

Open up Animation Shop.
Edit/Paste/As New Animation

Back in PSP.
Close out Flame 1 layer.
Open up Flame 2 layer.
Copy Merge

Carry into AS
Edit/Paste/After Current Frame.

Back in PSP.
Close out Flame 2 layer.
Open up Flame 3 layer.
Copy Merge.

Back in PSP.
Edit/Paste/After Current Frame.

Shift + A to be sure all frames are highlighted.
Animation/Frame Properties
Display time: 24
OK

Animation/Resize Animation
Percentage of Original checked.
Width and Height:
80
OK

View your animation.
If you’re happy then save.

I hope you enjoyed this tutorial.
I’d love to see your results and show it off in my gallery.
Email me!
Hugs,
Bev

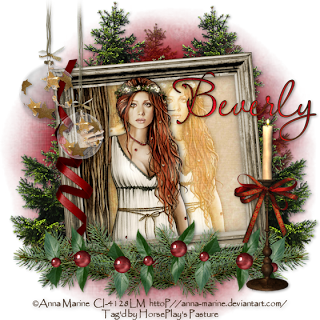
Holiday Wishes


Clicking on the image will allow you to enlarge for bigger view.

Supplies

1 tube of choice - I used the artwork of Anna Marine at CILM
Font of Choice - I used LavishlyYoursROB (pay font)
Monti Circular here
Greg’s Factory Output Vol. II - Pool Shadow
“Holiday Wishes” is a PTU tagger size scrap kit created by Jessica of Gothic Inspirations and can be purchased from her store Gothic Inspirations. You can visit her blog here.
Jessica, a thank you never seems to be enough. Your kits never disappoint! Thank you!

This tutorial was written assuming you have a working knowledge of PSP.

~♥~ Let’s get started ~♥~

Open up a 700 x 700 blank canvas.
Flood fill white.

Copy and paste Frame 6 as a new layer.
Free rotate left 5 degrees.
Click inside with your Magic Wand.
Selections/Modify/Expand by 6.
New Raster layer below the frame.
Copy and paste a paper of choice Into Selection.
Copy and paste your tube as a new layer below the frame.
Duplicate/Move to the right just a little/position below the other tube in your layers pallet/Change the Properties to Overlay.
Selections/Invert
Highlight each tube layer and tap the delete key.
Deselect.

Add your embellishments. I used:
Pine Garland: Resize 85%
Candle Stick: Resize 70%
Ribbon 1: Resize 70%
Glass Ball: Duplicate/Resize 80%
Tree Pine: Resize 70%/Duplicate/Mirror

Highlight your white background.
Select All.
Copy and paste a paper of choice Into Selection.
Deselect.
Apply the mask.
Merge Group.

Merge Visible the 2 Pine trees.
Duplicate/Resize 70%
Move into position between the bigger pine trees.
Change the Properties to Soft Light.

Add your credits.

Add your name.
Apply Greg’s Factory Output Vol. II - Pool Shadow:
Default Settings

Resize all layers 80%.

I hope you enjoyed this tutorial.
I’d love to see your results and show it off in my gallery.
Email me!
Hugs,
Bev

Friday, November 5, 2010

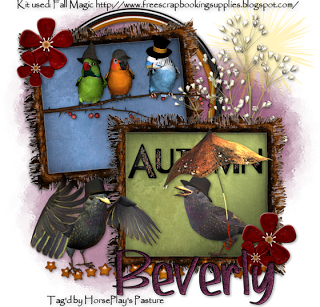
Fall Magic


Clicking on the image will allow you to enlarge for bigger view.

Supplies

Font of Choice - I used Rolina here
Vix Mask 452 here
DSB Flux - Bright Noise
Greg's Factory Output Vol. II - Pool Shadow
“Fall Magic” is a PTU full size scrap kit created by Free Scrapbooking Supplies and can be downloaded from here.

This tutorial was written assuming you have a working knowledge of PSP.

~♥~ Let’s get started ~♥~

Open up a 700 x 700 blank canvas.
Flood fill white.

Copy and paste Wood Frame as a new layer.
Resize 50%
Free rotate left 5 degrees left.
Paste the frame again.
Resize 50%
Move both frames into position - see my tag for reference.

Highlight the frame that’s rotated to the left.
Click inside of it with your Magic Wand.
Selections/Modify/Expand by 10.
New Raster layer below the frame.
Copy and paste Paper 1 Into Selection.
Deselect.

Repeat the above step with the bottom frame accept use Paper 2.

To each of the papers apply Greg’s Factory Output Vol. II - Pool Shadow:


Add your embellishments. I used:
Three Birds: Resize 25%/Apply Pool Shadow effect
Bird Flapping: Resize 25%/Apply Pool Shadow effect
Bird: Resize 25%/Apply Pool Shadow Effect
Circle Frame: Resize 35%
Babys Breath: Resize 70%/Duplicate/Mirror/Resize 80%
Flower Maroon: Resize 25% and 50%/Duplicate/Resize 70%
Stars 1: Resize 25% and 70%
Sunburst: Resize 25%

Crop your image.

Highlight your white background.
Select All.
Copy and paste Paper 3 Into Selection.
Deselect.
Apply the mask.
Resize 105%
Merge Group.

Add your credits.

Add your name.
Give it a slight inner bevel 4 times:


Resize all layers 80%.

I hope you enjoyed this tutorial.
I’d love to see your results and show it off in my gallery.
Email me!
Hugs,
Bev

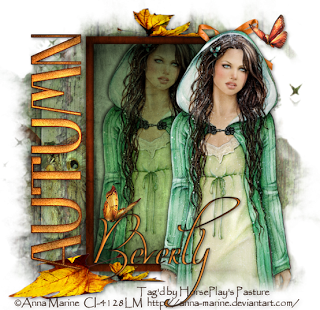
Simply Put...Autumn


Supplies

1 tube of choice - I used the artwork of Anna Marine at CILM
Font of Choice - I used Yiggivoo here and Oh Lara (pay font)
Gems Mask 204 here
DSB Flux - Bright Noise
Greg's Factory Output Vol. II - Pool Shadow
“Autumn has Arrived” is a PTU tagger size scrap kit created by Wilma of Wilma4ever and can be purchased from her store Wilma4ever. You can visit her blog here.
Thank you Wilma for a really wonderful autumn kit!

This tutorial was written assuming you have a working knowledge of PSP.

~♥~ Let’s get started ~♥~

Open up a 700 x 700 blank canvas.
Flood fill white.

Make your Selection Tool active.
Set to Rectangle.
Make a rectangle about the size of 290 x 450.
Don’t worry about it being centered…you can do that in a bit.
New Raster layer.
Copy and paste Paper 1 Into Selection.
Selections/Modify/Contract by 15
New Raster layer.
Copy and paste Paper 2 Into Selection.
Copy and paste your tube as a new layer over the paper.
Move into position.
Selections/Invert
Tap the delete key.
Deselect.
Change the Properties to Multiply.
Give the green paper a drop shadow.

Close out your white background.
Merge Visible.
Reopen the merged layer.

Go ahead and center the merged layer.
I positioned my ever so slightly off center, but it’s up to you.

Copy and paste your tube as a new layer.

Color Pallet:
Foreground: Pattern/Paper 1
Background: Pattern/Paper 4
Stroke: 2

Make your Text tool active and type out the word “Autumn”.
Free rotate left 90%
Pull the top and bottom in to align with your merged rectangle.
Convert to Raster layer.
Select All/Float/Defloat
Selection/Modify/Contract by 1
Give it a slight inner bevel:


Repeat the bevel 2 more times.
Apply DSB Flux - Bright Noise:
Intensity: 26
Mix checked
OK
Deselect.

Apply Greg's Factory Output Vol. II - Pool Shadow.
Use the default settings accept move the Intensity bar to get the effect you want.
I didn't show the one I used as I was truly undecided - so many different looks I found were terrific. So you decide what you like on your tag.

Add your embellishments. I used:
Bow 2: Resize 40%
Leave 6: Resize 70%/Mirror
Leave 5: Resize 60%/Free rotate right 30 degrees/Duplicate/Resize 70%
Butterfly 2: Resize 25%
Butterfly 3: Resize 35%

Crop your image.

Highlight your white background.
Select All.
Copy and paste Paper 7 Into Selection.
Deselect.
Apply the mask.
Merge Group.

Copy and paste Owl as a new layer.
Move it just above the mask layer and position it so it looks as if it’s peeking out through the word Autumn.
Apply the mask.
Merge Group.
Change the Properties to Overlay.

Add your credits.

Add your name.
Give it the same slight inner bevel 3 times.

Resize all layers 90%.

I hope you enjoyed this tutorial.
I’d love to see your results and show it off in my gallery.
Email me!
Hugs,
Bev

Thursday, November 4, 2010

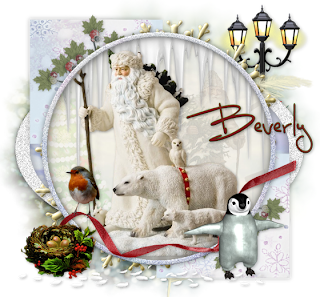
Holiday Spirit

Clicking on the image will allow you to enlarge for bigger view.

Supplies

Font of Choice - I used Luna Bar here
Weescotlass Mask 138 here
Scrap Rebellion Template 27 here
DSB Flux - Bright Noise
“Past and Present” is a PTU tagger size scrap kit created by Funky of WishingonaStarr and can be purchased from Butterfly Blush Designs. You can visit her blog here.
Thank you Funky for such a lovely winter kit!

This tutorial was written assuming you have a working knowledge of PSP.

~♥~ Let’s get started ~♥~

Open up the template.
Shift + D.
Close out the original.
Delete the top 5 layers and the Blue Strip layer.
Image/Canvas Size
700 x 650
OK
Flood fill the background layer white.

Highlight Blue Oval layer.
Click on it with your Magic Wand.
New Raster layer.
Copy and paste Paper 14 Into Selection.
Deselect.
Delete the template layer.

Highlight Top Square layer.
Click on it with your Magic Wand.
New Raster layer.
Copy and paste Paper 10 Into Selection.
Deselect.
Delete the template layer.

Highlight Bottom Square layer.
Repeat the above step using the same paper.

Highlight Circle layer.
Copy and paste Paper 8 Into Selection.
Deselect.

Open up Paper 11.
Adjust/Blur/Gaussian Blur
Radius: 10
OK
Copy
Highlight Frame layer.
Click on it with your magic Wand.
New Raster layer.
Paste
Deselect.
Give it a slight Inner Bevel:


Apply DSB Flux - Bright Noise:
Mix checked
Intensity: 20
OK

Paste and move into position the following elements:
(Don’t worry about what overhangs the frame. We’ll take care of that in a bit)
79
61: Resize 70%/Lower the Opacity to 16
70: Change the Properties to Soft Light
45: Resize 70%

Highlight the circle paper layer.
Click anywhere outside of it with your Magic Wand.
Highlight each of the element layers below the frame and tap the delete key.
Deselect.

Add your embellishments. I used:
46: Resize 70%/Mirror/Duplicate/Mirror/Flip
36: Duplicate
89: Resize 80%
77
8: Mirror/Erase the loop (otherwise it’ll look like you’re trying to snare the penguins’ feet…lol)
18: Resize 50%
57: Resize 25%
24: Resize 50%
5

Highlight your white background.
Select All.
Copy and paste a paper of choice Into Selection.
Deselect
Apply the mask.
Resize 130%
Merge Group.

Add your credits if you used a tube that requires it.
If you only used the scrap kit the designer would really appreciate credit for the kit but it is not required.

Add your name.
Apply the same inner bevel twice.

Resize all layers 80%.

I hope you enjoyed this tutorial.
I’d love to see your results and show it off in my gallery.
Email me!
Hugs,
Bev

Wednesday, November 3, 2010

Home for the Holidays


Supplies

Font of Choice - I used Dilana
Becky Mask 9 here
Snow which I supply here
Animation Shop
“Home for the Holidays” is a FTU tagger size scrap kit created by me and can be downloaded from my blog here.
Leaving a thank you would be greatly appreciated ;O)

This tutorial was written assuming you have a working knowledge of PSP.

~♥~ Let’s get started ~♥~

Open up a 700 x 700 blank canvas.
Flood fill white.

Copy and paste Frame 1 as a new layer.
Resize 85%
Click inside each of the squares in the frame.
Selections/Modify/Expand by 2.
New Raster layer below the frame.
Copy and paste Paper 8 Into Selection.
Deselect.

You’re going to add some of the embellishments below the frame now but don’t worry about what overhangs. We’ll take care of that in a bit.

Copy and paste Tree 1 as a new layer below the frame.
Resize 85% - position at the left side.
Duplicate/Mirror/Resize 70% - move to the right side.
Duplicate/Resize 60% - move into position behind all the trees and center it within the frame - Change the Properties of this tree to Luminance.
Highlight the Original tree - Duplicate/Resize 80/Move into position behind all the trees. Change the Properties of this layer to Soft Light.

Copy and paste Snow Mound as a new layer.
Move into position below all the trees in your layers pallet.
Duplicate/Mirror.
Move the snow mounds around to get the look you like.

Open up the snow that I supplied.
Highlight Frame 1/Copy
Make your working canvas active.
Highlight the element that’s just below the frame.
Paste the snow layer - Rename Snow 1.
Highlight the snow I supplied again.
Highlight Frame 2/Copy
Make your working canvas active.
Paste - (it should be just above Snow 1 layer). Rename Snow 2.
Continue this until you have all 10 snow layers copied onto your working canvas.

Highlight the paper layer.
Click anywhere outside of it with your Magic Wand.
Highlight each of the element and snow layers and tap the delete key.
Once you’ve cleaned up the mess and you can now see that it’s beginning to look like a tag (lol!) deselect.

Add your embellishments. I used:
Flower Line 2
Bow 3: Resize 40%
Snowflake Ornament: Resize 40%
Snowman 2: Resize 70%
Snowman 2: Resize 70%/Mirror
Tree 1
Tree 1 again: Resize 70%
Snowflakes of your choice - resize and splash about.

Highlight your white background.
Select All.
Copy and paste Paper 14 Into Selection.
Deselect
Adjust/Blur/Gaussian blur:
Radius: 10
OK
Apply the mask.
Use our Pick Tool to pull the side and bottom out a little.
Merge Group.

Add your credits if you used a tube that requires it.
If you only used the scrap kit I’d appreciate credit for the kit but it is not required.

Add your name.
Give it a slight inner bevel:

INSERT PIC HERE

Resize all layers 80%.

Be sure all snow layers are closed out accept for Snow 1.
Copy Merge.

~Time to Animate~

Open up Animation Shop.
Edit/Paste as New Animation.

Back in PSP.
Close out Snow 1 layer.
Open up Snow 2 layer.
Copy Merge.

Carry into AS.
Edit/Paste/After Current Frame.

Back in PSP.
Close out Snow 2 layer.
Open up Snow 3 layer.
Copy Merge.

Carry Into AS.
Edit/Paste/After Current Frame.

Continue copying all snow layers from PSP and pasting them into AS.
Once you have them all copied over into AS view your animation.
If you’re happy then save.

I hope you enjoyed this tutorial.
I’d love to see your results and show it off in my gallery.
Email me!
Hugs,
Bev


Monday, November 1, 2010

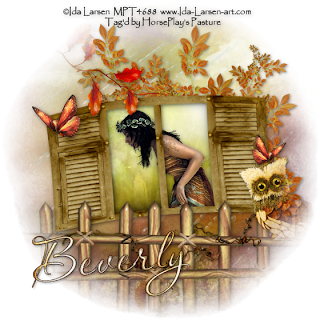
A Victorian Autumn


Clicking on the image will allow you to enlarge for bigger view.

Supplies

1 tube of choice - I used the artwork of Ida Laren at MPT
Font of Choice - I used Aquarelle here
Monti Circular Mask here
“Fall About” is a PTU tagger size scrap kit created by Julie of Bits N Bobs and can be purchased from Exquisite Scraps. You can visit her blog here.
Thank you Julie for a kit that really gives the feeling of Autumn!

This tutorial was written assuming you have a working knowledge of PSP.

~♥~ Let’s get started ~♥~

Open up a 700 x 700 blank canvas.
Flood fill white.

Open up the mask.
You’ll be using it through this tutorial.

Copy and paste 56 as a new layer.
Free rotate left 5 degrees.
Click inside each of the windows in the frame.
Selections/Modify/Expand by 6.
Copy and paste Paper 2 as a new layer below the frame.
Resize 50%
Move into position.
Selections/Invert
Tap the delete key.
Copy and paste your tube just below the frame layer.
Tap the delete key.
Deselect.

Copy and paste 52 as a new layer.
Position behind the paper of the frame.

Copy and paste 36 as a new layer.
Resize 70%
Move into exact position in front of the frame.
Apply the mask.
Merge Group.

Copy and paste 37 as a new layer.
Resize 45%
Move into exact position - make it seem as if it’s sitting on the fence.
Apply the mask.
Merge Group.

Copy and paste 54 as a new layer.
Resize 35%
Move into position behind the lower area of the fence.
Apply the mask.
Merge Group.
Use your eraser tool to erase any portion of the squirrel that you can see through the fence.

Copy and paste 63 as a new layer.
Resize 70%
Position at the middle rung of the fence.
Duplicate/Mirror and place along the top rung of the fence.
I lowered the opacity on the vines, used my eraser tool to erase parts of the vines to give it the effect it was wrapped or stapled to the fence.
Reopen the opacity to 100% when you’re done.

Copy and paste 33 as a new layer.
Resize 25%
Duplicate/Mirror/Resize 70%

Copy and patse 38 as a new layer in front of the frame.
Move into position - see my tag for reference.
Apply the mask.
Merge Group.

Highlight your white background.
Select All.
Copy and paste Paper 5 Into Selection.
Copy and paste 5 as a new layer above the paper.
Merge Down.
Apply the mask.
Merge Group.

Add your credits.

Add your name.
Give it a slight inner bevel:


Resize all layers 80%.

I hope you enjoyed this tutorial.
I’d love to see your results and show it off in my gallery.
Email me!
Hugs,
Bev

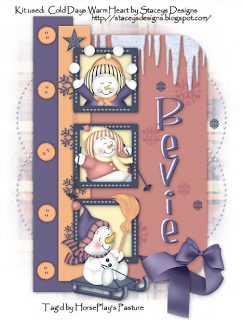
Cold Days Warm Heart


Supplies

Font of Choice - I used Rolina here
JWY_mask010 which I’ve supplied here. If you know who this belongs to please email me so that I can give proper credit or remove.
Tracy F. Designs Template 31 here. Scroll down the blog, right hand side you’ll see all of her templates in bulk loads.
Filters Unlimited 2.0 - Optional
“Cold Days Warm heart” is a PTU tagger size scrap kit created by Staceys Designs and can be purchased from Scraps with Attitude. You can visit her blog here.
Thank you Stacey for a really super cute kit!!

This tutorial was written assuming you have a working knowledge of PSP.

~♥~ Let’s get started ~♥~

Open up the template.
Shift + D.
Close out the original.
Delete the top 2 layers.
Resize all layers 120%
Image/Canvas Size
550 x 725
OK
New Raster layer.
Send to bottom.
Flood fill white.

Open up Icicles 1.
Scroll your mouse wheel to enlarge it.
Find the biggest area of the icicles and using your Selection Tool set on Rectangle and section it out.
Set your Foreground to pattern and find the icicles.
Angle: 0
Scale: 60
OK

Make your template active.
Highlight Circles layer.
Select All/Float/Defloat
New Raster layer.
Flood fill with your icicle pattern.
Deselect.
Give it a slight inner bevel:


Adjust/Add Remove Noise/Add Noise:
Gaussian and Monochrome checked
Noise: 30%
OK
Deselect.
Delete the template layer.

Highlight Rectangle layer.
Click on it with your Magic Wand.
New Raster layer.
Copy and paste Paper 10 Into Selection.
Deselect.
Delete the template layer.
Apply a texture of your choice. I used Filters Unlimited 2.0 -
Paper Textures - Rag Paper
Intensity: 13
Lightness: 47
Apply
Give it the same slight inner bevel.

Highlight Strip 1 layer.
Click on it with your Magic Wand.
New Raster layer.
Copy and paste Paper 9 Into Selection.
Deselect.
Delete the template layer.
Effect/Texture Effect/Blinds:
Width: 4
Opacity 3
Color: efefef
Light from left top checked
OK

Highlight Strip 2 layer.
Click on it with your Magic Wand.
New Raster layer.
Copy and paste Paper 11 Into Selection.
Deselect.
Delete the template layer.
Give it the same texture effect you did on the Rectangle layer.

Highlight Squares layer.
Click on each square with your Magic Wand.
New Raster layer.
Copy and paste Paper 12 Into Selection.
Deselect.
Delete the template layer.

Highlight Frames layer.
Click on each one with your Magic Wand.
New Raster layer.
Copy and paste Paper 8 Into Selection.
Deselect.
Delete the template layer.
Give it the same slight inner bevel.

Click on the squares layer.
Use your Magic Wand and click on the top square.
Copy and paste Juggling Snowman as a new layer just above the square paper.
Resize 40% - Move into position over the top square.
Selections/Invert
Tap the delete key.
Deselect.

Highlight the squares layer again.
Click on the middle square with your Magic Wand.
Copy and paste Skiing Snowman as a new layer just above the square paper.
Resize 40% - Move into position over the middle square.
Selections/Invert
Tap the delete key.
Deselect.

Copy and paste Snowman on Sleigh as a new layer.
Resize 50%
Move into position in front of the bottom frame.

Highlight Rectangle layer.
Click on it with your Magic Wand.
Make Icicle 1 active.
Deselect.
Copy.
Make your working canvas active.
Paste just above the rectangle layer.
Resize 80%.
Alight it with the top of the rectangle.
Selections/Invert
Tap the delete key.
Deselect.

Add your embellishments. I used:
Snowflake Chain: Resize 50%/I applied Noise
Button 1: Resize 25% and 60%/Duplicate as many times as you like
Bow 1: Resize 30%
Snowflake 1: Resize 25% and 70%/Duplciate and resize as you like. I changed the Properties of all of them to Soft Light.
Choose another flake of your choice and resize as small as you like/Duplicate/Resize as you like and splash a few around.

Highlight the white background.
New Raster layer.
Select All
Copy and paste a paper of choice Into Selection.
Deselect.
Apply the mask.
Use your Pick Tool to pull the sides out slightly.
Merge Group.

Add your credits.
If you didn’t use a tube that requires credit then the kit designer would sure appreciate credit on the tag - but is not required.

Add your name.
I changed the direction to go up and down and typed mine out using the icicle pattern/Gave it the same inner bevel.
Typed it out again using the purple paper/Gave it the same inner bevel.
Move one slightly off.
Merge Down.

Resize all layers 85%.

I hope you enjoyed this tutorial.
I’d love to see your results and show it off in my gallery.
Email me!
Hugs,
Bev

Sunday, October 31, 2010

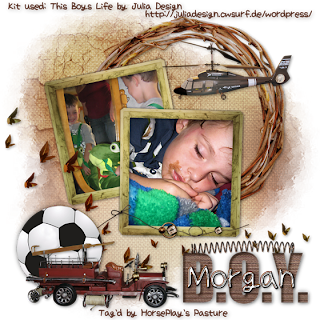
A Boys Life


Supplies

2 Pics of your own♥
Font of Choice - I used Childish Alpha here
Vix Mask 452 here
“A Boys Life” is a PTU Full size scrap kit created by Julia Designs and can be purchased from Twilight Scraps. You can visit her blog here.
Thank you Julia for scrap kit that truly captures a little boys life!

This tutorial was written assuming you have a working knowledge of PSP.

~♥~ Let’s get started ~♥~

Open up a blank 700 x 700 canvas.
Flood fill white.

Copy and paste Element 22 as a new layer.
Resize 25% and 50%
Use your Magic Wand and click inside the frame.
Selections/Modify/Expand by 4.
Copy and paste your photo as a new layer below the frame.
Resize as needed.
Selections/Invert
Tap the delete key.
Deselect.

To do something really interesting and fun to the photo click on Adjust.
See that long sub menu? Check them all out and see all the different changes you can make to your photo. Some can be dramatic, some can be subtle….but just try it out!

Merge Visible the frame and picture.

Copy and paste Element 22 as a new layer again..
Repeat the above step using a different pic.
Merge Visible the frame and picture.
Free rotate left 10 degrees.

Move both merges pictures into position.

Add your embellishments. I used:
Element 13: Resize 25% and 70%
Element 18: Resize 25% and 40%
Element 23: Resize 25%
Element 30: Resize 25% and 50%
Element 6: Resize 25% and 50%
Element 3: Resize 25% and 40%
Element 27: Resize 25% and 40%
Element 1: Resize 25% and 65%

Highlight your white background.
New Raster layer.
Copy and paste a paper of choice Into Selection.
Deselect.
Apply the mask.
Resize 105%
Merge Group.

I’m sure the designer of the kit would appreciate credit for the kit on your tag.

Add the name.
Give it a slight inner bevel:


Resize all layers 80%.

I hope you enjoyed this tutorial.
I’d love to see your results and show it off in my gallery.
Email me!
Hugs,
Bev