Saturday, June 19, 2010

Taurus


Clicking on the image will enlarge to full view.

Supplies
1 tube of choice - I’m using Taurus - the artwork of KatNKDA which you can purchase here
Font of Choice - I’m using Aquarelle here
Gem Mask 192 here
“Taurus” is a PTU art kit created by KatNKDA. It can be downloaded from her store NK Art Shop. You can visit Kat’s blog here.
Thank you so very much for another beautiful kit, Kat!

This tutorial was written assuming you have a working knowledge of PSP.

~♥~ Let’s get started ~♥~

Open up a 700 X 700 blank canvas.
Flood fill it white.

Copy and paste Element 64 as a new layer .
Resize 25%
Use your Magic Wand and click inside of it.
New Raster layer below the frame.
Copy and paste a paper of choice Into Selection.
DO NOT DESELECT.

Copy and paste your tube below the frame.
If you’re using the tube I did, resize 65%. You’ll see that the feathered edge of the cow can’t be hidden by the frame….this is alright because the curtain element will do the trick.
Tap the delete key.
Deselect.

Close out your white canvas.
Merge Visible.
Reopen your white canvas.

Elements that we’ll be adding to the tag will need to be feathered, but we’ll take care of that after….

Copy and paste Element 10 as a new layer.
Resize 40%
Move into position at the upper right corner.
Move it just above your white canvas in your layers pallet.

Paste the element again.
This time Mirror/Resize 25% and move into the upper right corner.
Move it just above your merged layer in your layers pallet.

Copy and paste Element 56 as a new layer.
Resize 60%
Move into position - see my tag for reference.

Copy and paste Element 27 as a new layer.
Mirror/Resize 25% and 75%
Highlight your white canvas.
Select All
Select/Modify/Feather
Number of Pixels:
33
OK
Highlight each of your element layers and tap the delete key to get a feathered effect of each.
Deselect.

Highlight your white background.
New Raster layer.
Select All.
Copy and paste a paper of choice Into Selection.
Deselect.
Apply the mask.
Merge Group.
Duplicate
Merge Down.

Add your copyrights.

Add your name.

Resize all layers 80%.

I hope you enjoyed this tutorial.
I’d love to see your results and show it off in my gallery.
Email me!
Hugs,
Bev

Aries

Clicking on the image will enlarge to full view.

Supplies
1 tube of choice - I’m using the beautiful artwork of Jennifer Janesko at CILM
Font of Choice - I’m using Kristen ITC which came with my PC
Gem’s Mask 166 here
“Aries” is a PTU art kit created by KatNKDA. It can be downloaded from her store NK Art Shop. You can visit Kat’s blog here.
Thank you so very much for another beautiful kit, Kat!

This tutorial was written assuming you have a working knowledge of PSP.

~♥~ Let’s get started ~♥~

Open up a 700 X 700 blank canvas.
Flood fill white.

Copy and paste Element 9 as a new layer.
Resize 25%
Use your Magic Wand and click inside of it.
Selections/Modify/Expand by 6.
New Raster layer below the frame.
Copy and paste a paper of choice Into Selection.
Deselect.

Copy and paste Element 6 as a new layer.
Resize 25%
Free rotate left 7 degrees
Position it over the frame.
Duplicate
Move the duplicate layer below the paper layer.
Highlight the frame layer.
Select All/Float/Defloat
Highlight the element layer that’s over the frame.
Use your Eraser tool and erase the part of the element you don’t want on the frame to give it the effect that it’s hung over the frame.

Copy and paste Element 8 as a new layer.
Resize 25% and 40%
Duplicate and position as you like around the vine.

Add your embellishments. I used:
Element 44: Resize 25% and 60%
Element 46: Resize 25% and70%
Element 16: Resize 25% and 70% Mirror
Element 2: Resize 40%
Element 8: Resize 25%

Highlight your white background.
New Raster layer.
Select All.
Copy and paste a paper of choice Into Selection.
Deselect.
Apply the mask.
Merge Group.

Add your copyrights.

Add your name.

Copy and paste Element 26 as a new layer.
Resize 25% and 70%
Position it behind your name.

Resize all layers 80%.

I hope you enjoyed this tutorial.
I’d love to see your results and show it off in my gallery.
Email me!
Hugs,
Bev

Thursday, June 17, 2010

Never Too Old for Fun

Clicking on the image will enlarge to full view.

Supplies
3 tubes of choice - I used the wonderful artwork of PinUpToons at CILM
Font of Choice - I used Piano Light Regular here
Gem’s Mask 166 here
Scraps of Enchantment Template 118 here
DSB Flux - Bright Noise
“Carefree Summer” is a FTU scrap kit created by myself and can be found here. Please leave a thank you when downloading. It’s not required but appreciated more than you know♥.

This tutorial was written assuming you have a working knowledge of PSP.

~♥~ Let’s get started ~♥~

If you’re using the tube I did and would like to use the same colors they are:

7fadc3 - it’s a lavender color
D7c7ef - it’s a blue tone

Open up the template.
Shift + D
Close out the Original.
Delete the following layers:
Info, Flower Doodle 2, Flower Doodle 1, and Flower Overlay

Open up Raster 1 layer.
Highlight Background 1 layer.
Click on it with your Magic Wand.
New Raster layer.
Copy and paste Paper 14 Into Selection.
Deselect.
Delete the template layer.

Copy and paste a tube above the frame of this layer.

Highlight Background 2 layer.
Click on it with your Magic Wand.
Copy and paste Paper 10 as a new layer.
Resize 50%
Choose an area you’d like to have within the frame.
Selections/Invert
Tap the delete key.
Deselect.
Delete the template layer.

Copy and paste a tube above the frame of this layer.
 
Highlight Background 3 layer.
Click on it with your Magic Wand.
Copy and paste Paper 13 as a new layer.
Resize 40%
Choose an area of the paper you’d like to see within the frame.
Selections/Invert
Tap the delete key.
DO NOT DESELECT.

Copy and paste your tube below the frame.
Resize as needed.
Move into position.
Tap the delete key.
Deselect.
Delete the template layer.

Add your embellishments. I used:
Bow 4: Resize 25%
Birdhouse: Resize 45%
Picnic Basket Pink: Resize 35%
Deco Flowers 2 & 3: Resize 50%
Deco Flowers 1, 2, and 3: Resize 25% and 70% - arrange at the base of the birdhouse
Bird: Resize 25% and 40%
Kite 1: Resize 60%
Butterflies 2 & 3: Resize 25% and 50% Free rotate 30 degrees

Highlight your white background.
New Raster layer.
Select All.
Copy and paste Paper 9 Into Selection.
Deselect.
Apply the mask.
Merge Group.
Duplicate

Add your copyrights.

Add your name.
Apply DSB Flux - Bright Noise:
Intensity: 10%
Mixed checked
OK

Resize all layers 85%.

I hope you enjoyed this tutorial.
I’d love to see your results and show it off in my gallery.
Email me!
Hugs,
Bev

Wednesday, June 16, 2010

Summer Fairy

Clicking on the image will enlarge to full view.

Supplies
1 tube of choice - I used the wonderful artwork of Joan Pelaez at CILM
Font of Choice - I used Nadall here
Monti Circular Mask here
“Hoppit” is a FTU scrap kit created by Artmama’s Studio and can be downloaded from here.
Please leave a thank you when downloading as it’s a small gesture for hard work given freely.

This tutorial was written assuming you have a working knowledge of PSP.

~♥~ Let’s get started ~♥~

Open up a 700 X 700 blank canvas.
Flood fill white.

Copy and paste Embellie 08 as a new layer.
Resize 85%
Use your Magic Wand and click inside of it.
Selections/Modify/Expand by 3.
New Raster layer below the frame.
Copy and paste a paper of choice Into Selection.
DO NOT DESELECT.

Copy and paste your tube as a new layer above the frame.
Duplicate/Resize much large and move it below the frame in your layer’s pallet.
Move it up and to the right slightly.
Change the Properties to Soft Light.
Selections/Invert
Tap the delete key.
Deselect.

Add your embellishments. I used:
Embellie 26: Mirror/Resize 60% Free rotate left 30 degrees
Embellie 20
Embellie 17: Mirror/Resize 80%
Embellie 19: Duplicate
Embellie 19 again: Mirror/Resize 70%
Embellie 30: Resize 50% Duplciate/Mirror/Resize 60% Free rotate right 30 degrees
Embellie 16
Embellie 15: Resize 60%

Highlight your white background.
New Raster layer.
Select All.
Copy and paste a paper of choice Into Selection.
Deselect.
Apply the mask.
Merge Group.

Add your copyrights.

Add your name.

Resize all layers 80%.

I hope you enjoyed this tutorial.
I’d love to see your results and show it off in my gallery.
Email me!
Hugs,
Bev

Heaven's Garden

Clicking on the image will enlarge to full view.

Supplies
1 tube of choice - I’m using the beautiful artwork of Barbara Jensen which can purchased here
Font of Choice - I’m Miama here
Gem’s Mask 71 here
“Garden Scrap Kit” is a FTU scrap kit created by Bluedream Designs and can be downloaded here.
Please leave a thank you when downloading as it‘s a small gesture for hard work given freely.

This tutorial was written assuming you have a working knowledge of PSP.

~♥~ Let’s get started ~♥~

Open up a 700 X 700 blank canvas.
Flood fill white.

Copy and paste Tag 1 as a new layer.
Position it to the left of your canvas.

Copy and paste your tube as a new layer.
Position it to the right of your canvas.
Duplicate/Mirror
In your layers pallet move the duplicate tube just above Tag 1.

To make it easier to see to work on this portion of the tut, close out your duplicated tube.

Using your Freehand Selection Tool outline Tag 1.


New Raster layer just above Tag 1.
Copy and paste a paper of choice Into Selection.
DO NOT DESELECT.

Highlight and re-open the duplicated tube.
Selections/Invert
Tap the delete key.
Change the Properties to Multiply.
Merge down.
Selections/Modify/Feather
Number of Pixels:
43
OK
Tap the delete key until you like the feathered image.
Deselect.
Merge Down.
Now your merged feathered image should be on the same layer as Tag 1.

Add your embellishments. I used:
Cherry Blossom: Resize 70%
Tulip 2: Mirror
Tulip 1: Resize 70%
Flower 9: Resize 50%
Flower 8: Resize 40% Mirror
Glitterfill Flower 2: Resize 40%
Butterfly: Resize 35% Free rotate left 30 degrees Duplicate/Mirror/Resize 80%

For all Flower elements:
Adjust/Sharpen/Sharpen More

Highlight your white background.
New Raster layer.
Select All.
Copy and paste a paper of choice Into Selection.
Deselect.
Apply the mask.
Merge Group.

Add your copyrights.

Add your name.
Give it an inner bevel:


Resize all layers 80%.

I hope you enjoyed this tutorial.
I’d love to see your results and show it off in my gallery.
Email me!
Hugs,
Bev

Lullaby

Clicking on the image will enlarge to full view.

Supplies
2 tubes of choice - I used the wonderful artwork of PinUpToons here
Font of choice - I used Perdition here
Becky Mask 22 here
My Template 88 here.
“Just Another Lullaby” is a FTU scrap kit created by Soxsational Scraps and can be downloaded from here.
Please leave a thank you when downloading as it‘s a small gesture for hard work given freely.

This tutorial was written assuming you have a working knowledge of PSP.

~♥~ Let’s get started ~♥~

Open up the template.
Shift + D.
Close out the original.
Delete the credit layer.

Highlight Top Square layer.
Click on it with your Magic Wand.
New Raster layer.
Copy and paste a paper of choice Into Selection.
Deselect.
DO NOT DELETE THE TEMPLATE LAYER YET.

Copy and paste your tube as a new layer.
Keep it on the large size and move it into position toward the right side of the square.
Duplicate to make it a bit smaller. If you want part of the tube to stick out of the frame then duplicate this tube layer and move above the frame layer in your layers pallet.
Once you have your tubes in exact position then highlight the template layer and click on it with your Magic Wand.
Selections/Invert
Highlight each of the tube layers that are below the frame layer and tap the delete key.
Deselect.
Highlight the tube layer above the frame.
Use your Eraser tool and erase parts of the tube you don’t want to see outside of the frame.
Delete the template layer.

Highlight Bottom Square layer.
Repeat the above steps accept position the tube at the left side of the square.

Highlight Top Frame layer.
Click on it with your Magic Wand.
New Raster layer.
Copy and paste a paper of choice Into Selection.
Deselect.
Delete the template layer.
Give it a slight inner bevel:


Highlight Bottom Frame layer.
Repeat the above step.

Add your embellishments. I used:
(I positioned the stars over the star template layers and then deleted the template layer)
Star 4: Resize 25% and 80%
Star 2: Resize 25% and 60%
Star 3: Resize 25% and 40%
Bow 2: Resize 25%
Cloud: Resize 70%
Stars: Resize 70%

Highlight your white canvas.
New Raster layer.
Select All.
Copy and paste a paper of choice Into Selection.
Deselect.
Apply the mask.
Merge Group.
Duplicate.
Merge Down.

Add your copyrights.

Add your name.
Give it the same Inner Bevel.

Resize all layers 90%.

I hope you enjoyed this tutorial.
I’d love to see your results and show it off in my gallery.
Email me!
Hugs,
Bev

Torn and Tattered Beauty

Clicking on the image will enlarge to full view.

Supplies
1 tube of choice - I used the wonderful artwork of Olivia here
Font of choice - I used Dream Orphans here
Weescotlass Mask 229 here
DSB Flux - Bright Noise - Optional
“Demilicious” is a FTU scrap kit created by Bluedream Designs and can be downloaded from here.
Please leave a nice thank you when downloading as it‘s a small gesture for hard work given freely.
This tutorial was written assuming you have a working knowledge of PSP.

~♥~ Let’s get started ~♥~

Open up a 700 X 700 blank canvas.
Flood fill white.

Copy and paste Frame 3 as a new layer.
Use your Magic Wand and click inside of it.
Selections/Modify/Expand by 6.
New Raster layer below the frame.
Copy and paste a paper of choice Into Selection.
DO NOT DESELECT.

Copy and paste your tube below the frame.
Selections/Invert
Tap the delete key.
Deselect.

Copy and paste Blossom as a new layer.
Resize 70%
Move it down and position at the left side of the frame.
See my tag for reference.
Erase the part of the branch that overhangs the bottom of the pocket.

Paste the Blossom again.
Mirror
Don’t resize - instead move it up and position it at the right side of the pocket.
See my tag for reference.
Erase the part of the branch at the top that’s just above the outside cluster of blossoms. And then erase the bottom part of the branch that overhangs the bottom of the pocket.

Add your embellishments. I used:
Safety Pin 2: Free rotate right 20 degrees/Mirror/Flip/Resize 40%. Erase a little of the pin to give the effect that it’s pinned into the denim.Flower 2: Resize 50% Duplicate/Resize 80%
Butterflies 1 & 2: Resize 25%

Highlight your white canvas.
New Raster layer.
Flood fill with a gradient of choice or a paper of choice.
Apply the mask.
Merge Group.

Add your copyrights.

Add your name.
Give it a slight inner bevel:


Apply DSB Flux - Bright Noise:
Intensity: 10
Mix checked
OK

Resize all layers 80%.

I hope you enjoyed this tutorial.
I’d love to see your results and show it off in my gallery.
Email me!
Hugs,
Bev

Hint of Spring

Clicking on the image will enlarge to full view.

Supplies
1 tube of choice - I used the wonderful artwork of Jo Lunch here
Font of choice - I used Dream Orphans Italic here
Gem’s Mask 164 here
Essence of Creativity Template 17 here
DSB Flux - Bright Noise - Optional
“Hint of Spring” is a FTU scrap kit created by Snappy Scrappy and can be downloaded from here.
Please leave a thank you when downloading as it‘s a small gesture for hard work given freely.
This tutorial was written assuming you have a working knowledge of PSP.

~♥~ Let’s get started ~♥~

Open up the template.
Shift + D.
Close out the original.
Delete the copyright and doodle layer.
Image/Canvas Size
500 X 600
OK
Flood fill the background layer white.

The colors I used in this tutorial were chosen from the tulips in this kit.

Highlight Heart layer.
Click on it with your Magic Wand.
New Raster layer.
Flood fill with a gradient of choice.
Deselect.
Delete the template layer.
Give it a slight inner bevel:


Apply DSB Flux - Bright Noise:
Intensity: 10
Mix checked
OK

Highlight Heart Frame 1.
Click on it with your Magic Wand.
New Raster layer.
Invert your gradient and flood fill.
Deselect.
Delete the template layer.
Apply DSB Flux - Bright Noise:
Same settings.

Highlight Heart Frame Top
Click on it with your Magic Wand.
New Raster layer.
Flood fill with your gradient.
Deselect.
Delete the template layer.
Apply DSB Flux - Bright Noise:
Same settings.

Highlight Rectangle 1 layer.
Click on it with your Magic Wand.
New Raster layer.
Flood fill with a gradient of choice.
DO NOT DESELECT.

Copy and paste your tube as a new layer.
Resize as needed.
Selections/Invert
Tap the delete key.
Deselect.

Highlight Rectangle 2 layer.
Repeat the above 2 steps.

Highlight Frame 1 layer.
Click on it with your Magic Wand.
New Raster layer.
Flood fill with a color of choice.
Deselect.
Give it the same inner bevel.

Highlight Frame 2 layer.
Repeat the above step.

Add your embellishments. I used:
Blossoms: Resize 25% and 50% - Mirror
Blossom 1: Resize 40%
Blossom 2: Resize 35%
Tulip 1: Resize 25% and 50%
Tulip 2: Resize 25% and 40%
Butterflies 1 & 2: Resize 25% and 70%

Highlight your white canvas.
New Raster layer.
Flood fill with a color of choice.
Apply the mask.
Merge Group.

Add your copyrights.

Add your name.

I hope you enjoyed this tutorial.
I’d love to see your results and show it off in my gallery.
Email me!
Hugs,
Bev

Jungle Beauty


Clicking on the image wil enlarge to full view.

Supplies
1 tube of choice - I used the wonderful artwork of Elias Chatzoudis here
Font of choice - I used Circus here
Becky Mask 22 here
“I Can See a Rainbow Add On” is a FTU scrap kit created by Funky of WishingonaStar and can be downloaded from here. Scroll down the page.
Please leave a thank you when downloading as it‘s a small gesture for hard work given freely.

This tutorial was written assuming you have a working knowledge of PSP.

~♥~ Let’s get started ~♥~

Open up a 700 X 700 blank canvas.
Flood fill white.

Copy and paste Charm as a new layer.
Use your Magic Wand and click inside of it.
Selections/Modify/Expand by 6.
New Raster layer below the charm.
Copy and paste a paper of choice Into Selection.
Deselect.

Copy and paste your tube as a new layer.
 
Add your embellishments. I used:
Blue Callalily
Macaw: Resize 50%

Highlight your white canvas.
New Raster layer.
Select All.
Copy and paste a paper of choice Into Selection.
Deselect.
Apply the mask.
Merge Group.

Copy and paste Blue Callalilly as a new layer just above the mask layer.
Move into position.
Apply the mask.
Merge Group.
Lower the Opacity to about 24.

Add your copyrights

Add your name.
Choose your foreground and background.
Set stroke to 1.5.
Convert to Raster layer.
Select All/Float/Defloat
Selections/Modify/Contract by 1.
Give it an inner bevel:


Adjust/Add Remove Noise/Add Noise
Uniform and Monochrome checked
Noise: 30%
OK

Resize all layers 80%.

I hope you enjoyed this tutorial.
I’d love to see your results and show it off in my gallery.
Email me!
Hugs,
Bev

Forever

Clicking on the image will enlarge to full view.

Supplies
1 tube of choice - I used the wonderful artwork of Anthony Guerra here
Font of choice - I used 5AM Melfina here
Weescotlass Mask 249 here
My Template 94 here
“Exquisite Love” is a FTU scrap kit created by Soxsational Scraps and can be downloaded from here.
Please leave a thank you when downloading as it‘s a small gesture for hard work given freely.

This tutorial was written assuming you have a working knowledge of PSP.

~♥~ Let’s get started ~♥~

Open up the template.
Shift + D.
Close out the original.
Image/Canvas Size
700 X 700
OK
Flood fill background layer white.
Delete the credit layer.

Highlight Large Rec Back layer.
Click on it with your Magic Wand.
New Raster layer.
Copy and paste a paper of choice Into Selection.
Deselect.
Delete the template layer.
Give it a slight Inner Bevel:


Highlight Large Rec layer.
Select All/Float/Defloat
New Raster layer.
Copy and paste a paper of choice Into Selection.
Deselect.
Delete the template layer.

Highlight Stitches layer.
Select All/Float/Defloat
New Raster layer.
Copy and paste a dark colored paper Into Selection.
Deselect.
Delete the template layer.

Highlight Vertical Rec
Select All/Float/Defloat
New Raster layer.
Copy and paste a paper of choice Into Selection.
Deselect.
Delete the template layer.

Highlight Vertical Rec Frame.
Click on it with your Magic Wand.
New Raster layer.
Copy and paste the same paper as you used for Large Rec Back layer Into Selection.
Deselect.
Give it the same Inner Bevel
.
Highlight Right Lines layer.
Merge Down.
Left and Right lines should now be on the same layer.
Select All/Float/Defloat
New Raster layer.
Copy and paste the same paper you used for the stitches Into Selection.
Deselect.
Delete the template layer.

Copy and paste your tube as a new layer.
Move it into the position where you want it.
Duplicate.
Make the tube larger. In your layers pallet move it into position over the Vertical Rec layer.
Highlight the Vertical Rec layer.
Select All/Float/Defloat
Selections/Invert
Be sure the tube layer is highlighted and tap the delete key.
Deselect.
Change the Properties to Luminance Legacy.
Lower the Opacity to about 48.

Add your embellishments. I used:
Flower 5
Flowers 1 & 2: Resize 30%
Fan 2: Resize 50%
Tulips: Resize 50%

Highlight your white canvas.
New Raster layer.
Select All.
Copy and paste a paper of choice Into Selection.
Deselect.
Apply the mask.
Resize 120%.
Merge Group.

Add your copyrights.

Add your name.
Give it the same inner bevel.

Resize all layers 80%.

I hope you enjoyed this tutorial.
I’d love to see your results and show it off in my gallery.
Email me!
Hugs,
Bev

Candy Treats


Clicking on the image will enlarge to full view.

Supplies
1 tube of choice - I used the wonderful artwork of Elias Chatzoudis at MPT
Font of Choice - I used Chicken Basket which is a pay font
Weescotlass Mask 84 here
“Easter” is a FTU scrap kit created by Candy’s Treats and can be downloaded from here.
Please leave a thank you when downloading as it’s a small gesture for hard work given freely.

This tutorial was written assuming you have a working knowledge of PSP.

~♥~ Let’s get started ~♥~

Open up a 700 X 700 blank canvas.
Flood fill white.

Copy and paste Heart 1 as a new layer.
Free rotate left 25 degrees.

Copy and paste your tube as a new layer.
Free rotate left 25 degrees
Move it into position over the heart.
Highlight the heart layer.
Select All/Float/Defloat
Selections/Invert
Highlight your tube layer.
Tap the delete key.
Selections/Modify/Feather
Number of Pixels:
23
OK
Tap the delete key a few times.
Deselect.
Merge Down.
Close the merged layer.

Copy and paste Heart 3 as a new layer.
Mirror
Free rotate left 5 degrees
Copy and paste your tube as a new layer.
Free rotate left 5 degrees
Move it into position over the heart.
Highlight the heart layer.
Select All/Float/Defloat
Selections/Invert
Highlight your tube layer.
Tap the delete key.
Selections/Modify/Feather
Number of Pixels:
23
OK
Tap the delete key a few times.
Deselect.
Merge Down.
Close the merged layer.
 
Copy and paste Heart 2 as a new layer.
Free rotate right 5 degrees
Copy and paste your tube as a new layer.
Free rotate right 5 degrees
Move it into position over the heart.
Highlight the heart layer.
Select All/Float/Defloat
Selections/Invert
Highlight your tube layer.
Tap the delete key.
Selections/Modify/Feather
Number of Pixels:
23
OK
Tap the delete key a few times.
Deselect.
Merge Down.

Reopen all your merged layers and move them into position.
See my tag for reference.

Add your embellishments. I used:
Luv Easter Flowers 2, 3, & 4
Luv Easter Flower 1: Resize 90% Free rotate left 5 degrees
Ribbon: Resize 50%
Mushroom & Mushroom 2: Resize 40%

Highlight your white background.
New Raster layer.
Select All.
Copy and paste a paper of choice Into Selection.
Deselect.
Apply the mask.
Merge Group.

Add your copyrights.

Add your name.

Resize all layers 80%.

I hope you enjoyed this tutorial.
I’d love to see your results and show it off in my gallery.
Email me!
Hugs,
Bev

Precious As You


Clicking on the image will enlarge to full view.

Supplies
2 Tubes of choice - I used the wonderful artwork of Karen Middleton at CILM
Font of Choice - I used Chicken Basket which is a Pay Font
Weescotlass Mask 297 here
Scrappity Scrap and More Template 23 here
“Precious as You” is a FTU scrap kit created by Chingip Design and can be downloaded from here.
Please leave a thank you when downloading as it’s a small gesture for hard work given freely.
This tutorial was written assuming you have a working knowledge of PSP.

~♥~ Let’s get started ~♥~

Open up the template.
Shift + D.
Close out the original.
Delete the credit layer.

Image/Canvas Size 650 X 450
Flood fill the background layer white.

Highlight Bottom Slat layer.
Use your Magic Wand and click on it.
New Raster layer.
Copy and paste a paper of choice Into Selection.
Deselect.
Delete the template layer.

Repeat the above step with Slat 1 & Slat 2 layers using a different paper for each layer.

Highlight Circle layer.
Click on it with our Magic Wand.
New Raster layer.
Copy and paste a paper of choice Into Selection.
Deselect.
Delete the template layer.

Highlight Rectangle 1 layer.
You can do either of the following ideas:
New Raster layer.
Copy and paste a paper of choice Into Selection
Deselect.
Delete the template layer.
OR
Copy and paste a paper of choice as a new layer.
(I used Paper 6)
Resize 25% and 60%
Move into position
Selection/Invert
Tap the delete key.
Deselect.
Delete the template layer.

Highlight Heart layer.
Click on it with your Magic Wand.
New Raster layer.
Copy and paste a paper of choice Into Selection.
Copy and paste a tube as a new layer.
Position it over the paper.
Selections/Invert
Tap the delete key.
Deselect.
Delete the template layer.

Highlight Rectangle 2 layer.
Click on it with your Magic Wand.
New Raster layer.
Copy and paste a paper of choice Into Selection.
Deselect.

Copy and paste your tube as a new layer.
Free rotate right 10 degrees
Move into position over the rectangle paper.
Highlight the template layer.
Click on it with your Magic Wand.
Selections/Invert
Highlight your tube layer.
Tap the delete key.
Deselect.
Delete the template layer.

Add your embellishments. I used:
Element 4: Resize 25%
Element 29: Resize 25% and 50%
Element 18: Resize 25% and 50%
Element 24: Resize 25% and 50% Free rotate right 10 degrees
Element 25: Resize 25% and 50%

Highlight your white background.
New Raster layer.
Select All.
Copy and paste a paper of choice Into Selection.
Deselect.
Apply the mask.
Merge Group.

Add your copyrights.

Add your name.

Resize all layers 80%.

I hope you enjoyed this tutorial.
I’d love to see your results and show it off in my gallery.
Email me!
Hugs,
Bev

Native Beauty

Clicking on the image will enlarge to full view.

Supplies
1 tube of choice - I used the wonderful artwork of Ray Leaning here
Font of choice - I used Dream Orphans here
Gem’s Mask 136 here
“Elegance” is a FTU scrap kit created by Bluedream Designs and can be downloaded from here.
Please leave thank you when downloading as it‘s a small gesture for hard work given freely.
This tutorial was written assuming you have a working knowledge of PSP.

~♥~ Let’s get started ~♥~

Open up a 700 X 700 blank canvas.
Flood fill white.

Copy and paste Cluster Frame as a new layer.
Free rotate right 90 degrees
Resize 70%
Position to the right of your canvas.
Use your Magic Wand and click inside of each frame.
Selections/Modify/expand by 6.
New Raster layer below the frame.
Copy and paste a paper of choice Into Selection.
Deselect.

Copy and paste your tube as a new layer.
Move it into position to the left of the frame.
Duplicate/Mirror
Move the duplicate below the frame.
Highlight the frame layer.

Use your Magic Wand again and click inside of each square.
Selections/Modify/Expand by 6.
Selections/Invert
Highlight the duplicated tube layer.
Tap the delete key.
Deselect.
Lower the opacity to about 42 or so.

Merge Visible the frame, duplicated tube, and paper layers.

Copy and paste Gem as a new layer.
Resize 25% and 30%
Position the gem at the corner of the top frame.
Duplicate as many times as you need to place the gem at the corner of each of the frames.

Copy and paste Blossom as a new layer.
Mirror and position it below the merged frame layer.

Now we’re going to feather the bottom part of the blossom…
Using your Freehand Selection Tool go around the entire blossom - DON’T let the line touch any of the blossoms…only the bottom portion of the stem so you want to make sure you keep that dotted line away from the flowers.
Selections/Modify/Feather
Number of Pixels: 23
OK
Selections/Invert
Tap the delete key until you have a nice feathered look to the bottom of the blossom branch.
Deselect.

Paste the Blossom again as a new layer.
Resize 80%.
This time arrange it in your layers pallet so that it’s at the very top - in front of your tube.

Copy and paste Butterfly 1 as a new layer.
Resize 50%.
Duplicate and resize as much as you like.

Highlight your white canvas.
New Raster layer.
Select All.
Copy and paste a paper of choice Into Selection.
Deselect.
Apply the mask.
Merge Group.

Add your copyrights.

Add your name.
Give it a slight Inner Bevel:


Resize all layers 80%.

I hope you enjoyed this tutorial.
I’d love to see your results and show it off in my gallery.
Email me!
Hugs,
Bev

Golden Moments


Clicking on the image will enlarge to full view.

Supplies
1 tube of choice - I used the beautiful artwork of Gary George here
Font of choice - I used Kells here
Gem’s Mask 166 here
Essence of Creativity Template 73 here
DSB Flux - Bright Noise - optional
“Golden Moments” is a FTU scrap kit created by Sabre of Sabre’s Quill and Parchment and can be downloaded from here.
Please leave thank you when downloading as it‘s a small gesture for hard work given freely.
This tutorial was written assuming you have a working knowledge of PSP.

~♥~ Let’s get started ~♥~

Open up the template.
Shift + D
Close out the original.
Delete the Copyright and text layers.

Image/Canvas Size
600 X 450
Flood fill the background layer white.

Highlight Rectangles layer.
Use your Magic Wand and click on both of the rectangles.
New Raster layer.
Copy and paste a paper of choice Into Selection.
Deselect.
Delete the template layer.

Highlight Dotted Rectangles layer.
Select All/Float/Defloat

Create a new canvas - any size - and flood fill with a very dark color.
Copy

Highlight your working canvas.
New Raster layer.
Paste Into Selection
Deselect.
Delete the template layer.

Highlight Squares layer.
Use your Magic Wand and click on each square.
New Raster layer.
Copy and paste a paper of choice Into Selection.
DO NOT DESELECT.

Copy and paste your tube as a new layer.
Keep it slightly larger than what you really want.
Move it into position over the squares.
Selections/Invert
Tap the delete key.
Change the Properties to Luminance Legacy.
Delete the template layer.

Copy and pate your tube as a new layer again.
Resize smaller than what you have in your squares.

Copy and paste Ribbon 1 as a new layer.
Resize 25%
Move it into position over the top of the rectangle layer.
See my tag for reference.
Duplicate
Zoom in very close and move the duplicated ribbon layer over and match the ends up.
Merge Down.
Duplicate
Free rotate right 90 degrees.
Move this ribbon into position down the left size of the rectangle.
See my tag for reference.

We’re not done with the ribbons yet - just giving a break in the directions so you won’t get lost on me!

Highlight the top horizontal ribbon.
Using your Selection tool section off the portion that overhangs the rectangle - although DO LEAVE a tad to overhang the rectangle - see my tag for reference.
Tap the delete key.
Duplicate/Flip
Move into position at the bottom of the rectangle.

Here’s another break in the directions - I hope I didn’t lose you!

Highlight the vertical ribbon.
Using your Selection Tool again, do the same with this as you did with the other - sectioning off the ribbon that overhangs.
Tap the delete key.
Duplicate - move it to the middle of the rectangles to hide the gap in between.
Highlight the original vertical ribbon and duplicate again - move this one to the far side of the rectangles.

Copy and paste Golden Rope as a new layer.
Resize 25%
Move into position at the side of the left square.
Duplicate/Free rotate right 90 degrees
Move into position at the top of the left square.
See my tag for reference.
Merge Down.
Duplicate/Mirror/Flip
Move into position at the bottom of the right square.

Copy and paste Stick Pin as a new layer.
Free rotate right 35 degrees
Resize 70%
Move into position near the bottom right corner of the square.
Using your Eraser Tool erase a bit of the middle of the pin to make it look as if it’s stuck through.
Using your Burn Tool with these settings:
Shape: Round
Size: (will explain in a minute)
Hardness: 40
Step: 1
Density: 64
Thickness: 100
Rotation: 0
Opacity: 9
For the size: Center the burn tool over the gap in the pin. Holding down the Alt key, move your mouse to make the circle get larger or smaller. You want the circle to barely touch the pin ends.
Now click your mouse until you have the darkened effect you like on the pin.

Add your embellishments. I used:
Circle 1: Resize 50%
String Pearl Bow: Resize 50%
Flower 1: Resize 25% Duplicate/Resize 80%/Mirror
Golden Branch: Resize 70%

Highlight your white canvas.
New Raster layer.
Select All.
Copy and paste a paper of choice Into Selection.
Deselect.
Apply the mask.
Merge Group.

Add your copyrights.

Add your name.
Foreground: Dark color of choice
Background: Pattern - paper of choice
Stroke: 2
Type out your name.
Convert to Raster layer.
Select All/Float/Defloat
Selections/Modify/Contract by 2
OK
Give it a slight inner bevel:
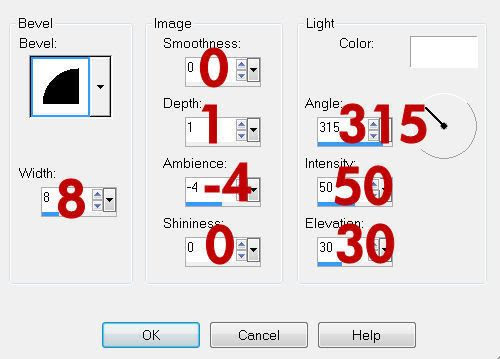

Apply DSB Flux - Bright Noise:
Intensity: 31
Mix checked
OK
Deselect.

I hope you enjoyed this tutorial.
I’d love to see your results and show it off in my gallery.
Email me!
Hugs,
Bev
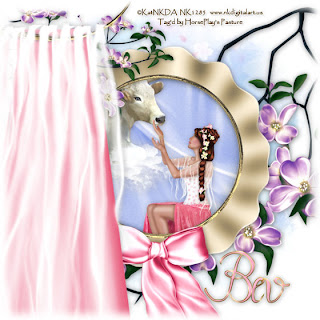
Blossom Dreams

Clicking on the image will enlarge to full view.

Supplies
1 tube of choice - I used the wonderful artwork of Michael Calandra at MPT
Font of Choice - I used Ar Blanca which came with my PC
Becky Mask 9 here
“Cherry Blossom” is a FTU scrap kit created by Sabre of Sabre’s Quill and Parchment and can be downloaded from here.
Please leave a thank you when downloading as it’s a small gesture for hard work given freely.
This tutorial was written assuming you have a working knowledge of PSP.

~♥~ Let’s get started ~♥~

Open up a 700 X 700 blank canvas.
Flood fill white.

Copy and paste Frame 4 as a new layer.
Resize 70%
Use your Magic Wand and click inside each of the frames.
Selections/Modify/Expand by 6.
New Raster layer below the frame.
Copy and paste a paper of choice Into Selection.
Deselect.

Copy and paste your tube as a new layer below the frame.
Resize if needed and position it exactly where you want it.
Duplicate/Resize much larger and move behind the smaller tube in your layers pallet.
Change the Properties to Soft Light.

Highlight the frame.
Click inside the frame with your Magic Wand.
Selections/Modify/Expand by 6.
Selections/Invert
Highlight each of your tubes and tap the delete key.
Deselect.

Add your embellishments. I used:
Bonsai Tree
Cat Tail: Mirror
Easter Kit Sabre Flower 3: Resize 80% Duplicate/Mirror/Move behind the frame to the upper left area.
Easter Kit Sabre Flower 2: Resize 40% - Move behind the frame to the lower left area. Duplciate/Flip/position where you like
Eastern Kit Sabre Feaf: Resize 40% - position near Flower 2.
Dragonfly Easter Kit Sabre: Resize 70%

Highlight your white background.
New Raster layer.
Select All.
Copy and paste a paper of choice Into Selection.
Deselect.
Apply the mask.
Merge Group.

Add your copyrights.

Add your name.
Stroke: 2
Foreground: #3e1e01
Background: Open up the frame. Choose an area with your Selection Tool and set your patten to it. Scale it to your liking.
Type your name.
Convert to Raster layer.
Select All/Float/Defloat
Selections/Modify/Contract by 2.
Give it an inner bevel:

Deselect.

Resize all layers 80%.

I hope you enjoyed this tutorial.
I’d love to see your results and show it off in my gallery.
Email me!
Hugs,
Bev

Dragons and Castles


Clicking on the image will enlarge to full view.

Supplies
Font of choice - I used Evanescence Series - I'm sorry I can't find a link
Weescotlass Mask 236 here
Divine Intentionz Template 317 here
DSB Flux - Bright Noise - Optional
Xenofex 1.0 - Shower Door - Optional
“Iris” is a FTU scrap kit created by Sabre of Sabre’s Quill and Parchment and can be downloaded from here.
Please leave thank you when downloading as it‘s a small gesture for hard work given freely.
This tutorial was written assuming you have a working knowledge of PSP.

~♥~ Let’s get started ~♥~

Open up the template.
Shift + D
Close out the original.
Delete the Copyright and Word Art layers.
Image/Canvas Size
700 X 600
Flood fill the background layer white.

Highlight Circle 1 layer.
Use your Magic Wand and click on it.
New Raster layer.
Copy and paste a paper of choice Into Selection.
Deselect.
Delete the template layer.
Give it a slight Inner Bevel:


Highlight the Oval layer.
Repeat the above step using a different paper.

Highlight Circle 2 layer.
Use your Magic Wand and click on it.
New Raster layer.
Flood fill with a plain color that will match the papers.
Deselect.
Delete the template layer.
Give it the same inner bevel.

Highlight Circle 3 layer.
Repeat the above step accept use a different color.
Highlight Raster 2 layer.
Select All/Float/Defloat
New Raster layer.
Flood fill with a color of choice.
Deselect.
Delete the template layer.
Apply DSB Flux - Bright Noise


Highlight Small Circle 1 layer.
Use your Magic Wand and click on it.
New Raster layer.
Copy and paste a paper of choice Into Selection.
Deselect.
Delete the template layer.
Give it the same slight Inner Bevel.

Highlight Small Circle 2 layer.
Repeat the above step.

Highlight Brush layer.
In your layers pallet change the foreground to a color you want the brush layer to be.
Using your Target Tool change the brush layer color.
Apply DSB Flux - Bright Noise:
Same settings.

Using your Freehand Selection tool outline the heart.
Copy and paste the Dragon as a new layer.
Resize 150%
Selections/Invert
Tap the delete key.
Selections/Modify/Feather
Number of Pixels:
23
OK
Tap the delete key a couple of times.
Deselect.
Change the Properties to Hard Light.

Copy and paste the Pillar as a new layer.
Resize 70%
Move into position over the Thin Rectangle template layer.
Delete the template layer.

Add your embellishments. I used:
Irish Swag: Resize 90%
Leaf 1: Resize 60% Duplciate/Mirror Duplicate/Resize 80%
Dragon

Highlight your white canvas.
New Raster layer.
Select All.
Copy and paste the Preview Paper Into Selection.
Deselect.
Apply Xenofex 1.0 - Shower Door:
Default Settings
If you didn’t use the filter then do this:
Adjust/Blur/Gaussian Blur:
Radius: 5
OK
Merge Group.

Add your copyrights.

Add your name.

Resize all layers 80%.

I hope you enjoyed this tutorial.
I’d love to see your results and show it off in my gallery.
Email me!
Hugs,
Bev

Castle by the Sea

Clicking on the image will enlarge to full view.

Supplies
1 tube of choice - I used the wonderful artwork of Michael Calandra here
Font of choice - I used Pavane here
Weescotlass Mask 297 here
“Castle by the Sea” is a FTU scrap kit created by Sabre and can be downloaded from here.
Please leave thank you when downloading as it‘s a small gesture for hard work given freely.

This tutorial was written assuming you have a working knowledge of PSP.

~♥~ Let’s get started ~♥~

This will be a very short and simple tut.

Open up a 700 X 700 blank canvas.
Flood fill white.

Copy and paste Oval Frame as a new layer.
Use your Freehand Selection Tool and outline the oval.
New Raster layer below the frame.
Copy and paste a paper of choice Into Selection.
DO NOT DESELECT.

Copy and paste your tube below the frame.
Selections/Invert
Tap the delete key.
Deselect.

Highlight your white canvas.
New Raster layer.
Select All.
Copy and paste a paper of choice Into Selection.
Deselect.
Apply the mask.
Merge Group.

Add your copyrights.

Add your name.
Give it a slight Inner Bevel:


Resize all layers 80%.

I hope you enjoyed this tutorial.
I’d love to see your results and show it off in my gallery.
Email me!
Hugs,
Bev

Girly

Clicking on the image will enlarge to full view.

Supplies
1 tube of choice - I used the wonderful artwork of Elias Chatzoudis at MPT
Font of Choice - I used Ar Blanca which came with my PC
Becky Mask 9 here
“Girly Scrap Kit” is a FTU scrap kit created by BlueDream Designs and can be downloaded from here.
Please leave a thank you when downloading as it’s a small gesture for hard work given freely.
This tutorial was written assuming you have a working knowledge of PSP.

~♥~ Let’s get started ~♥~

Open up a 700 X 700 blank canvas.
Flood fill white.

Copy and paste Frame 4 as a new layer.
Resize 70%
Use your Magic Wand and click inside each of the frames.
Selections/Modify/Expand by 6.
New Raster layer below the frame.
Copy and paste a paper of choice Into Selection.
Deselect.

Copy and paste your tube as a new layer below the frame.
Resize if needed and position it exactly where you want it.
Duplicate/Mirror
Move the duplicate above the frame in your layers pallet.

Highlight the frame layer.
Use your Magic Wand and click inside of each frame.Selections/Invert
Highlight the tube layer that’s below the frame and tap the delete key.
Deselect.
Change the Properties to Soft Light.

Add your embellishments. I used:
Foliage: Resize 60%
Beads
Butterfly 1: Resize 25% Free rotate right 30 degrees
Butterfly 2: Resize 25% and 80% Free rotate left 30 degrees

Highlight your white background.
New Raster layer.
Select All.
Copy and paste a paper of choice Into Selection.
Deselect.
Apply the mask.
Merge Group.

Crop your Image.

Add your copyrights.

Add your name.
Give it a slight inner bevel:


Resize all layers 85%.

I hope you enjoyed this tutorial.
I’d love to see your results and show it off in my gallery.
Email me!
Hugs,
Bev

Eternal Outlaw

Clicking on the image will enlarge to full view.

Supplies
1 tube of choice - I used the wonderful artwork of Greg Horn at CILM
Font of Choice - I used 5AM Melfina here
Gem’s Mask 8 here
My Template 96 here
DSB Flux - Bright Noise
Greg’s Factory Output Vol. II - Pool Shadow and Radial Hilite
This tutorial was written assuming you have a working knowledge of PSP.

~♥~ Let’s get started ~♥~

If you’re using the tube I did and would like to use the same colors they are:
7fadc3 - it’s a lavender color
D7c7ef - it’s a blue tone

Open up the template.
Shift + D
Close out the Original.
Delete the credit layer and Corner Dots layer.

Highlight Large Rectangle Back layer.
Click on it with your Magic Wand.
New Raster layer.
Flood fill with a gradient set at
Angle: 0
Repeats: 0
Invert Checked
Style: Linear
Flood fill the layer.
Deselect.
Apple Greg’s Factory Output Vol. II - Pool Shaodw:
Default Settings
Give it a drop shadow
Apply Greg’s Factory Output Vol. II - Radial Hilite:
Default Settings
Delete the template layer.

Highlight Large Rectangle layer.
Select All/Float/Defloat
New Raster layer.
Uncheck Invert on your gradient and flood fill the layer.
DO NOT DESELECT.

Copy and paste your tube as a new layer.
Resize larger if needed - I resized mine 130%
Selections/Invert
Tap the delete key.
Deselect.
Merge Down.
Delete the template layer.
Apply an inner bevel:


Highlight Small Rectangle Back.
Click on it with your Magic Wand.
New Raster layer.
Flood fill with the blue color.
Deselect.
Apply the Pool Shadow effect.
Give it the same inner bevel.

Highlight Small Rectangle layer.
Click on it with your Magic Wand.
New Raster layer.
Flood fill with the lavender color.
Deselect for now.

Copy and paste your tube again.
Resize - I resized mine 50%
Free rotate right 15 degrees
Position over the lavender rectangle.
Highlight the small rectangle layer template.
Click on it with your Magic Wand.
Highlight the tube layer.
Selections/Invert
Tap the delete key.
Deselect.
Merge Down.
Give it the same inner bevel.
Delete the template layer.

Highlight Thin Rectangles layer.
Click on them with your Magic Wand.
New Raster layer.
Flood fill with your gradient.
Apply Pool Shadow effect.
Give it the same drop shadow as you did for the large rectangle back.
Apply Radial Hilite.

Highlight Eternal Outlaw words layer.
Select All/Float/Defloat
New Raster layer.
Flood fill with the lavender color.
Deselect.
Delete the template layer.
Give it the same inner bevel.
Apply DSB Flux - Bright Noise:
Intensity: 12
Mix Checked
OK

Highlight Heart Arrow layer.
Click on it with your Magic Wand.
New Raster layer.
Flood fill with the lavender color.
New Raster layer.
Flood fill with the blue color.
Deselect.
Delete the template layer.

To each of the arrows do the following:
Give it the same inner bevel.
Apply DSB Flux Bright Noise
To the blue arrow:
Apply the Pool Shadow effect.
Move the blue arrow slightly to the right.

Highlight your white background.
New Raster layer.
Select All.
Copy and paste a paper of choice Into Selection.
Deselect.
Apply the mask.
Resize 110%
Merge Group.

Add your copyrights.

Add your name:
Type it out in the blue color.
Type it out again in the lavender color.
To each name layer give it the same inner bevel.
To the lavender layer apply the Pool Shadow effect and then move it slightly to the right.

Resize all layers 90%.

I hope you enjoyed this tutorial.
I’d love to see your results and show it off in my gallery.
Email me!
Hugs,
Bev

Wild Innocence

Clicking on the image will enlarge to full view.

2 tubes of choice - I used the beautiful artwork of Jay Trembly at CILM
Font of Choice - I used Tabitha Regular here
Gem’s Mask 116 here
My Template 95 here
“Spring Fever” is a FTU scrap kit created by Creation by Sanie and can be downloaded from here.

Please leave a thank you when downloading as it’s a small gesture for hard work given freely.
This tutorial was written assuming you have a working knowledge of PSP.

~♥~ Let’s get started ~♥~

Open up my template.
Shift + D.
Close out the original.
Delete the credit layer, Heart Front, and Heart Back layers.
Close out the words layer “Wild Innocence”.

Highlight Vertical Lines layer.
Select All/Float/Defloat
New Raster layer.
Copy and paste a paper of choice Into Selection.
Deselect.
Delete the template layer.
Give it an inner bevel:


Highlight Horizontal Lines layer.
Repeat the above step using the same paper.

Highlight Top Circle Frame layer.
Select All/Float/Defloat
New Raster layer.
Copy and paste a paper of choice Into Selection.
Deselect.
Delete the template layer.
Give it the same inner bevel.

Highlight Bottom Circle Frame layer.
Repeat the above step using the same paper.
Highlight Top Circle layer.
Select All/Float/Defloat
New Raster layer.
Copy and paste a paper of choice Into Selection.
Deselect.
Delete the template layer.

Highlight Bottom Circle layer.
Repeat the above step using the same paper.

Highlight the Top circle layer paper.
Copy and paste your tube as a new layer.
Move it into position below the frame.
Duplicate.
Resize the bottom tube 130% and move slightly to the side.
Position both tubes below the frame into exact position.

Highlight the paper.
Select All/Float/Defloat
Selections/Invert
Highlight each tube and tap the delete key.
Deselect.

Highlight Bottom circle layer paper.
Repeat the above step using a different tube.
Color Pallet:
Foreground - choose a dark color
Background - Set to pattern and use a paper from the kit.
Stroke: 2
Type out the words - a word on each layer:
Wild
Innocence
Merge the word layers visible once you’ve moved them into position
Convert to Raster layer.
Select All/Float/Defloat
Selections/Modify/Contract by 2
Give it the same inner bevel.
Deselect.

Add your embellishments. I used:
Element 36: Resize 50%
Element 4: Resize 40%
Element 6: Resize
Element 32: Resize 50% Duplicate/Mirror/Resize 80%

Highlight your white background.
New Raster layer.
Select All.
Copy and paste a paper of choice Into Selection.
Deselect.
Apply the mask.
Merge Group.

Add your copyrights.

Add your name and use the same steps we did for the “Wild Innocence” words.

Resize all layers 90%.

I hope you enjoyed this tutorial.
I’d love to see your results and show it off in my gallery.
Email me!
Hugs,
Bev

Bella's Lullaby

Clicking on the image will enlarge to full view.

Supplies
Font of Choice - I used Caligraf W here
Gem’s Mask 166 here
“Bella’s Lullaby” is a FTU scrap kit created by Scraps with Attitude and can be downloaded here.
Please leave a thank you when downloading as it’s a small gesture for hard work given freely.
This tutorial was written assuming you have a working knowledge of PSP.

~♥~ Let’s get started ~♥~

Open up a 700 X 700 blank canvas.
Flood fill white.

Copy and paste Frame 1 as a new layer.
Resize 50%
Free rotate right 85 degrees.

Click inside of it with your Magic Wand.
Selections/Modify/Expand by 6.
New Raster layer below the frame.
Copy and paste a paper of choice Into Selection.
Deselect.

Copy and paste Ray of Light as a new layer.
Resize 50%Free rotate left 5 degrees
In your layers pallet move it just above the paper and position it in the upper left corner of the frame.

Copy and paste Silhouette Couple 1 as a new layer.
Resize 35%
Move into position below the frame.

Add your embellishments. I used:
Candle 1: Resize 60%
Round Notes: Resize 50%
Rose: Resize 35% Free rotate left 80 degrees Duplicate
Black Rose: Resize 25% Mirror Free rotate left 70 degrees
Branch 1: Resize 60%
Heart 1: Resize 25% Duplicate/Resize 70%
Render 1: Resize 40% Mirror/Duplicate

Crop your image.

Highlight your white background.
New Raster layer.
Select All.
Copy and paste a paper of choice Into Selection.
Deselect.
Apply the mask.
Merge Group.

Copy and paste Piano as a new layer above the mask layer.
Resize 80%
Apply the mask.
Merge Group.
Lower the Opacity to about 53 or so.

Add your copyrights.

Resize all layers 85%.

I hope you enjoyed this tutorial.
I’d love to see your results and show it off in my gallery.
Email me!
Hugs,
Bev


Believe


Clicking on the image will enlarge to full view.

Supplies
1 tube and 1 Image of choice - I used the wonderful artwork of Rachael Tallamy at Up Your Art
Font of Choice - I used Angelo DB here
Gem Mask 164 here
Divine Intentionz Template 323 here
“Believe” is a FTU scrap kit created by Karla Scrapz and can be downloaded from here.
Please leave a thank you when downloading as it’s a small gesture for hard work given freely.
This tutorial was written assuming you have a working knowledge of PSP.

~♥~ Let’s get started ~♥~

Open up the template.
Shift + D
Close out the original.
Image/Canvas Size
700 X 600
OK
Open up the background layer and flood fill white.
Delete the following layers:
Raster 1, Heart 4, Heart 3, I will steal your mans heart, Heart 2, Heart 1, and Rectangle 5.

Highlight Circle 1 layer.
Use your Magic Wand and click on it.
New Raster layer.
Copy and paste a paper of choice Into Selection.
Deselect.
Delete the template layer.

Highlight Rectangle 1 layer.
Repeat the above step using the same paper.

Highlight Rectangle 1 layer.
Repeat the above step accept use a different paper.

Highlight Rectangle 3 layer.
Repeat the above step using a different paper.

Highlight Rectangle 4 layer.
Repeat the above step using the same paper.

Highlight Circle 2 layer.
Use your Magic Wand and click on it.
New Raster layer.
Copy and paste your Image Into Selection.
Deselect.
Delete the template layer.

Copy and paste your tube as a new layer.
Move into position.

Copy and paste Believe 16 as a new layer.
Resize 25%, 25%, and 80%
Free rotate left 20 degrees.
Position it over Med Heart 2 layer.
Delete the template layer.

If you want to cover Med Heart 1 layer then duplicate your heart element and move into position.
Delete Med Heart 1 template layer.

Copy and paste Believe 6 as a new layer.
Resize 25% and 25%
In your layers pallete move it just below the circle and position it over the left side of the smaller rectangle - see my tag for reference.
Duplicate/Mirror

Add your embellishments. I used:
Believe 26 & 28: Resize 25% and 35%
Believe 29: Resize 25% and 50%
Believe 11: Resize 25%
Believe 9: Resize 25% and 45%
  
Highlight your white background.
New Raster layer.
Select All.
Copy and paste a paper of choice Into Selection.
Deselect.
Apply the mask.
Resize 110%
Merge Group.

Add your copyrights.

Add your name and give it an inner bevel:


Resize all layers 80%.

I hope you enjoyed this tutorial.
I’d love to see your results and show it off in my gallery.
Email me!
Hugs,
Bev
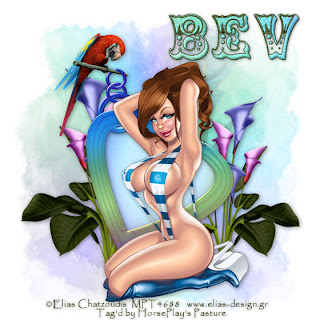
 

Are You Ready

Clicking on the image will enlarge to full view.

Supplies
1 tube and 1 close up image of choice - I used the wonderful artwork of Michale Landefeld at CILM
Font of Choice - I used Dream Orphans Bold here
Weescotlass Mask 138 here
Scraps of Enchantment Template 108 here
“Time for Coffee” is a FTU scrap kit created by Schnegge of Schnegge’s Scraps and can be downloaded from here.
Please leave a thank you when downloading as it’s a small gesture for hard work given freely.
This tutorial was written assuming you have a working knowledge of PSP.

~♥~ Let’s get started ~♥~
Open up the template.
Shift + D.
Close out the original.
Delete the credit layer.

Resize all layers 90%
Image/Canvas Size 700 X 600
New Raster layer.
Send to bottom.
Flood fill white.

Highlight Circle layer.
Use your Magic Wand and click on the black side.
New Raster layer.
Copy and paste a light colored paper of choice Into Selection.
Deselect.
Delete the template layer.
Give it an inner bevel:


Highlight Circle layer again.
Repeat the above step with the pink side using a dark colored paper of choice.
   
Highlight Inner Frame layer.
Click on it with your Magic Wand.
New Raster layer.
Copy and paste a light colored paper of choice Into Selection.
Copy and paste your close up image as a new layer.
Position it over the paper.
Selections/Invert
Tap the delete key.
Deselect.
Lower the opacity of the image to about 50.

Highlight Frame layer.
Select All/Float/Defloat
New Raster layer.
Copy and paste a paper of choice Into Selection.
Deselect.
Delete the template layer.
Give it the same inner bevel.

Highlight Black Dotted Lines layer.
Select All/Float/Defloat
Copy and paste a light colored paper of choice Into Selection.
Deselect.
Delete the template layer.

Highlight Pink Dotted Line layer.
Repeat the above step using a dark colored paper of choice.

Highlight Gray Rectangle layer.
Click on it with your Magic Wand.
New Raster layer.
Copy and paste a paper of choice into Selection.
Deselect.
Delete the template layer.
Give it the same inner bevel.

Highlight Pink Rectangle layer paper.
Repeat the above step using a different paper.
Highlight Are you Ready layer.
Select All/Float/Defloat
Copy and paste a paper of choice Into Selection.
Deselect.
Delete the template layer.
Give it an inner bevel.

Highlight BOYS layer.
Repeat the above step.

Highlight Stars Right layer.
Select All/Float/Defloat
New Raster layer.
Copy and paste a light colored paper of choice Into Selection.
Deselect.
Delete the template layer.

Highlight Stars left layer.
Select All/Float/Defloat
New Raster layer.
Flood fill with a gradient of choice.
Deselect.
Delete the template layer.

Copy and paste Heart 2 as a new layer.
Resize 25%
Position it over the Large Star Template layer.
Delete the template layer.

Add your embellishments. I used:
Frame Round 2: Resize 80%
Schmuckkordel 1: Resize 40%
Flower 3: Resize 25%
Flower 4: Resize 25% and 90%
Butterflies 1, 2, and 3: Resize 25% and 80%

Copy and paste your tube as a new layer.

Highlight your white background.
New Raster layer.
Select All.
Copy and paste a paper of choice Into Selection.
Deselect.
Apply the mask.
Resize 120%
Merge Group.
Use your Pick Tool and pull it out slightly to the right.

Add your copyrights.

Add your name.

Give it the same inner bevel.

Resize all layers 80%.

I hope you enjoyed this tutorial.
I’d love to see your results and show it off in my gallery.
Email me!
Hugs,
Bev


A Touch of Class

Clicking on the image will enlarge to full view.

Supplies
2 tubes of choice - I used the wonderful artwork of Gennadiy Koufay here
Font of choice - I used Oh Lara which is a pay font
Gem’s Mask 61 here
“Caseopaya” is a FTU scrap kit created by Codi’s Fun Scraps and can be downloaded from here.
Please leave a thank you when downloading as it‘s a small gesture for hard work given freely.
This tutorial was written assuming you have a working knowledge of PSP.

~♥~ Let’s get started ~♥~

Open up a 700 x 700 blank canvas.
Flood fill white.

Make your Selection Tool active.
Create a 425 X 500 area in the center of your canvas.

New Raster layer.
Copy and paste a paper of choice Into Selection.
New Raster layer.
Copy and paste a different paper of choice Into Selection.
New Raster layer.
Copy and paste a different paper of choice Into Selection.
Deselect.

Highlight the bottom paper.
Free rotate left 5 degrees.

Highlight the Top paper.
Free rotate right 5 degrees.

Copy and paste Heart 5 as a new layer.
Using your Freehand Selection Tool outline the left side of the heart.

New Raster layer.
Flood fill with a gradient of your choice.

Copy and paste your tube as a new layer.
Center it in the left side of the heart.
Selections/Invert
Tap the delete key.
Merge Down.
Selections/Modify/Feather
Number of Pixels:
43
OK
Tap the delete key twice.
Deselect.

Using your Freehand Selection Tool again, section out the right side of heart.

New Raster layer.
Flood fill with the same gradient.

Copy and paste your tube as a new layer and move into position on the right side of the heart - don’t worry about the clothespins…we’ll take care of them in a bit.
Selections/Invert
Tap the delete key.
Merge Down.
Selections/Modify/Feather
Number of Pixels:
43
OK
Tap the delete key once.
Deselect.

Duplicate Heart 5 layer.
In your layers pallet move it above both of the merged tube layers.
Using your Freehand Selection Tool outline the clothespins.
Selection/Invert
Tap the delete key.
Deselect.

Close out the 3 paper layers and white background layer.
Merge Visible.
Reopen all layers
.
Add your embellishments. I used:
Doodle 1: Resize 30 % Free rotate right 5 degrees Duplicate/Mirror/Flip - merge visible both doodle layers/Duplicate
Cherry Blossom 2: Resize 70% Mirror/Free rotate left 20 degrees
Wine 2: Resize 80% Mirror
Flower 4: Resize 25% Mirror
Flower 6: Resize 25%
Flower 5: Resize 25% and 80%
Deko 3: Resize 70%
Heart Pendant 5: Resize 40%
Leaf 2: Resize 25%

Highlight your white canvas.
New Raster layer.
Select All.
Copy and paste a paper of choice Into Selection.
Deselect.
Apply the mask.
Merge Group.

Add your copyrights.

Add your name.
Give it a slight inner bevel:


Resize all layers 80%.

I hope you enjoyed this tutorial.
I’d love to see your results and show it off in my gallery.
Email me!
Hugs,
Bev