Saturday, December 4, 2010

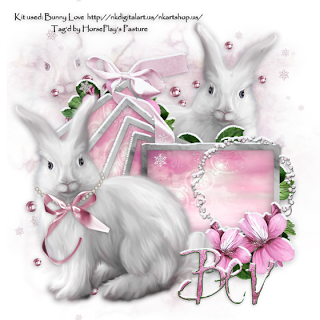
Snow Bunnies


Clicking on the image will allow you to enlarge for bigger view.

Supplies

Font of Choice - I used Clive Barker
Gem Mask 145 here
DSB Flux - Bright Noise
Eyecandy 5: Nature - Snow Drift
“Bunny Love” is a PTU art kit created by KatNKDA and can be purchased from her store NK Art Shop. You can visit her blog here.
Thank you Kat for an amazingly beautiful art kit! This is downright gorgeous!

This tutorial was written assuming you have a working knowledge of PSP.

~♥~ Let’s get started ~♥~

Open up a 700 x 700 blank canvas.
Flood fill white.

Copy and paste Element 40 as a new layer.
Resize 25%
Click inside main rectangle of the frame with your Magic Wand.
Selections/Modify/Expand by 6.
New Raster layer below the frame.
Copy and paste Paper 1 Into Selection.
Deselect.

Highlight the frame again.
Click inside the next frame with your Magic Wand. (With each frame area that you’ll be working with be sure to check that there isn’t a small piece of the frame at the bottom that needs to be clicked inside of)
Selections/Modify/Expand by 6.
Highlight the paper layer.
Paste Into Selection.
Deselect.

Repeat the above step with the remaining area of the frame.

Copy and paste Element 27 as a new layer.
Resize 25% and 40%
Move it into position
Duplicate the frame/Move into position over the ribbon.
Use your Eraser Tool and erase bits of the frame to give the effect the ribbon is draped over some of the frames.

Add you embellishments. I used:
Element 45: Resize 25%/Duplciate/Flip
Element 45 again: Resize 30% (position behind the main frame near the top)
Element 48: Resize 25% and 50%/Flip/Duplicate/Resize 80%/Mirror
Duplicate both flower layers and move behind the top corner of the frames.
Element 38: Resize 25% and 70%
Element 14: Resize 25%, 25%, and 30%/Duplciate and resize again as you like
Element 34: Resize 60%
Element 51: Resize 40%
Element 50: Resize 40%

Highlight your white background.
Select All.
New Raster layer.
Copy and paste Paper 17 Into Selection.
Deselect.
Apply the mask.
Merge Group.

Duplicate Element 50
Mirror
Apply the mask
Merge Group
Change the Properties to Overlay

Add your credits.

Add your name.
Apply DSB Flux - Bright Noise:
Intensity: 41
Mix checked
OK

Apply Eyecandy 5: Impact - Snow Drift to any of the elements of your choosing. Use these settings:

Settings Tab:
Small, First Flakes

Basic Tab:


Resize all layers 80%

I hope you enjoyed this tutorial.
I’d love to see your results and show it off in my gallery.
Email me!
Hugs,
Bev

And the Race is On


Clicking on the image will allow you to enlarge for bigger view.

Supplies

1 tube of choice - I used the artwork of PineUpToons at CILM
Font of Choice - I used Luna Bar here
Monti Circular Mask here
“Blue Christmas” is a PTU tagger size scrap kit created by Created by Jill and can be purchased from Stargazer Scraps. You can visit her blog here.
Thank you Jill for a really pretty kit! So beautiful!

This tutorial was written assuming you have a working knowledge of PSP.

~♥~ Let’s get started ~♥~

Open up a 700 x 700 blank canvas.
Flood fill white.

Copy and paste Frame 4 as a new layer.
Resize 80%
Click inside of it with your Magic Wand.
New Raster layer below the frame.
Copy and paste Paper 7 Into Selection.
Deselect.

Copy and paste Snow Border as a new layer below the frame.
Move it into position.
Duplicate/Mirror/Resize 70%
Move it into position behind the other snow layer.
Highlight the paper layer.
Click anywhere outside of it with your Magic Wand.
Highlight each now layer and tap the delete key.

Copy and past your tube as a new layer.
Resize if needed.
Tap the delete key.
Deselect.

Add you embellishments. I used:
Christmas Bells: Resize 60%
Christmas Ball: Resize 30% and 90%
Pine Needles: Resize 60%/Flip
Snowman: Resize 25% and 80%

Highlight your white background.
Select All.
New Raster layer.
Copy and paste Paper 4 Into Selection.
Deselect.
Apply the mask.
Merge Group.

Copy and paste the fence as a new layer just above the mask layer.
Move into position.
Apply the mask.
Merge Group.

Copy and paste the Christmas Tree as a new layer behind the fence.
Apply the mask.
Merge Group.

If you positioned the tree like I did then you probably can see it through the edge of the fence and you’ll want to get rid of that.
Highlight the fence layer.
Select All/Float/Defloat
If you’ve already added a drop shadow to the fence then do this:
Selections/Modify/Contract by the Blur number you used for your drop shadow.
Highlight your Christmas tree layer and use your Eraser Tool to erase where you can see the tree through the fence.
Deselect.

Copy and paste Snow Overlay as a new layer above the fence layer.
Apply the mask.
Merge Group.
Change the Properties to Soft Light.

Add your credits.

Add your name.

Resize all layers 80%

I hope you enjoyed this tutorial.
I’d love to see your results and show it off in my gallery.
Email me!
Hugs,
Bev
Thursday, December 2, 2010

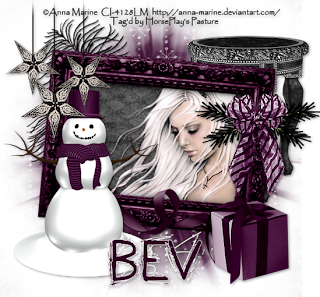
Holiday Muse


Supplies

1 tube of choice - I used the artwork of Anna Marine at CILM
Font of Choice - I used Rat Infested Mailbox here
MWY mask 010 and animated snowflake here- if you know who this mask belongs to please email me so I can give proper credit.
Eyecandy 5: Nature - Fire
Animation Shop
“Ho! Ho! Ho!” is a PTU tagger size scrap kit created by Jessica of Gothic Inspirations and can be purchased from her store Gothic Inspirations. You can visit her blog here.
Jessica, thank you for yet another brilliant kit!

This tutorial was written assuming you have a working knowledge of PSP.

~♥~ Let’s get started ~♥~

Open up a 700 x 700 blank canvas.
Flood fill white.

Copy and paste Frame 4 as a new layer.
Resize 60%
Free rotate left 5 degrees.
Click inside with your Magic Wand.
Selections/Modify/Expand by 6.
New Raster layer below the frame.
Copy and paste a paper of choice Into Selection.
Copy and paste your tube as a new layer in front of the frame.
Duplicate/Move to the right just a little/position below the frame.
Selections/Invert
Tap the delete key.
Change the Properties to Soft Light.
Deselect.

Add your embellishments. I used:
Frame 2: Resize 60%
Mistletoe: Resize 50%/Mirror
Flowers
Candle: Position behind the frame/Duplicate/See my tag for reference/Erase the base of both candles that you can see.
Candle again: Resize 70%/Position in front of the frame.
Bow 1: Resize 30%/Free rotate Right 15 degrees
Star: Resize 50%
Ornament 1: Resize 60%/Free rotate Left 20 degrees
Pine: Resize 60%/Free rotate Right 35 degrees/Duplicate/Mirror

Highlight your white background.
Select All.
Copy and paste a paper of choice Into Selection.
Deselect.
Apply the mask.
Merge Group.

We’re going to get the candles ready for animation.
Merge Visible the two candle behind the frame.
Duplicate twice for a total of 3 candle layers.
Rename them Merged Candle 1, 2, and 3.

Highlight the candle in front of the frame.
Duplicate two times for a total of 3 candle layers.
Rename them Candle 1, 2, and 3.

Using your Freehand Selection Tool outline the flame of each candle.
Zoom in very close to make it easier.

Highlight Merged Candle 1 layer.
Apply Eyecandy Nature - Fire using these settings:

Settings Tab:
Small, Candle

Basic Tab:


Colors Tab:
Move the tabs into about the same position as mine are. (You’re trying to keep the flame color the same as the element already is.)


Highlight Candle 1 layer.
Apply the same Fire setting….
ONLY CLICK “OK” - DO NOT HIT THE RANDOM SEED BUTTON!

Highlight Merged Candle 2 layer.
Apply the same fire effect but hit the Random Seed button once.
OK

Highlight Candle 2 layer.
Apply the same setting - DON’T HIT THE RANDOM SEED BUTTON!

Highlight Merged Candle 3 layer.
Apply the same fire effect but hit the Random Seed button once.
OK

Highlight Candle 3 layer.
Apply the same setting - DON’T HIT THE RANDOM SEED BUTTON!

Close out Merged Candle 2 & 3 layers.
Only keep Merged Candle 1 layer open.

Close out Candle 2 & 3 layers.
Only keep Candle 1 layer open.

Add your credits.

Add your name.

Resize all layers 80%

Copy Merge

~Time to Animate~

Open up Animation Shop.
Edit/Paste/As New Animation.

Back in PSP.
Close out Merged Candle 1 and Candle 1 layers.
Open up Merged Candle 2 and Candle 2 layers.
Merge Visible.

Carry Into AS.
Edit/Paste/After Current Frame.

Back in PSP.
Close out Merged Candle 2 and Candle 2 layers.
Open up Merged Candle 3 and Candle 3 layers.
Merge Visible.

Carry Into AS.
Edit/Paste/After Current Frame.

Ctrl + A to highlight all frames.
Animation/Frame Properties:
Change the display time to 25

Open up the animated Snowflake that I’ve provided.
I'm sorry it's not the same exact one that I used by very close - the one I used became distorted after it was up loaded into in a file to share.
Highlight Frame 1
Edit/Delete
Ctrl + A to highlight them all.
Animation/Resize Animation
Percentage of Original checked
Width x Height
15
OK

Edit/Copy

Highlight your tag frames.
Ctrl + A
Ctrl + E and place the snowflake over the largest flake at the top of the ring that hangs over the frame.

Highlight the Snowflake frames again.
Ctrl + A
Animation/Resize Animation
Percentage of Original checked.
Width x Height:
40
OK
Edit/Copy

Ctrl + E and place the snowflake where you like as many times as you like - I placed mine randomly around the ring.

View your animation.
If you’re happy then save.

I hope you enjoyed this tutorial.
I’d love to see your results and show it off in my gallery.
Email me!
Hugs,
Bev
Wednesday, December 1, 2010

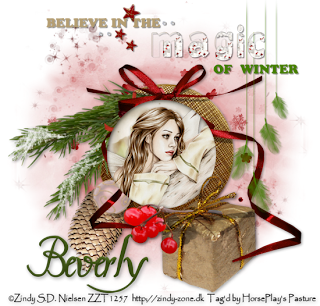
Believe in the Magic of Winter


Supplies

1 tube of choice - I used the artwork of Zindy S. D. Nielsen here
Font of Choice - I used Pavane
Weescotlass Mask 138 here
Mura’s Meister - Copies
“Christmas is Coming” is a PTU tagger size scrap kit created by Julie of bits N Bobs and can be purchased from Exquisite Scraps. You can visit her blog here.
Thank you Julie for such a joyful kit!

This tutorial was written assuming you have a working knowledge of PSP.

~♥~ Let’s get started ~♥~

Open up a 700 x 700 blank canvas.
Flood fill white.
Copy and paste Frame 3 as a new layer.
Click inside of it with your Magic Wand.
Selections/Modify/Expand by 6.
New Raster layer.
Copy and paste Paper 1 Into Selection.
Copy and paste your tube as a new layer below the frame.
Selections/Invert
Tap the delete key.
Deselect.

Add your embellishments. I used:
53
35
15
34
6: Resize 25% or smaller - Apply Mura Meister - Copies:
Wallpaper (Perspective)
Default Settings
2: Change the Properties to Soft Light (You’ll have to add this element after you apply the mask because you won’t see it when you change the Properties)

Highlight your white background.
Select All.
New Raster layer.
Copy and paste Paper 2 Into Selection.
Deselect.
Apply the mask.
Merge Group.
Duplicate/Mirror/Flip

Crop your image.

Add your credits.

Add your name.

Resize all layers 85%.

I hope you enjoyed this tutorial.
I’d love to see your results and show it off in my gallery.
Email me!
Hugs,
Bev
Christmas-Heart


Supplies

1 tube of choice - I used the artwork of J.W. Baker which was purchased at MPT. He can now be found at Mistaken Art.
Font of Choice - I used St. Nicholas here and Oh Lara (pay font)
Monti Circular Mask here
Greg’s Factory Output Vol. II - Pool Shadow
My Supplies of template and glass here
Snow which I’ll supply here
Animation Shop
“Christmas is Coming” is a PTU tagger size scrap kit created by Julie of Bits N Bobs and can be purchased from Exquisite Scraps. You can visit her blog here.
Thank you Julie for such a joyful kit!

This tutorial was written assuming you have a working knowledge of PSP.

~♥~ Let’s get started ~♥~

Open up a 700 x 700 blank canvas.
Open up my supplies of the template and glass.

Copy and paste the template onto your working canvas.
Click on it with your Magic Wand.
New Raster layer.
Copy and paste Paper 1 Into Selection.
Deselect for now.

Copy and paste elements of your choice above the paper that you want inside the snow globe. Arrange them as you like and don’t worry about any of the elements hanging over the edges of the circle. We’ll take care of that in a bit. I used:
40
28
26
14

Copy and paste your tube as a new layer.
Move into exact position.

Highlight the template layer.
Click anywhere outside of it with your Magic Wand.
Highlight each of the element layers and tube layer and tap the delete key.
Deselect.

Open up the snow animation that I’ve supplied.
Highlight Frame 1
Copy
Make your working canvas active and past at the top of your layers pallet.
Rename the layer Snow 1.
Make the animated snow frames active.
Highlight Snow 2.
Copy
Make your working canvas active and paste just above Snow 1.
Rename it Snow 2.

Repeat the above steps until you have all 10 snow frames copied onto your working canvas.
Highlight the template layer.
Click anywhere outside of it with your Magic Wand.
Highlight each Snow layer and tap the delete key.
Close out all snow layers accept for Snow 1.

Selections/Invert
New Raster layer.
Copy the glass that I’ve supplied
Paste Into Selection.
Deselect.
Is it starting to look like a snow globe?!

In your colors palllet:
Foreground: Black
Background: Null

Make your Ellipse Tool active - set on Circle
Width: 2
Draw a circle that’s a little bigger than your globe. It’s alright if it’s too big and you can resize in just a bit.
Objects/Align/Center in Canvas
You want your circle just a little bigger than your glove. Resize if you need to.
Choose the colors your want your text to be.
Make your Text Tool active and run it along the top center of the circle you just made. When you see a Rocking A click your mouse. A text box will appear.
Type whatever saying you want or you can use the one I did.
Apply.
In your layers pallet click on the plus sign.
Close out the New Ellipse layer.
Highlight the top layer.
Convert to Raster layer.

You can add the elements of your choice to the bottom of the globe. I used:
40
23
37
9: Resize 65%/Free rotate right 20 degrees

Crop your image

Highlight your white background.
Select All.
New Raster layer.
Copy and paste Paper 9 Into Selection.
Deselect.
Apply Greg’s Factory Output Vol. II - Pool Shadow:
Default Settings
Apply the mask.
Merge Group.

Crop your image.

Copy and paste Element 21
Highlight background layer.
Select All.
New Raster layer.
Copy and paste Into Selection.
Deselect.
Lower the Opacity to about 18.

Add your credits.

Add your name.

Resize all layers 85%.

Copy Merge

~Time to Animate~

Open up AS
Edit/Paste/As New Animation

Back into PSP.
Close out Snow 1 layer.
Open up Snow 2 layer.
Copy Merge

Back into AS.
Edit/Paste/After Current Frame.

Back into PSP.
Close out Snow 2 layer.
Open up Snow 3 layer.
Copy Merge

Back into AS.
Edit/Paste/After Current Frame.

Repeat the above steps until you have all 10 frames pasted in AS.

View your Animation.
If you’re happy with it then save.


I hope you enjoyed this tutorial.
I’d love to see your results and show it off in my gallery.
Email me!
Hugs,
Bev

Tuesday, November 30, 2010

Christmas Time at the North Pole


Supplies

Font of Choice - I used Nashville Regular
Vaybs Mask 111 here
Divine Intentionz Template 381 here
Animation Shop
“Christmas Time” is a PTU tagger size scrap kit created by WackyWinnie Designz and can be purchased from Butterfly Blush Designs. You can visit her blog here.
Thank you Sue for such an adorable Christmas kit!!

This tutorial was written assuming you have a working knowledge of PSP.

~♥~ Let’s get started ~♥~

Open up the template.
Shift + D.
Close out the original.
Image/Canvas Size
700 x 600
OK
Open up the background layer and flood fill white.
Delete the top 9 layers.

Highlight Copy of Raster 2 layer.
Merge Down.
Select All/Float/Defloat
New Raster layer.
Copy and paste Paper 20 Into Selection.
Deselect.
Delete the template layer.

Highlight Rectangle layer.
Click on it with your Magic Wand.
New Raster layer.
Copy and paste Paper 17 Into Selection.
Deselect.
Delete the template layer.

Highlight Oval layer.
Click on it with your Magic Wand.
New Raster layer.
Copy and paste Paper 5 Into Selection.
Deselect.
Delete the template layer.

Highlight Circle layer.
Click on it with your Magic Wand.
New Raster layer.
Copy and paste Paper 18 Into Selection.
Deselect.
Delete the template layer.

Highlight Chrome Circle layer.
Click on it with your Magic Wand.
New Raster layer.
Copy and paste Paper 20 Into Selection.
Deselect.
Delete the template layer.
Give it a slight Inner Bevel:


Highlight Frame Back layer - The layer just above the circle frame you were just working on.
Click on it with your Magic Wand.
New Raster layer.
Copy and paste Paper 19 Into Selection.
Copy and paste Snowman 2 as a new layer just below the frame.
Resize 50%/Move into position
Selections/Invert
Tap the delete key.
Deselect.
Delete the template layer.

Highlight Frame Back template layer.
Repeat the above step using Snowman 3 and resizing it 45%

Highlight Frame 1 layer.
Click on it with your Magic Wand.
New Raster layer.
Copy and paste Paper 20 Into Selection.
Deselect.
Delete the template layer.

Highlight Frame 2 layer.
Repeat the above step.

Add your embellishments. I used:
Lamp 1: Resize 70%
NPSign: Resize 40%
TRBow 3: Resize 30%/Free rotate Right 8 degrees
Holly: Resize 25%
Ball 5: Resize 25%
Lights: Resize 75%
Polar Bear 2: Resize 50%
Candy Cane 1: Resize 35%
Candy Cane 2: Resize 35%/Mirror

Highlight your white background.
Select All.
New Raster layer.
Copy and paste Paper 2 Into Selection.
Deselect.
Apply the mask.
Merge Group.

Add your credits.

Add your name.
Choose your colors and have the stroke set to 2.
Convert to Raster layer.
Select All/Float/Defloat
Selections/Modify/Contract by 2
Give it the same slight Inner Bevel:

Apply Greg’s Factory Output Vol. II - Pool Shadow:
Use default settings accept change
Intensity to 142
Lightness to 152
OK
Deselect.

I tried to make animating this as simple and easy for you as possible and it will be as long as you take your time…honest!!

Highlight the lights layer.
Duplicate 3 times for a total of 4 light layers.
Rename them Lights 1, 2, 3, and 4.

Highlight Light 1 layer.
Use your Freehand Selection Tool and outline the following bulbs:


Adjust/Brightness Contrast/Brightness Contrast
Change the numbers to these:


Deselect.

Highlight Light 2 layer.
Using your Freehand Selection Tool outline only the bulbs you DIDN’T outline in Light 1 one.
Repeat the Brightness Contrast effect - same settings.
Deselect.

Highlight Light 3 layer.
Outline the following bulbs and again, repeat the Brightness Contrast effect - same settings and then deselect.


Highlight Light 4 layer.
Repeat the above step outlining these bulbs:


Be sure to close out Light 2, 3, and 4.
Only leave Light 1 layer open.
Copy Merge.

~Time to Animate~

Open up AS
Edit/Paste/As New Animation

Back into PSP.
Close out Light 1 layer.
Open up Light 2 layer.
Copy Merge

Back into AS.
Edit/Paste/After Current Frame.

Back into PSP.
Close out Light 2 layer.
Open up Light 3 layer.
Copy Merge

Back into AS.
Edit/Paste/After Current Frame.

Back in PSP.
Close out Light 3 layer.
Open up Light 4 layer.
Copy Merge.

Back into AS.
Edit/Paste/After Current Frame.

Control + A to highlight all frames.
Animation/Frame Properties
Change the display time to 20
OK

View your Animation.
If you’re happy with it then save.

I hope you enjoyed this tutorial.
I’d love to see your results and show it off in my gallery.
Email me!
Hugs,
Bev

Magic of the Christmas Flake


Supplies

1 tube of choice - I used the artwork of Zindy S.D. Nielsen here - this tube was a freebie holiday gift
Font of Choice - I used St. Nicholas here
Monti Circular Mask here
Eyecandy 5: Nature - Snow Drift
DSB Flux - Bright Noise
Snow which I’ve supplied here
Twinks which I’ve supplied here
Animation Shop
“Dashing Through the Snow” is a PTU tagger size scrap kit created by Gina’s Gems Scraps and can be purchased from Butterfly Blush Designs. You can visit her blog here.
Thank you Gina for such a beautiful as well as delicate seasonal kit. You certainly have captured the seasonal feelings!

This tutorial was written assuming you have a working knowledge of PSP.

~♥~ Let’s get started ~♥~

Open up a 700 x 700 blank canvas.
Flood fill white.

Copy and paste Frame 1 as a new layer.
Resize 80%
Click inside of it with your Magic Wand.
Selections/Modify/Expand by 6.
New Raster layer.
Copy and paste Paper 23 Into Selection.
Deselect.

Copy and paste below the frame:
Move them into position - see my tag for reference (and don’t worry about elements sticking outside of the frame - we’ll take care of that in a bit)
Evergreen Trees 1: Resize 50%
Evergreen Trees 1 again: Resize 30%/Change the Properties to Overlay
Sleigh 1: Resize 25% and 50%/Change the Properties to Overlay
Wire Deer 1: Resize 25% and 80%
Wire Deer 2: Resize 25% and 80%

Highlight the paper layer.
Click anywhere outside of it with your Magic Wand.
Highlight each element that’s sticking out of the sides of the frame and tap the delete key.
Deselect.

Open up the snow animation that I’ve supplied.
Highlight Frame 1
Copy
Make your working canvas active and past just below the frame in your layers pallet.
Rename the layer Snow 1.
Make the animated snow frame active.
Highlight Snow 2.
Copy
Make your working canvas active and paste just above Snow 1.
Rename it Snow 2.

Repeat the above steps until you have all 10 snow frames copied onto your working canvas.
Highlight the frame paper layer.
Click anywhere outside of it with your Magic Wand.
Highlight each Snow layer and tap the delete key.
Close out all snow layers accept for Snow 1.

Copy and paste your tube as a new layer.

Add your embellishments. I used:
Tree 2: Resize 70%
Tree 1: Resize 50%
Bauble 3: Resize 70%/Free rotate left 5 degrees
Frosted Glass Ornament 2: Resize 70%/Free rotate right 5 degrees
Frosted Leaves: Resize 30%/Flip
Bow 1: Resize 50%/Mirror
Curled Ribbon 1: Resize 60%
Sparkles - optional - I used only one of them and put it in the palm of the tube I used.

Merge Visible the 2 baubles behind the frame.

Highlight your white background.
Select All.
New Raster layer.
Copy and paste Paper 31 Into Selection.
Deselect.
Apply the mask.
Merge Group.

Add your credits.

Add your name.
Apply DSB Flux - Bright Noise:
Intensity: 27
Mix checked
OK
Resize baubles of your choice and scatter them around your name.
Merge Visible your name and the baubles.

Apply Eyecandy 5 - Nature - Snow Drift the following elements on your tag:
The merged baubles behind the frame.
The larger trees inside the frame.
Ribbon
Your name with the baubles.

Settings Tab:
Small, First Flakes

Basic Tab:


Resize all layers 80%.

Copy Merge

~Time to Animate~

Open up AS
Edit/Paste/As New Animation

Back into PSP.
Close out Snow 1 layer.
Open up Snow 2 layer.
Copy Merge

Back into AS.
Edit/Paste/After Current Frame.

Back into PSP.
Close out Snow 2 layer.
Open up Snow 3 layer.
Copy Merge

Back into AS.
Edit/Paste/After Current Frame.

Repeat the above steps until you have all 10 frames pasted in AS.

Open up the Twinks that I’ve supplied.
Ctl + A to highlight all frames.
Edit/Copy

Make your tag frames active.
Control + A to highlight all frames.
Ctl + E
Place the twinks wherever you like.

View your Animation.
If you’re happy with it then save.

I hope you enjoyed this tutorial.
I’d love to see your results and show it off in my gallery.
Email me!
Hugs,
Bev

Monday, November 29, 2010

Beauty in the Darkness


Clicking on the image will allow you to enlarge for bigger view.

Supplies

1 tube of choice - I used the artwork of Anna Marine at CILM
Font of Choice - I used All Over Again here
Gem Mask 71 here
“Dark Xmas” is a FTU tagger size scrap kit created by Designs by Vaybs and can be found on her blog here.
Please leave a thank you or send her a small note of appreciation when downloading any of her creations as it’s a very small gesture for her hard work given freely.

This tutorial was written assuming you have a working knowledge of PSP.

~♥~ Let’s get started ~♥~

Open up a 700 x 700 blank canvas.
Flood fill white.

Copy and paste Frame 3 as a new layer.
Resize 80%
Click inside of it with your Magic Wand.
Selections/Modify/Expand by 6.
New Raster layer.
Copy and paste Paper 4 Into Selection.
Deselect.
Free rotate right 5 degrees both the frame and paper layer.

Copy and paste your tube as a new layer below the frame.
Highlight the paper layer.
Click anywhere outside of it with your Magic Wand.
Highlight the tube layer.
Tap the delete key.
Deselect.

Add your embellishments. I used:
4
12: Resize 70%/Mirror/Duplicate/Resize 90%
36: Resize 90%
24: resize 80%
18: Resize 70%
20
27

Highlight your white background.
Select All.
New Raster layer.
Copy and paste Paper 11 Into Selection.
Deselect.
Apply the mask.
Merge Group.

Crop your image.

Add your credits.

Add your name.

Resize all layers 80%.

I hope you enjoyed this tutorial.
I’d love to see your results and show it off in my gallery.
Email me!
Hugs,
Bev

Winter Sparkle


Supplies

Font of Choice - I used St. Nicholas here
Vaybs Mask 111 here
Eyecandy 5: Nature - Snow Drift
VM Natural - Sparkle
Animation Shop
“Northern Lights” is a FTU tagger size scrap kit created by Designs by Vaybs and can be found on her blog here.
Please leave a thank you or send her a small note of appreciation when downloading any of her creations as it’s a very small gesture for her hard work given freely.

This tutorial was written assuming you have a working knowledge of PSP.

~♥~ Let’s get started ~♥~

Open up a 700 x 700 blank canvas.
Flood fill white.

Copy and paste Frame 12 as a new layer.
Click inside of it with your Magic Wand.
Selections/Modify/Expand by 6.
New Raster layer.
Copy and paste Paper 6 Into Selection.
Deselect.

Copy and paste Element 15 as a new layer below the frame.
Resize 50%
Mirror
Move into position
Erase any part of the sled that you can see poking out from behind the side of the frame.

Copy and paste Element 25 as a new layer below the frame.
Resize 50%
Move into position
Erase any part of it that’s sticking out from the side of the frame.

Copy and paste Element 52 as a new layer.
Move into position behind the sled.
Highlight the paper layer.
Click anywhere outside of it with your Magic Wand.
Highlight the tree layer.
Tap the delete key.
Deselect.

Duplicate the tree layer three times for a total of 4 tree layers.
Rename them Tree 1, 2, 3, and 4.
Highlight Tree 1 layer.
Use your Freehand Selection Tool and outline the tree - it doesn’t have to be perfect. We’re going to apply the sparkles to it and you don’t want the sparkles all over your entire image.
Apply VM Natural - Sparkle:
Use default settings accept move the Random Seed button to a number of your choice.
Once you’ve done that highlight Tree 2.
Apply the same effect but move the Random Seed button.
Repeat this step on Tree layers 3 and 4.
Deselect.
Close out Tree layers 2, 3, and 4.
Leave Tree layer 1 open.

Copy and paste Element 47 as a new layer.
Resize 50%
Move into position at the right side of the frame.
Copy and paste Element 13 as a new layer.
Free rotate left 90 degrees.
Move into position behind the other blow - concentrate on only the sprigs sticking up from the bow. See my tag for reference.
Duplicate/close this layer off for now.
Be sure you have the original highlighted and use your Eraser Tool to erase all of the bow accept the sprigs sticking out of the top of the ribbon.
Open up your Duplicate layer.
Move it into position so that the sprigs are sticking out of the bottom of the ribbon.
Use your Eraser Tool to erase all of the ribbon accept for the sprigs sticking out of the bottom of the ribbon.

Add your embellishments. I used:
NL Element
Element 10: Resize 60%
Element 57: Resize 50%
Element 32: Resize 60%/Free rotate right90 degrees/Mirror
Element 58: Mirror

Highlight your white background.
Select All.
New Raster layer.
Copy and paste Paper 7 Into Selection.
Deselect.
Apply the mask.
Merge Group.

Add your credits.

Add your name.
Convert it to a Raster layer.
Select All/Float/Defloat
Selections/Modify/Contract by 1
Give it a slight Inner Bevel:


Copy and paste Element 31 as a new layer.
Resize 50%
Position behind your name.

Apply Eyecandy 5: Nature - Snow Drift to the flowers behind the frame and your name using these settings:
Basic Tab:


Resize all layers 80%.

Copy Merge.

~Time to Animate~

Open up Animation Shop.
Edit/Paste/As New Animation

Back in PSP.
Close out Tree 1 layer.
Open up Tree 2 layer.
Copy Merge

Carry into AS.
Edit/Paste/After Current Frame.

Back in PSP.
Close out Tree 3 layer.
Open up Tree 4 layer.
Copy Merge.

Carry into AS.
Edit/Paste/After Current Frame.

Ctrl + A to highlight all frame.
Animation/Frame Properties
Change the Display time to 25
OK

View your animation.
If you’re happy then save.

I hope you enjoyed this tutorial.
I’d love to see your results and show it off in my gallery.
Email me!
Hugs,
Bev

Sunday, November 28, 2010

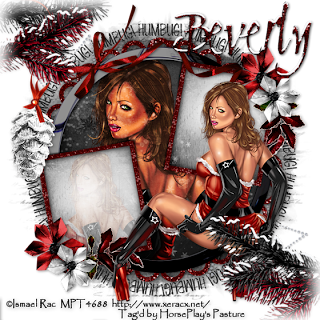
Humbug


Clicking on the image will allow you to enlarge for bigger view.

Supplies
1 tube of choice - I used the artwork of Ismael Rac which I purchased while he was at MPT. He can be found here now.
Font of Choice - I used Clive Barker
Weescotlass Mask 236 here
Eyecandy 5: Nature - Snow Drift
“Bah Humbub” is a PTU tagger size scrap kit (also available in full size) created by Diane of Candy’s Treats and can be purchased from Stargazer Scraps. You can visit her blog here.
Thank you Diane for another amazing kit where the tag possibilities are endless!

This tutorial was written assuming you have a working knowledge of PSP.

~♥~ Let’s get started ~♥~

Open up a 700 x 700 blank canvas.
Flood fill white.

Copy and paste Frame 11 as a new layer.
Resize 120%
Click inside of it with your Magic Wand.
Selections/Modify/Expand by 6.
New Raster layer below the frame.
Coy and paste Winter Black Paper Into Selection.
Copy and paste your tube below the frame.
Selections/Invert
Tap the delete key.
Deselect.
Change the Properties to Hard Light.

Copy and paste Frame 2 as a new layer.
Resize 50%
Free rotate left 100 degrees.
Duplicate/Mirror
Move the frames into position - see my tag for reference.

Highlight the top frame.
Click inside of it with your Magic Wand.
Selections/Modify/Expand by 4.
New Raster layer below the frame.
Copy and Paste Paper 9 Into Selection.
Deselect.

Highlight the bottom frame.
Repeat the above step accept don‘t deselect.
Copy and paste your tube below the frame.
Selections/Invert
Tap the delete key.
Deselect.
Change the Properties to Soft Light.

Add your embellishments. I used:
Bah Humbug WA3: (From the Word Art file)
The rest of the elements are from Ba-Humbug el file
Red Ribbon 2: Resize 65%
Diamond Star: Resize 50%/Free rotate right 15 degrees/Duplicate
Flower 2: Resize 60%
Flower 3: Resize 50%
Snowy Leaves Red: Resize 40%/Mirror/Duplciate/Free rotate right 90 degrees
Fir Black: Resize 75%/Free rotate right 20 degrees - position at the bottom right.
Fir Black again: Resize 85% - position at the top left.
Fir Red: Resize 85% - position at the bottom right.
Fir Red again: Resize 75%/Free rotate right 20 degrees - position at the top left.
Cone: Resize 85%

Apply Eyecandy 5: Nature - Snow Drift to all 4 fir branches.

Settings Tab:
Small, First Flakes

Basic Tab:


Highlight your white background.
Select All.
New Raster layer.
Copy and paste a paper of choice Into Selection.
Deselect.
Apply the mask.
Resize 110%
Merge Group.

Add your credits.

Add your name.
Apply the same snow effect.

Resize all layers 80%.

I hope you enjoyed this tutorial.
I’d love to see your results and show it off in my gallery.
Email me!
Hugs,
Bev