Friday, December 23, 2022

Satin, Silk, and Love

Clicking on the image will enlarge to full view.
Supplies 1 tube of choice - I’m using the artwork of Jennifer Janesko which you can purchase here Font of Choice - I’m using Pavane here and Caligraf W here WSL Mask 253 here “Look of Love” is a taggers size scrap kit created by Krissy’s Scraps and can be purchased here. You can visit her blog here. Thank you Krissy for this stunning, classy kit! This tutorial was written assuming you have working knowledge of PSP. ~♥~ Let’s get started ~♥~ Open up a 750 X 700 blank canvas. Flood Fill white. Copy and paste Pergament Scroll as a new layer. Free rotate left 90 degrees. Image/Flip. Select All/Float/Defloat Copy and paste your tube as a new layer positioning it to one side of the scroll. Selections/Modify/Feather Number of Pixels: 53 OK Tap the delete key until you get the feathered look you want. Using the Pavane Font, type out a love quote or you can use the one I did. Position it on the scroll. Add your embellishments. I used: Cherry Blossom 1: Resize 70% Cherry blossom 2: Resize 65% Blossom 1: Resize 40% and 90% Blossom 2 & 3: Resize 40% Bow 2: Resize 60% Free rotate left 15 degrees Heart 1: Resize 85%. Free rotate right 15 degrees Key 1: Resize 50%. Butterfly: 25%
Crop your image, but not too too close to your elements.
Highlight your white canvas. New Raster layer. Select All. Copy and paste a paper of choice Into Selection. Deselect. Apply the mask. Merge Group.
Add you copyrights.
Add your name.
Resize all layers 85%.
I hope you enjoyed this tutorial. I’d love to see your results. Email me!
Hugs,
Bev

Night Out with the Ghouls

Clicking on the image will enlarge to full view.
Supplies 2 tubes of choice - I’m using the artwork of Keith Garvey which you can purchase here Font of Choice - I’m using You Are Loved here Yarrow Mask 9 here Dezings by Ali Template 64 here Eyecandy 4000 Gradient Glow “Night of Ghouls” is a PTU tagger size scrap kit created by Cindy of Scrappin’ with Lil Ole Me and can be purchased at The Scrap Assylum. You can visit her blog here. Thank you Cindy for such a festive kit - boo!
This tutorial was written assuming you have a working knowledge of PSP.
~♥~ Let’s get started ~♥~
Open up the template. Shift + D. Close out the original. Delete the watermark and Staple layer. New Raster Layer Send to Bottom Image/Canvas Size 700 X 700 Flood Fill white.
Highlight Shape 3 layer. Select All/Float/Defloat Copy and paste a paper of choice Into Selection. Copy and paste the Haunted Tree as a new layer. Position it so the eyes are peeking through the template layer. Selection/Invert Tap the delete layer. Deselect.
Highlight Shape 2 layer. Select All/Float/Defloat Copy and paste a paper of choice Into Selection. Selections/Modify/Contract by 7. Tap the Delete button. Selections/Modify/Expand by 2 New Raster layer below the layer you’re working on. Copy and paste a paper of choice Into Selection. Deselect.
Repeat the above step with Shape 1 layer.
Highlight Frame 1 layer. Select All/Float/Defloat Copy and paste a paper of choice Into Selection. Selections/Modify/Contract by 15. Tap the Delete button. Selections/Modify/Expand by 4 New Raster layer below the layer you’re working on. Copy and paste a paper of choice Into Selection. Deselect.
Copy and paste your tube inside the frame.
Repeat the above 2 steps with Frame 2 layer.
Copy and paste Bat wings as a new layer. Resize 25% Apply Eyecandy 4000 Gradient Glow Using glow color: #98ec48
Add your embellishments. I used: Lamp: Resize 40% Ant Ribbon: Resize 30% Keys: Resize 40% Bow 5: Resize 30% Buttons of choice: Resize 30% Candy Corn: Resize 25% & 70% Pumpkin Sticker: Resize 40%
Highlight your white canvas. New Raster Layer. Select All. Copy and paste a paper of choice Into Selection. Deselect. Apply the mask. Merge Group.
Add your copyrights.
Add your name. I gave my a slight inner bevel: Apply Eyecandy 4000 Gradient Glow
Resize all layers 85%.
I hope you enjoyed this tutorial.
I’d love to see your results and show it off in my Show Arena.
Email me!
Hugs,
Bev    

Sweet Valentine

Clicking on the image will allow you to enlarge for bigger view. Supplies 1 tube of choice - I used the artwork of Barbara Jensen here Font of Choice - I used Oh Lara a pay font Weescotlass Mask 236 here My Template 123 here This tutorial was created with Puddicat Creations Scraps portion of the New Beginnings store collaboration kit. This kit is available for FREE with an $8 purchase at the store. It is available EXCLUSIVELY at Heartbeatz Creationz. You can visit Cindy’s blog here. This tutorial was written assuming you have a working knowledge of PSP. ~♥~ Let’s get started ~♥~ Open up the template. Shift + D. Close out the original. Delete Credit and Hearts layers. Image/Canvas size 700 x 700 OK Highlight the background layer and flood fill white. Highlight Back Rectangle 1 layer. Click on it with your Magic Wand. Copy and paste Paper 13 Into Selection. Deselect. Delete the template layer. Highlight Back Rectangle 2 layer. Click on it with your Magic Wand. Copy and paste Paper 9 as a new layer. Resize 70% Selections/Invert Tap the delete key. Deselect. Delete the template layer. Highlight Rec 1 layer. Click on it with your Magic Wand. New Raster layer. Copy and paste Paper 13 Into Selection. Adjust/Add Remove Noise/Add Noise: Uniform and Monochrome checked Noise: 55% OK Deselect. Delete the template layer. Repeat the above step with Rec 2 & 3 layers. Highlight Rec 1a layer. Select All/Float/Defloat New Raster layer. Copy and paste Paper 10 Into Selection. Deselect. Delete the template layer. Repeat the above step with Rec 2a & 3a layers. Copy and paste your tube as a new layer. Center it over the middle rectangle. Duplicate the tube layer. Free rotate Right 7 degrees. Move into position over the right rectangle. In your layers pallet move it just above the right rectangle paper. Highlight the paper layer. Click anywhere outside of it with your Magic Wand. Highlight the tube layer just above the paper. Tap the delete key. Repeat the above step accept Free rotate Left 7 degrees. Add your embellishments. I used: Bauble 1: Resize 40% Bird 1: Resize 30% Flower 4: Resize 35%/Duplicate/Resize 80%/Duplicate/Resize 80%/Duplicate/Resize 80% Ribbon 5 Sparkles 1 Highlight your white background/ New Raster layer. Select All. Copy and paste a paper of choice Into Selection. Deselect. Apply the mask. Merge Group. Add your credits. Add your name. Give it a slight Inner Bevel: Resize all layers 80%. I hope you enjoyed this tutorial. I’d love to see your results and show it off in my gallery. Email me! Hugs, Bev

When the Wind Blows

Clicking on the image will enlarge to full view.
Supplies Font of Choice - I used HandScript here Weescotlass Mask 249 here Scrapity Scrap and More Template #40 here “Samhain” is a PTU tagger size scrap kit created by Helga of Classic Creationz and can be purchased at Scraps with Attitude. You can visit Helga's blog here. Thank you Helga for such a festive kit!
This tutorial was written assuming you have a working knowledge of PSP.
~♥~ Let’s get started ~♥~
Open up the template. Shift + D. Close out the original. Delete the credit layer. Image/Canvas Size 700 X 700 Highlight the background layer and flood fill white.
Highlight the Big Circle layer. Select All/Float/Defloat New Raster Layer. Flood fill with a gradient that’s complimentary to your tubes and papers in the kit. Deselect. Delete the template layer.
Highlight Border Big Circle. Select All/Float/Defloat New Raster Layer. Flood fill with a dark color of your choice. Deselect. Delete the template layer.
. Highlight Small Circle Layer. Select All/Float/Defloat New Raster Layer. Flood fill with a light color that’s complimentary to your tubes and papers in the kit. Deselect. Delete the template layer.
Highlight Border Smaller Circle layer. Select All/Float/Defloat New Raster Layer. Flood fill with a contrasting color that’s complimentary to your tubes and papers in the kit. Deselect. Delete the template layer.
Highlight Big Rectangle Layer. Select All/Float/Defloat Copy and paste a paper of choice as a new layer. Selections/Invert Tap the delete key. Deselect. Delete the template layer.
Highlight the Square layer. Select All/Float/Defloat New Raster layer. Flood fill with a gradient of choice. Deselect. Delete the template layer.
Highlight the Line Square layer. Select All/Float/Defloat Copy and paste a paper of choice as a new layer. Selections/Invert Tap the delete key. Deselect. Delete the template layer.
Merge Visible Border Top, Border Mid, and Border Bottom Rectangle layers. Select All/Float/Defloat New Raster layer. Flood fill with the same color you used on the border of the large circle layer. Deselect. Delete the template layer.
Merge Visible Top, Mid, and Bottom Rectangle layers. Select All/Float/Defloat 
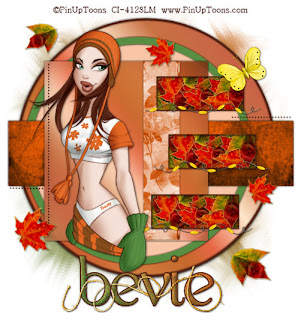
Copy and paste the leaves as new layers. Resize them small - to your liking. Duplicate them many times as you like and arrange them within the dotted lines of the top rectangle. Once you’ve done that then highlight the top leaf in your layers pallet and keep merging down until you have all leaves on one layer. Selections/Invert Tap the delete key. Deselect. Duplicate twice and move each duplicated layer below each of the other frames.
Highlight Small Dotted Lines layer. Select All/Float/Defloat Create a new image and flood fill with the same color you used for the large circle frame and the rectangle frames. Copy. Paste it on your working canvas as a new layer. Selections/Invert Delete the dotted layers template.
Repeat the above step with the Long Dotted Line layer.
Copy and paste your tube as a new layer.
Add your embellishments. I used: Butterfly 3: Resize 30%. Free rotate left 30 degrees Beaded wire: Resize 30%. Duplicate/Merge Down. Leaf Glitter 1 & 2: Resize different sizes
Highlight your white background. New Raster layer. Flood fill with a gradient of choice. Apply the mask. Merge Group. Resize 110%
Add your copyrights.
Add your name. I gave mine a touch of Noise. Copy and paste Rope as a new layer. Resize 50% Make it appear as if it’s looped through your name.
Resize all layers 80%.
I hope you enjoyed this tutorial.
I’d love to see your results and show it off in my Show Arena.
Email me!
Hugs,
Bev

Seaside Treasure

Supplies 1 tube of choice - I used the beautiful artwork of Carlos Diez which can be purchased from Up Your Art. You must have a license to use. Font of choice - I used Lyrics Movement here Monti Circular mask here “Seaside Treasures” is a tagger size scrap kit created by Krissy of Krissy’s Scraps and can be purchased from her store Exquisite Scraps. You can visit her blog here. Thank you Krissy for another fabulous summer kit! This tutorial was written assuming you have a working knowledge of PSP. ~♥~ Let’s get started ~♥~ Open up a 700 x 700 blank canvas. Flood fill white. Make your Selection Tool active set on Circle. Create a circle approximately 400 pixels. New Raster layer. Copy and paste Paper 2 Into Selection. Adjust/Add Remove Noise/Add Noise: Monochrome and Gaussian checked Noise: 25% OK Selections/Modify/Contract by 5. New Raster layer. Copy and paste Paper 5 Into Selection. Deselect. Give this paper layer a drop shadow. Merge Visible both paper layers. Make your Selection Tool active again, still set on Circle. Create a circle approximately 500 pixels. New Raster layer. Copy and paste Paper 2 Into Selection. Give it the same Noise effect. New Raster layer. Copy and paste Paper 3 Into Selection. Deselect. Give that paper a drop shadow. Close out the merged layer and white background. Merge Visible. Reopen all layers. Copy and paste Frame 1 as a new layer. Resize 35% Free rotate Left 5 degrees Duplicate/Mirror Move both merged circle layers and frames into position - see my tag for reference. Highlight the right frame. Click inside of it with your Magic Wand. New Raster layer below the frame. Copy and paste Paper 6 Into Selection. Copy and paste your tube as a new layer below the frame. Choose the position of the tube that you want to see in the frame. Selections/Invert Tap the delete key. Deselect. Change the Properties to Soft Light. Duplicate twice. Repeat the above step with the left frame. Copy and paste your tube as a new layer. Add your embellishments. I used: Preserver 1: Resize 60%/Duplicate Fishing Mesh 1 Lighthouse 1: Resize 70% Bow 1: Resize 30% Ceramic Fish 1: Resize 40% Starfish 1: Resize 30% Copy and paste Ruffled Ribbon 1 as a new layer. Free rotate left 45 degrees. Use your Selection Tool set on Rectangle and section off the right side. Tap the delete key. Deselect. Position just above the white canvas as the bottom of the circle. Duplicate/Mirror Highlight your white canvas. New Raster layer. Select All. Copy and paste Paper 11 Into Selection. Deselect. Apply the mask. Merge Group. Add your copyrights. Add your name. Resize all layers 80%. I hope you enjoyed this tutorial. I’d love to see your results and show it off in my gallery. Email me! Hugs, Bev

Night Shadows

Clicking on the image will enlarge to full view and show animation. Supplies 1 tube of choice - I’m using the artwork of Ismael Rac here. Font of Choice - Insula here Weescotlass Mask 297 here Eyecandy 5: Nature - Fire Animation Shop “Night Shadows” is a PTU tagger size scrap kit created by Cindy of Scrappin’ with Lil Ole Me can be purchased at The Scrap Asylum here. You can visit Cindy’s blog here. Thank you Cindy for such a stunning kit! This tutorial was written assuming you have working knowledge of PSP. ~♥~ Let’s get started ~♥~ Open up a 700 X 700 transparent image. Flood fill white. Copy and paste Frame 5 as a new layer. Resize 80%. Use your Magic Wand and click inside both of the frames. Selections/Modify/Expand by 6. Selections/Invert. Copy and paste a paper of choice below the frame. Tap the delete key. Deselect. Copy and paste Skull 4 as a new layer below the frame. Resize 25% Free rotate right 15 degrees Center inside the smaller frame. Copy and paste your tube as a new layer. Apply shadows of your choice to everything in your tag, but for your tube I suggest the following:   Add your embellishments. I used: Bow 4: Resize 50% Butterfly 1: Resize 25%. Free rotate right 15 degrees Flower 5: Resize 30% Floral Cluster Candle: Resize 30% Duplicate/resize 70% Merge Visible the 2 candles. Give it the same drop shadow as your tube. Duplicate twice for a total of 3 candle layers. Rename Candle 1, Candle 2, and Candle 3. Highlight Candle 1 and using your Freehand Selection Tool, draw a candle flame above each wick. It doesn’t have to be perfect!! Apply Eyecandy 5: Nature - Fire with these settings:
Be sure to close out Candle 2 and 3 layers. Keep open Candle 1 layer. Highlight your white canvas. New Raster Layer. Select All. Copy and paste a paper of choice Into Selection. Deselect. Apply the mask. Merge Group. Add your copyrights. Add your name. Crop your image.
Resize all layers 85%.
Time to animate: Copy Merge and carry into Animation Shop. Edit/Paste/As New Animation. Go back into PSP. Close out Candle 1 and open up Candle 2. Copy Merge and carry into Animation Shop. Edit/Paste/After Current Frame. Go back into PSP.
Close out Candle 2 and open up Candle 3. Copy Merge and carry into Animation Shop. Edit/Paste/After Current Frame . Ctrl + A to highlight all Frames. Animation/Frame Properties. Change the number to 20. View your animation. If you’re happy with it then save. I hope you enjoyed this tutorial. I’d love to see your results and show it off in my Show Arena. Email me! Hugs, Bev

The Beauty of the Dragon's Lair

Clicking on the image will enlarge to full view.
Supplies 1 tube and 1 Image of choice - I’m using the artwork of Jennifer Janesko which you can purchase here Font of Choice - Ginko here Beck Mask 22 here Toadies - Ommadawn “Dragon‘s Lair” is FTU for a limited time tagger size scrap kit created by Krissy‘s Scraps. You can visit her blog here for download. Please leave a Thank You. It’s a small gesture for hard work given freely. Thank you Krissy for a stunning scrap kit! This tutorial was written assuming you have a working knowledge of PSP. ~♥~ Let’s get started ~♥~ Open a transparent 700 x 700 canvas. Flood Fill white. Copy and Paste Frame 1 as a new layer. Use your Magic Wand and click inside the frame and also inside the larger gaps. Selections/Modify/Expand by 2. New Rater Layer. Fill with a gradient of your choice. DO NOT DESELECT Copy and paste your image below the frame. Selections/Modify/Feather Number of Pixels: 53 OK Selections/Invert Tap the delete key until you’re happy with the feathering to your image. Deselect. Copy and paste Grass 1 as a new layer. Resize 70% Copy and paste Berry Branch 1 as a new layer. Resize 25% Use your Pick Tool and turn vertical. Position at the side of the frame. Copy and paste Dragonfly 2 as a new layer. Resize 40% Copy and paste Dragon 2 as a new layer just above your white canvas. Position it so that it appears to be curling around the frame. Copy and paste Snow Drops 2 as a new layer just above your white canvas. Copy and paste Bubble Cluster 1 as a new layer just above your white canvas. Copy and paste your tube as a new layer. Close out your white canvas. Merge Visible. Duplicate. On the Merged layer apply Toadies - Ommadawn
Use Default settings
Highlight your white canvas. New Raster Layer. Select All. Copy and paste a paper of choice Into Selection. Deselect. Apply the Mask. Merge Group.
Add your copyrights.
Add your name. I used Eastern Dragon 1, resized, and positioned behind my name.
Resize all layers 85%.
I hope you enjoyed this tutorial.
I’d love to see your results and show it off in my Show Arena.
Email me!
Hugs,
Bev          

Black Widow

Clicking on the image will allow you to enlarge for bigger view. Supplies 1 tube of your choice - I used the artwork of Keith Garvey here Font of Choice - I used Burton’s Nightmare here Gem's Mask 161 here Creative by Nature Template 38 here Eyecandy 4000 - Gradient Glow “Black Widow” is a PTU tagger size scrap kit created by Cindy of Puddicat Creations and can be purchased at Lollipops n Gumdrops. You can visit her blog here. Thank you Cindy for such a festive kit! This tutorial was written assuming you have a working knowledge of PSP. ~♥~ Let’s get started ~♥~ Open up the template. Shift + D. Close out the original. Image/Canvas size 650 x 550 OK Highlight Raster 1 and flood fill white. Delete the top 4 layers and Raster 8 layer. Highlight Raster 2 layer. Click on it with your Magic Wand. Copy and paste Paper 6 as a new layer. Resize 60% Move into position. Selections/Invert Tap the delete key. Deselect. Delete the template layer. Highlight Raster 3 layer. Click on it with your Magic Wand. New Raster layer. Flood fill white. Adjust/Add Remove Noise/Add Noise: Uniform and Monochrome checked Noise: 45% OK Deselect. Delete the template layer. Repeat the above step with Rasters 4 and 6. Highlight Copy of Vector 1 layer. Click on it with your Magic Wand. New Raster layer. Copy and paste Paper 11 Into Selection. Deselect. Delete the template layer. Highlight Copy (2) of Vector 1 layer. Click on it with your Magic Wand. New Raster layer. Copy and paste Paper 15 Into Selection. Deselect. Delete the template layer. Apply Eyecandy 4000 - Gradient Glow: Highlight Copy of Vector 1 layer (the black circle). Click on it with your Magic Wand. Copy and paste Paper 10 as a new layer. Move into position over the circle. Selections/Invert Tap the delete key. Deselect. Delete the template layer. Highlight Copy of Vector 1 layer (the pink circle). Click on it with your Magic Wand. Copy and paste Paper 10 as a new layer. Move into position over the circle. Selections/Invert Tap the delete key. Copy and paste your tube as a new layer. Position it over the circle. Tap the delete key. Deselect. Delete the template layer. Add your embellishments. I used: Pumpkin 3: Resize 80% Creepy Trees 3: Resize 65% Trees 1: Resize 50% Vulture 1 Cat 1: Resize 50% Skulls 2: Resize 30% Spooky Eyes: Resize 90%/Lower the Opacity to 36 Spider 1: Resize 25%/Mirror/Duplicate and resize as many times as you like. Highlight your white background. Select All. Copy and paste a paper of choice Into Selection. Deselect. Apply the mask. Merge Group. Add your credits. Add your name. Resize all layers 80% I hope you enjoyed this tutorial. I’d love to see your results and show it off in my gallery. Email me! Hugs, Bev

Silent as the Grave

Supplies 1 tube of your choice - I used the awesome artwork of Michael Calandra at MPT Font of Choice - I used Merced here Vix PSP Mask 393 here Scrapity Scrap and More Template 18 here Animation Shop “Silent as the Grave” is a PTU scrap kit created by Sarah of LadyRaven Creations and can be purchased at Lollipops n Gumdrops. Thank you Sarah for a really wicked kit! ~♥~ Let’s get started ~♥~ Open up the template. Shift + D. Close out the Original. Resize all layers 130% Image/Canvas Size 700 X 700 OK New Raster layer. Flood fill white and send to bottom. Delete the credit layer. Highlight Copy of Slats layer. Click on each line with your Magic Wand. New Raster layer. Copy and paste Paper 12 Into Selection. Deselect. Delete the template layer. Highlight Copy of Rectangles layer. Click on each rectangle with your Magic Wand. New Raster layer. Copy and paste Paper 13 Into Selection. Deselect. Delete the template layer. Highlight Copy of Circle 1 layer. Merge Down. Both Circles should be on one layer. Use your Magic Wand and click on both Circles. New Raster layer. Copy and paste Paper 7 Into Selection. Selections/Modify/Contract by 6. Tap the delete key. Selections/Modify/Expand by 3. New Raster layer below your new circle frames. Copy and paste Paper 19 Into Selection. Copy and paste Jeweled Border 1 as a new layer. Resize 50%/Move into position below the frame of the top circle. Paste Jeweled Border 1 again. Resize 50%/Move into Position below the frame of the bottom circle. Selections/Invert Highlight each of the element layers and tap the delete key. Deselect. Delete the template layer. Highlight Copy of Circle Swirl 1 layer. Merge Down. Both Circle Swirl layers should be on one layer now. Select All/Float/Defloat New Raster layer. Copy and paste Paper 7 Into Selection. Selections/Modify/Contract by 3. Tap the delete key. Selections/Modify/Expand by 2. New Raster layer below the new frame you just made. Copy and paste Paper 19 Into Selection. Copy and paste Skull 1 as a new layer. Resize 45% Move into position below the frame of the largest circle of the swirl layer - it will be slightly bigger than the frame and that’s ok! We’ll take care of that later. Duplicate/Resize 90% /Move beneath the next Swirl Frame. Duplicate/Resize 90%/Move beneath the next Swirl Frame. Keep repeating this process until you have a skull beneath each circle. Paste the skull again. Resize 45%/Mirror Repeat the above step with the top set of circle swirls. Merge Visible all skull layers. Highlight the paper of the circle swirls. Select All/Float/Defloat Highlight the merged skull layer. Selections/Invert Tap the delete key. Deselect. Rename Skulls Close the layer out for now. Copy and paste your tube as a new layer. Resize so that the face will fit snugly into the largest circle of the swirl layer. Highlight the paper layer. Select All/Float/Defloat Selection/Invert Highlight the tube layer. Tap the delete key. Deselect. Repeat the same procedure you did with the skull. Once you’ve merged visible all tube layers rename it “Face”. Highlight the Skull layer. Lower the Opacity to 0. Highlight the Face layer. Be sure the Opaicty is set to 100. Copy and paste your tube as a new layer. Add your embellishments. I used: Row Stitches: Resize 30% Ball and Chain Heart: Resize 50% Highlight your white background. Select All New Raster layer. Copy and paste Paper 21 Into Selection. Deselect. Apply the mask. Merge Group. Add your credits. Add your name. Copy Merge ~Time to Animate~ Open up Animation Shop Edit/Paste/As New Animation Back in PSP. Face Layer: Lower the Opacity to 90 Skull Layer: Bring the Opacity up to 10 Copy Merge. Back in AS. Edit/Paste/After Current Frame. Back in PSP. Face Layer: Lower the Opacity to 80 Skull Layer: Bring the Opacity up to 20 Copy Merge Back in AS Edit/Paste/After Current Frame Back in PSP. Face Layer: Lower the Opacity to 70 Skull Layer: Bring the Opacity up to 30 Copy Merge Back in AS Edit/Paste/After Current Frame Back in PSP. Face Layer: Lower the Opacity to 60 Skull Layer: Bring the Opacity up to 40 Copy Merge Back in AS Edit/Paste/After Current Frame Back in PSP Face Layer: Lower the Opacity to 50 Skull Layer: Bring the Opacity up to 50 Copy Merge Back in AS Edit/Paste/After Current Frame Back in PSP Face Layer: Lower the Opacity to 40 Skull Layer: Bring the Opacity up to 60 Copy Merge Back in AS Edit/Paste/After Current Frame Back in PSP Face Layer: Lower the Opacity to 30 Skull Layer: Bring the Opacity up to 70 Copy Merge Back in AS Edit/Paste/After Current Frame Back in PSP Face Layer: Lower the Opacity to 20 Skull Layer: Bring the Opacity up to 80 Copy Merge Back in AS Edit/Paste/After Current Frame Back in PSP Face Layer: Lower the Opacity to 10 Skull Layer: Bring the Opacity up to 90 Copy Merge Back in AS Edit/Paste/After Current Frame Back in PSP Face Layer: Lower the Opacity to 0 Skull Layer: Bring the Opacity up to 100 Copy Merge Back in AS Edit/Paste After Current Frame You should have 11 frames. Ctrl + A (to highlight all frames) Edit/Copy Edit/Paste Ctrl + A Animation/Reverse Frames Edit/Copy Highlight the original frames. Click on Frame 11. Edit/Paste/After Current Frame Click on Frame 11. Animation/Frame Properties Display Time: 150 OK Highlight Frame 22. Animation/Frame Properties Display Time: 150 OK Animation/Resize Animation: Percentage of Original checked Width x Height: 80 OK If you’re happy with it then save. I hope you enjoyed this tutorial. I’d love to see your results and show it off in my gallery. Email me! Hugs, Bev

Garden Delights

Supplies 1 tube of choice - I used the artwork of Anna Marine whoch can be purchased from CDO. You must obtain a license to use. Font of choice - I used CAC Shishoni Brush here Weescotlass Mask 297 here Divine Intentionz Template 268 here Greg’s Factory Output Vol. II - Pool Shadow Eyecandy 3.1 - Glow “Garden Delights ” is a tagger size scrap kit created by Krissy of Krissy’s Scraps and can be purchased from her store Exquisite Scraps. You can visit her blog here. This tutorial was written assuming you have a working knowledge of PSP. ~♥~ Let’s get started ~♥~ Open up the template. Shift + D. Close out the original. Resize all layers 90% Image/Canvas Size 700 x 500 Open up the background layer and flood fill white. Delete the top 3 layers. Highlight Large Circle layer. Click on it with your Magic Wand. New Raster layer. Copy and paste Paper 10 Into Selection. Deselect. Delete the template layer. Apply Eyecandy 3.1 - Glow: Width: 5 Opacity: 100 Opacity Drop off: Fat Color: White Highlight Circle 1 layer. Click on it with your Magic Wand. New Raster layer. Copy and paste Paper 9 Into Selection. Deselect. Delete the template layer. Highlight Center Rectangle layer. Click on it with your Magic Wand. New Raster layer. Copy and paste Paper 11 Into Selection. Apply Greg’s Factory Output Vol. II - Pool Shadow: Default settings. Deselect. Copy and paste Cloud 1 as a new layer. Resize 40% Position over the paper. Copy and paste Cherry Tree 1 as a new layer about the paper layer. Resize 60% Move into position to one side of the rectangle - see my tag for reference. Duplicate/Mirror Highlight Center Rectangle template layer. Click anywhere outside of it with your Magic Wand. Highlight each of the tree layers and tap the delete key. Deselect. Delete the template layer. Highlight Thin Rectangle 1 layer. Click anywhere outside of it with your Magic Wand. Copy and paste Paper 12 as a new layer over the template layer. Resize 60% Move into position. Tap the delete key. Deselect. Delete the template layer. Highlight Thin Rectangle 2 layer. Repeat the above step. Highlight Dotted Line layer. Select All/Float/Defloat New Raster layer. Copy and paste Paper 11 Into Selection. Deselect. Duplicate/Merge Down. Delete the template layer. Highlight Frame Left layer. Click on it with your Magic Wand. New Raster layer. Paste Paper 11 Into Selection. Deselect. Delete the template layer. Give it a slight Inner Bevel: Highlight Frame Right layer. Repeat the above step. Highlight Frame Back layer. Click on it with your Magic Wand. New Raster layer. Copy and paste Paper 3 Into Selection. Deselect. Delete the template layer. Repeat the above step with the other Frame Back template layer. Highlight the frame paper on the right. Click anywhere outside of it with your Magic Wand. Copy and paste your tube as a new layer. Position over the paper. Tap the delete key. Deselect. Highlight the frame back paper on the bottom. Click anywhere outside of the paper with your Magic Wand. Copy and paste Watering Can 1 as a new layer. Resize 80% Move into position - see my tag for reference. Tap the delete key. Deselect. Paste the watering can again. Resize 60% Position in front of the frame. Add your embellishments. I used: Butterfly 1: Resize 25% Staple 2: Resize 25% and 70%/Duplicate Painted Bird 1: Resize 40% Feather 1: Resize 40% Ribbon 1: Resize 60% Natural Bloom 3: Resize 25% and 80%/Duplicate/Flip/Resize 80%/Duplicate/Mirror Highlight your white canvas. New Raster layer. Select All. Copy and paste Paper 4 Into Selection. Deselect. Apply the mask. Merge Group. Add your copyrights. Add your name: Give it the same Inner Bevel. I hope you enjoyed this tutorial. I’d love to see your results and show it off in my gallery. Email me! Hugs,