Saturday, October 24, 2009

Changes of the Season

Clicking on the image will enlarge to full view.

Supplies
1 tube of choice - I’m using the beautiful artwork of Olivia here
Font of Choice - I used Bonheur Royale
Weescotlass Mask 84 here
Scrapity Scrap and More Template 25 (blog has been removed so I made a replacement) here
“Café Autumn” is a PTU scrap kit created by Kesha of KnC Scrapz and can be purchased at Lollipops n Gumdrops. You can visit her blog here.
Thank you Kesha for such an amazing kit!

This tutorial was written assuming you have a working knowledge of PSP.

~♥~ Let’s get started ~♥~

Open up the template.
Shift + D.
Delete the credit layer.
Resize all layers 120%
Image/Canvas Size
650 x 450
Highlight Raster 1 layer and flood fill white.

Highlight Bottom Dotted Line layer.
Merge down.
The Top and Bottom dotted line layers should be on the same layer now.
Select All/Float/Defloat
Copy and paste a paper of choice as a new layer.
Selections/Invert
Tap the delete key.
Deselect.
Delete the template layer.

Highlight Right Circle Layer.
Select All/Float/Defloat
Copy and paste a paper of choice as a new layer.
Selections/Invert
Tap the delete key.
Deselect.
Delete the template layer.
Copy and paste the gate as a new layer.
Resize 25%.
Move into position over the paper of the right circle layer. (It won’t fit all the way across)
See my tag for reference.
Duplicate/Mirror
Match the fence layers up.
Merge down.
It overhangs the circle and that’s alright - and the next several layers will, too. We’ll take care of them later.

Copy and paste Arch Window Open No Glass as a new layer.
Resize 30%
Move into position -
See my tag for reference.

Copy and paste Table as a new layer.
Resize 20% and 60%
Move into position.
See my tag for reference.

Copy and paste Chair as a new layer.
Resize 20% and 30%
Duplicate/Merge down.
Duplicate/Mirror.
Move both chairs into position.

Copy and paste Champagne as a new layer.
Resize 20% and 20% again.
Move into position.

Copy and paste Flute as a new layer.
Resize 20% and 20% and 70%
Duplicate/Merge Down.
Duplicate.
Move both glasses into position.

Now Merge Visible the fence, gate, table, chairs, champagne and glass layers.
Highlight the circle layer.
Select All/Float/Defloat
Selections/Invert
Highlight the merged layer.
Tap the delete key.
Deselect.

Highlight Border Right Circle layer.
Select All/Float/Defloat
New Raster layer.
Flood fill with a dark color - or you can section out a dark portion of a paper, set your materials foreground to pattern and flood fill with the paper pattern.
Deselect.
Delete the template layer.

Merge Visible Top Rect and Bottom Rect layers.
Select All/Float/Defloat
Copy and paste a paper of choice as a new layer.
Selections/Invert
Tap the delete key.
Deselect.
Delete the template layer.

Copy and paste Falling Leaves.
Resize 60%
Use your Pick Tool and rotate it until it’s as straight across as possible.
Position it over the top rectangle layer.
Highlight the merged Rectangle layer.
Select All/Float/Defloat
Selections/Invert
Highlight the Falling Leaves layer.
Tap the delete key.
Duplicate.
Deselect.
Move the copy into position over the lower rectangle layer.

Merge Visible Border Bottom Rect and Border top Rect layers.
Repeat the same as you did for the right circle border layer.
Highlight Left Circle layer.
Select All/Float/Defloat
Copy and paste a paper of choice as a new layer.
Selections/Invert
Tap the delete key.
DON’T DESELECT YET.

Copy and paste your tube as a new layer.
Resize quite large and position over the circle.
Tap the delete key.
Deselect.
Change the Properties to Soft Light.

Highlight Border Left Circle layer.
Repeat the same as you did for the right circle border layer.

Copy and paste your tube as a new layer.

Add your embellishments. I used:
Leaf Bunch: Resize 25% and 80%. Flip.
Falling Leaves 2: Choose various leaves

Highlight your white canvas.
New Raster Layer.
Select All.
Copy and paste a paper of choice Into Selection or flood fill with a gradient of choice.
Apply the mask.
Merge Group.
Use your Pick Tool and pull the mask out a bit on all sides.

Add your copyrights.

Add your name.

Resize all layers 85%.

I hope you enjoyed this tutorial.
I’d love to see your results.
Email me!
Hugs,
Bev


All Hallows Eve

Clicking on the image will enlarge to full view.

Supplies
1 tube of choice - I’m using the beautiful artwork of Elias Chatzoudis here
Font of Choice - I used Bats & Dragons here
Becky Mask 22 here
Greg’s Factory Output Vol. II - Pool Shadow
DSB Flux - Bright Noise
“Hallows Eve” is a PTU tagger size scrap kit created by Julie of Bits ’n Bobs and can be purchased at Exquisite Scraps. You can visit her blog here.
Thank you Julie for yet another spooky kit!

This tutorial was written assuming you have a working knowledge of PSP.

~♥~ Let’s get started ~♥~

Open up a 700 x 700 transparent image.
Flood fill white.

Copy and paste Frame 2 as a new layer.
Use your Magic Wand and click inside of it.
Selections/Modify/Expand by 6
New Raster layer below the frame.
Flood fill with a gradient of your choice.
Deselect.

Copy and paste your tube as a new layer.

Add your embellishments. I used:
Bow 2: Resize 70%
Element 24: Resize 70%
Element 18: Resize 70%
Element 19: Resize 60%
Element 4: Resize 130%. Duplicate/Mirror
Highlight your white canvas.
New Raster Layer.
Select All.
Copy and paste a paper of choice Into Selection.
Deselect.
Apply the mask.
Merge Group.

Add your copyrights.

Add your name.
Select All/Float/Defloat
Selections/Modify/Contract by 2
Apply Greg’s Factory Output Vol. II - Pool Shadow


DO NOT DESELECT
Apply DSB Flux Bright - Noise


Resize all layers 80%.

I hope you enjoyed this tutorial.
I’d love to see your results.
Email me!
Hugs,
Bev

Flawless Beauty

Clicking on the image will enlarge to full view.

Supplies
1 tube of choice - I’m using the beautiful artwork of Barbara Jensen here
Font of Choice - I used Nadall here
Weescotlass Mask 81 here
“Shades of Gray” is a PTU tagger size scrap kit created by Terry of Treasure’s by Terry and can be purchased at Butterfly Blush Designs. You can visit her blog here.
Thank you Terry for yet another beautiful kit!

This tutorial was written assuming you have a working knowledge of PSP.

~♥~ Let’s get started ~♥~
Open up a 700 x 700 transparent image.
Flood fill white.

Copy and paste Frame 5 as a new layer.
Use your Magic Wand and click inside of it.
Copy and paste a paper of choice as a new layer below the frame.
Selections/Invert
Tap the delete key.

Copy and paste your tube as a new layer.
Tap the delete key.
Deselect.

Add your embellishments. I used:
Butterfly 2: Resize 40%
Butterfly 1: Resize 30%
Flower 3: Resize 50% - give it a drop shadow using a very light gray color, and then give it a drop shadow in black
Flower 1: Resize 50%

Highlight your white canvas.
New Raster Layer.
Select All.
Copy and paste a paper of choice Into Selection.
Copy and paste Curtain 1 as a new layer.
Deselect.
Merge down.
Apply the mask.
Merge Group.
Resize 90%

Add your copyrights.

Add your name.
I gave mine a slight inner bevel:

Resize all layers 95%.

I hope you enjoyed this tutorial.
I’d love to see your results.
Email me!
Hugs,
Bev


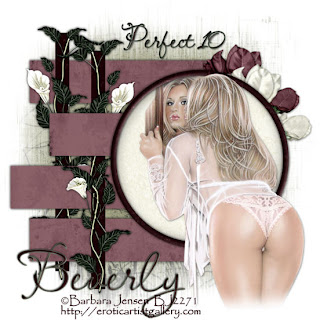
Perfect 10


Clicking on the image will enlarge to full view.

Supplies
1 tube of choice - I’m using the beautiful artwork of Barbara Jensen here
Font of Choice - I used LavishlyYours, but Aquarelle here works the same
Weescotlass Mask 39 here
Blissfully Beth’s Template 59 here
“Something for Me” is a PTU tagger size scrap kit created by Connie of Connie’s Creative Chaos and can be purchased at Creative Scraps Store. You can visit her blog here.
Thank you Connie for such a beautiful kit!

This tutorial was written assuming you have a working knowledge of PSP.

~♥~ Let’s get started ~♥~

Open up the template.
Shift + D.
Close out the original.
Delete the credit layer.
Highlight Rect4 layer.
Select All/Float/Defloat
Copy and paste a paper of choice as a new layer.
Selections/Invert
Tap the delete key.
Deselect.
Delete the template layer.
Repeat the above step with Rect3, Rect2, and Rect1 layers.
Highlight Line 2 layer.
Select All/Float/Defloat
New Raster layer.
Flood fill with a dark color of choice.
Deselect.
Delete the template layer.
Highlight Circle Frame layer.
Select All/Float/Defloat
New Raster layer.
Flood fill with the same dark color.
Deselect.
Delete the template layer.
Give it a slight inner bevel:


Highlight Circle layer.
Select All/Float/Defloat
Copy and paste a paper of choice as a new layer.
Selections/Invert
Tap the delete key.
Deselect.
Delete the template layer.

Copy and paste your tube as a new layer.

Add your embellishments. I used:
Flower 4: Resize 85%
Flower 1: Resize 70% Mirror/Free rotate right 10 degrees
Flower 2: Resize 70% Mirror/Free rotate right 20 degrees

If you choose to use the “Perfect 10” layer:
Select All/Float/Defloat
New raster layer.
Flood fill with a color of choice.
Deselect.
Delete the template layer.
I chose to delete the layer and use my font to write Perfect 10 out.
I gave it the same inner bevel.

Highlight your white canvas.
New Raster layer.
Select all.
Copy and paste a paper of choice Into Selection.
Deselect.
Apply the mask.
Merge Group.
Resize 120%

Add your copyrights.

Add your name.
I gave mine the same slight inner bevel.

Resize all layers 85%.

I hope you enjoyed this tutorial.
I’d love to see your results.
Email me!
Hugs,
Bev

Prim Christmas

Clicking on the image will enlarge to full view.

Supplies
Font of Choice - I used Chicken Basket here
Weescotlass Mask 297 here
Scrapity Scrap and More Template 15 here
“Prim Christmas” is a PTU tagger size scrap kit created by Krissy of Krissy’s Scraps and can be purchased at Exquisite Scraps. You can visit her blog here.
Thank you Krissy for such a gorgeous Prim kit!

This tutorial was written assuming you have a working knowledge of PSP.

~♥~ Let’s get started ~♥~

Open up the template.
Shift + D.
Close out the original.
Image/Canvas Size
650 X 500
Highlight Raster 1 and flood fill white.

Highlight Raster 2.
Select All/Float/Defloat
Copy and paste a paper of choice as a new layer.
Resize 75%
Selections/Invert
Tap the delete key.
Deselect.
Delete the template layer.

Highlight Copy of Vector 2 Layer
Select All/Float/Defloat
New Raster layer.
Open up a paper of choice. Using your Selection Tool, select a part of the paper you’d like to use for the color and texture on the Copy of Vector 2 layer. I used this:


In your Materials pallet set the foreground to Pattern and find the paper.
Flood fill with your pattern.
Deselect.
Delete the template layer.

Highlight Raster 3.
Select All/Float/Defloat
Copy and paste a paper of choice as a new layer.
Resize 75%
Selections/Invert
Tap the delete key.
Deselect.
Delete the template layer.

Highlight Copy of Vector 3 layer.
Select All/Float/Defloat
New Raster layer.
Open up a different paper, select a portion of it just as you did before with the other paper, set your foreground to pattern, find the paper and flood fill this layer.
Deselect.
Delete the template layer.

Highlight Copy of Raster 5 layer.
Select All/Float/Defloat
Copy and paste a paper of choice as a new layer.
Resize 75%
Selections/Invert
Tap the delete key.
Deselect.
Delete the template layer.

Highlight Copy (2) of Vector 1.
Select All/Float/Defloat
New Raster layer.
Flood fill with the same paper pattern you used first in this tutorial.
Deselect.
Delete the template layer.

Repeat the above 2 steps with Raster 5 layer and Copy and Vector 1 layer.

Highlight Raster 4 layer.
Select All/Float/Defloat
Copy and paste a paper of choice as a new layer.
Deselect.
Delete the template layer.

Highlight Copy of Vector 1 layer.
Select All/Float/Defloat
Flood fill with a paper pattern of your choice.
Deselect.
Delete the template layer.

Add your embellishments. I used:
Snowman with Baubles 1: Resize 60%
Tree 1: Resize 75%
Reindeer and Snowman 1: Resize 50%
Wrapped Gift Box 1: Resize 30% Free rotate left 10%
Gift Box 2: Resize 30% Free rotate right 10%
Embellished Bow 1: Resize 40%
Christmas Bauble 1, 2, and 3: Resize 25% & 80%
Potted Candle 1: Resize 30%
Plain Christmas Bauble 2: Resize 25% and 80% Free rotate left 45 degrees
Plain Christmas Bauble 2: Resize 25% and 80%,. Free rotate right 120 degrees

Highlight your white canvas.
New Raster Layer.
Select All.
Copy and paste a paper of choice Into Selection.
Deselect.
Apply the mask.
Merge Group.

Add your copyrights.

Add your name.
I gave mine a slight inner bevel:


Resize all layers 85%.

I hope you enjoyed this tutorial.
I’d love to see your results..
Email me!
Hugs,
Bev

Thursday, October 22, 2009

Mocha Moments

Clicking on the image will enlarge to full view.

Supplies
1 tube of choice - I used the beautiful artwork of Barbara Jensen which can be purchased here.
Font of Choice - I used Aquarelle here
Weescotlass Mask 249 here
“Coffee Caramel” is a PTU tagger size scrap kit created by Tina of Tina’s Magic Scrap World and can be purchased at Exquisite Scraps. You can visit her blog here.
Thank you Tina for yet another stunningly beautiful kit!
You’re work is awesome, chickadee!

This tutorial was written assuming you have a working knowledge of PSP.

~♥~ Let’s get started ~♥~

Open up a 700 X 700 transparent image.
Flood fill white.

Copy and paste Frame 14 as a new layer.
Resize 80%
Use your Magic Wand and click inside of it.
Selections/Modify/Expand by 6.
New Raster layer below the frame.
Copy and paste a paper of choice Into Selection.
Deselect.

Copy and paste Ribbon Wrap 1 as a new layer.
Resize 65% and 98%.

Add your embellishments. I used:
Leaves 2: Resize 75%. Mirror. Free rotate right 30 degrees
Leaves 4: Resize 75%. Mirror. Free rotate right 30 degrees
Bow with Flower 2: Resize 60%
Pearl Charm: Resize 70%. Free rotate right 80 degrees
Rose 2: Resize 70%. Duplicate/Resize 80%
Butterfly 4: Resize 40%
Butterfly 3: Resize 35%
 
Highlight your white canvas.
New Raster Layer.
Select All.
Copy and paste a paper of choice Into Selection.
Deselect.
Apply the mask.
Merge Group.
Resize 105%

Add your copyrights.

Add your name.
I gave mine a slight inner bevel:


Resize all layers 80%.

I hope you enjoyed this tutorial.
I’d love to see your results.
Email me!
Hugs,
Bev

Wednesday, October 21, 2009

Web Mistress

Clicking on the image will enlarge to full view.

Supplies
1 tube of choice - I used the beautiful artwork of Bits ’n Bobs which can be purchased here.
Font of Choice - I used Haunted Mouse here
Weescotlass Mask 62 here
Blissfully Beth Template 32 here
Greg’s Factory Output Vol. II - Pool Shadow
“For the Love of Goth” is a PTU tagger size scrap kit created by Julie of Bits ’n Bobs and can be purchased at AMI. You can visit her blog here.
Thank you Julie for such a gorgeous tube and an amazing kit!

This tutorial was written assuming you have a working knowledge of PSP.

~♥~ Let’s get started ~♥~

Open up the template.
Shift + D.
Close out the original.
Delete the credit layer.
Resize all layers 120%
Highlight the Background layer and flood fill white.

Highlight Raster 1 layer.
Select All/Float/Defloat
Copy and paste a paper of choice as a new layer.
Selections/Invert
Tap the delete key.
Deselect
Delete the template layer.
Adjust/Sharpness/Sharpen
Repeat the sharpness 3 more times or until you get the bright effect you like.

Highlight the Gray Rectangle layer.
Select All/Float/Defloat
New Raster layer.
Copy and paste a paper of choice Into Selection.
Selections/Modify/Contract by 15
OK
New Raster layer.
Copy and paste a paper of choice Into Selection.
Deselect.
Delete the template layer.
Apply Greg’s Factory Output Vol. II - Pool Shadow


Highlight the White Circle layer.
Select All/Float/Defloat
New Raster layer.
Copy and paste a paper of choice Into Selection.
Selections/Modify/Contract by 15
OK
New Raster layer.
Copy and paste a paper of choice Into Selection.
Deselect.
Delete the template layer.

Highlight the Dotted Circle layer.
Select All/Float/Defloat
New Raster layer.
Copy and paste a paper of choice Into Selection.
Deselect.
Delete the template layer.
Adjust/Sharpness/Sharpen
Repeat the sharpness until you have the brightness you like.

Add your embellishments. I used:
Element 12 & 13: Resize each 25%
Element 26: Resize 40%
Element 20: Resize 50%

Highlight your white canvas.
New Raster Layer.
Select All.
Copy and paste a paper of choice Into Selection.
Deselect.
Apply the mask.
Merge Group.

Add your copyrights.

Add your name.

Resize all layers 85%.

I hope you enjoyed this tutorial.
I’d love to see your results.
Email me!
Hugs,
Bev


Tuesday, October 20, 2009

You and I

Clicking on the image will enlarge to full view.

Supplies
1 tube of choice - I used the wonderful artwork of Zindy S.D. Nielsen which can be purchased here.
Font of Choice - I used Dragonfly here
Weescotlass Mask 138 here
Scrapity Scrap and More Template 17 here
“Autumn Has Arrived” is a PTU size scrap kit created by Wilma of Wilma4ever and can be purchased at Nuthouse Scraps. You can visit her blog here.
Thank you Wilma for such a festive kit!

This tutorial was written assuming you have a working knowledge of PSP.

~♥~ Let’s get started ~♥~

Open up the template.
Shift + D.
Close out the original.
Delete the credit layer.
Image/Canvas size
650 X 450
Highlight Raster 1 and flood fill white.

Highlight Raster 3 layer.
Select All/Float/Defloat
Copy and paste a paper of choice as a new layer.
Selections/Invert
Tap the delete key.
DO NOT DESELECT.

Copy and paste Tree 1 as a new layer.
Resize 50%
Move into position.
Tap the delete key.
Deselect.
Delete the template layer.

Highlight Copy of Vector layer (that belongs with the circle layer)
Select All/Float/Defloat
Copy and paste a paper of choice as a new layer.
Selections/Invert
Tap the delete key.
Deselect.
Delete the template layer.

Highlight Raster 4.
Select All/Float/Defloat
Copy and paste a paper of choice as a new layer.
Selections/Invert
Tap the delete key.
Deselect.
Delete the template layer.

Highlight Raster 5.
Repeat the above step with another paper of choice.
Highlight Raster 6.
Again, repeat the above step with another paper of choice.
Highlight Copy of Raster layer that belong with Raster 6.
Select All/Float/Defloat
Copy and paste the same paper you used for the other Copy of Raster as a new layer.
Selections/Invert
Tap the delete key.
Deselect.
Delete the template layer.

Highlight the layer above this - Copy of Raster
(It’s the dark gray rectangle)
Select All/Float/Defloat
Copy and paste a paper of choice as a new layer.
Selections/Invert
Tap the delete key.
Deselect.
Delete the template layer.

Highlight the layer above (the white Rectangle)
Repeat the above step.

Highlight Raster 7.
Select All/Float/Defloat
Copy and paste a paper of choice as a new layer.
Selections/Invert
Tap the delete key.
DO NOT DESELECT.
Copy and paste your tube as a new layer.
Selections/Invert
Selections/Modify/Feather
Number of Pixels: 43
OK
Tap the delete key until you have the feathered image you like.
Selections/Invert
Tap the delete key.
Delete the template layer.

Add your embellishments. I used:
Bow 1: Resize 40%
Butterfly 3: Resize 50%
Butterfly 2: Resize 25%
Owl: Resize 30%
Leave 6: Resize 30%
Leave 5: Resize 30%
Leave 7: Resize 15%

Highlight your white canvas.
New Raster Layer.
Select All.
Copy and paste a paper of choice Into Selection.
Deselect.
Apply the mask.
Merge Group.
Use your Pick tool and pull all sides out a little.

Crop your image, but be sure you don’t crop any of the mask.
Add your copyrights.

Add your name.

I hope you enjoyed this tutorial.
I’d love to see your results.
Email me!
Hugs,
Bev

Monday, October 19, 2009

Light of the Season

Clicking on the image will enlarge to full view.

Supplies
1 tube of choice - I used the wonderful artwork of PinUpToons which can be purchased here.
Font of Choice - I used Komika Boogie here
Becky Mask 22 here
My Template 68 here
“Autumn Blessings” is a PTU size scrap kit created by Jessica of Gothic Inspirations and can be purchased at Scraps with Attitude. You can visit her blog here.
Thank you Jessica for such a stunning kit!

This tutorial was written assuming you have a working knowledge of PSP.

~♥~ Let’s get started ~♥~

Open up the template.
Shift + D.
Close out the original.
Delete the credit layer.

Highlight Diamond 1 layer.
Select All/Float/Defloat
Copy and paste a paper of choice as a new layer.
Selections/Invert
Tap the delete key.
DO NOT DESELECT.

New Raster Layer.
Effects/3D Effects/Cutout
Apply these settings: (you can change the color if you like)


Repeat the above step accept change the horizontal and vertical numbers to 10 (don’t leave them negative 10).
Merge Down.
Both of your cutout layers should be one layer now.
Duplicate.
Merge Down..

Repeat all of the above steps with Diamond 2 layer.

Highlight Circle 1 layer.
Select All/Float/Defloat
Copy and paste a paper of choice as a new layer.
Resize to your liking.
Selections/Invert
Tap the delete key.
Deselect.
Delete the template layer.

Repeat the above step with Circle 2 layer.

Highlight Circle Ring 1 layer.
Select All/Float/Defloat
New Raster layer.
Flood fill with the same color you used for the Cutout layer.
DO NOT DESELECT.
Effect/3D Effect/Cutout
Repeat the same cutout procedure as before.
Copy and paste your tube as a new layer below the cutout layer.
Selections/Invert
Tap the delete key.
Deselect.
Delete the template layer.

Highlight Circle Ring 2 layer.
Repeat the above steps.

Add your embellishments. I used:
Leaves 3: Resize 40% Lower the opacity to about 44
Tree
Leaves 1: Resize 40% Free rotate right 90 degrees
Leaves: Resize 30%
Lantern: Resize 40%
Grass: Resize 50%

Highlight your white canvas.
New Raster Layer.
Select All.
Copy and paste a paper of choice Into Selection.
Deselect.
Copy and paste Screen Back above the paper layer.
Resize 80%
Merge down.
Apply the mask.
Merge Group.

Add your copyrights.

Add your name.
Give it a slight inner bevel:


Resize all layers 90%.

I hope you enjoyed this tutorial.
I’d love to see your results.Email me!
Hugs,
Bev

The Warmth of Autumn

Clicking on the image will enlarge to full view.

Supplies
1 tube of choice - I used the beautiful artwork of Jennifer Janesko which can be purchased here.
Font of Choice - I used Pendulum here
Weescotlass Mask 84 here
Scrapity Scrap and More Template 16 here
“Vintage Autumn” is a PTU size scrap kit created by Gina of Gina’s Gems Scraps and can be purchased at Butterfly Blush Designs. You can visit her blog here.
Thank you Gina for such an incredible kit!

This tutorial was written assuming you have a working knowledge of PSP.

~♥~ Let’s get started ~♥~

Open up the template.
Shift + D.
Close out the original.
Delete the credit layer and the 3 snowflake layers.

Image/Canvas Size
700 X 500.
Flood fill Raster 1 white.

Highlight Copy of Vector 3 layer.
Select All/Float/Defloat
Copy and paste a paper of choice as a new layer.
Selections/Invert
Tap the delete key.
Deselect.
Delete the template layer.
Repeat the about step with Copy of Vector 1 and Copy of Vector 2 layers using the same paper.

Highlight Raster 2.
Select All/Float/Defloat
Copy and paste a paper of choice as a new layer.
Resize to your liking.
Selections/Invert
Tap the delete key.
Deselect.
Delete the template layer.
Repeat the above step with Rasters 3 using a different paper.
Highlight Raster 4.
Repeat the above step using a different paper.
Give it a slight inner bevel:


Highlight Raster 5.
Select All/Float/Defloat
Copy and paste a paper of choice as a new layer.
Resize to your liking.
Selections/Invert
Tap the delete key.
Copy and paste your tube above the paper.
Tap the delete key.
Deselect.
Delete the template layer.

Add your embellishments. I used:
Bronze Leaf Doodle: Resize 60%. Duplicate/Mirror/Resize 80%
Vintage Flowers 1 & 3: Resize 35%
Ribbon Curl 1: Resize 40%
Autumn Leaves 1, 2, and 3: Resize 25% and 80%
Flutterby 2 & 4: Resize 25%

Highlight your white canvas.
New Raster Layer.
Select All.
Copy and paste a paper of choice Into Selection.
Deselect.
Apply the mask.
Merge Group.
Use your Pick Tool and pull the sides out slightly.

Add your copyrights.

Add your name.

Resize all layers 85%.

I hope you enjoyed this tutorial.
I’d love to see your results.
Email me!
Hugs,
Bev

Sunday, October 18, 2009

Autumn Dreams

Clicking on the image will enlarge to full view.

Supplies
1 tube of choice - I used the wonderful artwork of PinUpToons which can be purchased here.
Font of Choice - I used Felt here
Weescotlass Mask 223 here
“Autumn Dream” is a PTU tagger size scrap kit created by Amanda of Bastelgalaxy and can be purchased from Twilight Scraps. You can visit her blog here.
Thank you Amanda for a truly amazing kit!

This tutorial was written assuming you have a working knowledge of PSP.

~♥~ Let’s get started ~♥~

Open up a transparent 700 X 700 image.
Flood fill white.

Copy and paste Heart Frame 3 as a new layer.
Use your Magic Wand and click inside the frame.
Selections/Modify/Expand by 6.
Copy and paste a paper of choice below the frame.
Selections/Invert
Tap the delete key.
Deselect.

Copy and paste your tube as a new layer.

Add your embellishments. I used:
Flower 11: Resize 50%
Flower 12: Resize 45%
Ornament 3
Doodle 3. Duplicate/Mirror/Flip
Butterfly 8: Resize 50%
Butterfly 9: Resize 40%
Bow 14: Resize 80%

Highlight your white canvas.
New Raster Layer.
Select All.
Copy and paste a paper of choice Into Selection.
Deselect.
Apply the mask.
Merge Group.
I moved my mask into a little bit better position behind the tag.

Add your copyrights.

Add your name.
I gave mine a slight inner bevel:


Resize all layers 80%.

I hope you enjoyed this tutorial.
I’d love to see your results.
Email me!
Hugs,
Bev
Gothic Attitude

Clicking on the image will enlarge to full view.

Supplies
1 tube of choice - I used the wonderful artwork of PinUpToons which can be purchased here.
Font of Choice - I used Burton’s Nightmare here
Weescotlass Mask 297 here
Divine Intentions Template 179 here
“For the Love of Goth” is a PTU tagger size scrap kit created by Julie of Bits ’n Bobs and can be purchased at AMI. You can visit her blog here.
Thank you Julie for such an amazing kit!

This tutorial was written assuming you have a working knowledge of PSP.

~♥~ Let’s get started ~♥~

Open up the template.
Shift + D.
Close out the original.
Delete the credit layer.

Highlight Rectangle 1 layer.
Select All/Float/Defloat
New Raster layer.
Copy and paste a paper of choice Into Selection
Deselect.
Delete the template layer.
Give it a slight inner bevel:


Highlight Rectangle 2.
Repeat the above step using the same paper.

Highlight Rec Rac layer.
Select All/Float/Defloat
Copy and paste a paper of choice as a new layer.
Selections/Invert
Tap the delete key.
Deselect.
Delete the template layer.
Give it the same slight inner bevel.

Highlight the Circle layer.
Repeat the above step.

Use your Magic Wand and click inside the frame.
Selections/Modify/Expand by 6.
New Raster Layer below the frame.
Flood fill with a gradient of your choice.
DO NOT DESELECT

Copy and paste your tube below the frame.
Resize as needed.
Selections/Invert
Tap the delete key.
Change the Properties to Soft Light
DO NOT DESELECT

Copy and paste Element 8 as a new layer below your tube layer.
Tap the delete key.
Deselect.
Highlight the tube layer.
Select All/Float/Defloat
Highlight Element 8 layer.
Tap the delete key.
Deselect.

Copy and paste your tube as a new layer.

Add your embellishments. I used:
Element 20: Resize 50%
Element 54: Resize 50% Free rotate left 75 degrees
Element 25: Resize 50%
Element 27: Resize 45%
Element 13: Resize 40%
Element 12: Resize 25%

Highlight your white canvas.
New Raster Layer.
Select All.
Copy and paste a paper of choice Into Selection.
Deselect.
Apply the mask.
Merge Group.
Use your Pick Tool and pull the sides out slightly.

Add your copyrights.

Add your name.

Resize all layers 95%.

I hope you enjoyed this tutorial.
I’d love to see your results and show it off in my Show Arena.
Email me!
Hugs,
Bev