Saturday, March 27, 2010

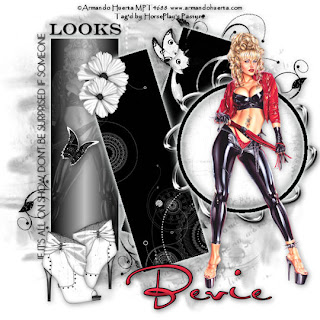
It's All On Show


Clicking on the image will enlarge to full view.

Supplies
1 tube of choice - I used the wonderful artwork of Armando Heurta here
Font of choice - I used AlSandra here
Gems Mask 103 here
Vix Template Sept GB03 here
Eyecandy 5: Impact - Gradient glow
“Black n White” is a PTU tagger size scrap kit created by Kristi of oOoh LaLa Scraps and can be purchased at TKO Scraps. You can visit her blog here.
Thank you Kristi for a terrific kit!

This tutorial was written assuming you have a working knowledge of PSP.

~♥~ Let’s get started ~♥~

Open up the template.
Shift + D.
Close out the original.
Delete the terms layer.
Open the Back layer.

Highlight Back Rectangle layer.
Use your Magic Wand and click on it.
New Raster layer.
In your layers pallet:
Foreground: #000000
Background: #c0c0c0
Set to Gradient:


Flood fill.
Deselect.
Delete the template layer.

Highlight Middle Rectangle layer.
Use your Magic Wand and click on it.
Copy and paste a paper of choice as a new layer.
Resize 70%
Selections/Invert
Tap the delete key.
Deselect.
Delete the template layer.

Highlight Front Rectangle layer.
Repeat the above step.

Highlight Circle Fill layer.
Use your Magic Wand and click on it.
New Raster layer.
Copy and paste a paper of choice Into Selection.
Deselect.
Delete the template layer.

Highlight Circle Frame layer.
Use your Magic Wand and click on it.
New Raster layer.
Flood fill with the color black.
Deselect.
Delete the template layer.

Copy and paste your tube as a new layer.
Move into position before the circle.
Duplicate/Mirror
Move the duplicate layer into position over the far left Gradient Rectangle.
Highlight the Gradient Rectangle layer.
Select All/Float/Defloat
Highlight the duplicate tube layer and tap the delete key.
Deselect.
Change the Properties to Luminance Legacy and lower the Opacity to about 22.

Highlight the Gradient Rectangle layer and apply Eyecandy 5 Impact: Gradient Glow


Repeat the above step with the other 2 rectangle layers and the Circle Frame layer.

Add your embellishments. I used:
Bling 1: Resize 70% and 98%
Flower 3: Resize 25% and 80% Duplicate/Resize 80%
Butterfly 1: Resize 25% and 80%
Butterfly 3: Resize 25%
Boot 1: Resize 30%
Doodle 2

Highlight your white background.
New Raster layer.
Select All.
Copy and paste a paper of choice Into Selection.
Deselect.
Apply the Mask.
Merge Group.

Add your copyrights.

Add your name.
Give it a slight inner bevel:


Resize all layers 90%.

I hope you enjoyed this tutorial.
I’d love to see your results and show it off in my gallery.
Email me!
Hugs,
Bev

Spring is Here

Clicking on the image will enlarge to full view.

Supplies
1 tube of choice - I used the wonderful artwork of Dean Yeagle here
Font of choice - I used Bonheur Royale and is a pay font
Weescotlass mask 138 here
Designs by Ali Template 181 here
“Spring is Here” is a PTU scrap kit created by Manda of Manda’z Dazzling Dzignz and can be purchased Heartbeatz Creationz. You can visit her blog here.
Thank you Manda for such a beautiful spring kit!

This tutorial was written assuming you have a working knowledge of PSP.

~♥~ Let’s get started ~♥~

Open up the template.
Shift + D.
Close out the original.
Resize all layers 85%
Image/Canvas Size
700 X 700
OK
New Raster layer.
Send to bottom.
Flood fill white.

Highlight Raster 2 layer.
Use your Magic Wand and click on it.
New Raster layer.
Copy and paste a paper of choice Into Selection.
Deselect.
Delete the template layer.

Highlight Raster 8 layer.
Select All/Float/Defloat
New Raster layer
Copy and paste a paper of choice Into Selection.
Deselect.
Delete the template layer.
Give it a slight inner bevel:


Highlight Raster 6 layer.
Use your Magic Wand and click on it.
New Raster layer.
Copy and paste a paper of choice Into Selection.
Copy and paste your tube as a new layer.
Move into position over the paper.
Selections/Invert
Tap the delete key.
Deselect.
Change the Properties to Multiply.
Lower the Opacity to about 24
Delete the template layer.

Highlight Raster 7 layer.
Use your Magic Wand and click on it.
New Raster layer.
Copy and paste a paper of choice Into Selection.
Deselect.
Delete the template layer.

Highlight Raster 5 layer.
Repeat the above step.

Highlight Raster 3 layer.
Use your Magic Wand and click on it.
New Raster layer.
Copy and paste a paper of choice Into Selection.
Deselect.
Delete the template layer.

Highlight Raster 4 layer.
Repeat the above step.
Give it the same inner bevel as you used before.

Copy and paste your tube as a new layer.

Add your embellishments. I used:
Flower Frame 1: Resize 25% and 80%
Butterfly & Butterfly 1: Resize 25% and 40%
Cli Flower: Resize 25% and 50% Free rotate left 40 degrees
Flower 1: Resize 25% and 50% Duplicate/Resize 80%
Flower 2: Resize 25% and 40% Mirror
Heart Button & Heart Button 1: Resize 25% and 70% Free rotate 10 degrees
Chickie 1: Resize 25% and 50%

Highlight your white background.
New Raster layer.
Select All.
Copy and paste a paper of choice Into Selection.
Deselect.
Apply the Mask.
Resize 130%
Merge Group.

Add your copyrights.

Add your name.
Give it the same slight inner bevel.

Resize all layers 80%.

I hope you enjoyed this tutorial.
I’d love to see your results and show it off in my gallery.
Email me!
Hugs,
Bev

Friday, March 26, 2010

Forever Yours

Clicking on the image will enlarge to full view.

Supplies
2 tubes of choice - I’m using the beautiful artwork of Zindy S.D. Nielsen here
Font of Choice - I’m using Kingthings Wrote here
Gem’s Mask 22 here
“Antoinette” is a PTU art kit created by KatNKDA. It can be downloaded from her store NK Art Shop. You can visit Kat’s blog here.
Thank you so much for this elegantly beautiful kit, Kat!

This tutorial was written assuming you have a working knowledge of PSP.
~♥~ Let’s get started ~♥~
Open up a transparent 700 X 700 canvas.
Flood Fill white.
Copy and paste Element 17 as a new layer.
Resize 25% and 70%
Use your Magic Wand and click inside of it. Be sure to click in the gaps in the leaves and glitter swirls.
Selections/Modify/Expand by 6.
New Rater layer below he frame.
Copy and paste a paper of choice Into Selection.
Copy and paste your tube as a new layer above the paper.
Selections/Invert
Tap the delete key.
Deselect.

Close out your white canvas.
Merge Visible.
Reopen your white canvas.
Close out your merged layer.
Copy and paste Element 42 as a new layer.
Resize 25% and 70%
Free rotate right 5 degrees
Use your Magic Wand and click inside of it.
Selections/Modify/Expand by 2.
New Raster layer below the frame.
Copy and paste a paper of choice Into Selection.
Copy and paste your tube as a new layer above the paper.
Selections/Invert
Tap the delete key.
Selections/Modify/Feather
Number of Pixels:
43
OK
Tap the delete key a couple of times.
Deselect.
Close out your white canvas.
Merge Visible.
Reopen both merged layers and move into position.
See my tag for reference.

Add your embellishments. I used:
Element 24: Resize 25% and 70%
Element 25: Resize 25% and 70%
Element 16: Resize 25% and 40%
Element 15: Resize 25% and 40%
Element 18: Resize 25% Mirror/Flip
Element 2: Resize 25% and 70% Mirror
Element 28: Resize 25% and 50% Mirror/Free rotate left 40 degrees Duplicate/Free rotate Left 20 degrees
Element 28 again: Resize 25% and 25% Flip
Element 47: Resize 25% and 50% Mirror
Crop your image.
Highlight your white background.
New Raster layer.
Select All.
Copy and paste a paper of choice Into Selection.
Deselect.
Apply the Mask.
Merge Group.
Add your copyrights.
Add your name.
Give it a slight inner bevel:


Resize all layers 80%.

I hope you enjoyed this tutorial.
I’d love to see your results and show it off in my gallery.
Email me!
Hugs,
Bev

Thursday, March 25, 2010

Easter Surprise

Clicking on the image will enlarge to full view.

Supplies
2 tubes of choice - I used the wonderful artwork of Elias Chatzoudis here
Font of choice - I used Dragonfly here
Gems Mask 116 here
Essence of Creativity Template 85 here
“Easter Surprise” is a FTU tagger size scrap kit created by me of Horsin’ Round with Scraps and can be found on my blog here.

This tutorial was written assuming you have a working knowledge of PSP.

~♥~ Let’s get started ~♥~

Open up the template.
Shift + D.
Close out the original.
Image/Canvas Size
650 X 500
Delete the copyright layer.

Highlight Rectangle layer.
Use your Magic Wand and click on the pink portion.
New Raster layer.
Copy and paste a paper of choice Into Selection.
Deselect.

Highlight Dotted Rectangle layer.
Select All/Float/Defloat.
New Raster layer.
Flood fill with a dark color of choice.
Delete the template layer.

Highlight Background 1 layer.
Use your Magic Wand and click on it.
New Raster layer.
Copy and paste a paper of choice Into Selection.
Deselect.
Delete the template layer.
 
Highlight Frame 1 layer.
Use your Magic Wand and click on it.
New Raster layer.
Copy and paste a paper of choice Into Selection.
Deselect.
Delete the template layer.
Adjust/Add Remove Noise/Add Noise:
Monochrome and Gaussian checked
Noise: 17%
OK

Copy and paste your tube below the frame.
Duplicate and resize a bit large.
In your layers pallet move the larger tube behind the smaller one and move it into position. See my tag for reference.
Change the Properties to Soft Light.
Highlight the paper.
Select All/Float/Defloat
Selections/Invert
Highlight each of the tube layers and tap the delete key.
Deselect.

Repeat the 3 steps above with the other circle and frame template layers using a different tube.

Add your embellishments. I used:
Daisy 2: Resize 30%
Daisy 1: Resize 25%
Eggs 1, 2, and 3: Resize 50%
Candy Stick 1: Resize 50% Free rotate left 25 degrees
Candy Stick 2: Resize 50%
Candy Stick 3: Resize 50% Free rotate right 25 degrees
Bunny 2: Resize 50%
Bow 1: Resize 40%
Doodle Flower 2: Resize 50%
  
Highlight your white background.
New Raster layer.
Select All.
Copy and paste a paper of choice Into Selection.
Deselect.
Apply the Mask.
Merge Group.
Duplicate

Add your copyrights.

Add your name.
Select All/Float/Defloat
Selections/Modify/Contract by 1
Give it an inner bevel:
Photobucket

Give it the same noise as you used before.
Deselect
.
Resize all layers 85%.

I hope you enjoyed this tutorial.
I’d love to see your results and show it off in my gallery.
Email me!
Hugs,
Bev

Wednesday, March 24, 2010

Spring's Beauties

Clicking on the image will enlarge to full view.

Supplies
4 tubes of choice - I used the beautiful artwork of Jennifer Janesko here
Font of choice - I used Aquarelle here
Weescotlass Mask 236 here
Divine Intentions Template 311 here
“Spring Fling” is a PTU tagger size scrap kit created by Jane of JT’s Designs and can be purchased at Butterfly Blush Designs. You can visit her blog here.
Thank you Jane for yet another kit that really shows off your brilliant talent! This kit truly is beautiful.

This tutorial was written assuming you have a working knowledge of PSP.

~♥~ Let’s get started ~♥~

Open up the template.
Shift + D.
Close out the original.
Image/Canvas Size
700 X 700
Flood fill Bakcground layer white.
Delete By Missy, Word Art by Missy, and Pink Punk layer.

Highlight Circle layer.
Use your Magic Wand and click on it.
New Raster layer.
Copy and paste a Glitter Sheet of your choice Into Selection.
Deselect.
Delete the template layer.

Highlight Glittered Circle layer.
Select All/Float/Defloat
New Raster layer.
Copy and paste a different Glitter Sheet of choice Into Selection.
Deselect.
Delete the template layer.
 
Highlight Circle 2 layer.
Use your Magic Wand and click on it.
New Raster layer.
Copy and paste a paper of choice Into Selection.
Deselect.
Delete the template layer.

Highlight Circle Half layer.
Repeat the above step.
Highlight 3 Frame Background layer.
Select All/Float/Defloat
New Raster layer.
Copy and paste a paper of choice Into Selection.
Deselect.
Delete the template layer.

Highlight Stars layer.
Select All/Float/Defloat
New Raster layer.
Flood fill with plain color that will match your tag.
Deselect.
Delete the template layer.
Move this layer above the 3 frame layer in your layers pallet.

Highlight 3 Frame layer.
Select All/Float/Defloat.
New Raster layer.
Copy and paste a Glitter Paper of your choice Into Selection.
Deselect.
Delete the template layer.

Highlight the Glittered Frame layer.
Click inside one of the squares with your Magic Wand.
Selections/Modify/Expand by 4.
Copy and paste a tube below the frame.
Selections/Invert
Tap the delete key.
Deselect.

Repeat the above step with the remaining 2 frames.

Highlight Frame Background Layer.
Select All/Float/Defloat
New Raster layer.
Copy and paste a paper of choice Into Selection.
Deselect.
Delete the template layer.

Highlight Frame layer.
Select All/Float/Defloat
New Raster layer.
Flood fill with the same Glitter paper you used for the 3 frame layer.
Deselect.
Delete the template layer.

Click inside the frame with your Magic Wand.
Selections/Modify/Expand by 4.
Copy and paste your tube below the frame.
Selections/Invert
Tap the delete key.
Deselect.

Copy and paste Bunny 3 above the circle layer.
Move it into position - see my tag for reference.
Highlight the paper circle layer.
Select All/Float/Defloat
Highlight the bunny layer and tap the delete key.
Deselect.
Change the Properties to Multiply.

Add your embellishments. I used:
RoseVine 1: Resize 35% Free rotate left 90 degrees
Bow 9: Resize 25%
Heart String 3: Resize 35%
Butterfly 7: Resize 30%
Daisy 1: Resize 40% Duplicate/Resize 80%
Daisy 2: Resize 40%

Highlight your white background.
New Raster layer.
Select All.
Copy and paste a paper of choice Into Selection.
Deselect.
Apply the Mask.
Merge Group.
Duplicate

Add your copyrights.

Add your name.
Select All/Float/Defloat
Selections/Modify/Contract by 1
Give it an inner bevel:


I also added that cute little turtle for decoration - lol!
Resize 25%

Resize all layers 80%.

I hope you enjoyed this tutorial.
I’d love to see your results and show it off in my gallery.
Email me!
Hugs,
Bev

Tuesday, March 23, 2010

Butterfly Kisses

Clicking on the image will enlarge to full view.

Supplies
2 tubes of choice - I’m using the wonderful artwork of Dean Yeagle here
Font of choice - I used Miama here
Gem mask 33 here
“Butterfly Kisses” is a PTU full size scrap kit created by Jeanne of Jeanne Maries Scraps and can be purchased from Kreative Kreations Korner. You can visit her blog here.
Thank you Jeanne for such a terrific kit!

This tutorial was written assuming you have a working knowledge of PSP.

~♥~ Let’s get started ~♥~

Open up a 700 X 700 blank canvas.
Flood fill white.

Copy and paste Clip Board Trim as a new layer.
Resize 25% and 60%
Position near the top third of your canvas.
See mine for reference.

Copy and paste Frame Dotted as a new layer.
Resize 25% and 40%
Free rotate right 45 degrees
Duplicate.
Move both of the frames into position.
See my tag for reference.

Highlight one of the frames.
Use your Magic Wand and click inside of it.
Selections/Modify/Expand by 4.
New Raster layer below the frame.
Copy and paste a paper of choice Into Selection.
DO NOT DESELECT.

Copy and paste one of the bears as a new layer below the frames.
Resize 25%
Move into position near one of the upper frame corners.
See my tag for reference.
Duplicate/Resize 70%
Move this bear toward the opposite corner of the other bear.

Highlight the bear layer that’s in the upper corner - the larger bear.
Change the Properties to Luminance.
Lower the Opacity to about 38.
Selections/Invert
Highlight each of the bear layers and tap the delete key.
Deselect.

Highlight the other frame.
Repeat the above steps using the other bear.

Copy and paste your tubes as new layers.

Add your embellishments. I used:
Flower Pink: Resize 25% and 25%. Duplicate/Resize 80%
Flower Pink again: Resize 25% and 50% Position a bit behind your tube. Duplicate/Resize 80%
Ribbon Pink: Resize 25% and 25% Free rotate right 80 degrees. Duplicate/Mirror Duplicate and use your Pick Tool to straighten out just a bit. Merge visible all 3 ribbon layers. Duplicate/Mirror
Butterflies of choice: Resize 25% and 40% Free rotate 25 degrees

Highlight your white background.
New Raster layer.
Select All.
Copy and paste a paper of choice Into Selection.
Deselect.
Apply the Mask.
Merge Group.

Add your copyrights.

Add your name.
Give it the same slight inner bevel:


Crop your Image.

Resize all layers 80%.

I hope you enjoyed this tutorial.
I’d love to see your results and show it off in my gallery.
Email me!
Hugs,
Bev
Monday, March 22, 2010

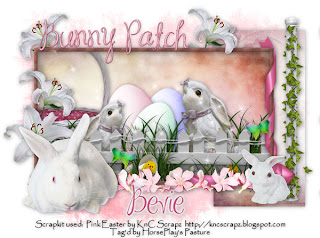
Bunny Patch

Clicking on the image will enlarge to full view.

Supplies
Font of choice - I used MaSexy here
Weescotlass Mask 297 here
Scraps of Enchantment Template 106 here
Eyecandy 5 - Impact: Gradient Glow
“Pink Easter” is a PTU tagger size scrap kit created by Kesha of KnC Scrapz and can be purchased at Lollipops n Gumdrops. You can visit her blog here.
Thank you Kesha for such a sweet kit!

This tutorial was written assuming you have a working knowledge of PSP.

~♥~ Let’s get started ~♥~

Open up the template.
Shift + D.
Close out the original.
Delete Info, Glitter Dots, Teasing, Enticing, SSF Text, and the Brush layer.

Highlight Black Rectangle layer.
Select All/Fl9oat/Defloat.
Copy and paste a paper of choice as a new layer.
Resize 65%
Selections/Invert
Tap the delete key.
Deselect.

Highlight Gradient Background layer.
Select All/Float/Defloat
Copy and paste a different paper of choice as a new layer.
Resize 70%
Selections/Invert
Tap the delete key.
Deselect.
Delete the template layer.
 
Highlight White Frame layer.
Use your Magic Wand and click on it.
New Raster layer.
Flood fill with a plain color.
Deselect.
Delete the template layer.
Give it a slight inner bevel:


Copy and paste the Archway as a new layer.
Resize 40%
Use your Freehand Selection Tool and section off the top and right pole of the Archway.
Tap the delete key.
You should now only have the left pole of the archway.
Position it over the Pink Strip template layer.
Delete the template layer.

Copy and paste the fence as a new layer at the top of your layers pallet.
Resize 30%
Duplicate 3 times and move the layers into position to create a fence line across your pallet.
Merge Visible all fence layers.
Move beneath the frame in your layers pallet.
Highlight your frame layer.
Click inside with your Magic Wand.
Selections/Modify//Expand by 4.
Selections/Invert
Highlight the merged fence layer.
Tap the delete key.

Copy and paste Chick in Egg.
Resize 25%
Move it below the frame in your layers pallet.
Position it so that only the tip of the grass are poking up from the frame.
Duplicate as many times as you like to create grass along the bottom of your frame.
Merge Visible all the grass layers.
Highlight your frame layer.
Click inside with your Magic Wand.
Selections/Modify//Expand by 4.
Selections/Invert
Highlight the merged grass layer.
Tap the delete key.

Add your embellishments. I used:
Ribbon 1: Resize 40%
White Lily: Resize 25%
Flower Strand: Resize 25%
Chick in Egg: Resize 25% and 50%
Basket: Resize 50%
Bunny: Resize 30%
Lil Bunny: Resize 40%
Bunny String: Resize 60% Erase the string
Egg: Use your Target Tool to color different colors. Put as many eggs as you like in your tag…resizing them 70% or smaller and rotating them as you like.


Highlight your white background.
New Raster layer.
Select All.
Copy and paste a paper of choice Into Selection.
Deselect.
Apply the Mask.
Merge Group.
Duplicate


Type out the words “Bunny Patch” and position at the top left corner of your frame.

Add your copyrights.

Add your name.

Apply Eyecandy 5: Impact - Gradient Glow


Resize all layers 80%.

I hope you enjoyed this tutorial.
I’d love to see your results and show it off in my gallery.
Email me!
Hugs,
Bev