Supplies
1 tube of choice - I used the wonderful artwork of Genniday Koufay at CILM
Font of Choice - I used Rebel Caps here
Weescotlass Mask 241 here
Alien Skin Xenofex 2: Burnt Edges
VanDerLee Snowflakes
Animation Shop
“Sunflower Patch” is a PTU tagger size scrap kit created by Julie of Bits n Bobs and can be purchased at Exquisite Scraps.
Thank you Julie for such a beautiful kit! I adore it!
This tutorial was written assuming you have a working knowledge of PSP.
~♥~ Let’s get started ~♥~
Open up a 700 X 700 blank canvas.
Flood fill white.
Select All
Copy and paste Paper 10 Into Selection.
Deselect.
Resize 90%
Select All/Float/Defloat
Apply Xenofex 2: Burnt Edges
Copy and paste your tube as a new layer.
Change the Properties to Luminance Legacy
Copy and paste element 10 as a new layer.
Position at the left side of the burnt paper layer.
Duplicate/Free rotate right 90 degrees
Position at the bottom of the burnt layer.
Copy and paste Element 38 as a new layer.
Mirror
Move into position - see my tag for reference.
Use your Freehand Selection Tool and circle around the branch - letting the line touch only the ends of the branch:
Selections/Modify/Feather
Number of Pixels:
33
OK
Selections/Invert
Tap the delete key until you have a nice feathered effect to the branch.
Deselect.
Highlight the paper layer.
Select All/Float/Defloat
Create 3 new raster layers just above your tube layer.
Rename them Rain 1, 2, and 3.
Highlight Rain 1 layer.
Apply VanDerLee Snowflakes:
Adjust/Blur/Motion Blur
Highlight Rain 2.
Repeat the above steps accept when you apply VanDerLee Snowflakes move the Random Seed button a little.
Highlight Rain 3.
Repeat the above step.
Deselect.
Close out Rain 2 and Rain 3 layers.
Highlight your white background.
New Raster layer.
Select All.
Copy and paste a paper of choice Into Selection.
Deselect.
Apply the mask.
Resize 120%
Merge Group.
Add your copyrights.
Add your name.
Give it a slight inner bevel:
Resize all layers 80%.
Copy Merge
Time to Animate:
Open up Animation Shop.
Edit/Paste/As New Animation.
Back into PSP.
Close out Rain 1.
Open up Rain 2.
Edit/Copy Merge
Carry Into AS
Edit/Paste after Current Frame
Back into PSP.
Close out Rain 2.
Open up Rain 3.
Edit/Copy Merge
Carry into AS
Edit/Paste/After Current Frame.
View your animation.
If you’re happy then save.
I hope you enjoyed this tutorial.
I’d love to see your results and show it off in my gallery.
Email me!
Hugs,
Bev

Saturday, June 26, 2010
Summer Passion


Fairytale Forest
 Clicking on the image will enlarge to full view.
Supplies
Font of Choice - I used Billy Argel here
Becky Mask 22 here
Divine Intentionz Template 329 here.
“Fairytale Forest” is a PTU tagger size size scrap kit created by Wilma of Wilma4Ever and can be purchased at her store here. You can visit her blog here.
Thank you Wilma for such a beautiful kit! Just gorgeous!
This tutorial was written assuming you have a working knowledge of PSP.
~♥~ Let’s get started ~♥~
Open up the template.
Resize all layers 85%
Image/Canvas Size
700 X 600
Open up the background layer and flood fill white.
Delete the top 3 layers.
Highlight Shape 1 layer.
Click on it with your Magic Wand.
New Raster layer.
Copy and paste Paper 5 Into Selection.
Deselect.
Delete the template layer.
Highlight Thin Rectangle 1 layer.
Select All/Float/Defloat
New Raster layer.
Flood fill with a color of choice.
Deselect.
Delete the template layer.
Highlight Dotted Line 1 layer.
Repeat the above step using the same color.
Highlight Stars layer.
Repeat the above step using the same color.
Highlight Shape 2 layer.
Use your Magic Wand and click on it.
Copy and paste Paper 5 as a new layer.
Resize 60%
Move it into position.
Selections/Invert
Tap the delete key.
Deselect.
Delete the template layer.
Highlight Thin Rectangle 2 layer.
Select All/Float/Defloat
New Raster layer.
Flood fill with a light color of choice.
Adjust/Add Remove Noise/Add Noise
Uniform and Monochrome checked
Noise: 45%
OK
Deselect.
Delete the template layer.
Highlight Dotted Line 2 layer.
Select All/Float/Defloat
New Raster layer.
Flood fill with the same color you used on the Thin Rectangle layer.
Deselect.
Delete the template layer.
Highlight Glittered Rectangle layer.
Select All/Float/Defloat
New Raster layer.
Flood fill with the same color you used for Thin Rectangle 2 layer.
Apply the same Noise
Deselect.
Delete the template layer.
Highlight Rectangle layer.
Click on it with your Magic Wand.
Copy and paste Paper 5 as a new layer.
Resize 60%
Move into position.
Selections/Invert
Tap the delete key.
Deselect.
Delete the template layer.
Highlight Glittered Thin Rectangle layer.
Repeat the same step you used on Glittered Rectangle layer.
Highlight Thin Rectangle layer.
Click on it with your Magic Wand.
New Raster layer.
Copy and paste Paper 1 as a new layer.
Resize 60%
Move into Position.
Selections/Invert
Tap the delete key.
Deselect.
Delete the template layer.
Highlight Small Circle layer.
Select All/Float/Defloat
Copy and paste Paper 14 as a new layer.
Resize 40%
Move into position.
Selections/Invert
Tap the delete key.
Duplicate
Change Properties to Multiply.
Make the element “House” active.
Mirror
Copy and paste it as a new layer.
Resize 50%
Move into position.
Tap the delete key.
Deselect.
Delete the template layer.
Highlight Small Circle 2 layer.
Select All/Float/Defloat
Copy and paste Paper 14 as a new layer.
Resize 40%
Move into position.
Selections/Invert
Tap the delete key.
Duplicate
Change Properties to Multiply.
Copy and patse Bridge Scene as a new layer.
Resize 25%
Move into position.
Tap the delete key.
Copy and paste Tree as a new layer.
Resize 50%
Move into position.
Tap the delete key.
Make the element from the kit active again.
Mirror
Copy and paste as a new layer.
Resize 50% and 50%
Move into position.
Tap the delete key.
Deselect.
Delete the template layer.
Highlight Glittered Circle 1 layer.
Select All/Float/Defloat
New Raster layer.
Flood fill with the same color you used on the other glittered layers.
Apply the same Noise.
Deselect.
Delete the template layer.
Highlight Circle 1 layer.
Click on it with your Magic Wand.
New Raster layer.
Flood will with another color of your choice.
Deselect.
Delete the template layer.
Highlight Circle 2 layer.
Click on it with your Magic Wand.
New Raster layer.
Copy and paste Paper 15 Into Selection.
Duplicate
Change the Properties to Multiply.
Deselect.
Delete the template layer.
Highlight Glittered Circle 2 layer.
Repeat the same step you used for the other glittered circle.
Highlight Circle 3 layer.
Click on it with your Magic Wand.
New Raster layer.
Copy and paste Paper 1 Into Selection.
Deselect.
Delete the template layer.
Copy and paste Frame 2 as a new layer.
Move into position behind the largest circle - see my tag for reference.
Move the frame so that the leaves and flowers are peeking around the top half of the circle.
Duplciate/Flip/Mirror
Move that frame so that the leaves and flowers are peeking out from the lower half of the circle. Use your Eraser Tool to delete any that you see peeking around the top edges of the circle.
Merge Down.
Add your embellishments. I used:
Stairs: Resize 35%
Mushroom Arbor: Resize 35%
Bug: Resize 40% Mirror
Fairy 2: Resize 50%
Bird: Resize 30%
Flower: Duplicate/Resize 80%
Flower 2: Resize 50%
Highlight your white background.
New Raster layer.
Select All.
Copy and paste a paper of choice Into Selection.
Deselect.
Apply the mask.
Merge Group.
Duplicate
Change the Properties to Mulitply.
Add your copyrights.
Add your name.
Give it a slight inner bevel:

Resize all layers 80%.
I hope you enjoyed this tutorial.
I’d love to see your results and show it off in my gallery.
Email me!
Hugs,
Bev
Wednesday, June 23, 2010
Cherry Blossom
 Clicking on the image will enlarge to full view.
Supplies
1 tube of choice - I used the wonderful artwork of Elias Chatzoudis at MPT
Font of Choice - I used Nadall here
Monti’s Circular Mask here
“Cherry Blossom” is a PTU tagger size scrap kit created by Jen of C. C. Creationz and can be purchased at TKO Scraps. You can visit her blog here.
Thank you Jen for such a beautiful kit!
This tutorial was written assuming you have a working knowledge of PSP.
~♥~ Let’s get started ~♥~
Open up a 700 X 700 blank canvas.
Flood fill white.
Copy and paste Frame as a new layer.
Resize 40%
Duplicate twice for a total of 3 frames.
Highlight the top frame in your layers pallet and free rotate left 5 degrees.
Highlight the bottom frame and free rotate right 5 degrees.
Highlight the middle frame and free rotate 90 degrees.
Move the frame into position…see my tag for reference.
Highlight the frame on the left.
Click inside of it with your Magic Wand.
Selections/Modify/Expand by 6.
New Raster layer below the frame.
Copy and paste a paper of choice Into Selection.
Copy and paste a tube below the frame.
Selections/Invert
Tap the delete key.
Deselect.
Close out the white background and middle and right frame layers.
Merge Visible.
Reopen all other layers.
Duplicate the above step with the 2 remaining frames using a different tube in each.
Add your embellishments. I used:
Flower Branch: Flip/Resize 80% Duplicate/Mirror
Round Lantern: Resize 40%
Flowers and Ribbons: Resize 40%
Butterfly & Butterfly 2: Resize 25% and 80% Free rotate 25 degrees
Highlight your white background.
New Raster layer.
Select All.
Copy and paste a paper of choice Into Selection.
Deselect.
Apply the mask.
Merge Group.
Add your copyrights.
Add your name.
Give it a slight inner bevel:
Resize all layers 80%.
I hope you enjoyed this tutorial.
I’d love to see your results and show it off in my gallery.
Email me!
Hugs,
Bev
Jungle Book

Clicking on the image will enlarge to full view.
Supplies
Font of Choice - I used Chicken Basket - a pay font
Gem’s Mask 166 here
Divine Intentionz Template 298 here.
“Jungle Book” is a PTU fullsize size scrap kit created by Gail of Aussie Scraps and can be purchased at her store Aussie Scrap Designs. You can visit her blog here.
Thank you Gail for such a fun kit! Loved it!!
This tutorial was written assuming you have a working knowledge of PSP.
~♥~ Let’s get started ~♥~
Open up the template.
Image/Canvas Size
700 X 700
Open up the background layer and flood fill white.
Delete the following template layers:
By Missy, Diamonds, Hearts, Maintenance, So High, Pixel Words, and Stars
In this tutorial we won’t be deleting any template layers but rather closing them out.
Highlight Circle layer (the black one just above the white background layer)
Click on it with your Magic Wand.
Copy and paste BG2 as a new layer.
Resize 25% and 60%
Selections/Invert
Tap the delete key.
Deselect.
Paste the paper again.
Flip
Resize 25% and 60%
Highlight the template layer and click on it with your Magic Wand.
Selections/Invert
Highlight the paper and tap the delete key.
Deselect.
Use your Eraser tool and erase the top half of the paper - this is just to have a uniform color to the circle and no pictures from the paper showing.
Merge Down.
Close out the template layer.
Highlight (the pink) Circle layer.
Use your Magic Wand and click on both portions of it.
Copy and paste BG1 as a new layer.
Resize 25% and 60%
Selections/Invert
Tap the delete key.
Deselect.
Close out the template layer.
Make your Target Tool active.
Change the foreground in your Color Pallet to a color of your choosing -
I used a blue shade from the paper.
Highlight Glittered Circle 1 layer.
Use your Target Tool to change the color.
Highlight Thin Rectangle layer.
Use your Magic Wand and click on it.
Copy and paste BG6 as a new layer.
Resize 25% and 60%
Move it into position.
Selections/Invert
Tap the delete key.
Deselect.
Close out the template layer.
Highlight Glittered Rectangle layer.
Use your Target Tool on this layer to change the color the same as the other.
Highlight Rectangle layer.
Copy and paste BG6 as a new layer.
Resize 25% and 60%
Move it into position.
Selections/Invert
Tap the delete key.
Deselect.
Close out the template layer.
Highlight Small Rectangle Shapes layer.
Use your Target Tool on this layer.
Highlight Glittered Circle 2 layer.
Repeat the above step.
Highlight Small Circle layer.
Use your Magic Wand and click on it.
Copy and pate BG6 as a new layer.
Resize 25% and 60%
Move into position.
Selections/Invert
Tap the delete key.
Deselect.
Close out the template layer.
Now we’re going to add the embellishments. See my Tag for reference on any that you need to.
Copy and paste TG2 as a new layer.
Resize 35%
Move into position.
Adjust/Brightness and Contrast
Brightness/Contrast
Brightness: 35
Contrast: 35
OK
Copy and paste Banana Tree as a new layer.
Resize 35%
Move into position over the paper of the largest circle.
Highlight the black template layer (you don’t have to open the layer up) and click on it with your Magic Wand.
Selections/Invert
Highlight the banana tree.
Use your Eraser Tool and erase all of the tree that overhangs the circle.
Deselect.
Copy and paste Vines 2 as a new layer.
Resize 25% and 85%
Highlight the template layer (You don’t have to open it up) and click on it with your Magic Wand.
Move the vine into exact position
Selections/Invert
Highlight the vine layer.
Use your Eraser Tool and erase all that is outside of the circle.
Deselect.
Copy and pate MB1 as a new layer.
Resize 25% and 85%
Free rotate right 20 degrees
Move into position.
Copy and paste Banana as a new layer.
Resize 25% and 25%
Place it in the Monkey’s hand.
Copy and paste Moss 1 as a new layer.
Resize 25% and 85%
Highlight the large black circle template layer and click on it with your Magic Wand.
Selections/Invert
Tap the delete key.
Deselect.
Copy and paste the Lion as a new layer.
Resize 25%
Move into position
Highlight the pink circle template layer and click on it with your Magic Wand.
Selections/Invert
Highlight the lion and tap the delete key.
Deselect.
Copy and paste Grasses 1 as a new layer.
Resize 25% and 45%
Highlight the black circle template layer and click on it with your Magic Wand.
Selections/Invert
Highlight the grass layer.
Tap the delete key.
Deselect.
Copy and paste BM5 as a new layer.
Resize 25% and 60%
Copy and paste the banana as a new layer.
Resize 25%, 25%, and 60%
Free rotate right 65 degrees.
Copy and paste Papyrus 1 as a new layer.
Resize 25%, 25%, and 60%
Duplicate
Copy and pate Toucan 1 as a new layer.
Resize 25%nad 35%
Copy and paste Palm Tree 2 as a new layer.
Resize 40%
Duplicate/Mirror
Copy and paste the Frog as a new layer.
Resize 25% and 25%
Copy and paste Butterflies 1, 2, and 4:
Resize all 25% and 40%
Highlight your white background.
New Raster layer.
Select All.
Copy and paste a paper of choice Into Selection.
Deselect.
Duplicate/Flip
Use your Eraser Tool and erase the top half of the paper so that you don’t see any of the picture on the paper and it appears as if the entire canvas is the yellow/blue color only.
Merge Down.
Apply the mask.
Merge Group.
Duplicate/Merge Down
Duplicate/Merge Down
Add your copyrights.
Add your name.
Give it a slight inner bevel:
Resize all layers 80%.
I hope you enjoyed this tutorial.
I’d love to see your results and show it off in my gallery.
Email me!
Hugs,
Bev
Monday, June 21, 2010
Old Fashioned Summer
 Clicking on the image will enlarge to full view.
Supplies
1 tube of choice - I used the beautiful artwork of Genniday Koufay at CILM
Font of Choice - I used Oh Lara - a pay font
Gem’s Mask 161 here
“Sunflower Patch” is a PTU tagger size scrap kit created by Julie of Bits n Bobs and can be purchased at Exquisite Scraps. You can visit her blog here.
Thank you Julie for such a beautiful kit with that old time feel! I absolutely love this one!!
This tutorial was written assuming you have a working knowledge of PSP.
~♥~ Let’s get started ~♥~
Open up a 700 X 700 blank canvas.
Flood fill white.
Copy and paste SP 63 as a new layer.
Use your Selection Tool and section out a square:

New Raster layer below the frame.
Copy and paste Paper 3 Into Selection.
Selections/Modify/Feather
Number of Pixels:
43
OK
Selections/Invert
Tap the delete key twice.
Deselect.
Be sure you’re still highlighted on the paper layer:
Adjust/Brightness and Contrast
Brightness/Contrast
Brightness: -10
Contrast: 5
OK
Apply the Brightness/Contrast once more.
Copy and paste your tube as a new layer.
Add your embellishments. I used:
SP-20: Mirror
SP-8
SP-9: Mirror
Sp-22
SP-57
Crop your Image.
Highlight your white background.
New Raster layer.
Select All.
Copy and paste a paper of choice Into Selection.
Deselect.
Apply the mask.
Merge Group.
Add your copyrights.
Add your name.
Give it a slight inner bevel:
Resize all layers 85%.
I hope you enjoyed this tutorial.
I’d love to see your results and show it off in my gallery.
Email me!
Hugs,
Bev
Independance
 Clicking on the image will enlarge to full view.
Supplies
1 tube of choice - I used the beautiful artwork of Elizabeth Austin at CILM
Font of Choice - I used Dream Orphan Bold here
Weescotlass Mask 236 here
Eyecandy 5 Impact: Gradient Glow
“Independance” is a PTU tagger size scrap kit created by Teresa of Teresa’s Treasures and can be purchased at Scraps with Attitude.
Thank you Teresa for such an amazing kit!
This tutorial was written assuming you have a working knowledge of PSP.
~♥~ Let’s get started ~♥~
Open up a 700 X 700 blank canvas.
Flood fill white.
Copy and paste Frame 10 as a new layer.
Resize 80%
Click inside with your Magic Wand.
Selections/Modify/Expand by 6.
New Raster layer below the frame.
Copy and paste a paper of choice Into Selection.
Deselect.
Copy and paste your tube as a new layer.
Add your embellishments. I used:
Ivy: Resize 70%
Rope
Flower 3: Resize 70%
Flowers 1 & 2: Resize 35%
Bow 2: Resize 70%
Birdhouse: Resize 50%
Copy and paste Light as a new layer.
Resize 70%
Move into position - see my tag for reference
Give it a drop shadow:

Use your Eraser and erase all of the glow from the top of the lantern on up.
Highlight the lantern layer and give it a drop shadow with the color black.
Highlight your white background.
New Raster layer.
Select All.
Copy and paste a paper of choice Into Selection.
Deselect.
Apply the mask.
Resize 105%
Merge Group.
Add your copyrights.
Add your name.
Apply Eyecandy 5 Impact: Gradient Glow:

Resize all layers 80%.
I hope you enjoyed this tutorial.
I’d love to see your results and show it off in my gallery.
Email me!
Hugs,
Bev
Sunday, June 20, 2010
By the Seashore
 Clicking on the image will enlarge to full view.
Supplies
2 tubes of choice - I used the wonderful artwork of PinUpToons at CILM
Font of Choice - I used Dragonfly here
Gem Mask 192 here
“Seaside Getaway” is a PTU tagger size scrap kit created by Katie of Crazed’s Creations and can be purchased at Twilight Scraps. You can visit her blog here.
Thank you Katie for such a fun kit!
This tutorial was written assuming you have a working knowledge of PSP.
~♥~ Let’s get started ~♥~
Open up a 700 X 700 blank canvas.
Flood fill white.
Copy and paste Livesaver 2 as a new layer.
Resize 75%
Duplicate/Mirror
Move each Lifesaver into position - see my tag for reference.
Click inside the top Lifesaver with your Magic Wand.
Selections/Modify/Expand by 6.
New Raster layer below the frame.
Copy and paste a paper of choice Into Selection.
Copy and paste your tube as a new layer.
Selections/Invert
Tap the delete key.
Deselect.
Merge Visible the Lifesaver, paper, and tube.
Repeat the above step with the bottom Lifesaver and another tube.
Move both merged Lifesavers into the exact position you want them.
Copy and paste Sand as a new layer.
Move it to the bottom and to the right a bit on your canvas.
Apply the mask.
Merge Group.
Duplicate/Duplicate/Duplicate
Merge Down
Merge down
Duplicate/Mirror
Move each sand mount outward a bit.
Be sure they're just above your white canvas in your layers pallet.
Add your embellishments. I used:
Surfboard 2: Resize 80% Free rotate left 5 degrees
Surfboard 1: Resize 75% Free rotate left 5 degrees
Palm Tree 1
Palm Tree 2: Resize 40%
Seagull: Resize 30%
Beach ball 1: Resize 35%
Chair 2: Resize 40%
Bucket 2: Resize 50% Free rotate right 5 degrees
Fern 1: Resize 50%
Shell 1: Resize 50%
Shell 2: Resize 25%
Shell 5: Resize 50%
Highlight your white background.
New Raster layer.
Select All.
Copy and paste a paper of choice Into Selection.
Deselect.
Apply the mask.
Merge Group.
Add your copyrights.
Add your name.
Resize all layers 80%.
I hope you enjoyed this tutorial.
I’d love to see your results and show it off in my gallery.
Email me!
Hugs,
Bev
Strawberry Beauty
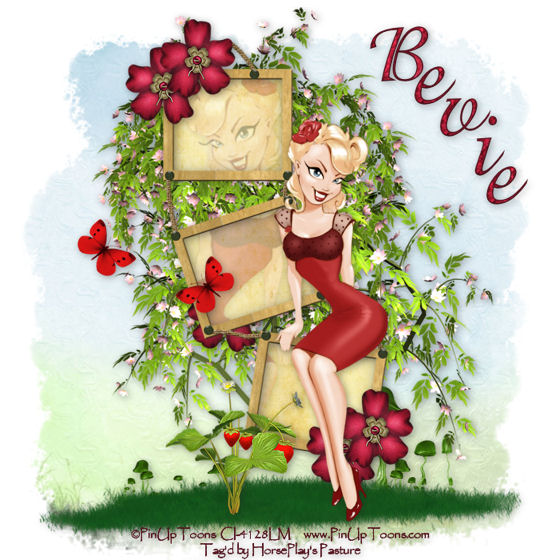 Clicking on the image will enlarge to full view.
Supplies
1 tube of choice - I used the wonderful artwork of PinUpToons at CILM
Font of Choice - I used Adorable here
Becky Mask 22 here
“Strawberry” is a PTU tagger size scrap kit created by Hf-Projekte and can be purchased at from his store Inspiration of Scrap Friends. You can visit his blog here.
Thank you Herbert for a very beautiful kit!
This tutorial was written assuming you have a working knowledge of PSP.
~♥~ Let’s get started ~♥~
Open up a blank 700 X 700 canvas.
Flood fill white.
Copy and paste Element 18 as a new layer.
Resize 70%
Click inside each frame with your Magic Wand.
Selections/Modify/Expand by 4.
New Raster layer below the frame.
Copy and paste a paper of choice Into Selection.
Deselect.
Copy and paste your tube as a new layer.
Move it into the position you like.
Duplicate/Mirror
Move the duplicate tube below the frame in your layers pallet.
Resize a bit bigger.
Highlight your frame layer.
Click inside each frame with your Magic Wand.
Selections/Modify/Expand by 4.
Highlight the duplicate tube layer.
Tap the delete key.
Deselect.
Lower the Opacity to about 30 or so.
Add your embellishments. I used:
Element 7: Resize 25% and 50%
Strawberries 3: Resize 80%
Element 14: Resize 80%
Strawberries 23: Resize
Strawberries 21: Resize 25% - I erased the mushrooms I didn’t want.
Strawberries 1 - Use your Selection Tool to choose which butterfly (ies) you want.
Highlight your white background.
New Raster layer.
Select All.
Copy and paste Paper 10 Into Selection.
Deselect.
Apply the mask.
Merge Group.
Duplicate/Merge Down.
Duplicate/Merge Down.
Duplicate/Merge Down.
Add your copyrights.
Add your name.
Resize all layers 80%.
I hope you enjoyed this tutorial.
I’d love to see your results and show it off in my gallery.
Email me!
Hugs,
Bev
Subscribe to:
Posts (Atom)