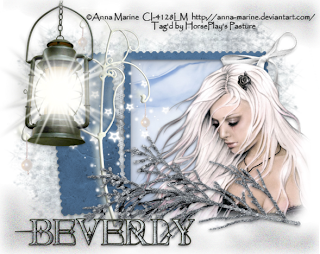
Clicking on the image will allow you to enlarge for bigger view.
Supplies
1 tube of choice - I used the artwork of Anna Marine at CILM
Font of Choice - I used Starstruck here
Gem Mask 16 here
DSB Flux - Bright Noise - Optional
This tutorial was created with Gothic Inspirations’ Sampler portion of the Stargazing collaboration kit. This kit is available for FREE with an $8 purchase at the store, or it may be purchased outright for the same price.
It is available EXCLUSIVELY at Stargazer Scraps. You can visit her blog here.
This tutorial was written assuming you have a working knowledge of PSP.
~♥~ Let’s get started ~♥~
Open up a 700 x 700 blank canvas.
Flood fill white.
Copy and paste Frame 5 as a new layer.
Resize 70%
Click inside of it with your Magic Wand.
Selections/Modify/Expand by 4.
New Raster layer below the frame.
Copy and paste Paper 2 Into Selection.
Deselect.
Copy and paste your tube as a new layer above the frame.
To give the tube feathered edges….
Use your Freehand Selection Tool and outline your tube - make the line touch wherever you want the tube feathered….keep the line far away from what you don’t want feathered.
Selections/Modify/Feather
Number of Pixels: 43
OK
Selections/Invert
Tap the delete key until you have the feathered effect you like.
Deselect.
Add your embellishments. I used:
Lantern: Resize 60%
Bow 2: Resize 50%
Tree: Resize 70%
Bough: Resize 70%
Crop your image.
Highlight your white background.
Select All.
New Raster layer.
Copy and paste Paper 4 Into Selection.
Deselect.
Apply the mask.
Merge Group.
Copy and paste Mist as a new layer in the top of your layers pallet.
Position it at the bottom of your image.
Duplicate/Mirror/Flip
Position it at the top of your image.
Merge Down.
Highlight your white canvas.
Selections/Modify/Feather
Number of Pixles:
43
OK
Selections/Invert
Tap the delete key a couple of times.
DO NOT DESELECT
Highlight the lantern layer.
Tap the delete key a couple of times.
Deselect.
Add your credits.
Add your name.
Give it a touch of noise if you like.
Move the credits and your name below the mist layer in your layers pallet.
Resize all layers 85%.
I hope you enjoyed this tutorial.
I’d love to see your results and show it off in my gallery.
Email me!
Hugs,
Bev

Bev that is gorgeous!! Thank you so much. Hugs, Jess
ReplyDelete